Killer Klipsch
By now you know I’m in love with JJPs GnR Pinball machine. It’s really like nothing else and an amazing achievement in so many ways. Even the stock sound package is good. I wanted it to be better. The solution that follows is updated from a post I placed in Pinside. This version of the install places all the components within the JJP backbox AND dramatically reduces noise/hum I was getting at high output levels.
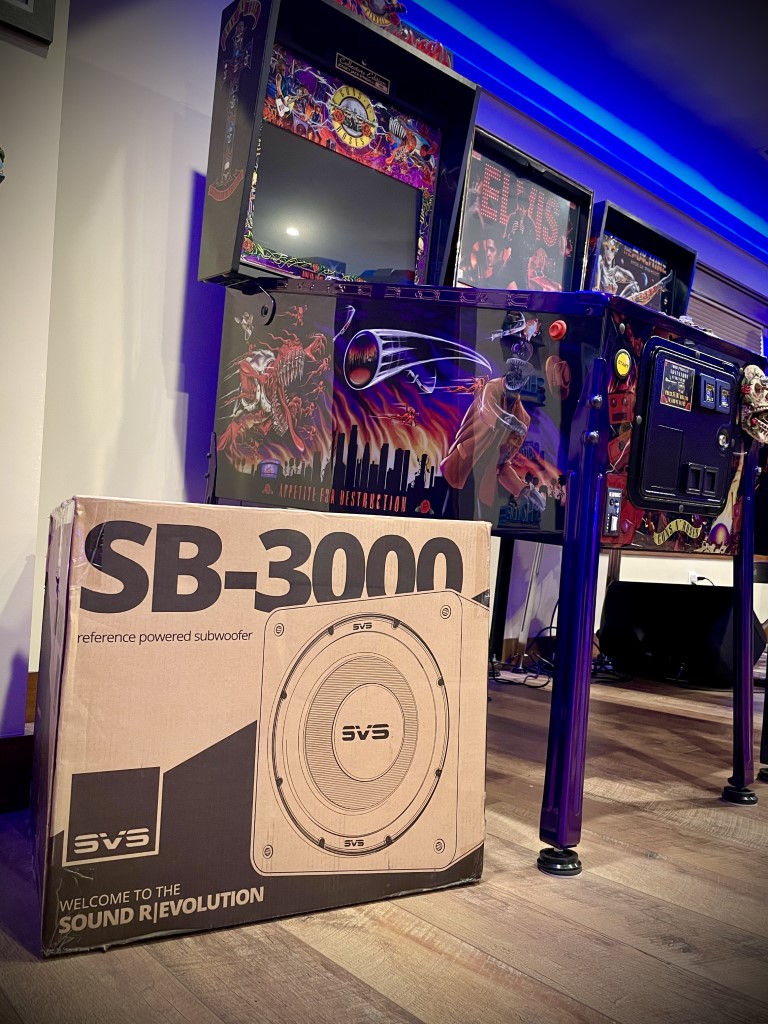
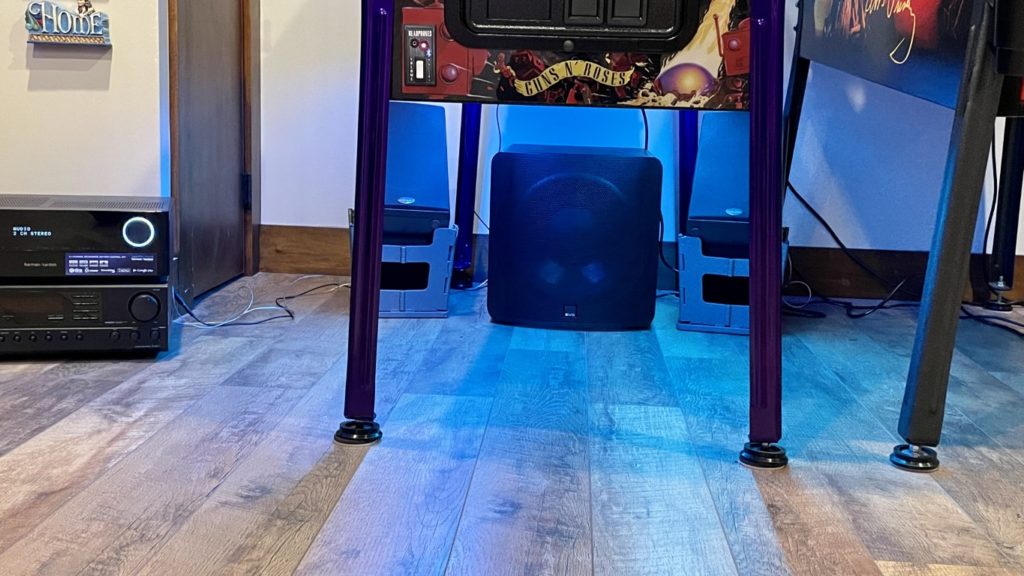
I started with adding a new SVS subwoofer. Externally connected and sitting under the machine like the other machines in the Loft. The SVS is not cheap and, in fact, costs 10x what a single Polks does … but, I thought with everything about this game already over-the-top … why not! ![]()
Seriously though I have 7 or 8 Polks hooked up in the Loft already in service and love them – they are affordable but not cheap and sound good too. I have most of the Polks “shared” between 2 games using Pinnovators mixers – the mixers work awesome for this application.
https://pinnovators.myshopify.com/collections/all/products/pinsmx-passive-subwoofer-mixer

For GnR I wanted a better answer than the Polks – thus the SVS-SB3000, it’s the entry level version of the SVS subs that has a mobile phone app to control and set the sub. Has a parametric EQ, Variable low pass filter crossover, output control, naming and saving of settings, etc. I was able to very nicely blend the subs massive output to transition smoothing from the sub to cabinet speakers. I’m running it using the low pass filter set at 65Hz. When I first connected it without the low pass filter set, it sounded boomy as I’m sure that cabinet speaker is reproducing quite a bit of mid-bass and my sub did not need to do the same. Once I turned on the low pass filter and moved the crossover point a bit – it sounded perfect. Kick drums have “gut punch”. Bass lines in the songs are clear and tactile. I’m loving it and play it loud. Only issue for me is that the sub was now outpacing the ability of the game to keep up …
Here’s the link the oh-so-simple to install Pinnovators sub taps
https://pinnovators.myshopify.com/collections/all-other-systems-subwoofer-kits/products/pinsub-subwoofer-kit-multi-system-blue
A few days after installing the SVS subwoofer and in a quest to have the game sound keep up with the SVS, I started testing an external sound system. First I hooked up a home stereo receiver and a couple of old Polk monitors I had laying around. The addition to the overall sound was significant – both in sound pressure and clarity. The only negatives were the output level of the line level feed from the game was very low. I had to turn the receiver to max volume to get satisfactory levels of sound. The receiver also did not have tone controls and i knew I would want to be able to dial up or down the bass/treble.
After my test I ordered some Klipsch R41M speakers because I already have the R51Ms and love them – but the downside was that they would need to be stand or wall mounted. They sounded fantastic but in the end I settled on trying to find a way to replace the topper speaker bar, rather than have wall or stand mounted speakers.
Newly energized at how much better I could make the sound, my first missing was to find an amp with tone controls and importantly, a preamp that could lift the anemic line level coming off the game.

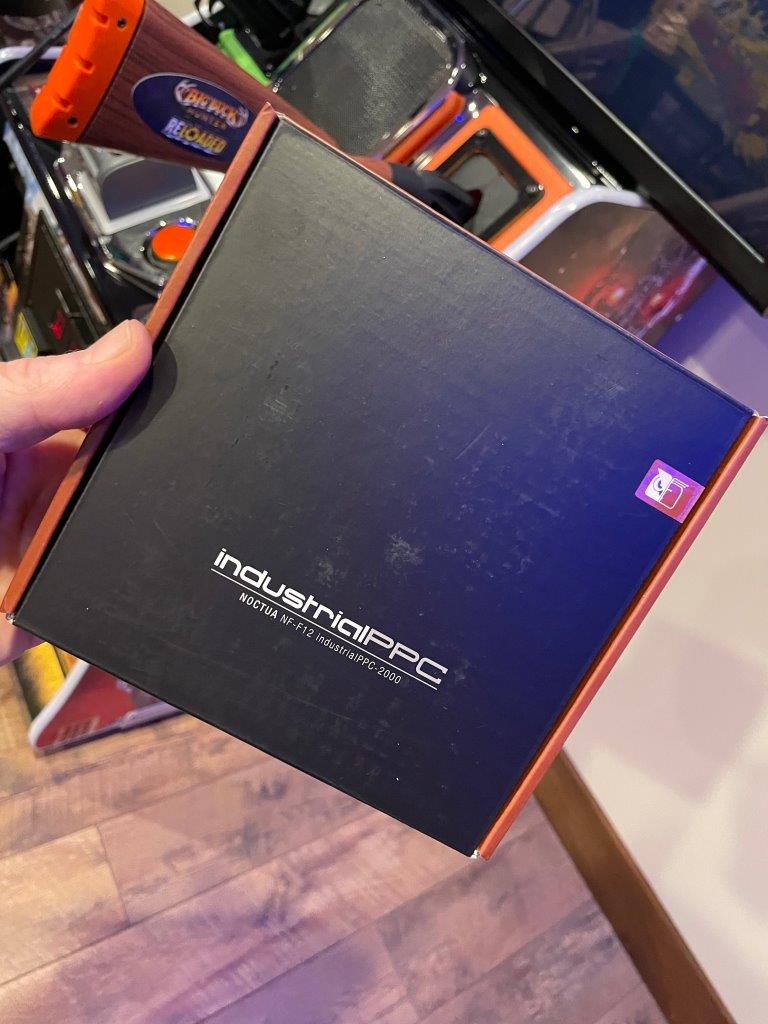
I already owned a Fosi class D amp that I use to drive some outdoor speakers here at the ranch – it’s 100 watts per channel, it’s about the size of 2 packs of cigs and it works really well – so I bought another one
I found a line level preamp on Amazon and ordered that.
The last part was to find speakers.
I considered ordering a nice center channel for the topper but gave up when I realized that the center channels usually have just one connection and one crossover. I was trying to create a stereo sound and utilize both channels of my Fosi amp
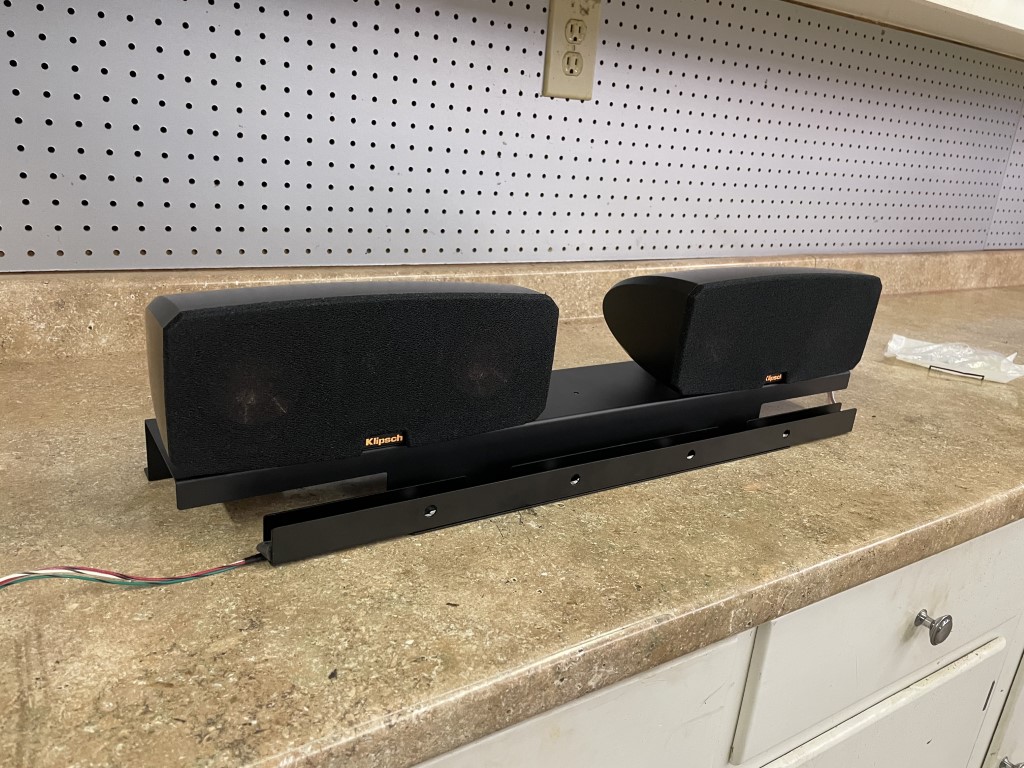
I then started looking for center channels that were small enough so I could mount TWO of them on the soundbar frame AND they needed to be efficient to make good use of the 100 watts that the Fosi would provide
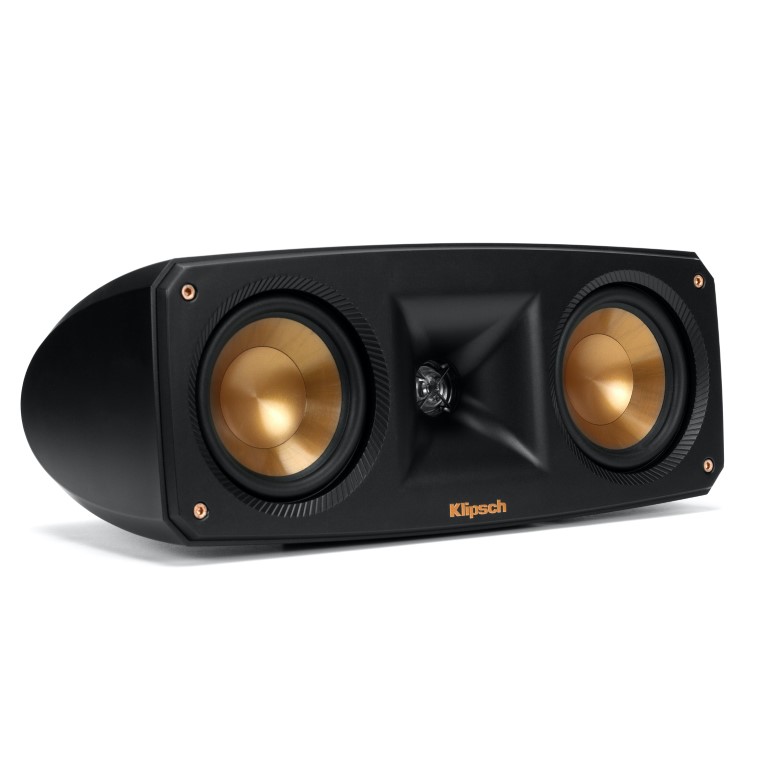
I found a great option in the Klipsch Reference Theater Center Channel – it comes as part of an entire Home Theater combo set and you can find them both used and a few new as well. I ordered 2 from Ebay and although they came with none of the original packaging, they were perfect AND a perfect fit

It was a challenge to get all 4 things to come together:
High efficiency (90db 1w/1m), nice appearance (nothing ugly or out of place vs stuff around it), good clean sound and a physical “fit” in the original area I had to work with. The Klipsch was the only one that ticked all the boxes!
https://www.klipsch.com/products/reference-theater-pack
The old soundbar can easily be separated from the lower frame by unscrewing a few screws. Once it’s off, you’ll find a nice flat mounting surface
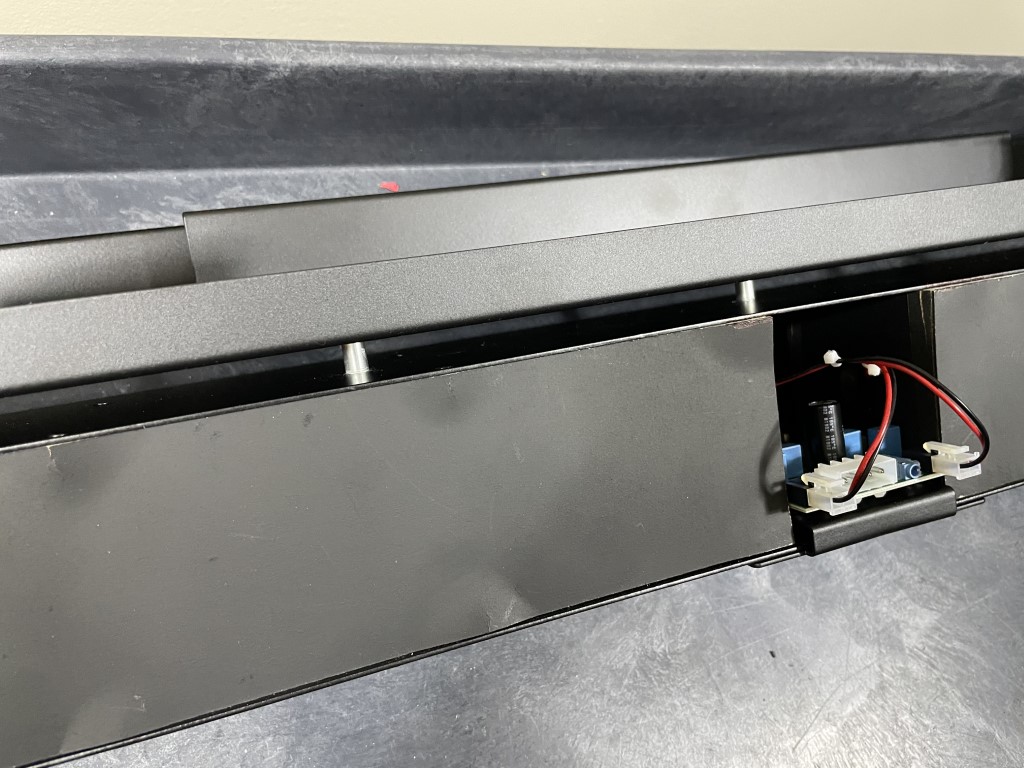
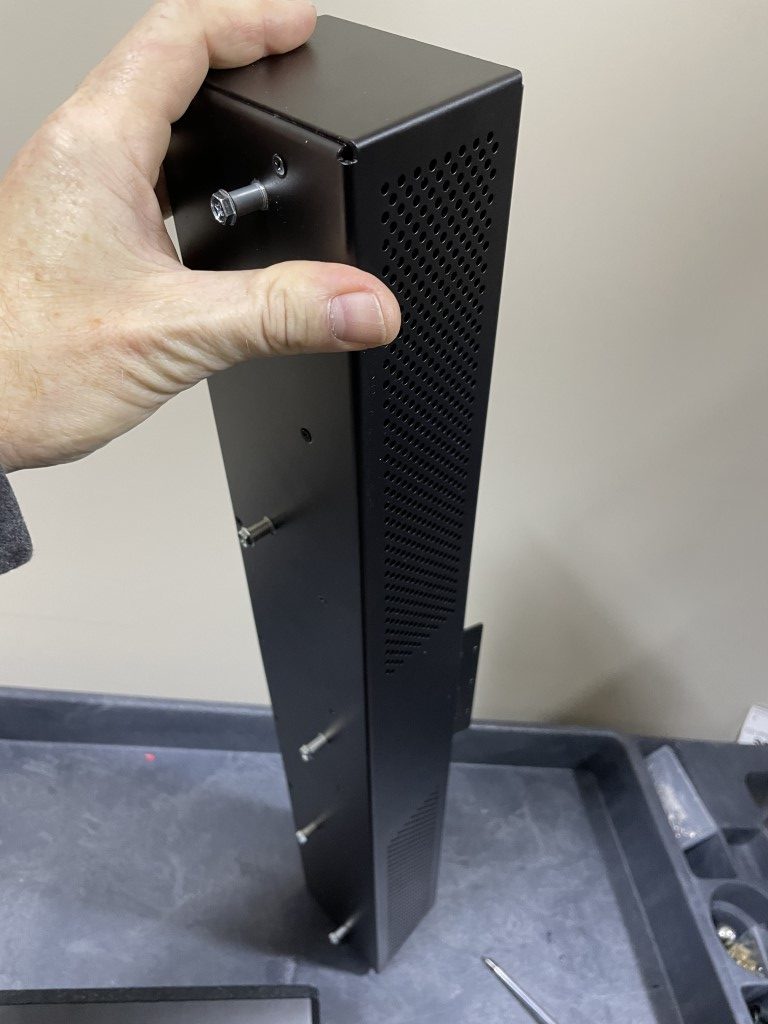
To mount the new speakers, I added 2 silicone rubber bumpers to add some downward tilt in order to fire the sound at the player. Then I created some custom mounts from a few scraps of metal. I needed to drill just 4 small holes in the frame so my modification/addition of the speakers is 100% reversible (see the end of this post for details)

The amp and preamp CAN sit behind the subwoofer, outside the game on the floor and CAN BE fed from the original 3.5mm line cord that originally fed the stock soundbar. I tested my setup this way, and ultimately moved all the components inside – to the backbox to remove hum from the sound and to have a cleaner look.
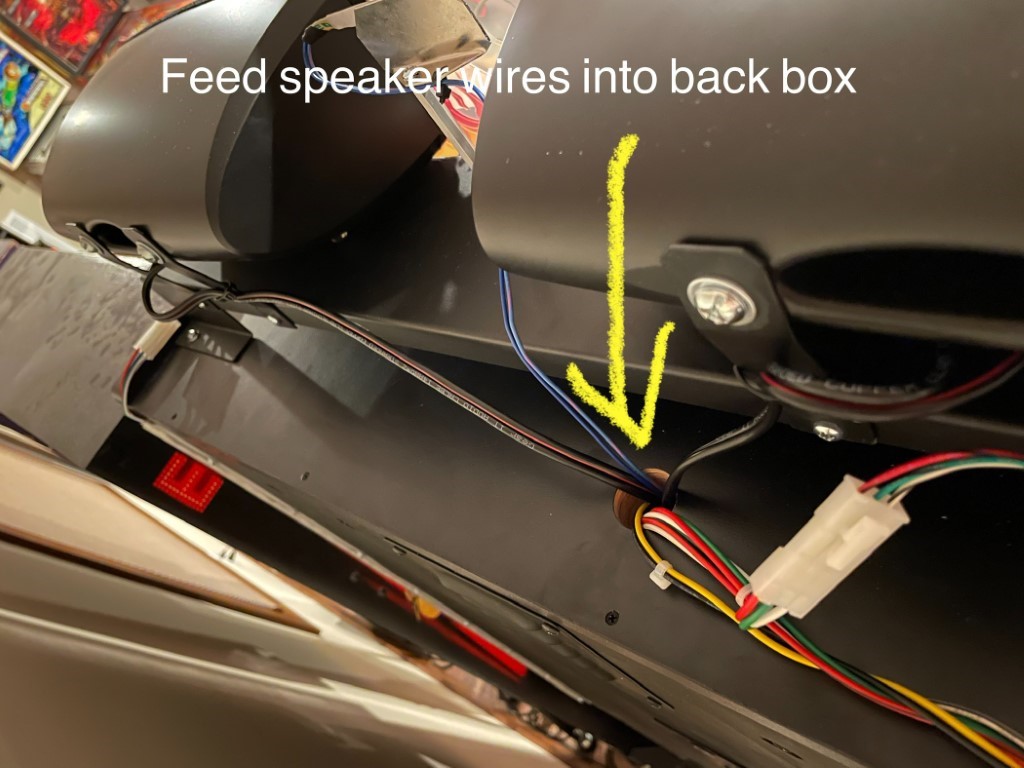
Here is the wiring and install process – mostly shared in images as it’s easier to follow along


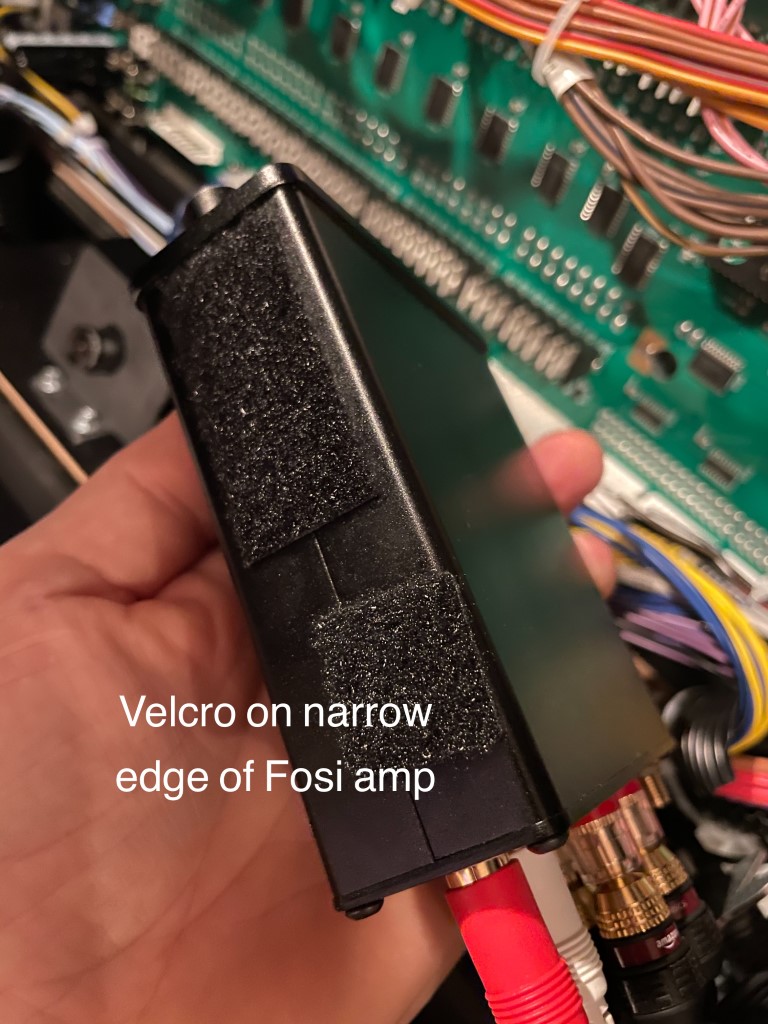
You’ll probably notice the amp is not mounted to the side of the backbox like the pre-amp is. I tried it. Don’t waste you time. It won’t fit. Mount it via the long narrow edge and the screen wont hit it. It will hold just fine with some quality velcro (it’s light).


Overall, I’m really pleased with both the appearance and the sound. If you want to adjust the output, change the treble or bass settings, it’s not that difficult. Pull the backglass and all the settings are right at your fingertips.
The SPL is now probably 3-5db higher than before, much louder than the stock soundbar, it’s cleaner at that level and I can now dial in the right amount of treble (these speakers are not capable of delivering significant bass)

Someone on Pinside asked if I thought all of this was “worth it”. I do, but not everyone would. Getting older now and need a little boost in the treble area. Even without the ability to dial in the tone controls, the ability to “mix” the sound to get more from the backbox (ok topper) than the cabinet speaker is a big win on it’s own. With the stock setup, when you wanted more power in the callouts or high end, you had to turn the whole system up or go into the menu and hope the settings for increasing songs vs callouts etc was satisfactory. Now I can independently do that (using the preamp gain)
Remember that I also popped a $1,200 SVS sub under there too and you might be hard pressed to justify both of these spends but I look at it this way … this pin is unbelievable – it really is a concert-like experience, these mods to the sound system take it about as close as you can get without adding external monitors (other than the sub) that then must be moved/relocated when you move the machine. I think it’s worth it and in the past 30 years I’ve spent stupid money on other audio equipment that did less to make me happy than this pin and these add-ons have!

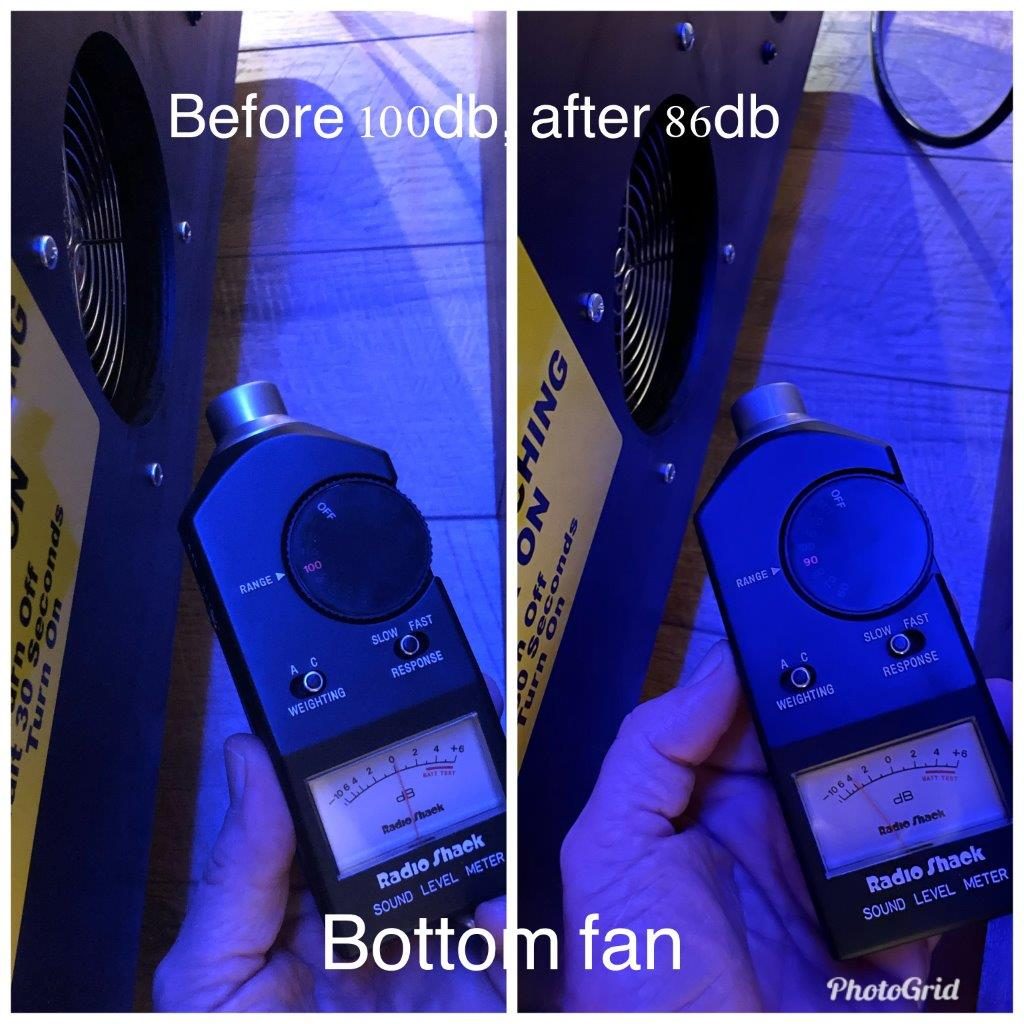
Adding some info here on SPL levels. With the little amp at 3/4 (3 o clock), the preamp at 6.5 and the machine at 30 there is no reason to play it any louder. If you move the preamp up or turn the machine volume up it will begin to add distortion and degrade the sound – terrible no but distortion nonetheless and I despise it.
For me, these are the max settings that still sound clean – and to be honest (I’ve been to lots of rock concerts) you really wouldn’t want it to play louder
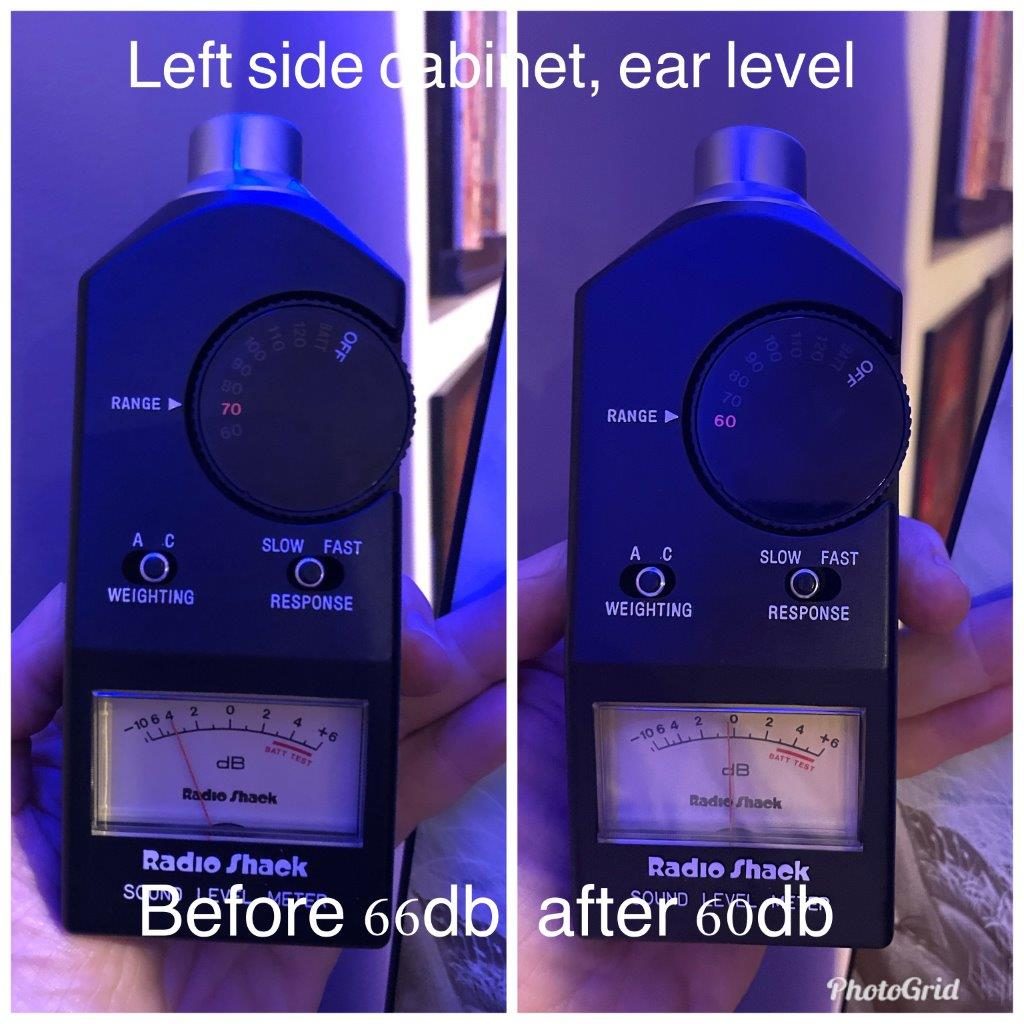
I’m getting about 105db sustained and 110db peaks (C weighted 32-20khz) during a song as measured at player ear level with my trusty Radio Shack meter. The yellow line I drew onto the scale shows where the needle spent most of its time during “Out ta Get Me” – it peaked higher at times.
I wish I would have measured the game before the addition of the sub and the custom topper – because I know the game was already capable of very high output as stock from the factory. I’m guessing I’m getting around 6db or so more output than stock (BTW, that is a lot louder as every 3db requires around a doubling of amplifier power to deliver it)
Anyhow, just a bit more info to share on this mod and, of course the normal warning to be careful with anything that can play this loud. 110db for 2 sustained minutes can begin to cause damage to your ears.
This machine is a real rock concert in a box – amazing
Scroll below the “Game Over” to see detailed supply and install instructions

Installation Notes and Supplies List
You’ll need 2 Klipsch Theater Reference Standard speakers
Just the center channel in the Amazon link
You’ll need a SVS SB3000 subwoofer
You’ll need a Pinnovator subwoofer blue tap
Tap into the existing cabinet speaker to run a 3.5mm cable out to the SVSSB3000
You’ll need to make 4 brackets, I used some aluminum stock from the hardware store


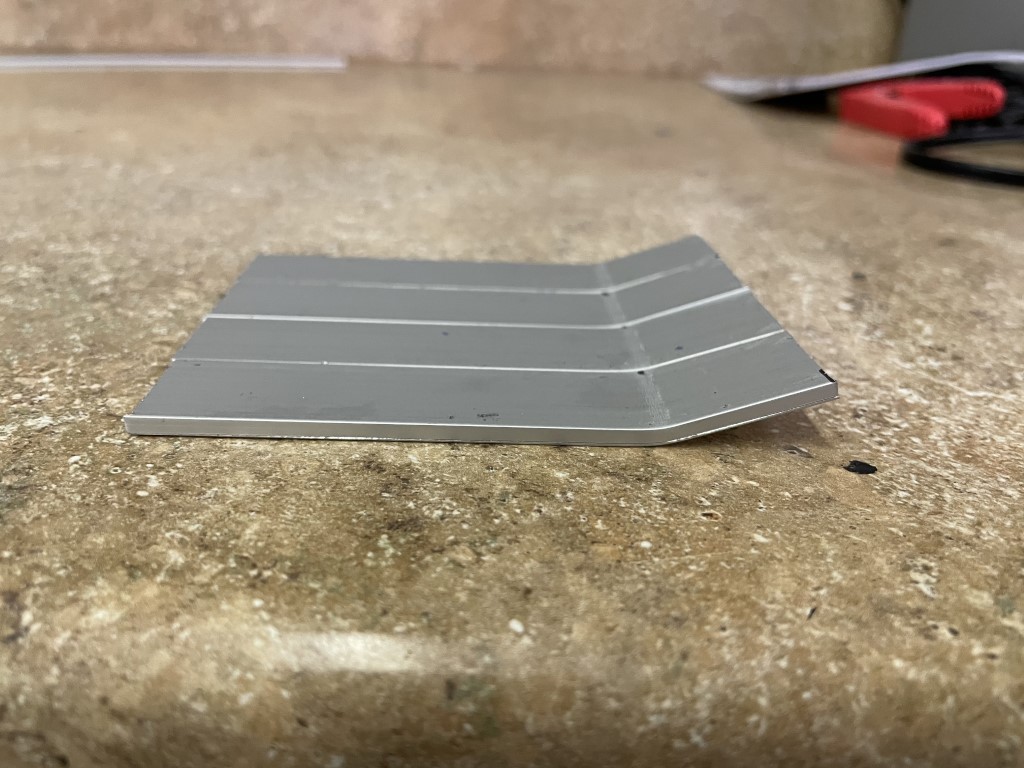

Easy to bend and easy to drill but rigid enough to hold the speakers once bent
The bar stock is 1/8” thick (comes in 4’ length) and ¾” wide (got mine at Ace)
Cut the 4 pieces at 3 15/16” length each
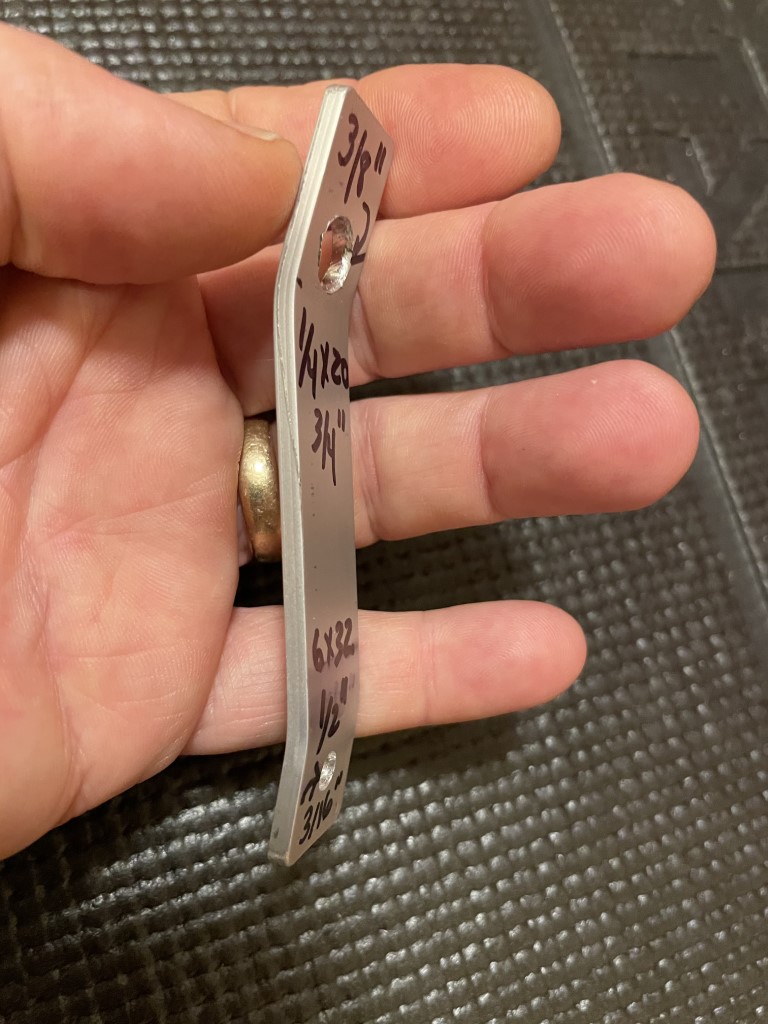
SEE IMAGE to follow along with instructions below:
- Use a vise to add opposing bends into the 3 15/16” long pieces
- Bend #1 should be made at 15/16” from one end of the short edge of the piece
- Bend #2 should be made at 5/8” from the other end of the piece
- Drill the larger of 2 holes (3/8”) just ABOVE the 15/16” bend
- Drill the smaller of 2 holes (3/16”) just BELOW the 5/8” bend
You’ll need some bolts and nuts to attach the speakers
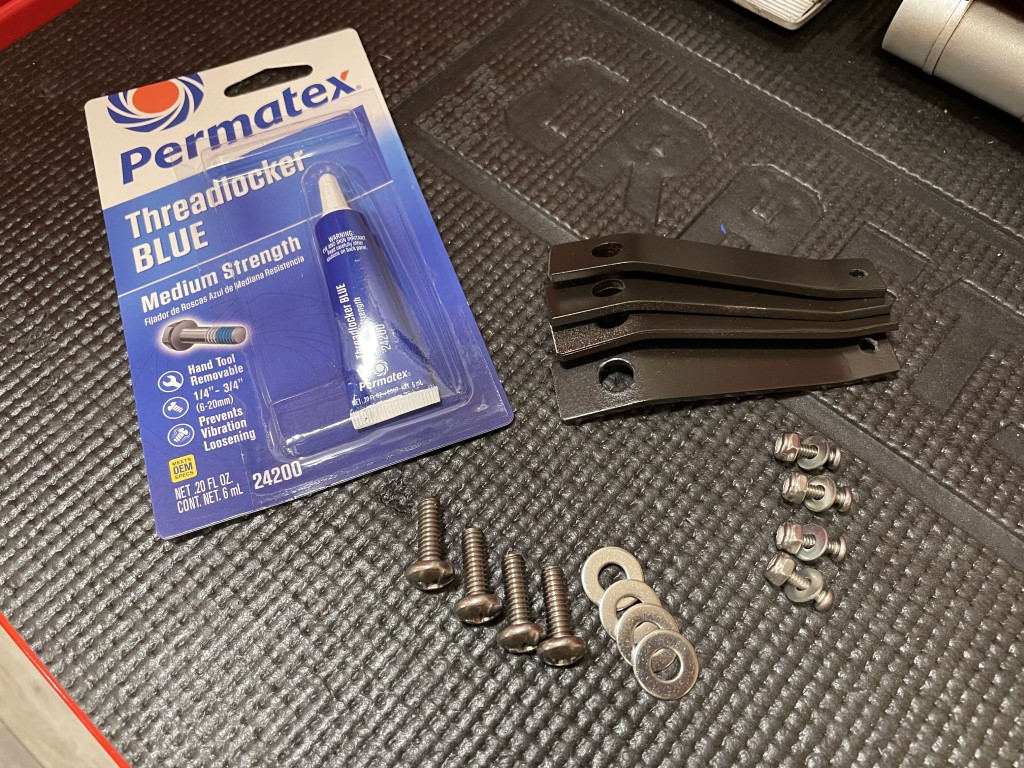
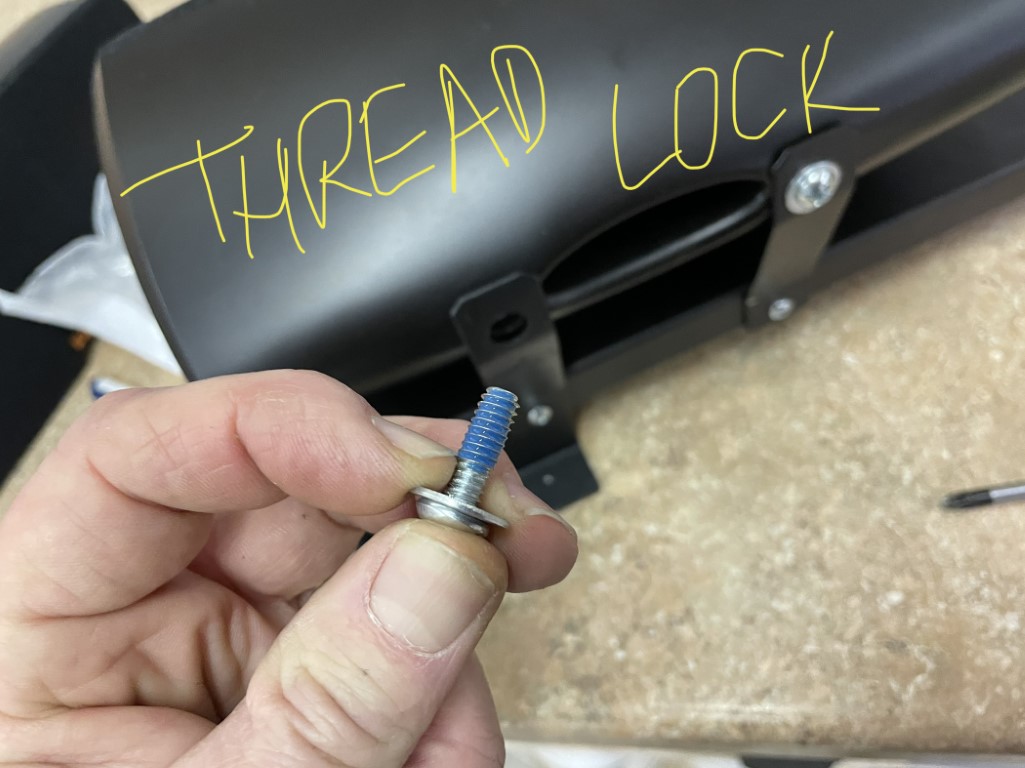
You’ll use 1/4 x 20 x ¾” long bolts (4 total) to attach at the speaker (these go thru the 3/8” hole in brackets and use some blue threadlocker when putting them in)
You’ll use 6 x 32 x ½” long bolts (4 total) to attach the bottom of the bracket to the JJP topper base
You’ll need to drill 4 holes to accommodate these bolts (drill 3/16” holes)> Note that these are the only holes you’ll need to drill in your original JJP topper frame, but they are small, they are in the back and would never be noticed should you decide to later reverse your install.
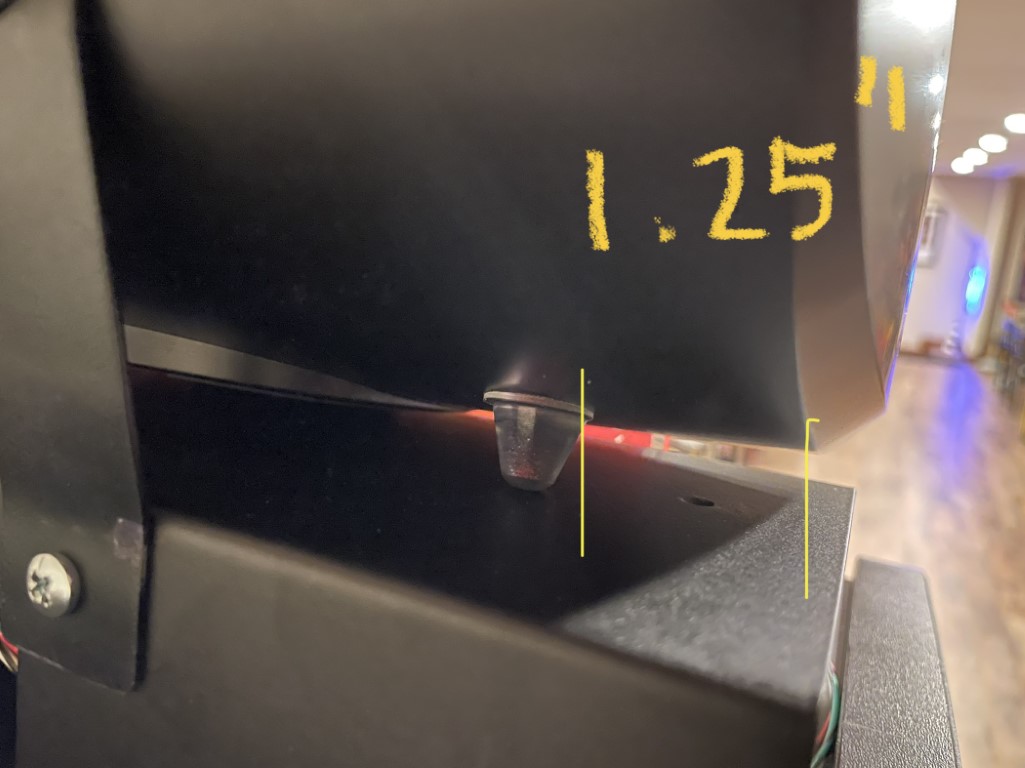
You’ll need 4 of the cone shaped silicone rubber bumpers. Use the 18.3mm x 14.2mm size only. Place these 2” back from front edge of speaker (see image). Place these 1.5” in from the outside (left and right) ends of the speaker
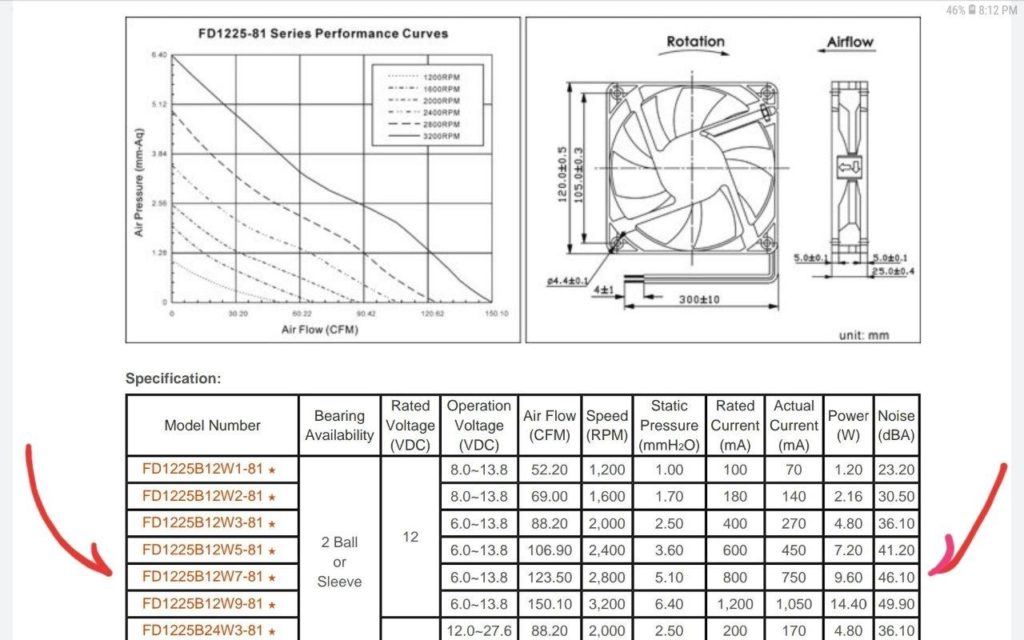
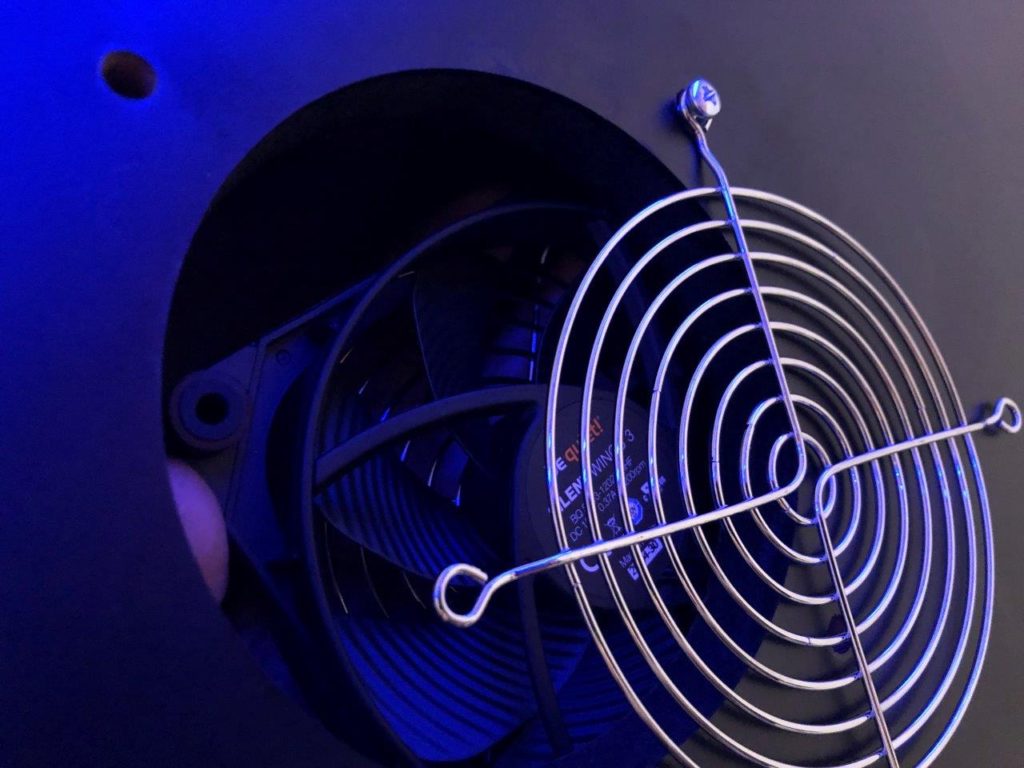
You’ll need to put a pad under the center of speaker before bolting it down to make sure it does not vibrate against the JJP bracket. You can use almost any thin pad but these fan balancing pads will work. Place them in the center of each speaker and right at the front edge
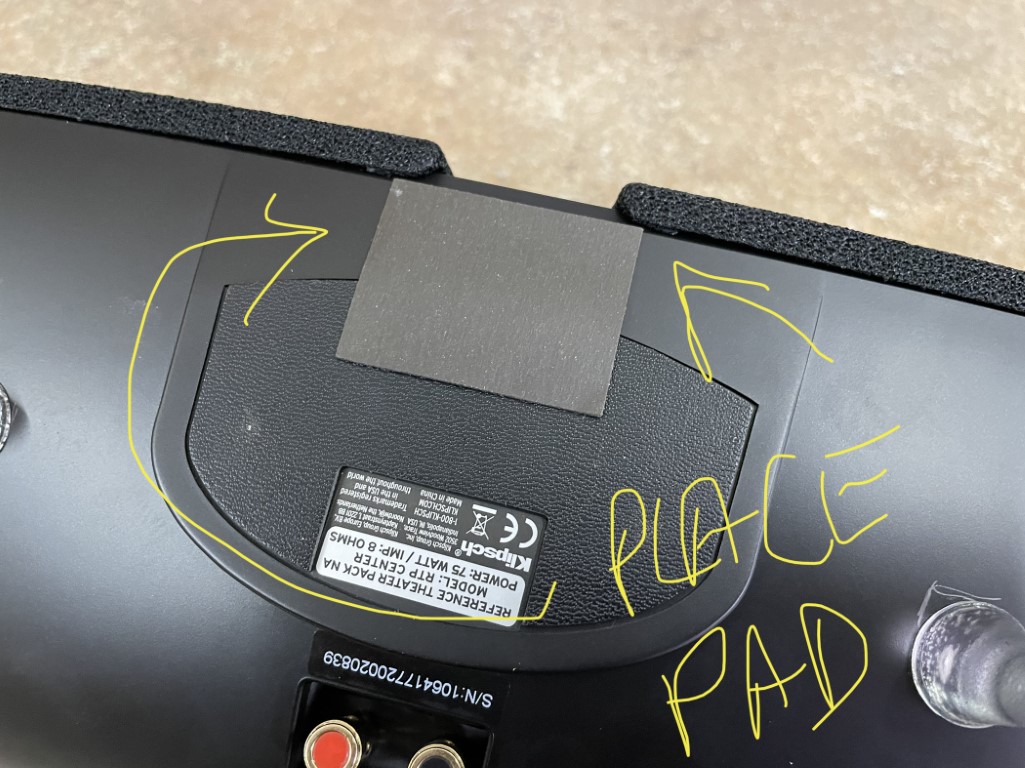
If you can’t find the fan pads then these will work too
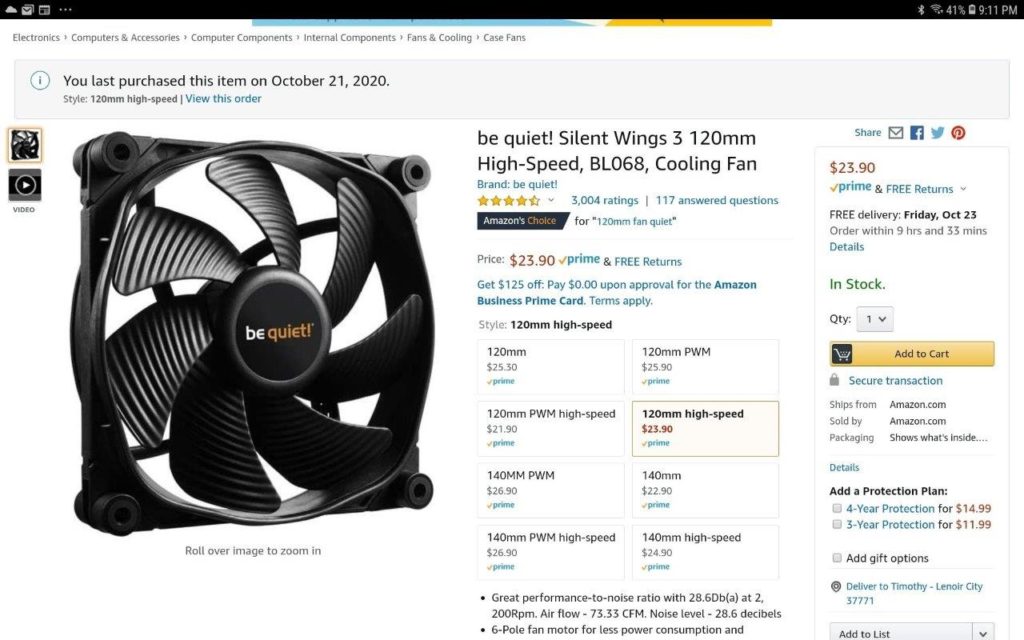
You’ll need a FOSI 100 watt x 2 amp
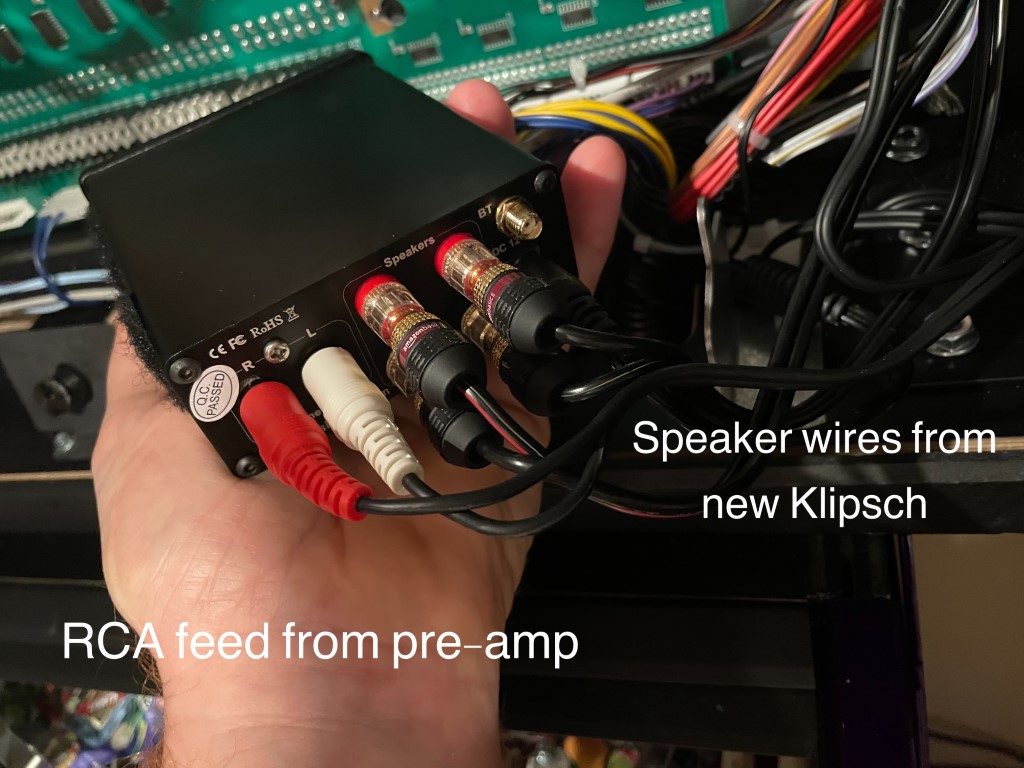
You’ll need a Preamp
You’ll need some speaker wire too
You’ll need banana plugs
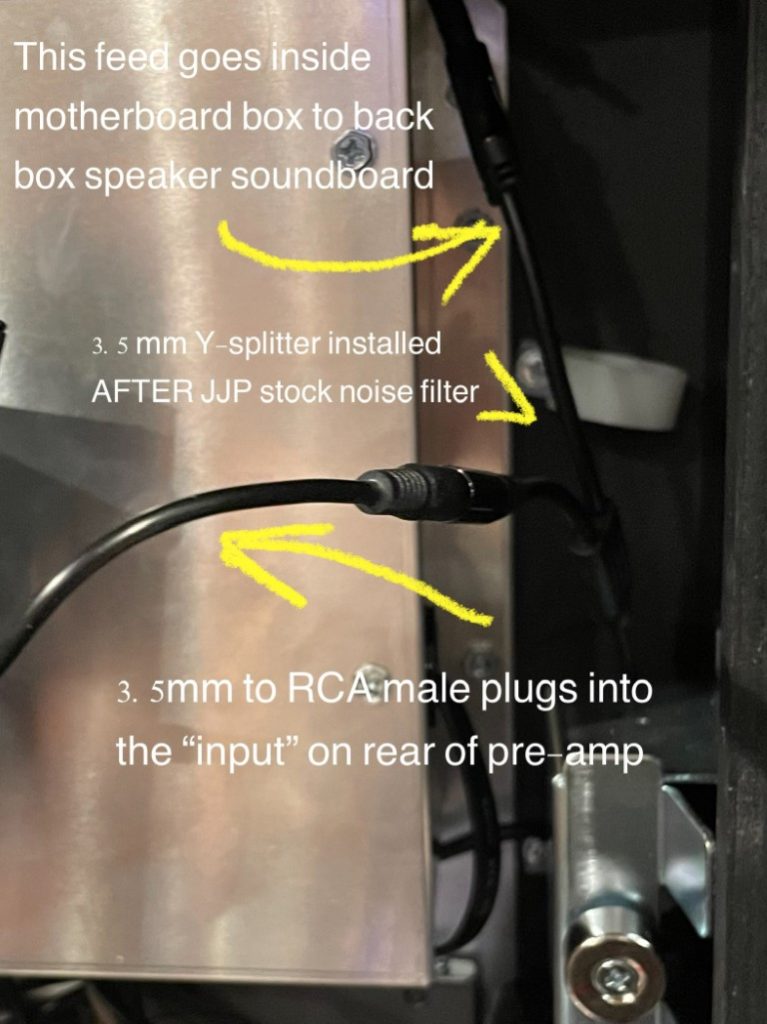
You’ll need a 3.5MM to RCA male adapter (from Y-splitter going into pre-amp)
You’ll need a 3.5MM male to 3.5MM male adapter (to connect Y-splitter to RCA adapter going into pre-amp). Check your preamp box because I think it may come with one of these!
Settings to start with
SVS Subwoofer
- Set the sub volume at MINUS 16db
- Set the Low Pass Filter to “on” and at 65hz (VERY important setting)
- Set your parametric EQ the way it sounds best or use a meter to dial it in (or worst case leave them off)
FOSI Amp
- Volume set to 3 o clock
- Bass at 12 o clock
- Treble at 1 or 2 o clock
iBoost Preamp
- Set the gain at 6.5
Game
- Set the “music” setting in the JJP game menu (game settings) to 77 (I think default is 80)
- Max volume for game will be around 30, game will sound very clean at 28
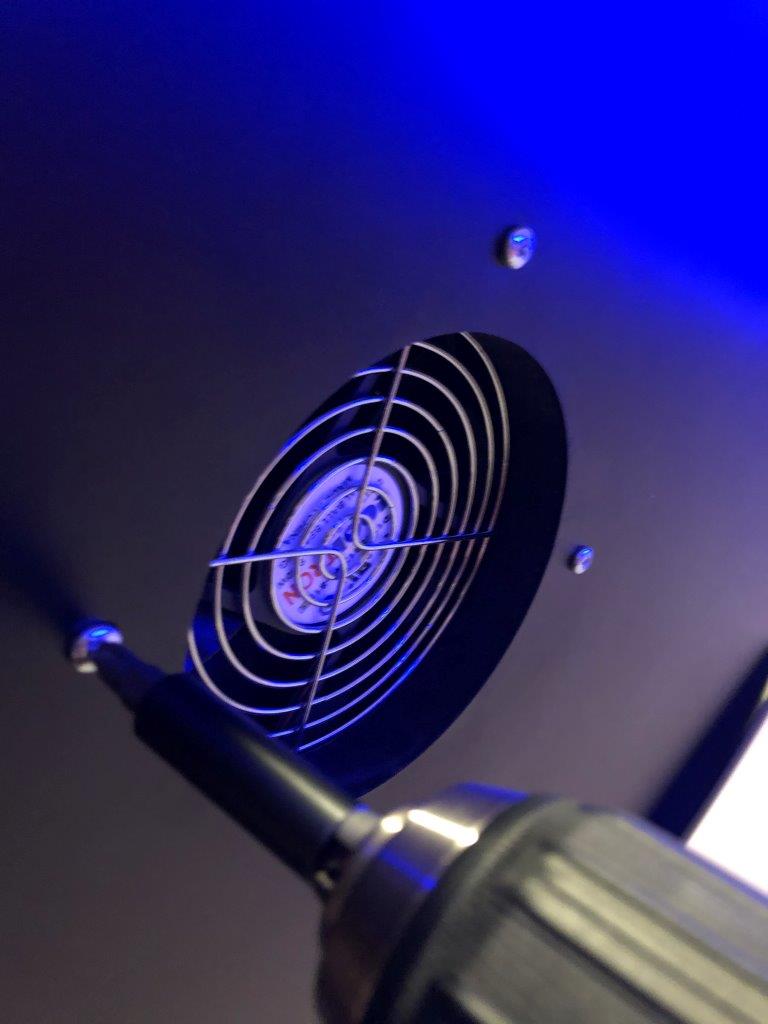
Extra Photos Follow