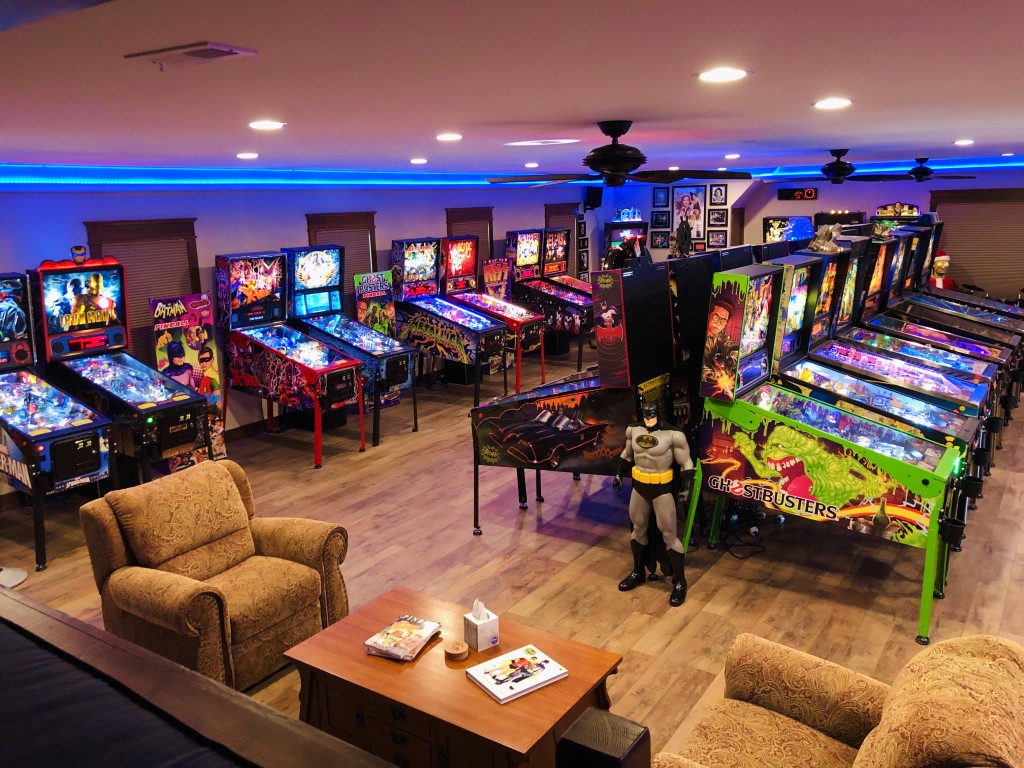
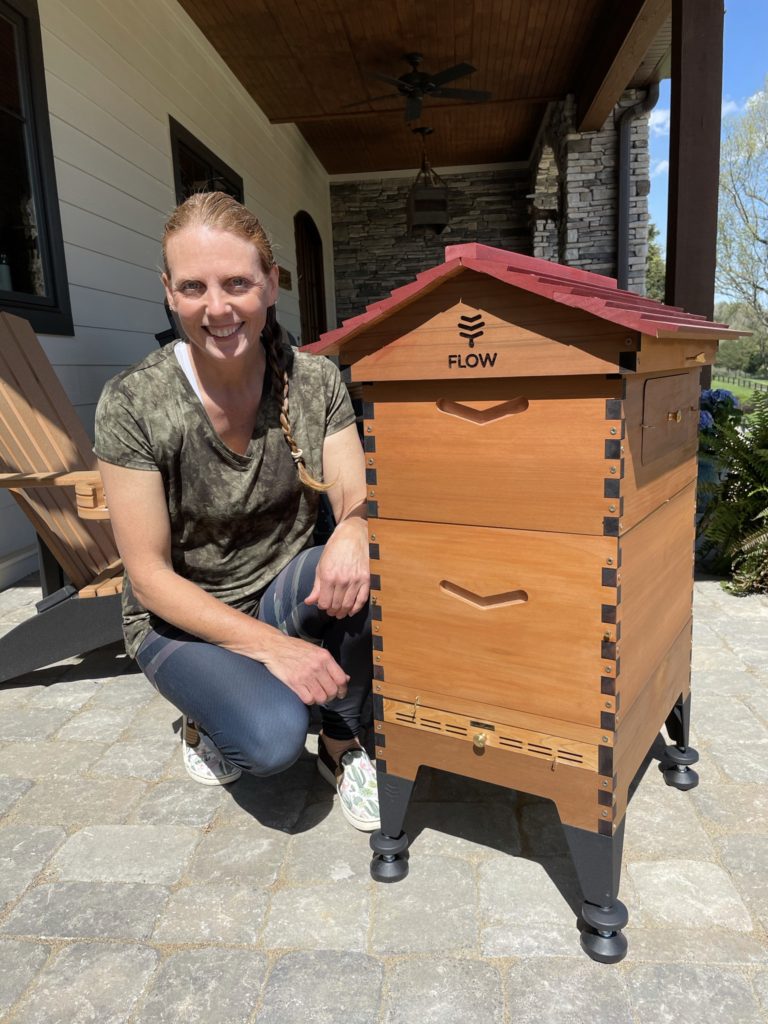
It’s been a dozen years since I bought Theater of Magic to put in the gameroom of our summer home. Pinball guys know what “just one pinball” means – right? I bought 5 more by the time we sold that house, 13 more by the time we sold our main home and moved here to Red Heaven Ranch. In the subsequent 3 years it took to finally get the new house built, I had bought 20 MORE games. Oh, and I had many of them stuffed into the 1,700 square foot area of the old ranch house. They were in the living room, the hallway, the office, the pole barn and folded/stored in a spare bedroom in the basement. It was a relief to finally finish the Pinball Loft and move the games into its dedicated 1,500 sq/ft environment. If you’re curious about the design and build, you can find the details HERE.
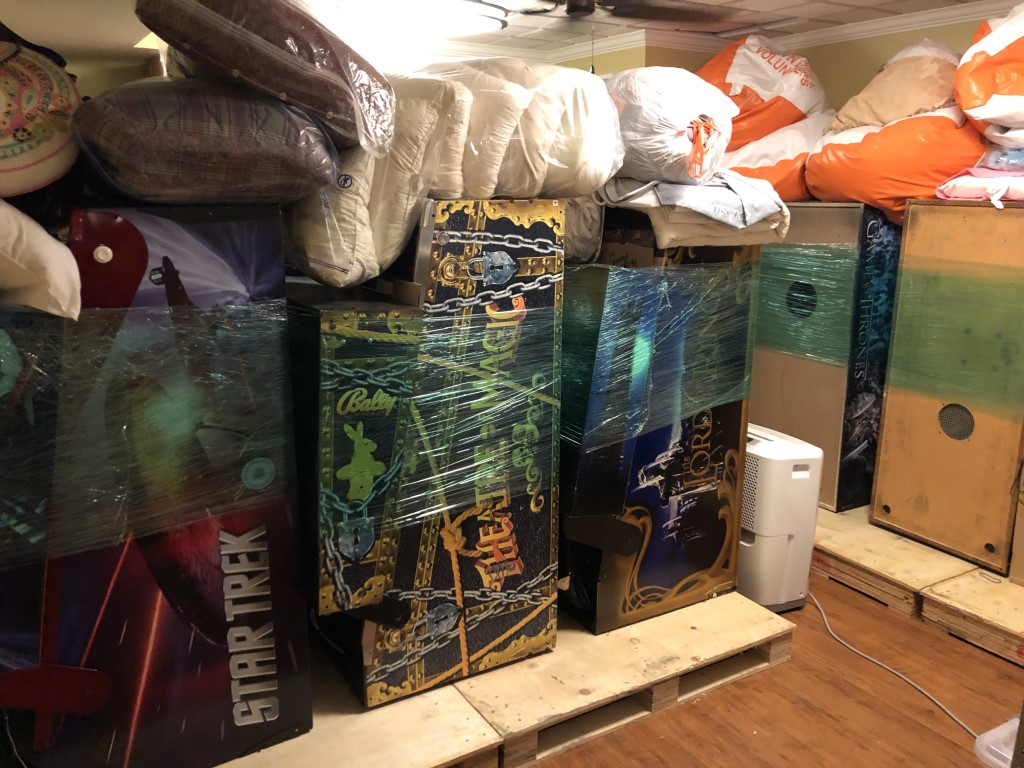
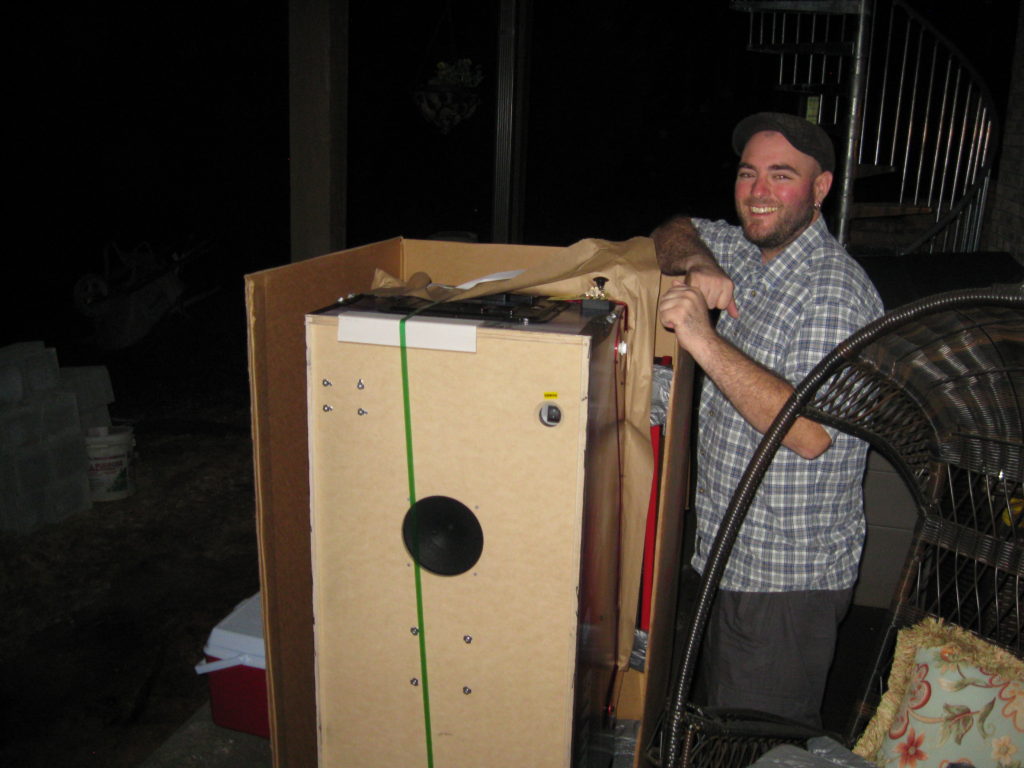
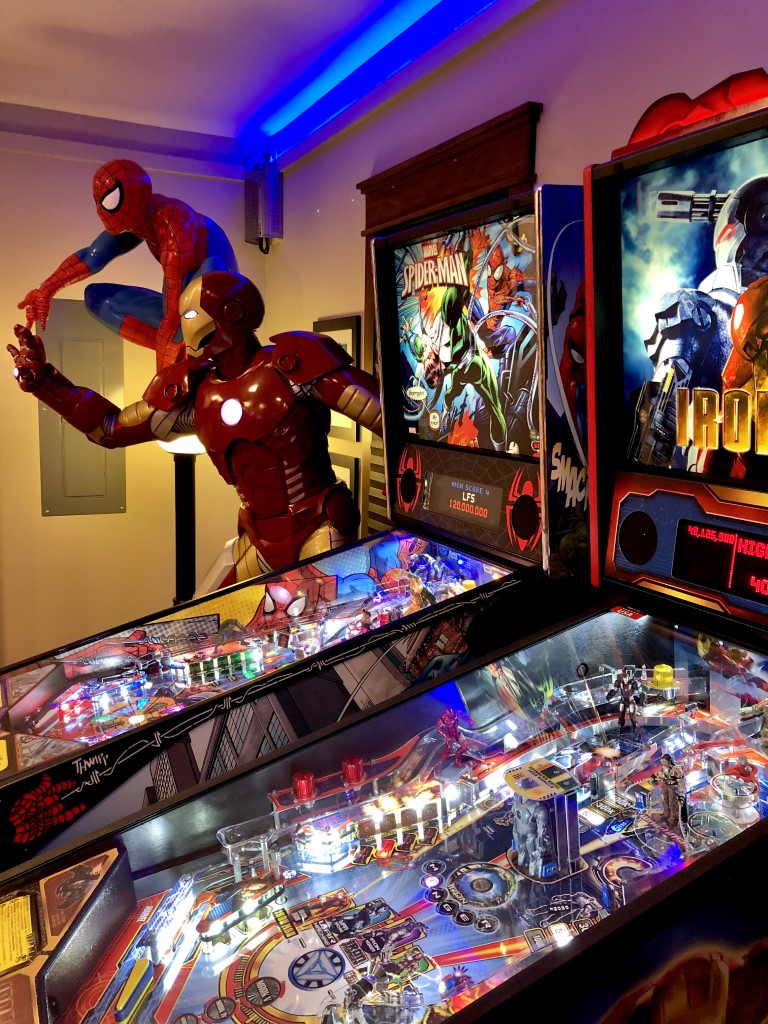
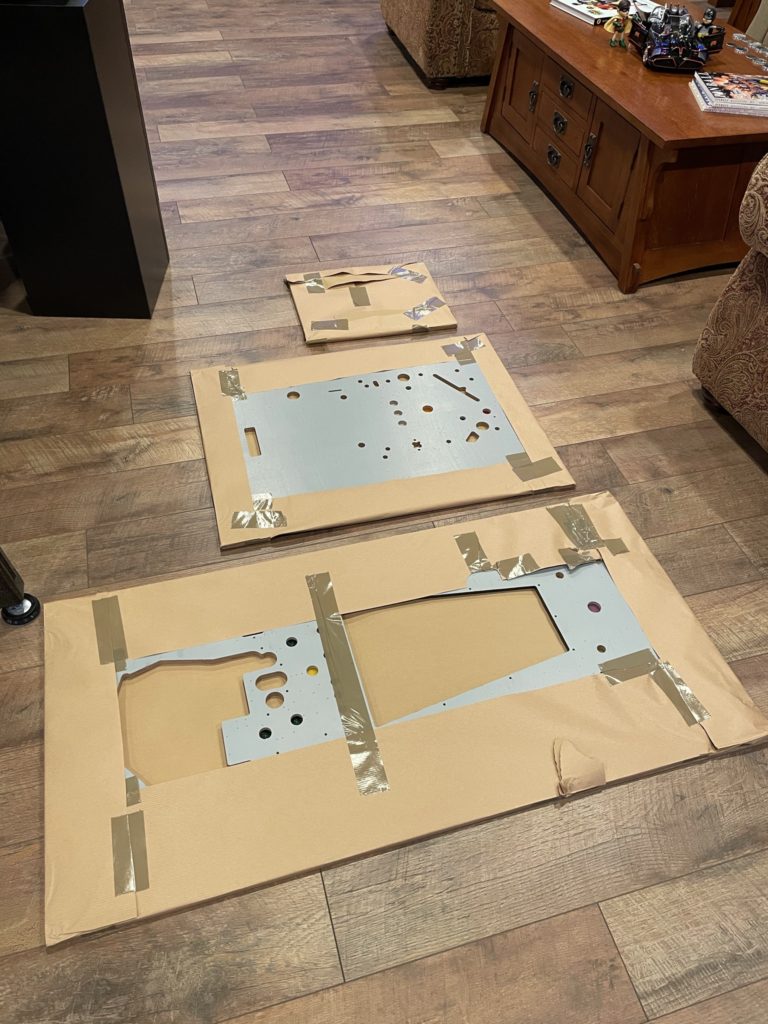
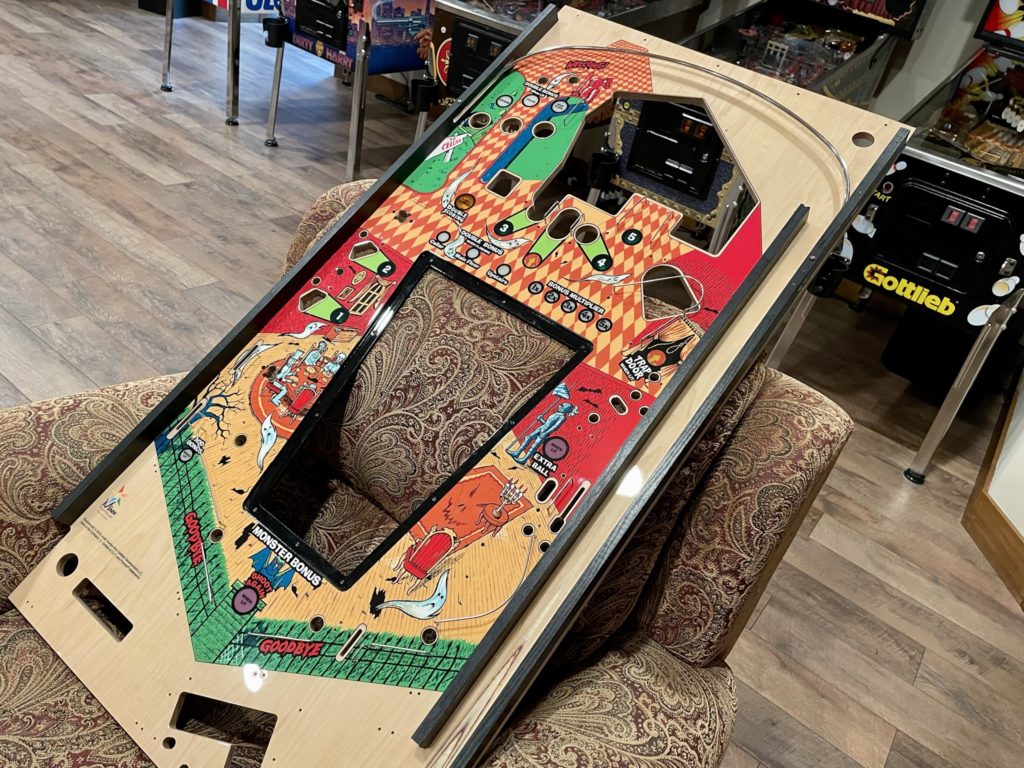
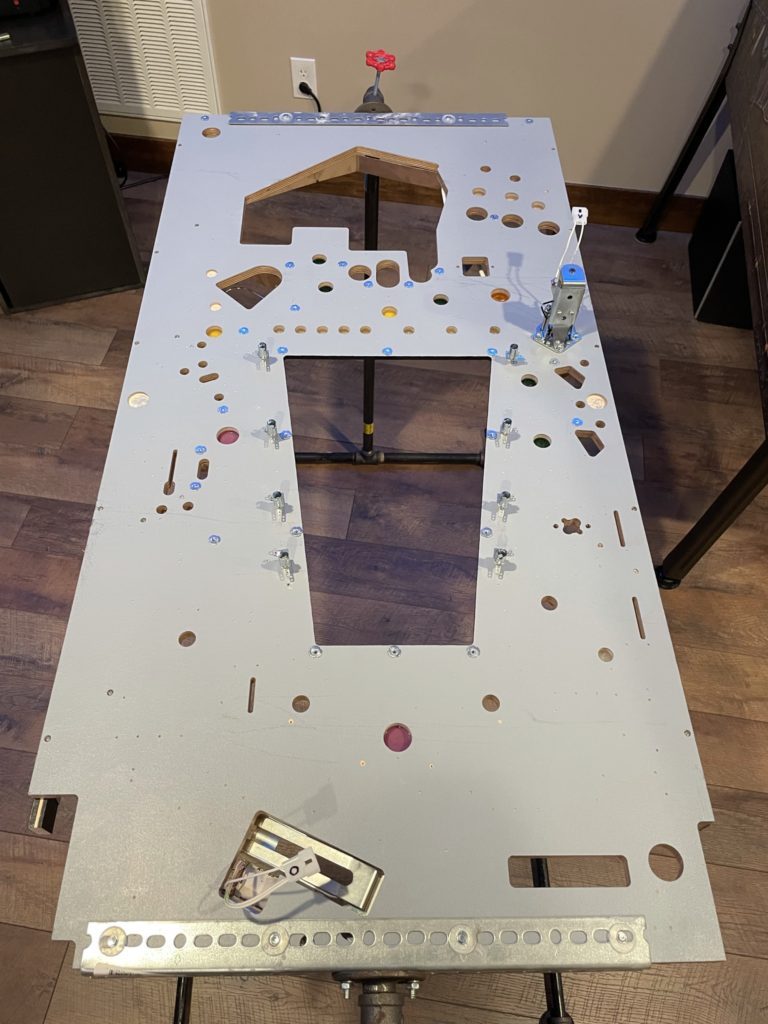
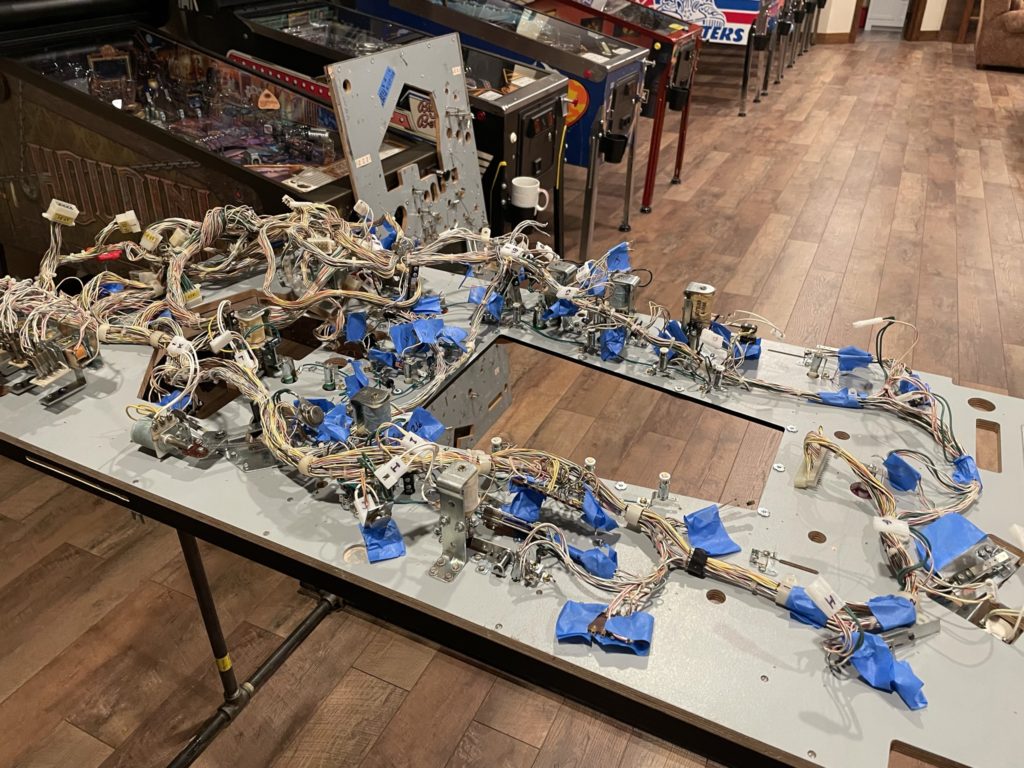
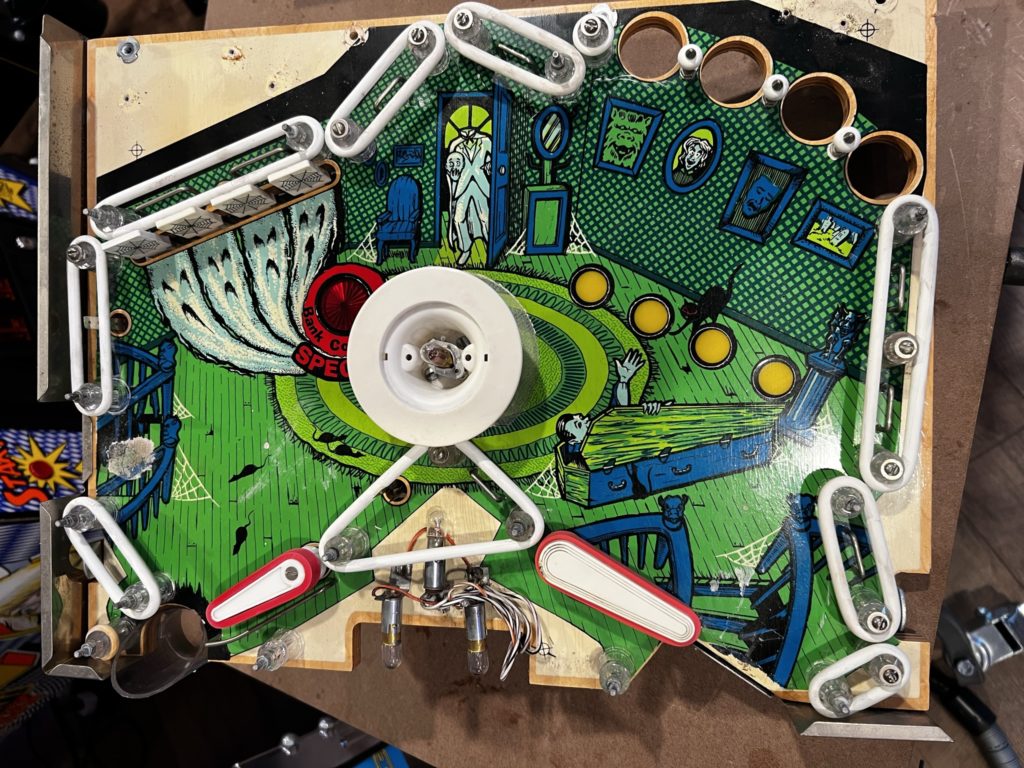
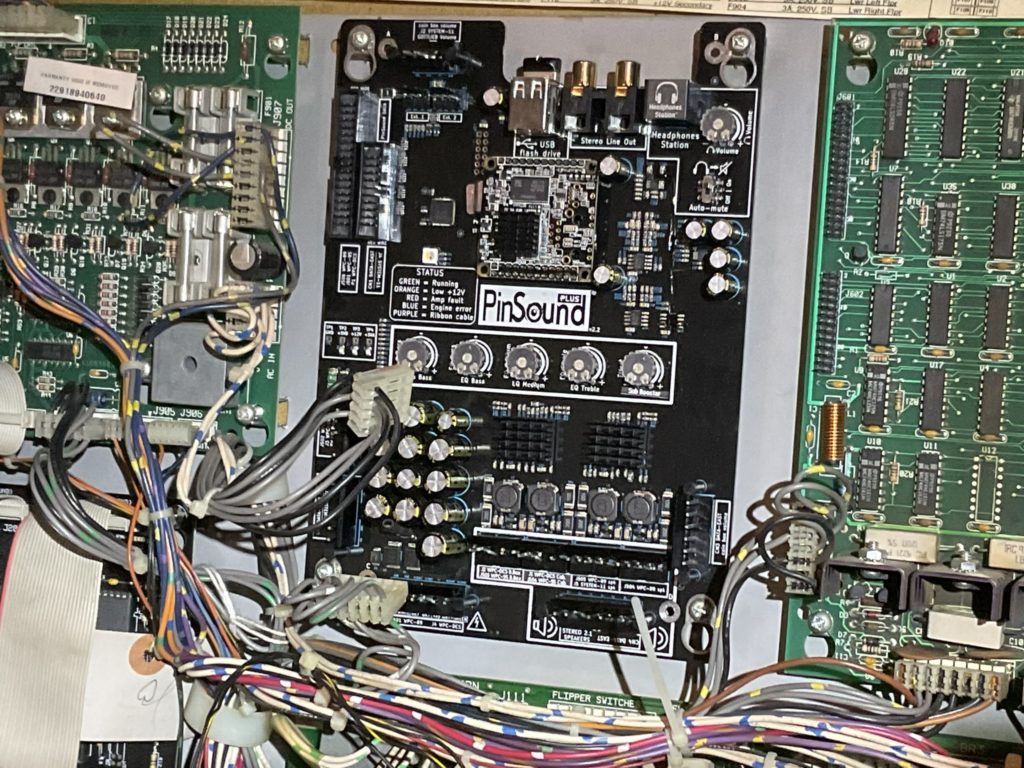
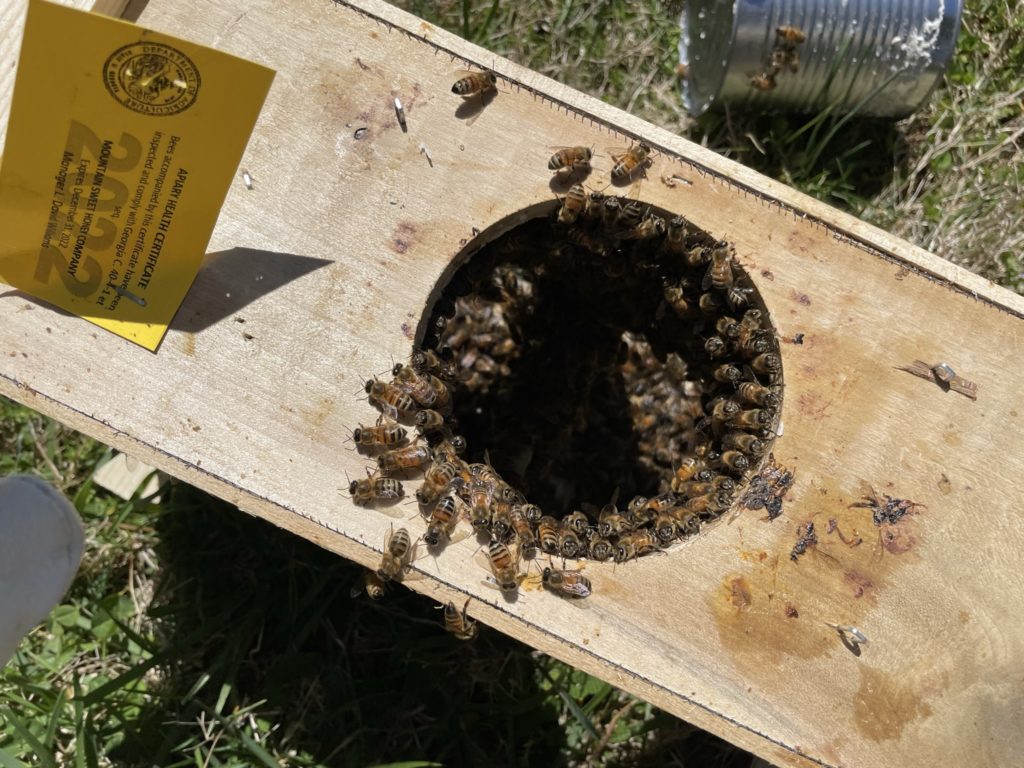
Some of the games crammed into the old ranch house before moving to the new Pinball Loft
2 years have passed since I moved into the new space and 12 years since entering the hobby, I thought it appropriate to highlight some key lessons, memorable moments and interesting tidbits that I’ve gleaned from being an older and (hopefully) wiser collector.
Let’s dive in:
ONE
Stay engaged
– New hobbies come and go. I’m sure Pinball is no different. The initial euphoria subsides and people wander away for various reasons. One of the best ways to stay engaged in the pinball world, is to continue to play or own a variety of machines. Engaging with new rules, new shots, new themes and new manufacturers keeps pinball fresh. There are 2 main ways of accomplishing this goal in the world of home collections (location play is another ballgame). The first way is the most common, and is driven by available funding and space. Most home collectors will need to buy, sell and trade games often in order to keep their collection interesting to them. When I first started collecting I saw these type of enthusiasts and wondered why they were never satisfied with what they had. I asked myself if they really liked ANY game at all – because it seemed their latest buy lasted no more than 6 months or so and it was sold off for another title.
The truth is more obvious – there is only so much money and space available to most collectors. Routinely cycling in new titles is a way of keeping the collection fresh. Another approach is to simply keep building a larger and larger collection. This assumes you can afford it and (just as important) you have the space. This is the approach I took in collecting. Aside from the capital investment, this type of collection demands you have a bigger than life plan for future space. Knowing where you will keep 40-50 games is critical in approaching collecting this way. Knowing where you’ll “stop” is just as important as the endgame here is a dedicated, purpose built Pinball gameroom. The next segment will talk about how I answered that question.
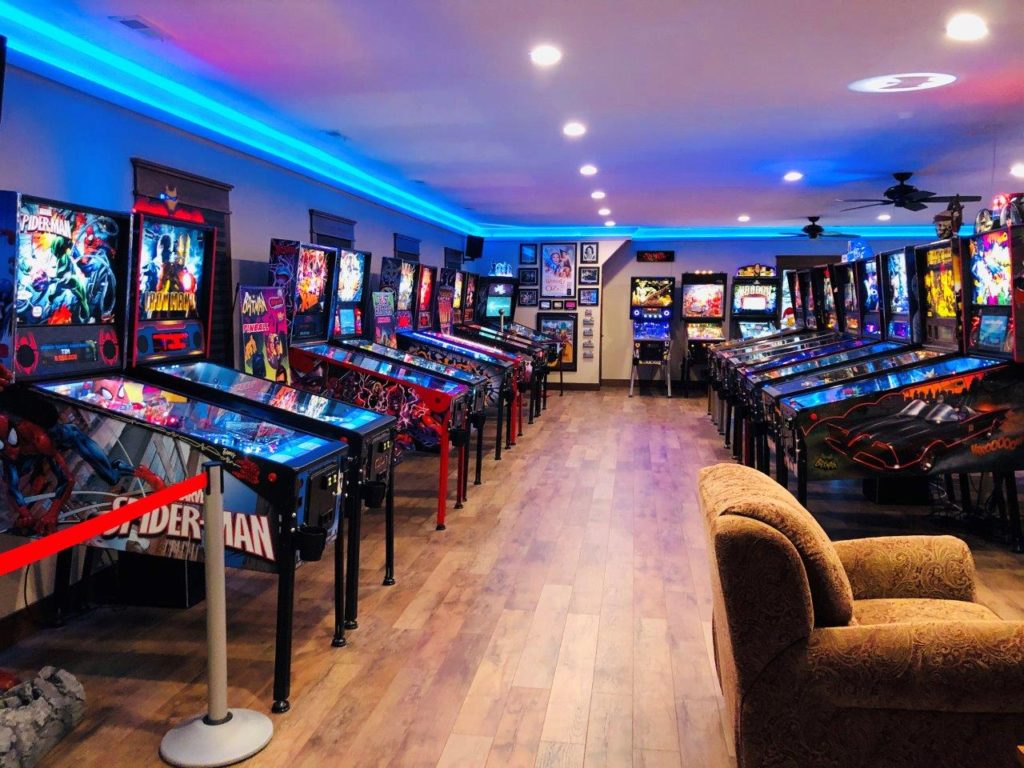
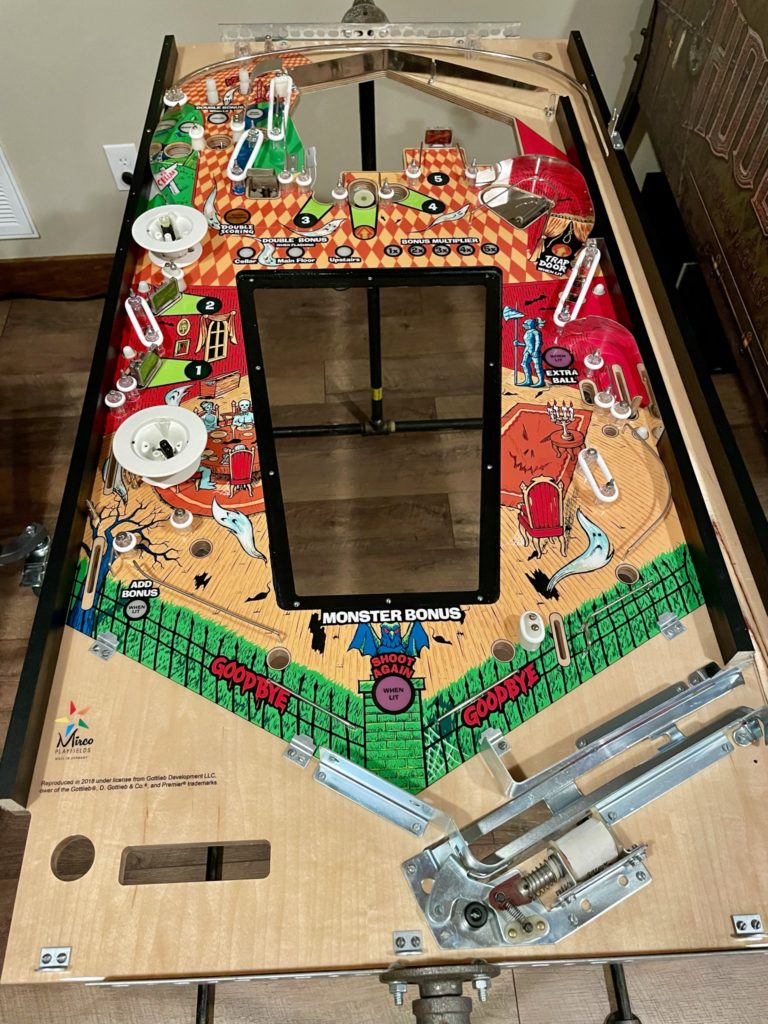
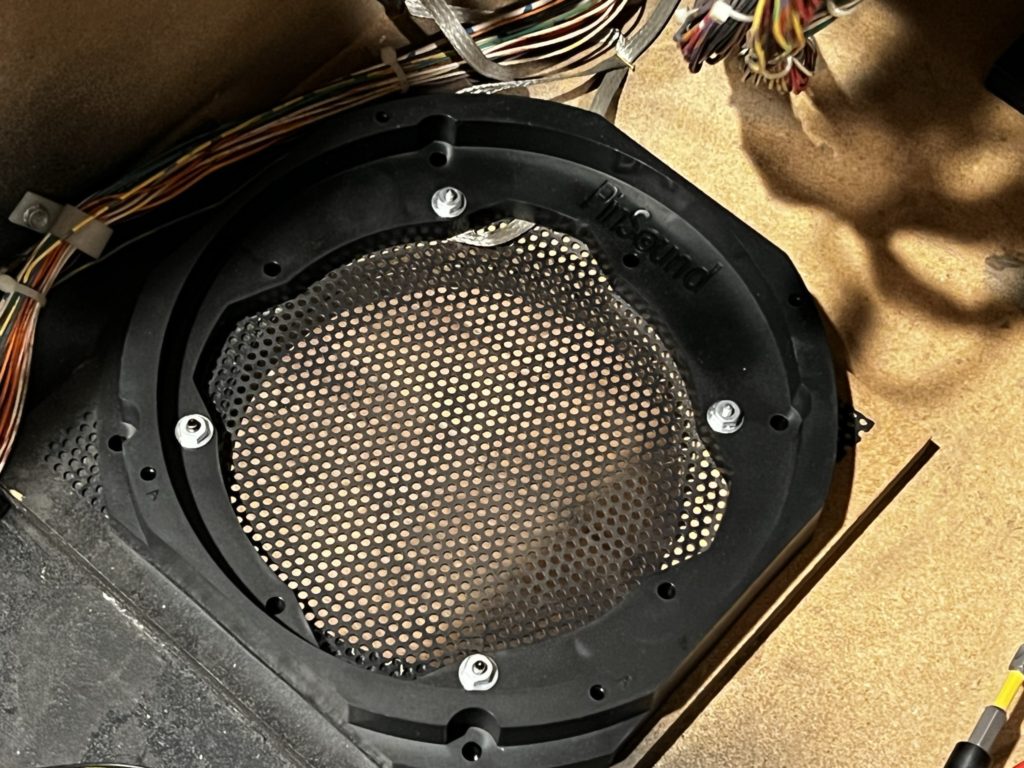
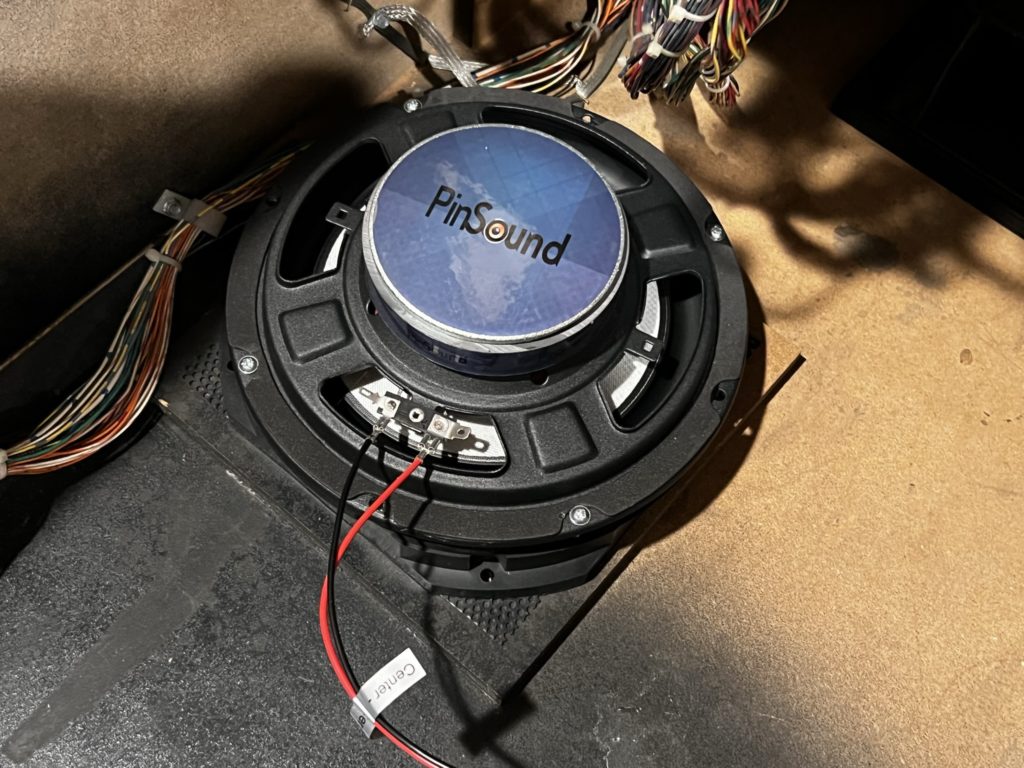
The Loft shortly after completion
TWO
Don’t go over 40
– I certainly did not expect it but when I got all my games into the Loft and fired them up at the same time, there were 5 or 6 of them that simply did not work or work properly. They worked perfectly when I folded and stored them 2 years prior! As I looked around the room that first night I became aware that this was the first time I had all 40 games in one spot and all turned on. Then I started to think that based on the sheer number of games, it was going to be highly likely that at any time 1 or 2 games would need a significant repair. That proved to be true over the long haul. In the past 2 years, and for several months at a time I’ll have a game that will be out of service. I’ll have 2 or 3 more games that need mechanical attention to “play right” and another few that are waiting to have mods installed. When the collection was smaller all of those prior mentioned numbers were smaller as well. Do the math on doubling the collection to 80 or more and you quickly become aware of the hours of maintenance and repair you sign up for when the collection is large. I made a decision that first week in the Loft that I would keep the collection at around 40 or less and have followed that standard since.
Setting up 40 games in the new Loft to discover just how many needed some “work” to be operational
THREE
It’s a cheap hobby
– When I bought my first pin (Theatre of Magic) I paid 30% too much and had NO expectations that I would make any money should I decide to sell it. I assumed that if I ever sold it I would lose something because all expensive items depreciate. But … in the case of pinball, and the years 2010-2023, the current value of my collection exceeds the original investment (including mods). New to the hobby? This segment means NOTHING to you. You may be buying in at the peak for all I know. I’m only able to share what happened to me as I’ve collected over the past number of years. I have history and financial facts on my side. As rosy as this picture sounds, I’m sure the rate of gain is not sustainable, but until inflation settles, it appears that IF the big base of your investment was made say 8-10 years ago and you decide to liquidate, you could get your money back with interest. It’s an unexpected blessing from a hobby that has brought priceless joy.
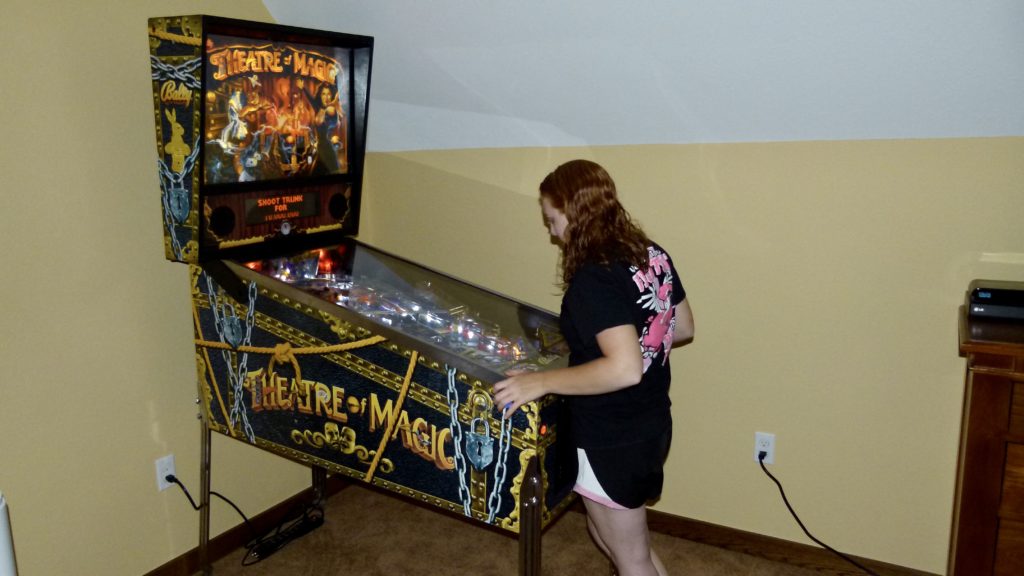
Where it all started. Theatre of Magic as played by my daughter. Game number one
FOUR
Designers are human
– To some extent, we ALL want validation from others. If you’re a game designer, even before you are a pinball celebrity, you’re just a regular Joe. While I’m not a designer, I have reviewed many games and personally interacted with designers as prompted from those reviews. I can say that the ones I’ve talked to WANT to know that we love and enjoy their games. It’s a little odd because in the business world we don’t look to end users to say “good Job”, we look to our leadership for that – but as a pinball designer, this validation matters. I think it means even more because the product is supposed to be “fun”, not just “a pinball game”. The games also have a significant amount of personal creativity embedded in them. When you share a positive opinion about a game, you are in a way validating the creativity of the person that made it. As a former Fine Art student, I can tell you that praise for my work was important
Joe Balcer and Miss Tami yucking it up at Texas Pinball Festival
FIVE
Marketing is immature
– Holy cow. Coming to this hobby as a professional marketer with more than 25 years in the business, I was astounded by the level of amateur handling of my beloved product. I wondered if they “knew” just how far behind they were compared to other product based companies? The good news is that over the past 5 years that marketing effort has improved. Some would argue that given the backlog and unbelievable demand, that the marketing effort is “good enough” – after all, why push for more sales if you can’t meet current demand? My take is that pinball marketing is still relatively weak and it’s that way across all manufacturers. Yes, some are better than others but all still lack the level of polish you see in other mature hobbies (I consider pinball a mature hobby given it’s hundred year plus history). In many cases the manufacturer is the origin point for all things promotional and each does it differently.
The widely used distributor model behaves the same with each distributor having varying levels of skills in the promotional process. Some use social, some don’t. Some produce slick video segments and some don’t even have a functioning website (call to order). There is little to no attempt to sell in the area of mass-media (billboards, web advertising, enthusiast magazines, TV, cable, etc.) The level of professional presentation skills at industry shows varies widely among each manufacturer (and bigger does not mean better). Some of the seminars and PowerPoint presentations are just cringeworthy to watch. Maybe my background causes me to see things here that others don’t. Maybe the efforts are “good enough”. Maybe the industry just doesn’t need or would not benefit from improved marketing. Whatever the answer, sometimes it hurts to watch
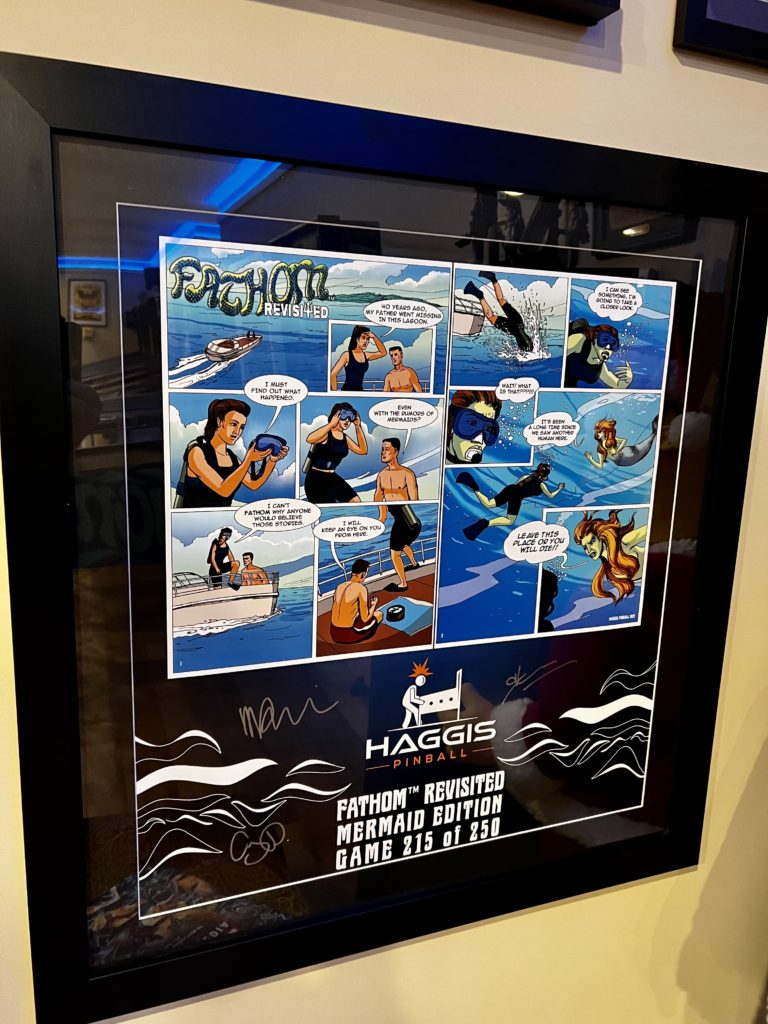
A good example of great marketing … the custom signed posted included with Fathom
SIX
Fixing equals fun
– I started like many others … scared to death that my first game would break (it did) and that I would never be able to get it working again (I did). Every breakdown, diagnosis and repair since then has made me more confident, less frustrated and generally happier in the hobby. Heck, it’s even lowered my anger levels! Almost every NIB machine I’ve purchased comes with its own list of “things that don’t work right out of the box” and will need diagnosis and repair. When I started collecting, I’d be angry about it. I’d ask myself why the manufacturer didn’t do a better job of QC on the game – especially at these prices. Today, I never do that, I note the issue, diagnose the problem and quickly fix it (most times) and move on. Having that level of knowledge and the repair skills softens everything around the hobby of pinball. I think the reason is obvious. Pinball machines break. Collectors are left with answering the question “What level of involvement will I take to get it going again? Learning to repair your own games allows you to enjoy the hobby even more. Hobby satisfaction rises with repair skills
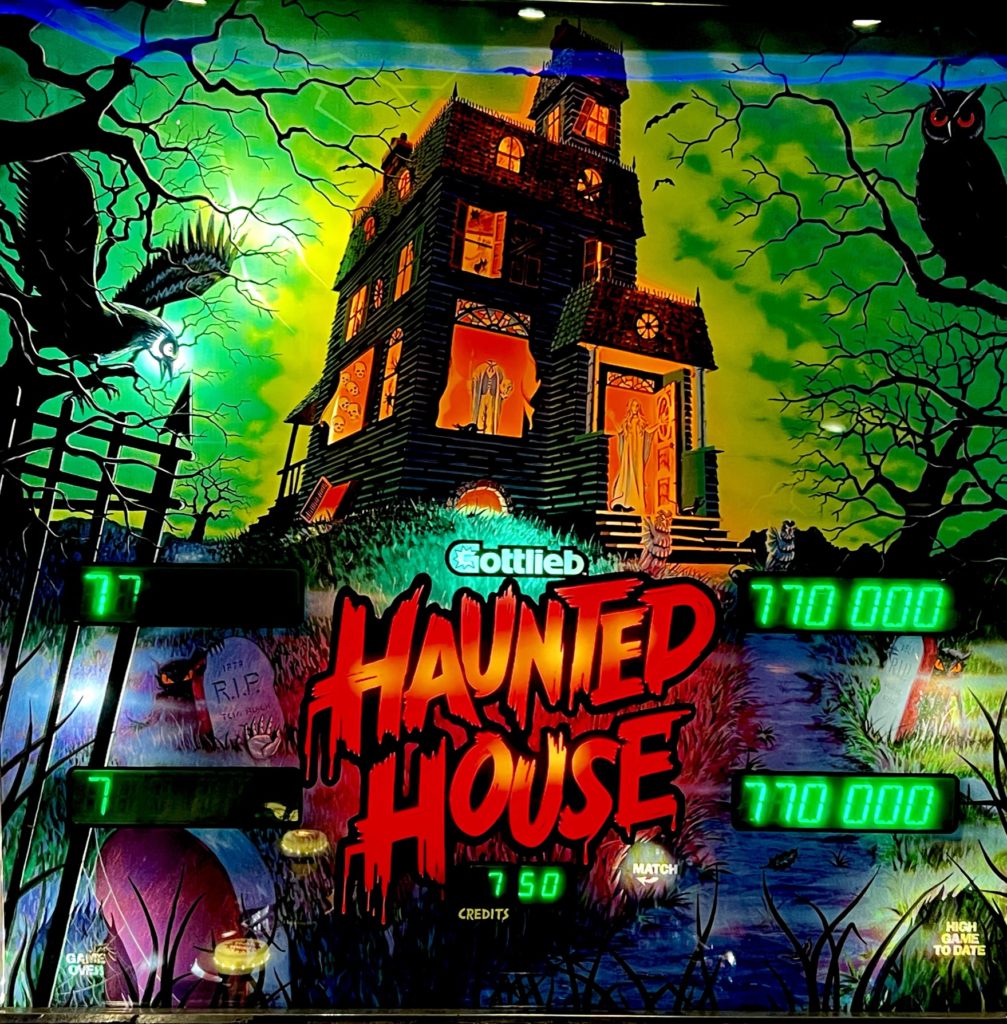
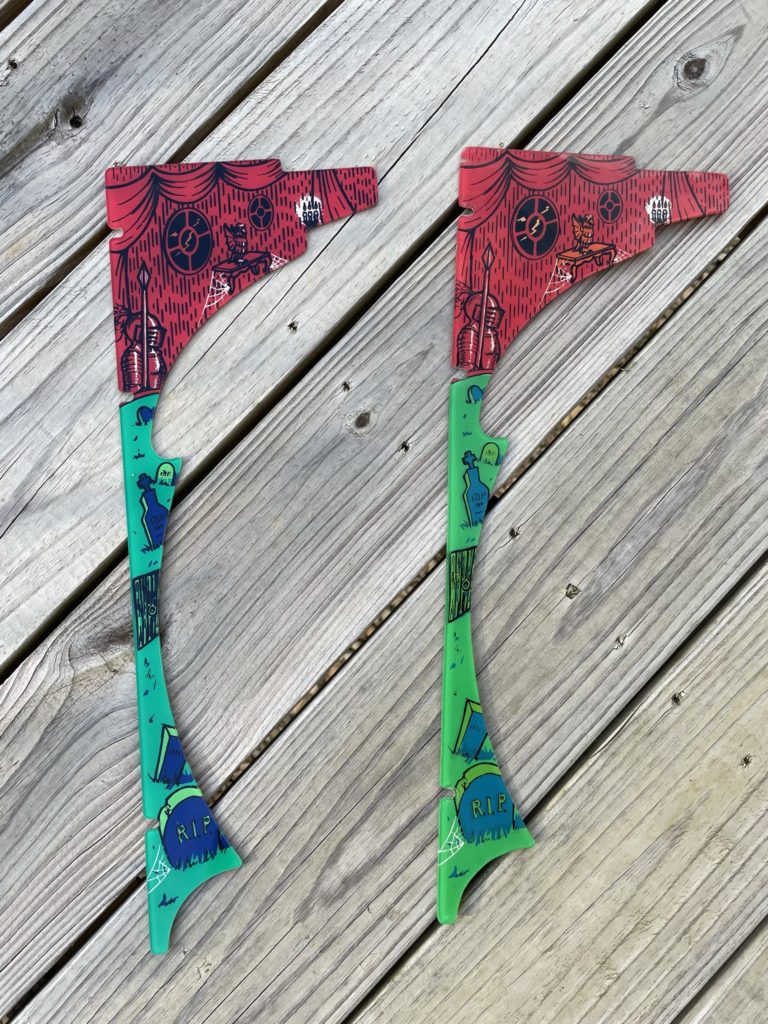
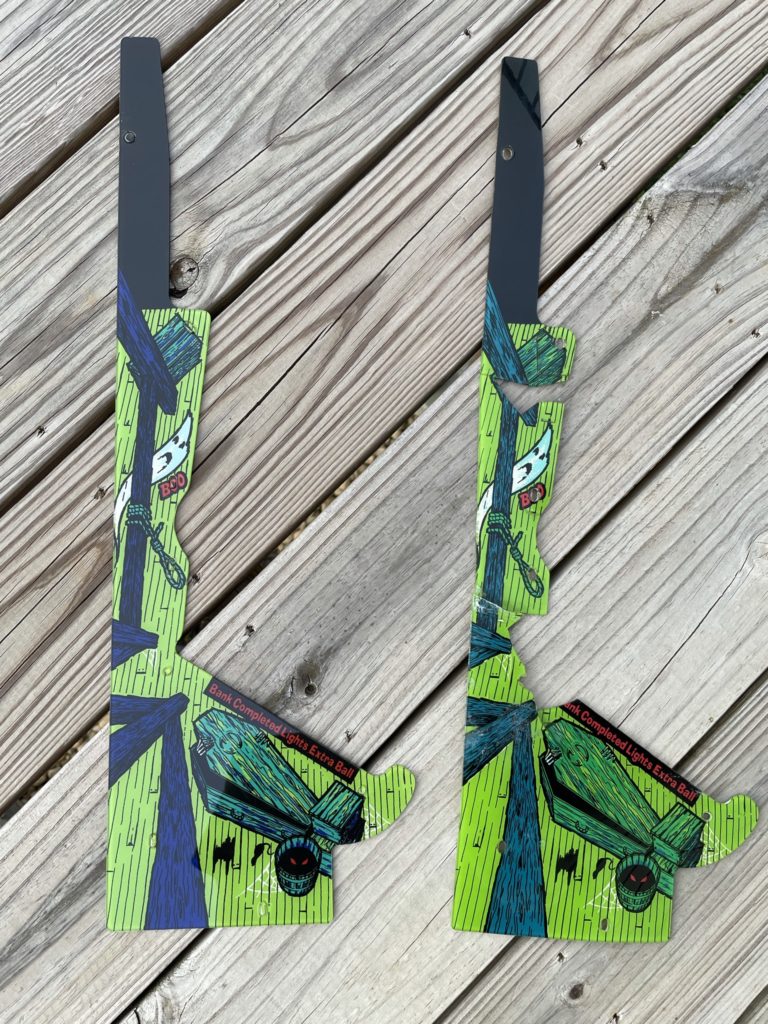
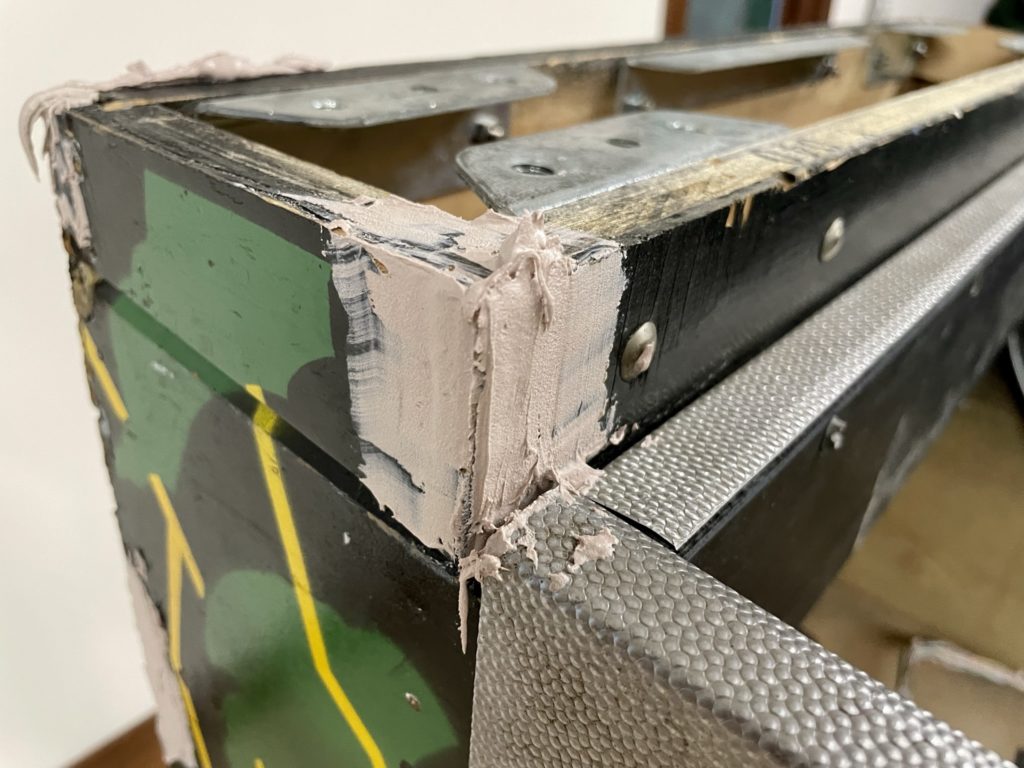
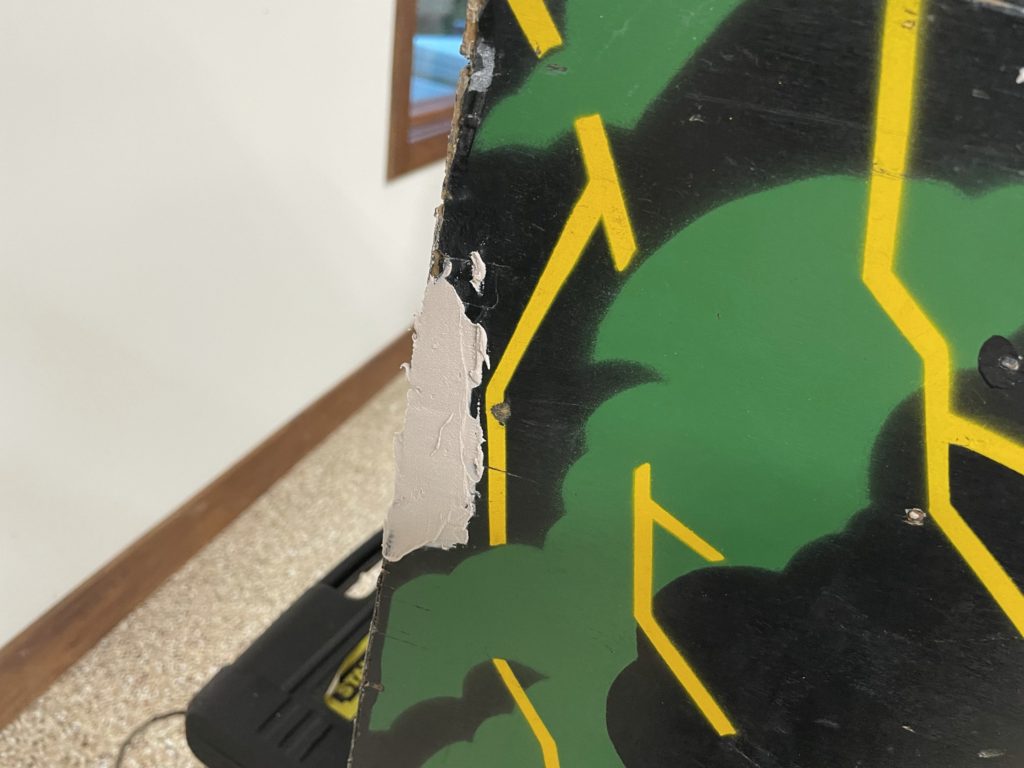
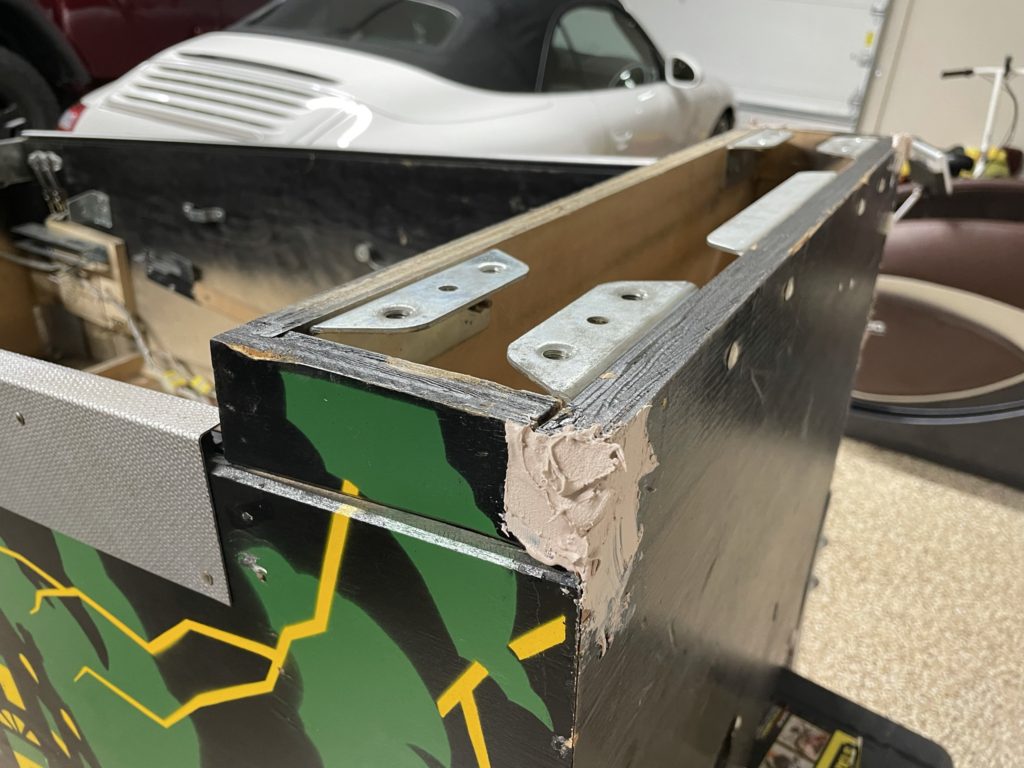
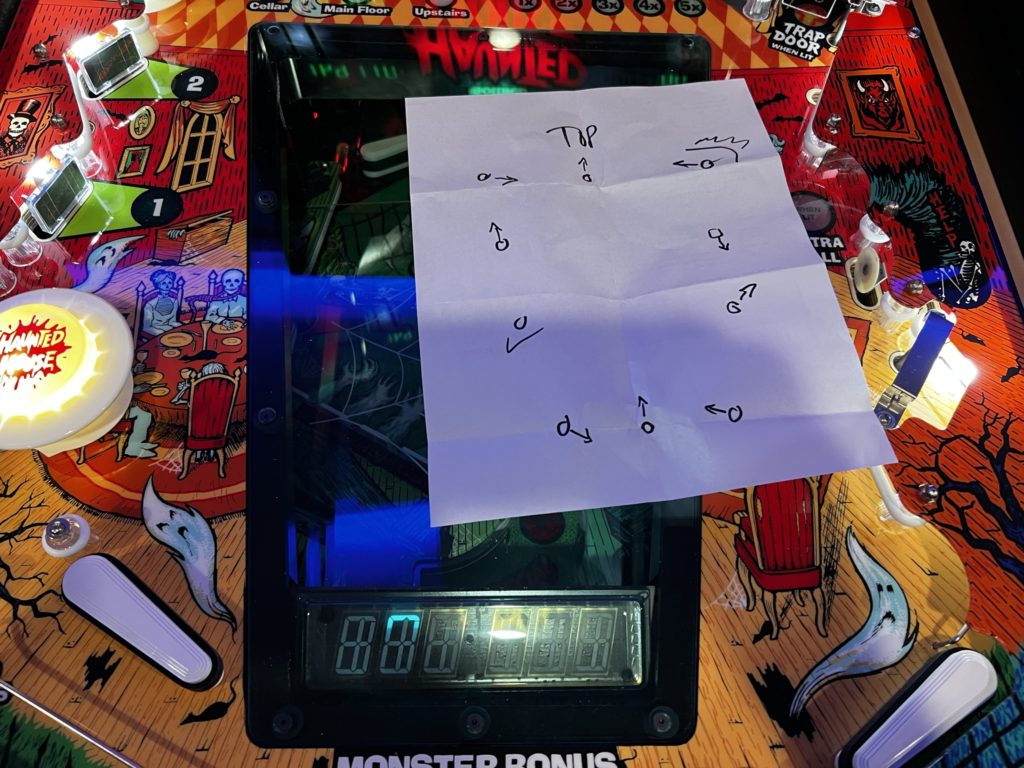
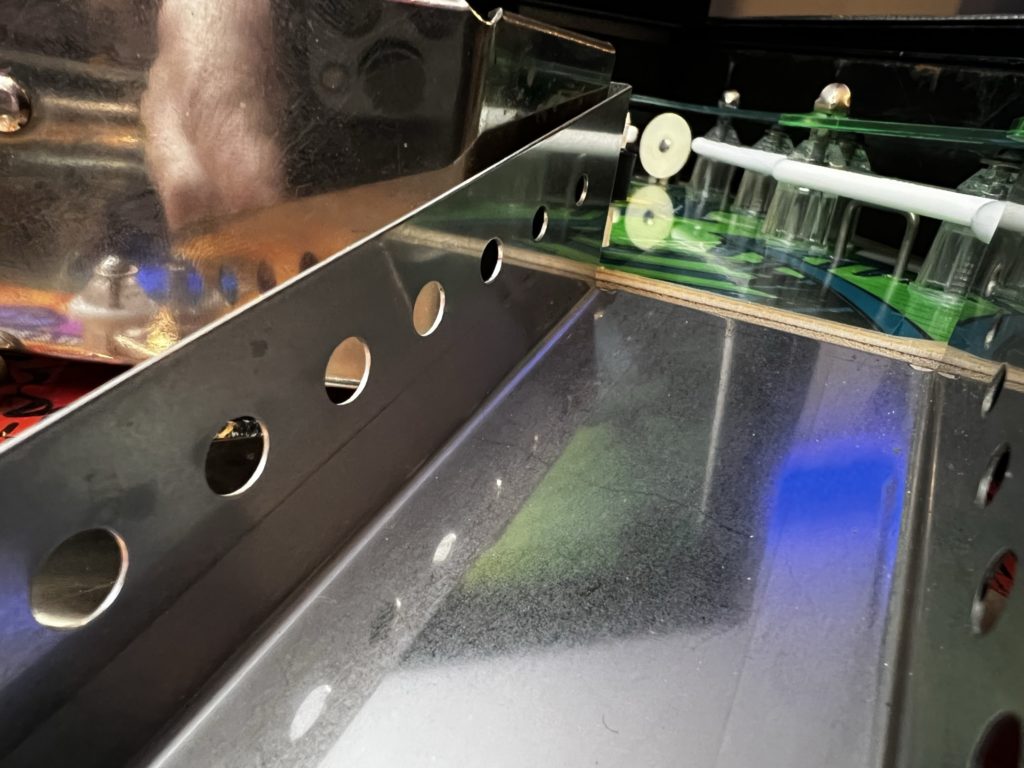
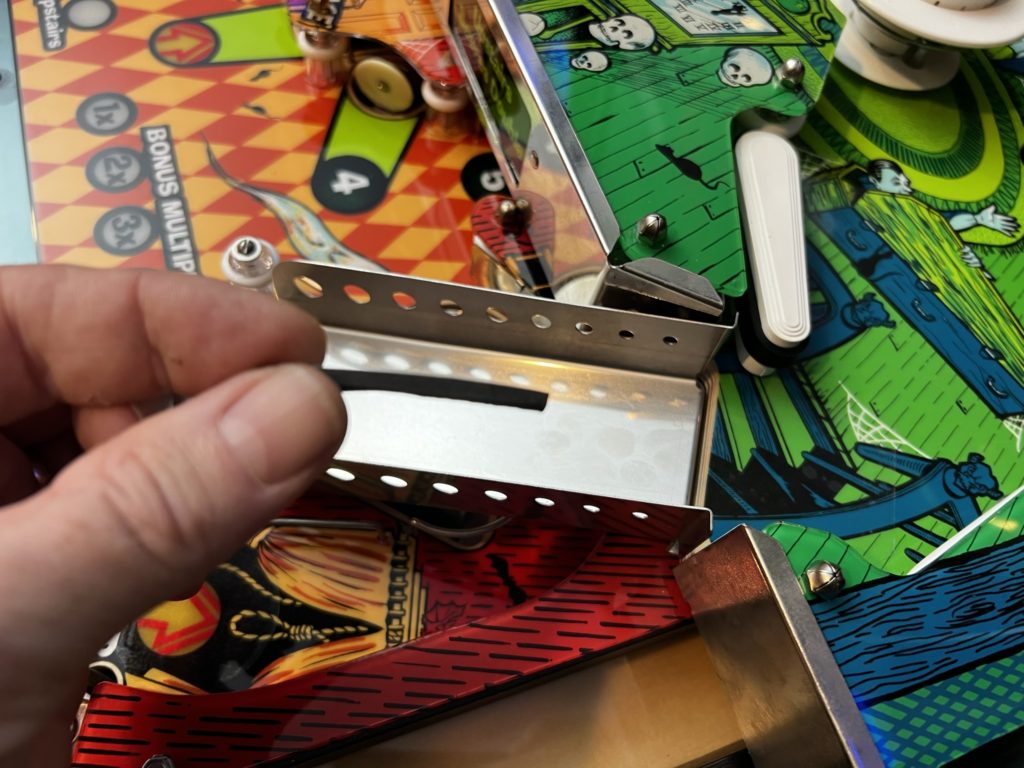
Straightening up a Haunted House cabinet
SEVEN
Don’t hurt yourself
– When I started collecting, every single machine was moved and set up with muscle. Lifting them into my truck, hand carting them up several sets of stairs or across an uneven lawn. Deadlifting them high enough to place a stool underneath to get the legs on, and then “coffin carrying” or worse dragging them into position. Just ahead of the move into the new Pinball Loft, I began to seek out the very best solutions for moving and setting up pinball machines. The thought of breaking down and transporting 40+ games and then hauling them up 18 steps only to then have to reverse the process was overwhelming. I started my journey with the obvious – an Escalera from Zach and Flip N Out Pinball. We talked back and forth a bit about which model and landed on the perfect one to accommodate my needs and the short landing I had at the top of the Loft staircase. I even bought a spare battery knowing that the poor thing would likely run until the first battery died and I wanted to be able to keep the party going no matter what. Following that I needed a way to break down and set up a game without another persons help. That was a tall order and it required a custom build. You can see the tool I built (stole the idea) in both the YouTube video HERE and in the commentary on the Loft build HERE. Utilizing only some judicially cut plywood, a cheap RV jack and your power drill, the tool does all the work and you do very little lifting. It’s indispensable and a game changer if you are handling a lot of games without help (even if you have all the help in the world it’s a blessing).
After getting all the games moved and setup in the new space, I then bought a coffin lift. This tool is used frequently to reposition games within the Loft by using only my body weight to lift a game. The coffin lift then rolls on casters and with very little effort I’m able to change a games position in a line quickly. Finally, my “pinskates” are the cats meow when maneuvering a pin in super tight spaces. Especially handy when buying a pin in a strange environment as unlike the coffin lift, they are very portable. Essentially, Pinskates add a caster to each leg allowing very fine control of the entire machines movement in every single direction. Having each of these specialized tools has very likely saved me a $50K hospital bill and a forever damaged back. Invest here and you wont regret it
How NOT to move a pin safely … never have anyone at the bottom of the stairs!
EIGHT
I love the history
– If it’s a new game I want to know what the unfolding story of its development looked like. I want to hear about the “aha” moments, the bad days where everything went wrong, to the moments when the magic I see in the gameplay was created by the people building it. If it’s an older game, I want to know first the “who”, followed by discovering where they are now. I was the same way when I collected vinyl records – fascinated by obscure bands that had a single record out. Where did they go from there? Did they continue in music? Were they creative in another genre? The same holds true for the classics in pinball. I want to know if they stayed in the industry. What other games did they design or play a role in? What jobs do they have today? My interest goes beyond the game makers IF the game is a licensed theme. In that case I want to discover everything I can about that license. Its origins, history and status today. I’ll go so far as to collect various memorabilia from people associated with the license – in a way, bringing a piece of them into the Loft to join the game
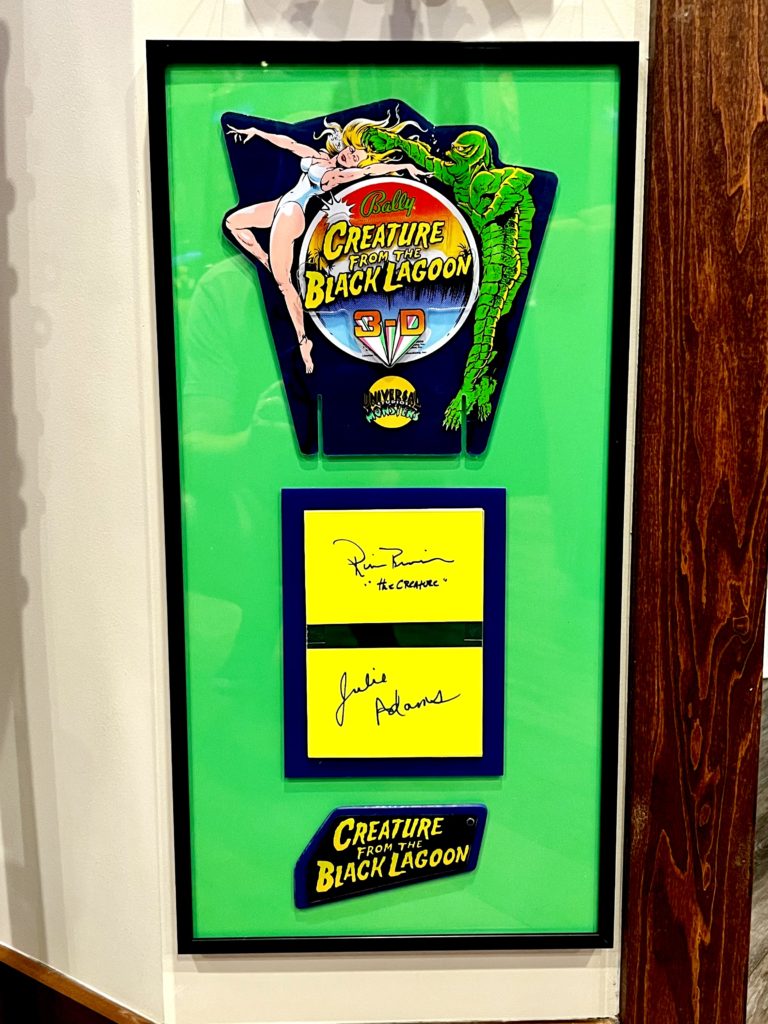
Signed by actor and actress from the original Creature movie
NINE
Sharing feels good
– As we discussed earlier in this post, my first forays into repair were scary and daunting. I was able to learn by standing on the backs of others. Specifically by asking questions and consuming content on Pinside. Without the work of others who knew the answers and their willingness to share those answer in words and images, I could not have progressed. I received one of the first Batman 66SLE machines delivered in the states. I then spent many hours crafting a hand made playfield protector, then posted my results on Pinside and mailed the template off to another Pinsider in Florida to use to make his own. I beta tested the version that was mass produced in Germany and was happy to provide the company owners with some engineering feedback to make the protector fit better. It’s interesting that a dozen years on I still LOVE diagnosing a unique problem, finding the appropriate fix, documenting that repair and then sharing it with folks that may benefit from it. The shine hasn’t worn off that process after hundreds of Pinside posts that solve a problem for others. The obvious benefit to me is I get to pay it forward. I love to do it and don’t see that ever changing. Everybody wins.
Shared with the Pinside group how to do “this” to your GnR Collectors Edition
TEN
Pinball and life
– Long term readers will know that I rarely post here without weaving into the story news of “life” here at the ranch. It’s hard for me to write about pinball without sharing what was going on during that time period or around that subject. After all, we don’t live for pinball, rather pinball is a part of our lives. Moments that pop into my mind? I’m sanding down a Harlem Globetrotters cabinet and I had to take time out to save a hummingbird that had flown into the pole barn. He was so exhausted from the ordeal, he sat on my index finger long enough for several photographs. The stories of bad weather and torrential rain storms associated with my pinball pick-ups are legendary. Playing pinball with and befriending John Schneider and his wife Alicia, Chris Blue and his amazing family, Keith Burns and his wife Bonnie, Big Smo (now simply “Smo”) and other entertainers are highlight experiences that are hard NOT to write about. Finally, even the painful parts of life happen parallel to the hobby – like it or not.
As we play, we live with the reality of losing family members (my Dad, Uncle), buddies (my best friend Andy) and a host of other pinball creators (Lyman Sheats, Barry Ousler, Steve Kordek, Wayne Neyens) The very best way to highlight the joy of playing pinball is to understand the depths of emotional pain that life can bring. Don’t misread my statement. Pinball is no substitute or palliative for grief or loss. It can’t “make it go away”. Pinball simply exists on the other end of the emotional spectrum. A joyful, all senses on deck game that provides entertainment. For a few minutes you can be in a different place than the stressors of the day or that painful season in your life. I really do wish that for everyone.
EDIT: Since this image was taken, John Schneider lost his wife Alicia Allain Schneider at just 53 years old
ELEVEN
Optimism and politics
– By biasing your point of view 2 people can write about the same topic, and come out with a significantly different outcome. I choose to write content that is positive and optimistic but never approaching rose colored glasses. I’ll call out the reality of an issue, but try to understand both sides and the potential for improvement. It’s more fun writing that way and it’s more fair to the subject matter because NOBODY is an expert or can know it all. The best decision I’ve made to date about writing is to keep politics out of it. Making the decision “up front” and having it be a hard and fast rule was the right call. As I shared in prior posts I’m very opinionated about my Politics. I have a well considered and years in the making line of thought about how I view the world politically, socially, and fiscally. While I would not consider my viewpoints extreme, they are most definitely not a middle of the road perspective. Even if they were, I would not write about them, push them as an agenda to others or preach to you my readers to “think like me”. The decision to stay apolitical has eliminated a thousand rough comments and probably helped me keep many readers. We all like Pinball – why destroy the common ground. I won’t do it.
My buddy Andy. He loved EVERYBODY, no matter your Politics or viewpoint
TWELVE
It was worth it
– Pinball has occupied some percentage of my life now for about 20% of the time I’ve been on earth. It’s been there for me through COVID lockdowns, really tough weeks at the office, personal trauma and loss – those seasons in life have all been a little easier on me due to access to Pinball. I’ve met an incredibly diverse group of warm, giving and trustworthy pinball people over these years. Most of them happy to lend a hand, an ear or a hard to find part to a total stranger. The people in this hobby come from every walk of life but show up at the doorstep of pinball with a common set of very easy to love traits. Pinball also seems to “fit me”. I like to create, to stay busy, to build, design and learn. I adore graphic art and design. I’m a history buff and have a high nostalgia meter. Pinball fits all of these like a glove and has been my “go to” hobby long enough to feel like it will be a lifetime engagement. I have other lifetime hobbies – Firearms and competitive shooting (40 years now), Music and audiophile equipment (40 years) and they both remain and from time to time have taken center stage for a bit, but the bulk of my free time has been spent playing, fixing, studying, reading and writing about Pinball. It’s been worth it.
Conclusion
I still play pinball every day. The amount of time I play hasn’t really changed over the past 10 + years. If I miss a day or so, there is always a good reason – sickness, family commitments, etc.. I’ve recently met a few more folks that enjoy the game as much as I do and I take the opportunity to invite them over every chance I get. I’m buying a few new games, but selling at least the same number in order to keep the overall game count down. If you’re a regular reader you know that Fathom Mermaid Edition arrived last month (check out the review HERE). Scooby Doo is on order as it’s a dream theme for me. I’ll be selling a few to make room for Scooby. I will continue my focus on finding games I REALLY love to replace ones that I simply LIKE that sit in my collection, mostly unplayed. On the potential sales block are: Last Action Hero, Houdini, Dr. Dude and Time Machine. On the “need to find and buy” are titles like: Deadpool, Walking Dead and White Water.
I’m really happy that I’ve arrived at a point that I truly know what I like. This has given me renewed purpose in the process of upgrading my collection. So, yes … the thrill of the chase is still there. Is it as intense as it was 12 years ago? No, not even close. When I open a new in box game today, I’m MUCH more tempered in my expectations and initial reactions. When you cycle through 40-50 (or more) games, you understand that you will never find that “perfect machine”. The mature collector discovers there are only degrees of “better” and that’s the journey I’m on now.
Fathomagical
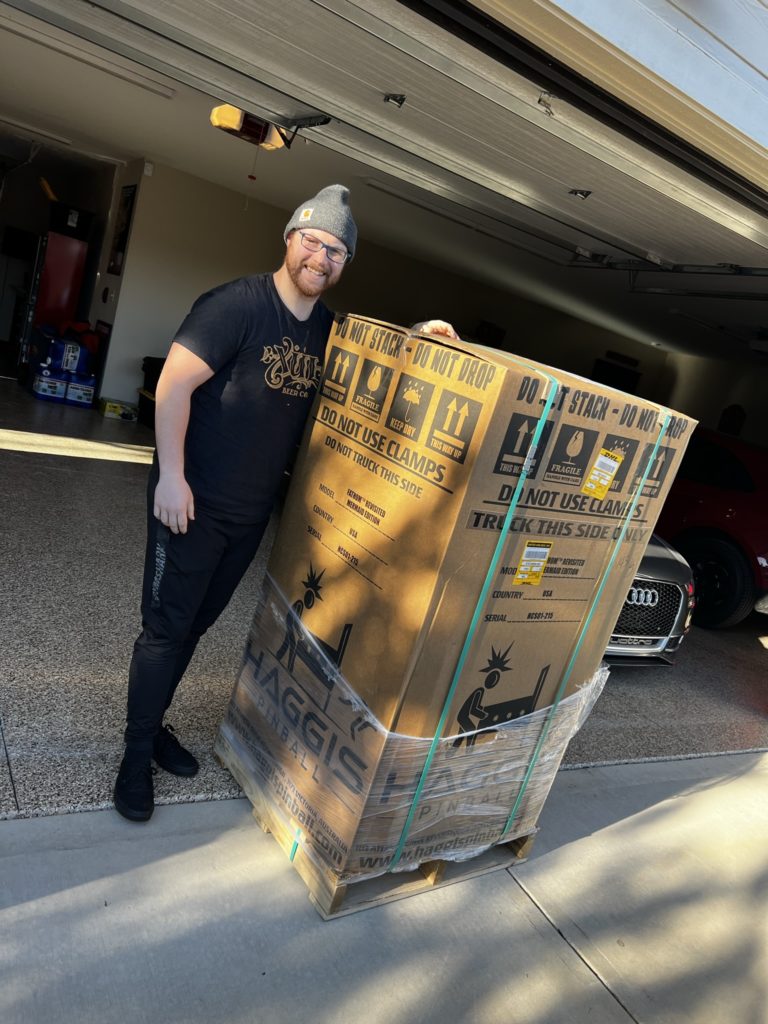
“Heard you might have a Fathom Mermaid Edition left? Potential interest here …” was my message on June 1st, 2021. I had just sent it to Zach at Flip N Out Pinball after seeing the release information on the new Haggis Fathom Mermaid Edition out of Australia. By the next day, Zach let me know that I had a slot reserved and I didn’t need to do anything more to ensure I got a game. Zach is a man of his word, so I never gave it another thought – when the game was ready, he would let me know. No one could have predicted what was about to happen in Australia (and around the world). The COVID related shut downs, parts shortages and supply chain breakdowns all contributed to a sizeable delay for Haggis in the manufacture and delivery of this game.
Ready for the journey to Evansville
What’s A Fathom?
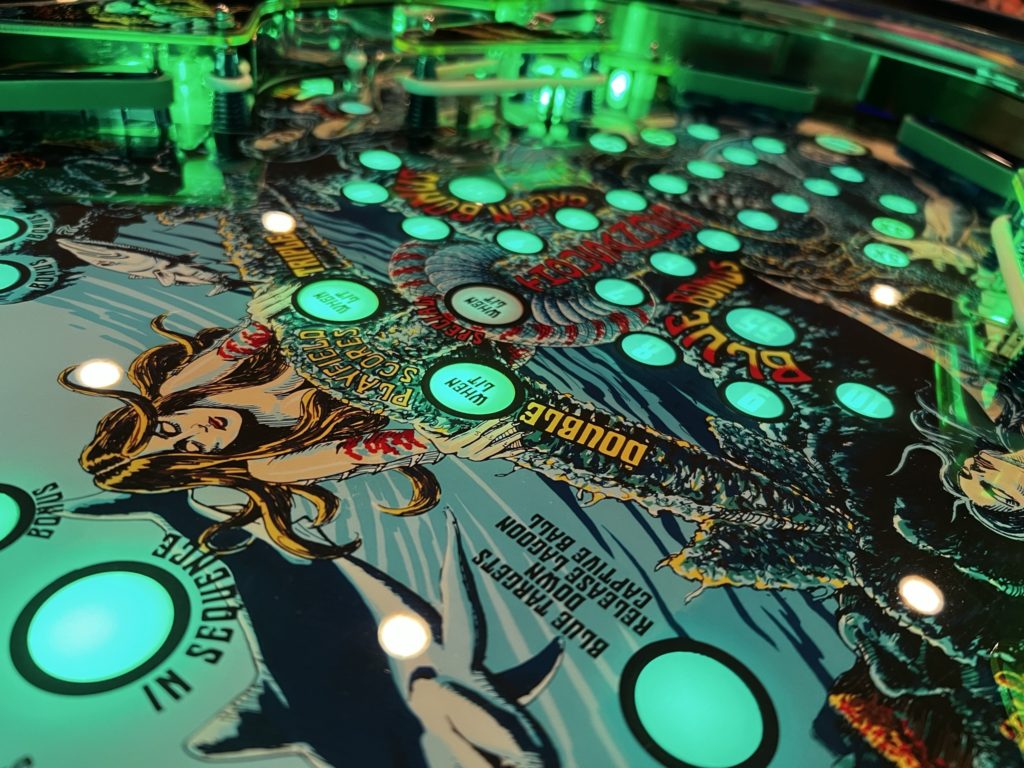
Fathom is a 1981 Bally pinball machine that is beloved by those that know pinball. Especially those that know this era. Like any other time in pinball history, some games were killer and others were duds. Fathom was on the homicidal side. Killer in every sense of the word. Heck, Mermaids are the theme but if you were expecting the “nice ones”, think again. They are trying to accomplish one thing – kill you.
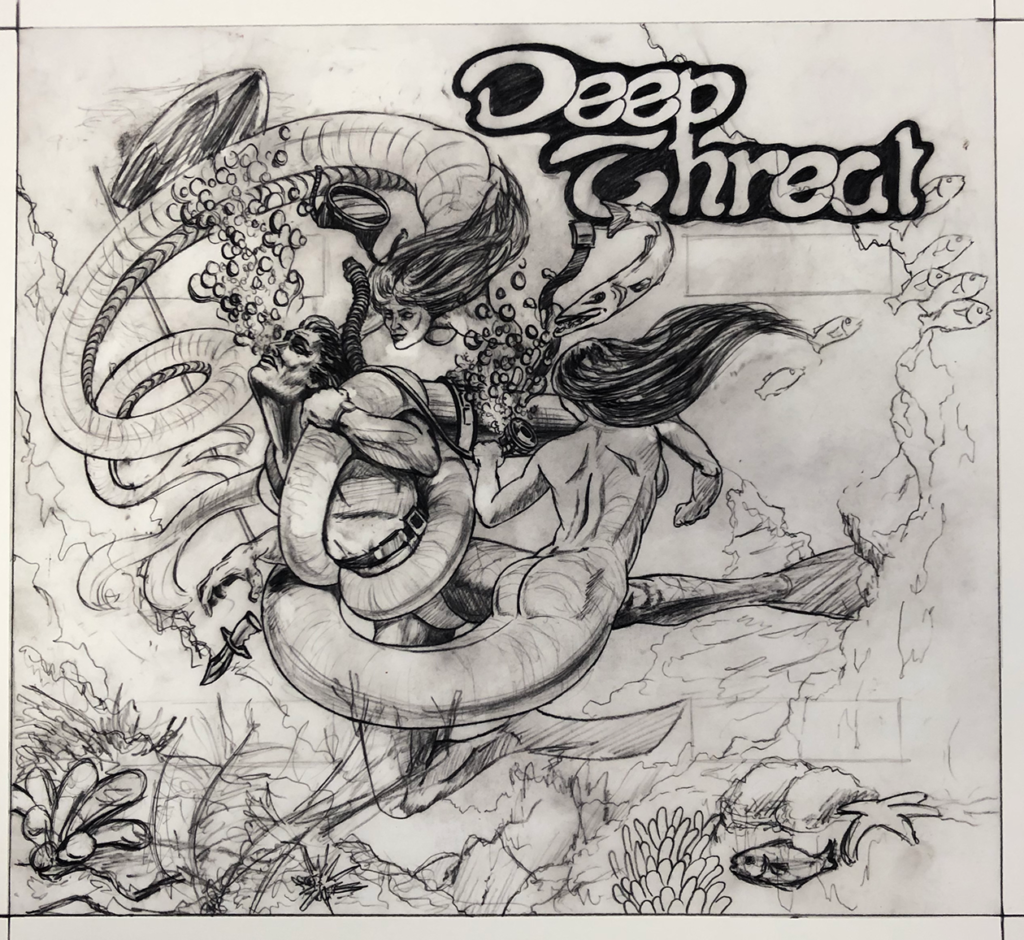
Greg Freres original design for the 1981 Fathom backglass
The game is fast, brutal at times, simple to understand but challenging to master. More than just myself view it as the most beautiful artwork to ever grace a pinball machine (nice work Greg Freres). The machine was the first to come with it’s own comic book storyline. While the original working title was “Deep Threat”, the Bally management team landed on “Fathom” in the end.
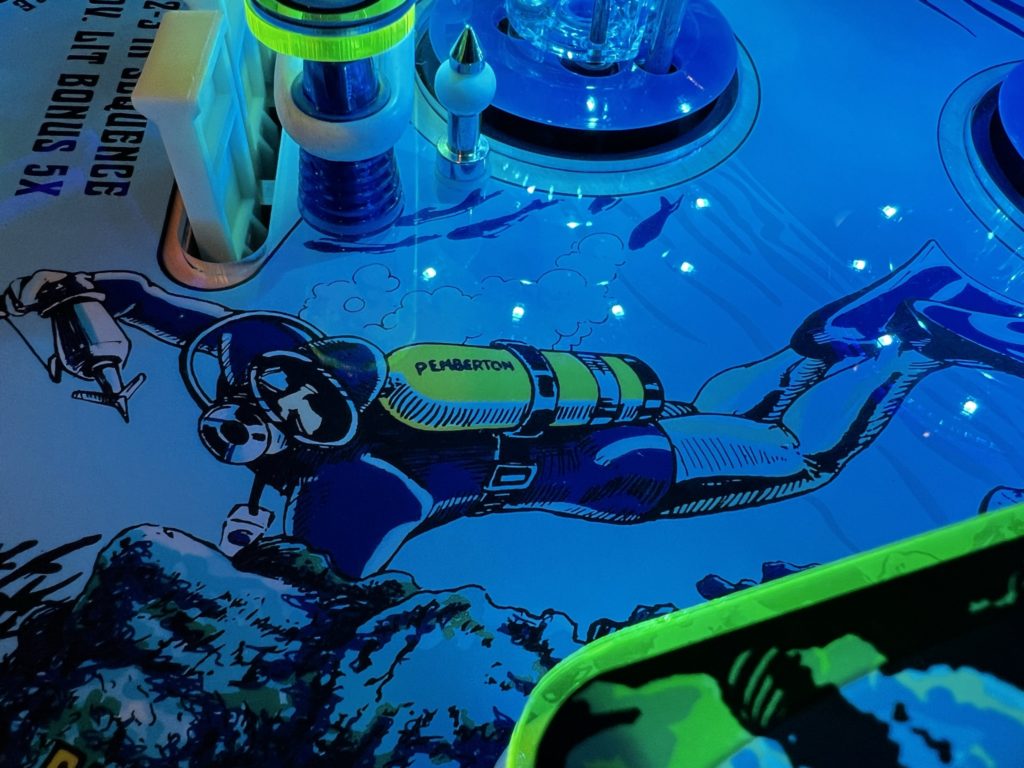
Original Designer (1981): Ward Pemberton
Original Artwork (1981): Greg Freres
Original Production (1981): 3,500 units
Ward Pemberton (the original Fathom game designer) was interviewed in 2008 on the TOPcast Show (episode #56). When asked how he thought the original Fathom sold in the market said, “There wasn’t many games doing much more at that time”. He also went on to share that it was a positively reviewed game, by none other than Roger Sharpe (Roger giving it his thumbs up). Wards pinball origin story starts with his dad. Wards father worked at Bally for over 26 years and once Ward graduated high school, he got an opportunity to join Bally in 1978-79. He spent a few years toiling away before Norm Clark gave him a chance to design a game. Fathom was his FIRST game.
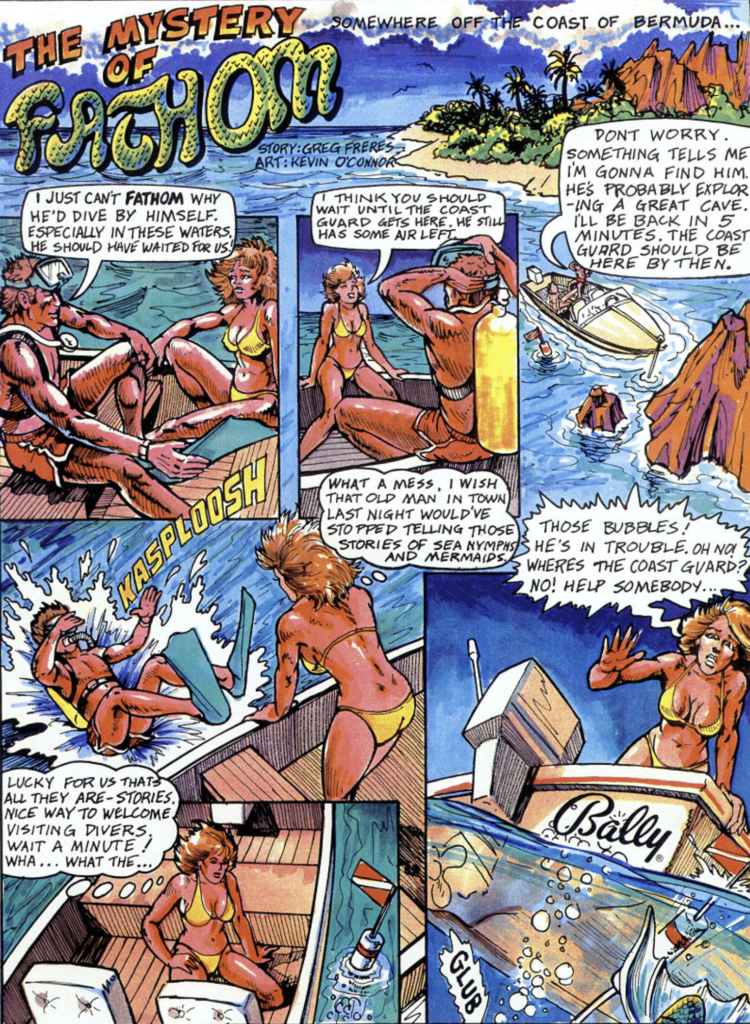
Original Fathom comic story: Art by Kevin O’Conner, story by Greg Freres
Fathom Mermaid Edition
It wasn’t until nearly a year and a half later, on November 29th 2022 that I received a text from Zach. My Fathom was on a plane and on it’s way to the Cincinnati airport! Zach had to arrange to pick it up, then bring it back to his warehouse first. I had already planned to drive from TN to Evansville to pick it up during the upcoming Christmas break. In between all this Zach had some back issues and was laid up in a hospital bed – it was serious enough that he was unsure if he and Nicole would even make it home for Christmas. Thankfully he healed enough to be released and enjoy Christmas with his family. I really did not expect to see my Fathom until sometime in January – and that was just fine with me. Surprise! I got a message from Zach just a few days after Christmas that Fathom had landed at his warehouse and I could pick it up anytime.
Why do I look like a midget compared to these giants??
I checked with my son-in-law Chris to see if he was available to ride along on the 4 1/2 hour trip (each way) on a day in the coming week. He said he was and we planned to drive up to Evansville on Wednesday as it appeared to be a sunny day both in TN and Evansville Indiana. Good weather makes the drive and the haul easier all the way around. We had just experienced some of the coldest weather we have seen in East TN since moving here almost 28 years ago and the forecast for our travel day seemed downright tropical (45 degrees!) vs what we had just gone through.
Holy Cow they make big Santa’s in Zach’s neck of the woods!
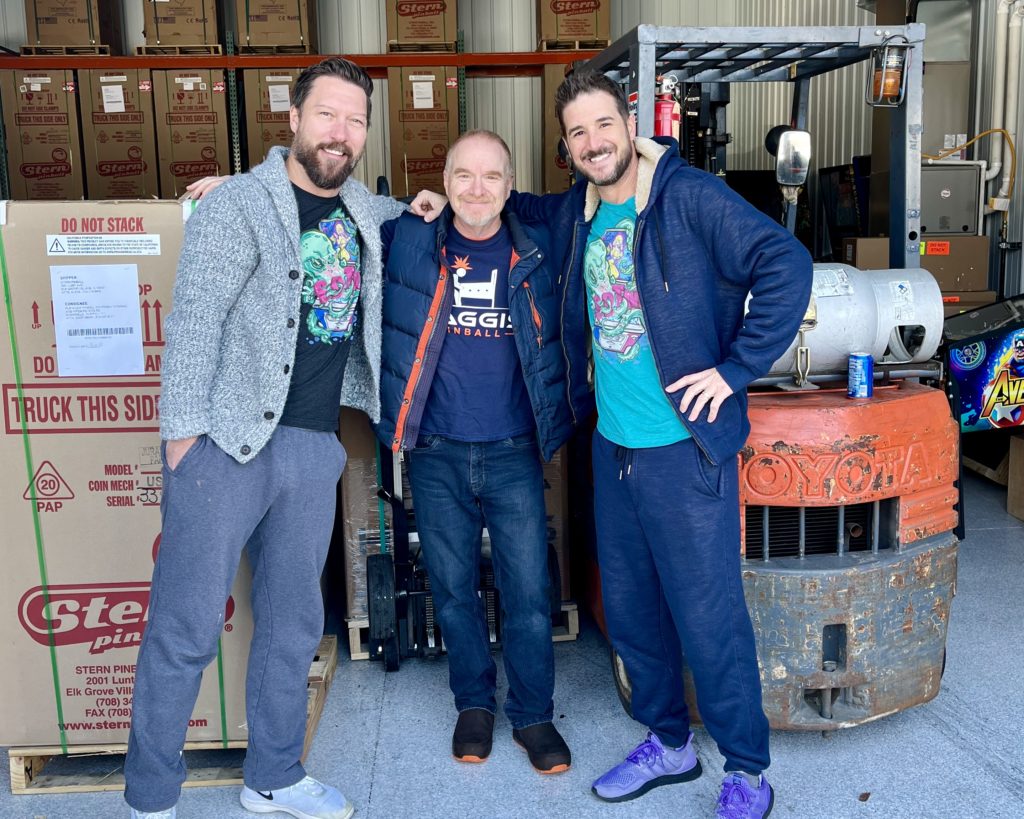
I met Chris at the old ranch house at 5:45 am with hot coffee and a cooler full of water and drinks for the road. We made excellent time – in fact too excellent! I forgot to account for the 1 hour time change as we left EST and moved to CST, so I texted Zach and let him know we would be an hour early. We arrived around 9:30 and were unexpectedly greeted by the dynamic duo themselves – Zach and Greg! The “pinball stars” of SDTM fame were there to say hello and Greg was present to provide the muscle to load the game (recall that Zach was in no shape to lift anything). I had never met Greg in person and he was just as kind and easy going as he appears on camera. Though standing side by side with him and Zach made me feel like a toddler – gosh those two guys are tall.
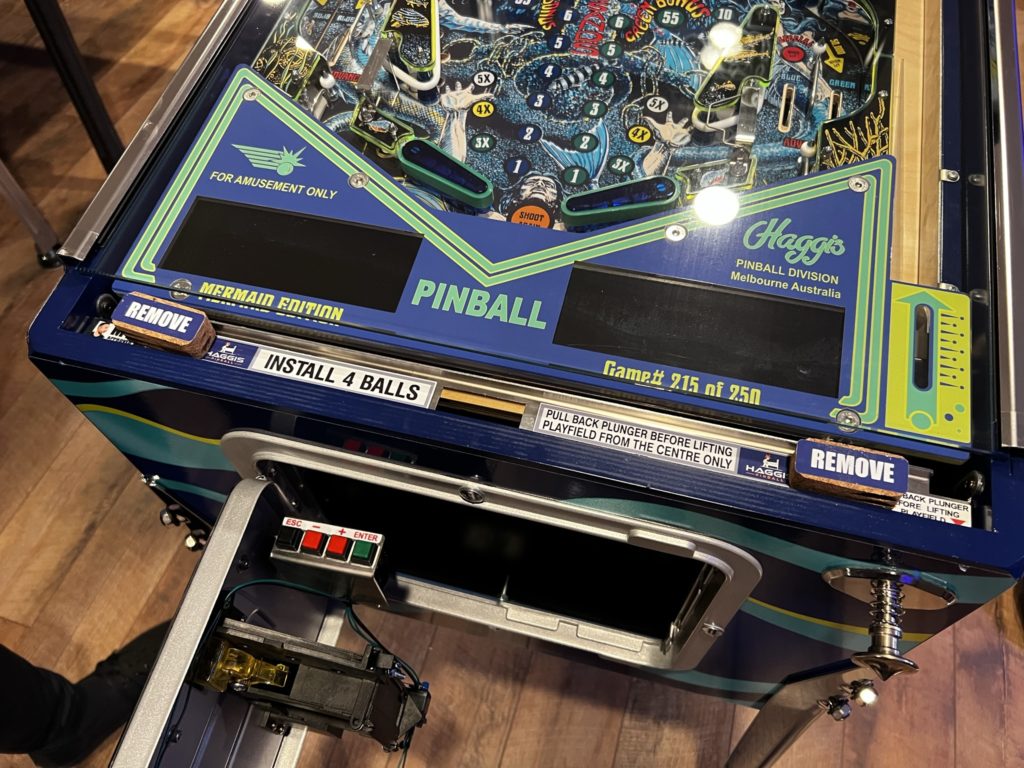
Haggis remade Fathom as a modern game while remaining true to the Bally original
Zach gave me a choice of several game numbers but it was just as easy to take the “game on the end” (Game #215) than any of the others, so that’s what I did. After we tipped the game into the bed of my pickup, Zach was kind enough to give us a tour of his super nice Pinball Gameroom. The games are absolutely stunning. Even the older classics look as if they just came off the factory line (or better). We shot the breeze for a bit on the topic of pinball and after a few handshakes and goodbyes, we were back on the road again headed home.
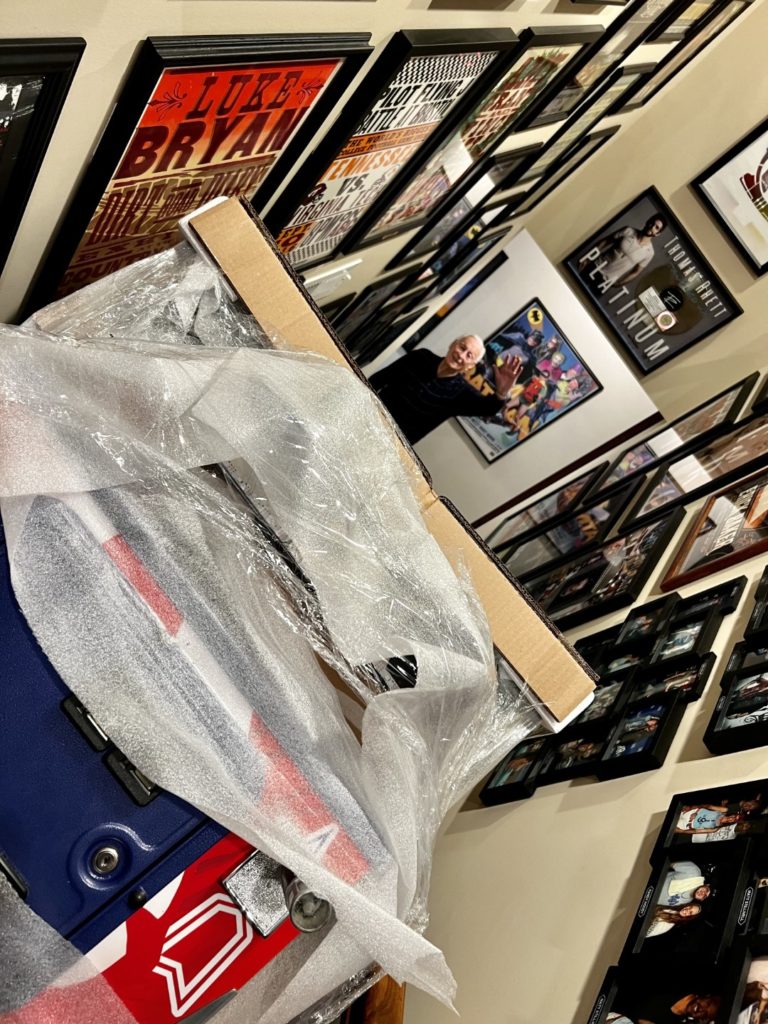
Chris helping me prepare for the move and unboxing
Count On Zach
As we drove away, I thought about how Zach runs his business and how it’s different than others and why those differences are better. Here’s the bottom line – he trusts people and he is trustworthy. Yes, there is risk in that but he takes those risks and sees value in the outcomes. Our “deal” on Fathom was a few emails only. No deposit. No upfront payment of any kind. Zach took all the risk up front. He protects his customers. On the customer side, he is a trustworthy person. That means an email reserved my Fathom spot at the market price and I was confident in that. When I asked him if I could send a deposit, he declined and said he had a spot saved for me. When the game arrived, he did not try to sell it to someone else. He didn’t tack on a upcharge (though the game could easily have justified it) No. Instead, he actually helped me save almost $1,000 by allowing a direct pickup and a payment method that saved him a few dollars as well. So on the promise of an email I secured and took delivery of a very hard to find game. That’s why Zach is my go to guy for my game needs AND for all the folks that I’ve sent his way. I trust him. You can too.
Unboxing
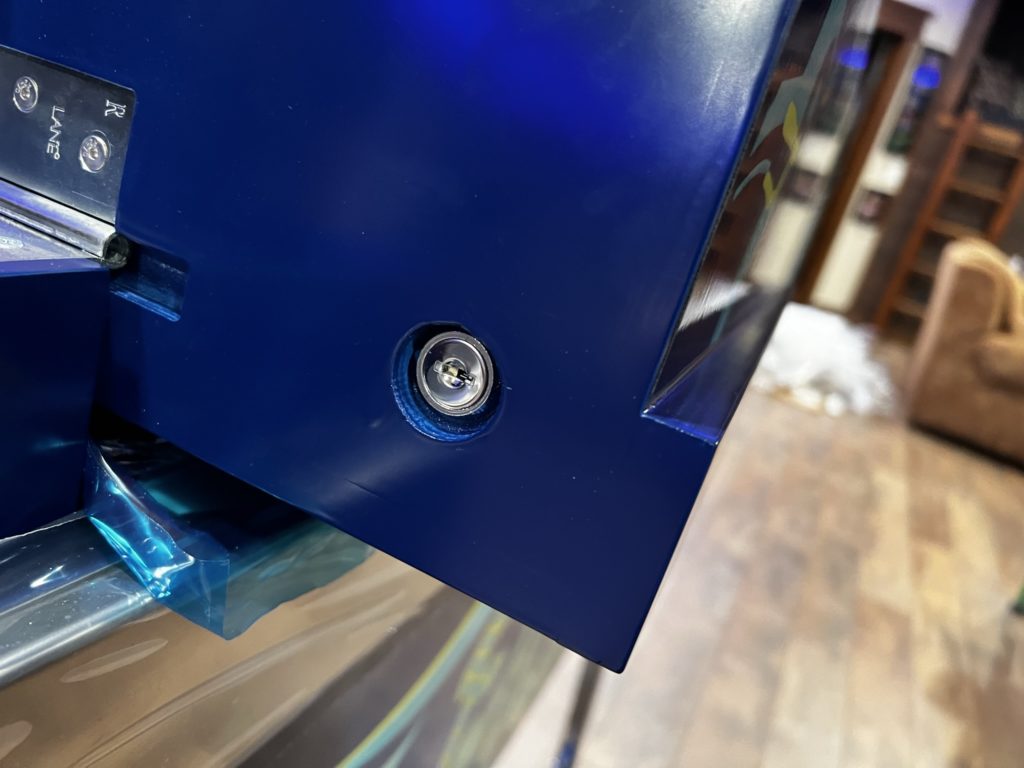
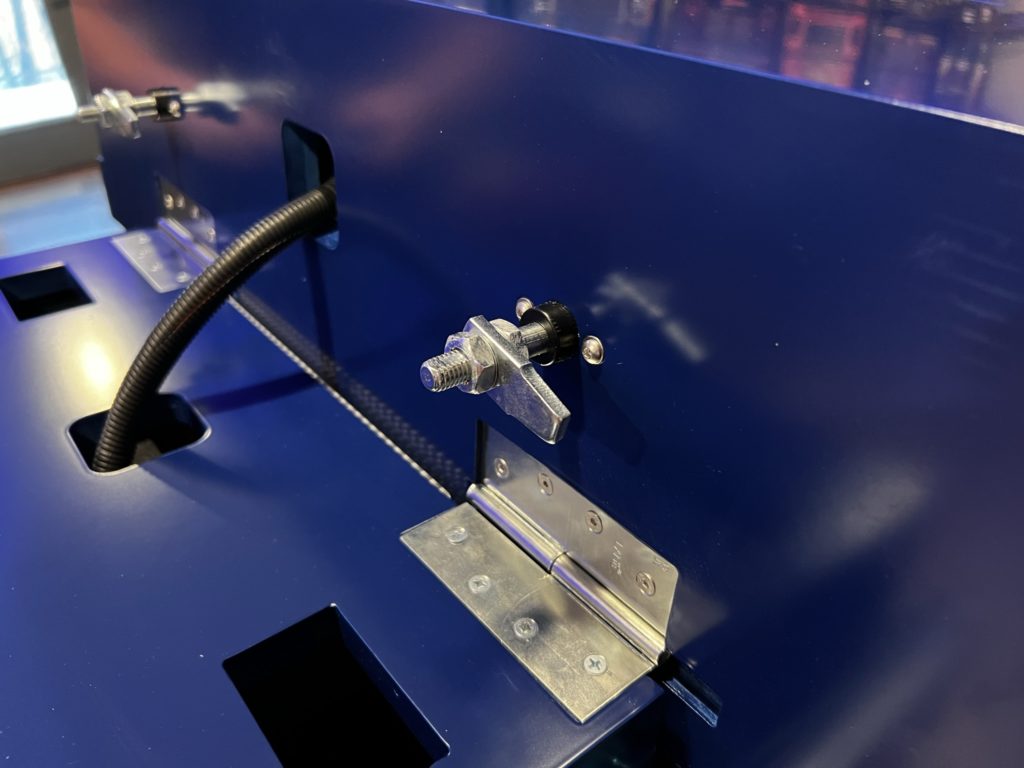
It’s hard to unbox this game without noticing that you are unpacking something special indeed. I could not help but take photographs along the way. Again and again I was seeing new and thoughtful features added to a game originally released in August 1981. The lock for the back box is in a place you can REACH! It’s positioned to the lower left of the head so the vertically challenged don’t need a stool anymore.
A backbox/head lock that you can reach!
The backbox locks to the cabinet with turnbuckles. Simply raise the head to playing position and turn the “T” handle about a half turn and you’re done! No more scratching up your floor with those Williams style clips. No more trying to line up the large head bolts of the Bally days. Simple. Thoughtful. Useful.
Just a half turn or so and it’s locked
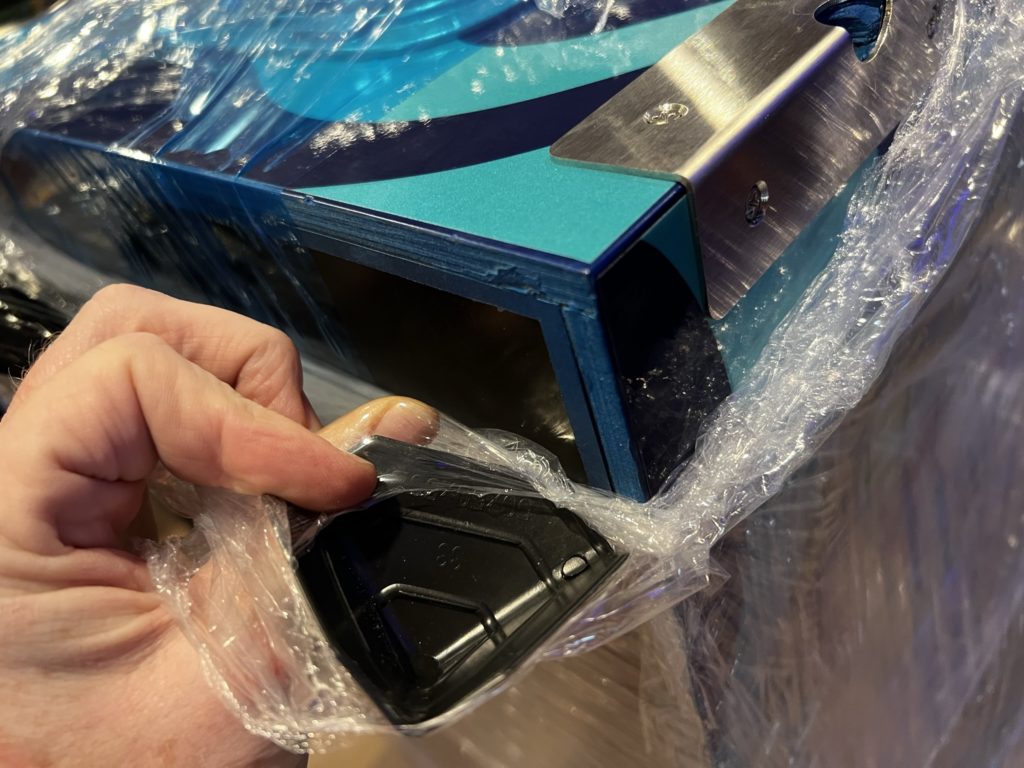
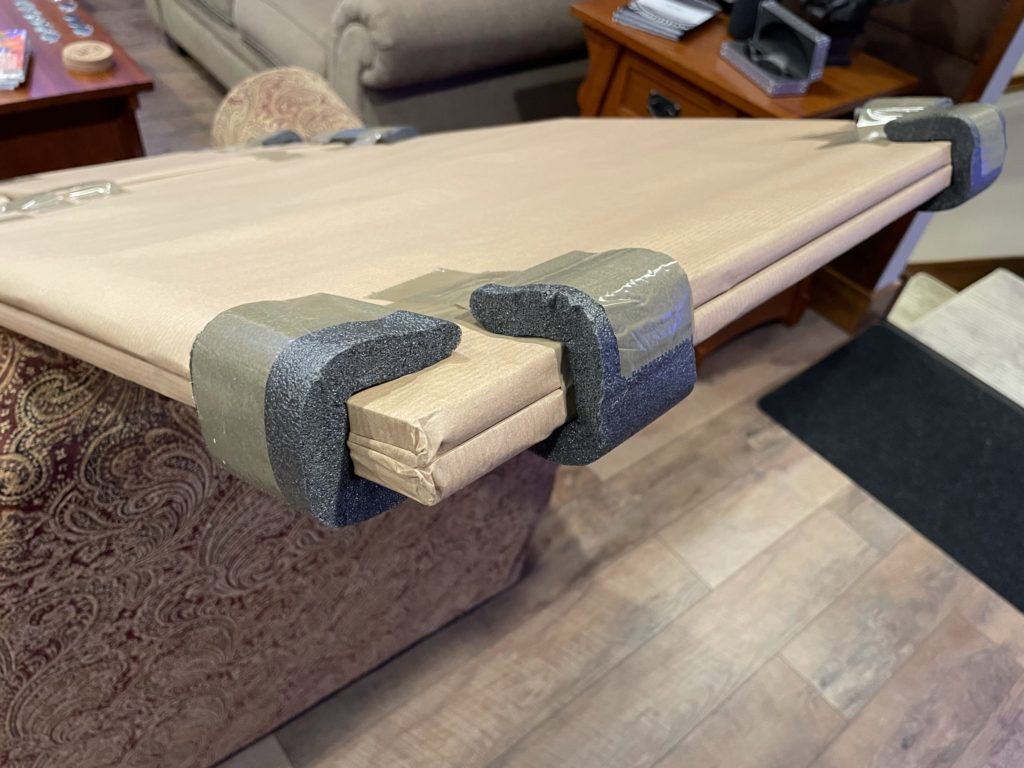
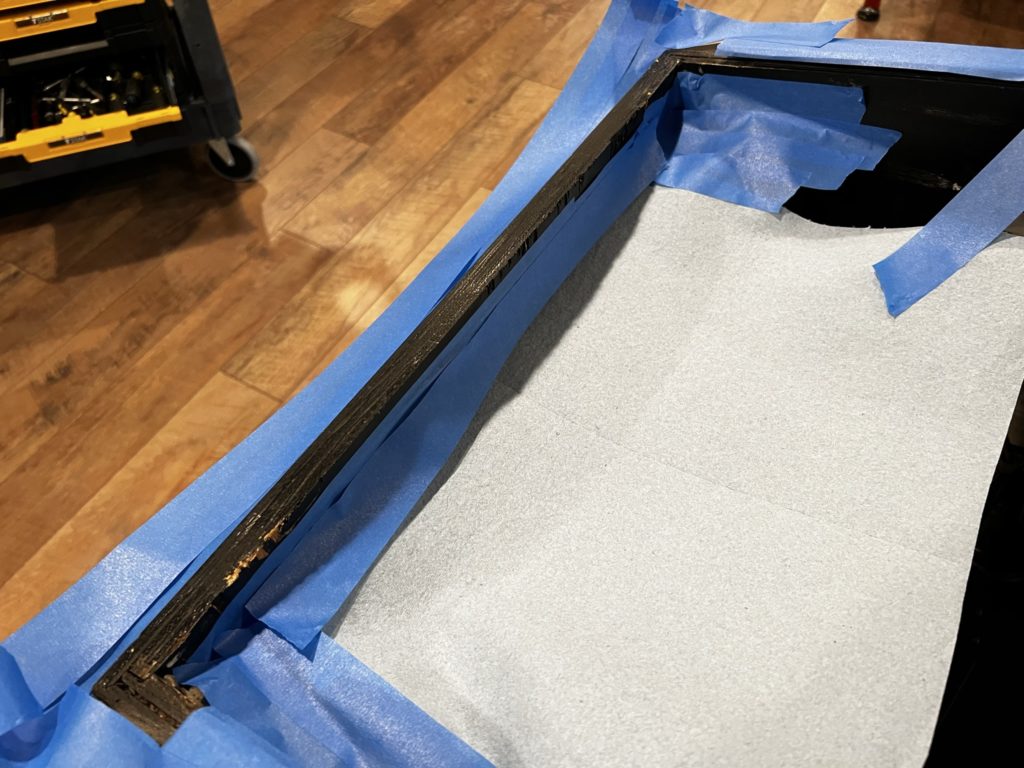
Moving on to the packaging. I know, right? The packaging. It was phenomenal. Clear blue tape to protect the artwork in key areas. That same blue tape was across the entire coin door and the playfield glass as well. There was foam padding and cardboard “blocks” wherever the outer carton could conceivably be crushed in transit. See the image of the front of the coin door to see how protected the machine was.
Protective blue adhesive tapeCoin door well protected in shipment
Even the cabinet corners came with temporary plastic corners to protect them from crushing or dings in transit. When we popped off the lock down bar, there were 2 strategically placed cork pads underneath it to prevent any denting or movement during travel. Quite a bit of thought went into ensuring that I got my game in one piece.
Good gosh, they even thought of protecting the cabinet cornersNote the cork spacers (they say “remove”) in place to protect the lock down bar in transit
The goody bag was a nice Haggis logo bag taped onto the front of the machine under the plastic wrapping. There was a BUNCH of stuff in there so I’ll list it out:
Haggis baseball cap
Haggis Koozie
Haggis car decals (2)
Haggis key chain
Fathom art cards (3 wrinkled)
Rubber floor protectors (4)
Balls (4)
Feet (4)
Leg bolts (8)
Leg bolt washer/protectors black (8)
Goodie bag: extra decals/plastics
Plumb bob
Key sets
Power cable
Also included and carefully packed in a shipping tube was a custom poster with my game number on it and signed by the entire Haggis team – very nice. The poster is in the process of being framed
The goodie bag contents
Mind Blown First Impressions
When we got the game set up, I flicked the power switch and the game came alive and as it launched into attract mode, I reflexively said – Holy Sh&t!
Followed by:
Holy cow!
Oh my gosh!
Wow, just WOW!
The hair stood up on my arms and for a few seconds as I stood there literally speechless.
A stunning game
Listen, I’m not a fan of cussing. To be fair, I’m really good at it, but I try not to practice it. In the moment, the expletive was just uncontrollable. Turning this game on and experiencing the sound and light show for the very first time was simply astounding. Very few games sound as good (save for TNA) or look as good as far as the light show (save for GnR). The sound is visceral and at first I was convinced there was a shaker motor installed. The light show is in a word – startling. I say that because when I set the game up I put it next to my fully restored Harlem Globetrotters. I have a pretty good idea of the light show in Harlem (non-existent right?) so to see a VERY similar era game right beside it literally BLAST to life was unreal. The visual and sonic experience was obviously without compare to Harlem (or any game of that era) and in my opinion in many ways it easily exceeds many modern games. OK, Fathom, you got my attention. Seriously – I couldn’t stop looking at it.
Visual pinball treat
First Game Impressions
OK, I wrote this part first to “get it out of the way”. Listen, I love this game. It’s challenging, beautiful, rare, loud, fun, interesting and a whole host of other superlatives BUT … my first day of ownership was a struggle. The game was not playable out of the box. Here is what went wrong:
The right flippers had intermittent power or in the case of the upper flipper, at times did not work
The manual ball launch could not put the ball in play (went about 3/4 up shooter lane at best)
The right side (outer green) lane would never return the ball to the flippers – an automatic drain
The first issue (the flippers) meant the game simply couldn’t be played. The second problem related to the manual ball launch would still allow me to play a game but you had to wait for the game logic to kick in and auto-launch the ball. This took about 4x as long as a simple/manual plunge and essentially killed the vibe. The last issue concerning the right side outer lane draining was simply an annoyance as I now had TWO drains on the right vs one (proper) on the left.
Here’s my take on this. For me, this was frustrating but I’ve bought enough NIB games to know ALL manufacturers suffer from this to some degree. I’m also a expert mechanical tech. If the problem is mechanics or engineering, I got it. I’m also more than passable on electronics. So when I have problems with new games – well, I just fix them. I had all 3 of these sorted within 24 hours. I posted my solutions to Pinside so it might help others as well. So for ME – hey, it was no big deal. For folks that are new to the hobby OR rely on a tech of their own to help them out … well that’s a horse of a different color. When the game issues rise to the level that they make it unplayable, then that’s when said manufacturer will have a problem. To be fair, Haggis is new at this, I’m confident they will improve. If they bring the same passion that created this wonderful machine to the QC process – they’ll sort it out I’m sure.
As I mentioned all 3 of my issues were corrected (by me) within 24 hours. See the end of this post for details on the “fixes” should you run into the same issues.
I had some other minor issues as listed below:
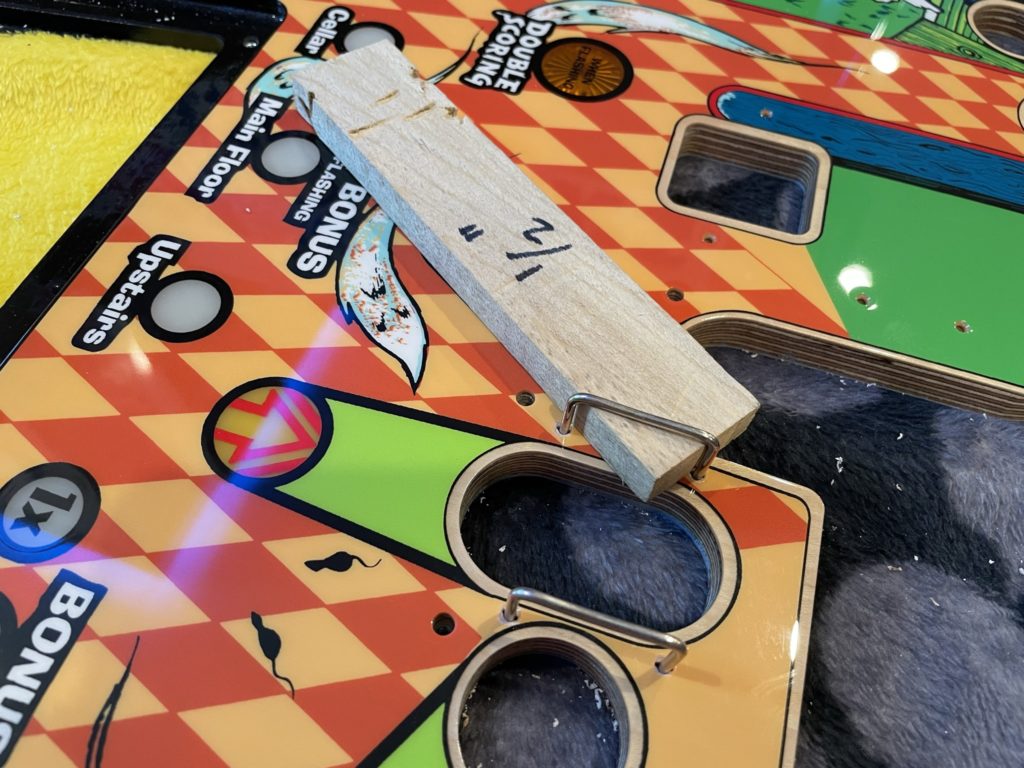
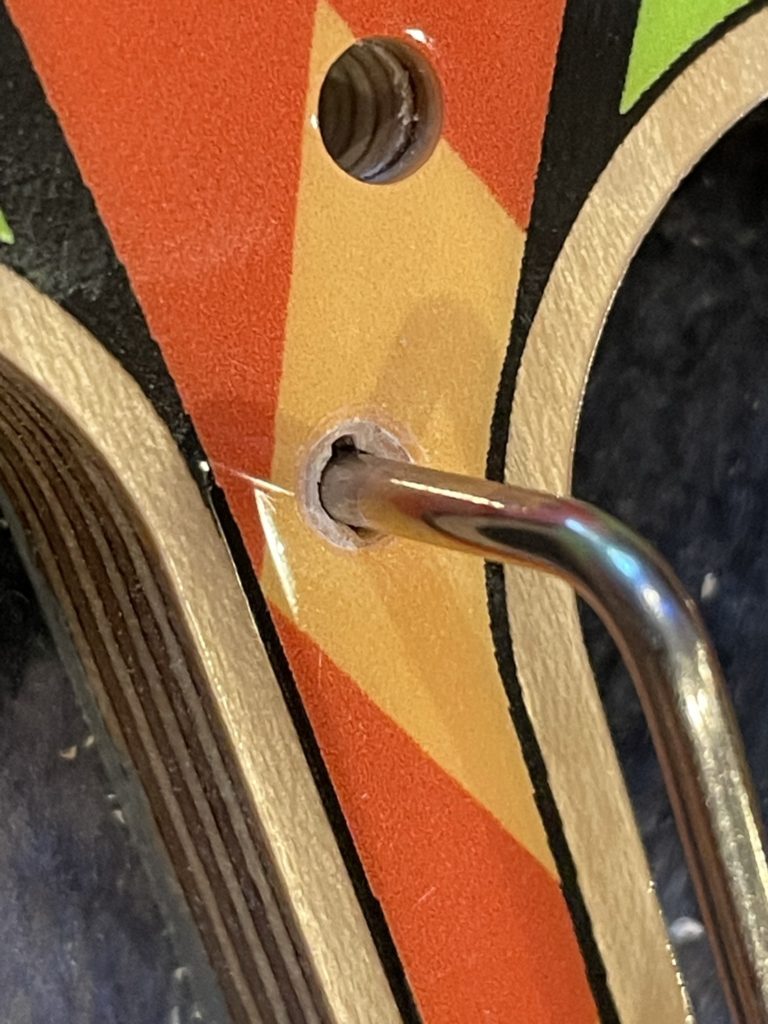
Lower one way wire gates are pulling out of their frames (gate wire is too short in the frame)
A few stuck balls (recurring on left edge of top/left pop bumper, forces pulling the glass)
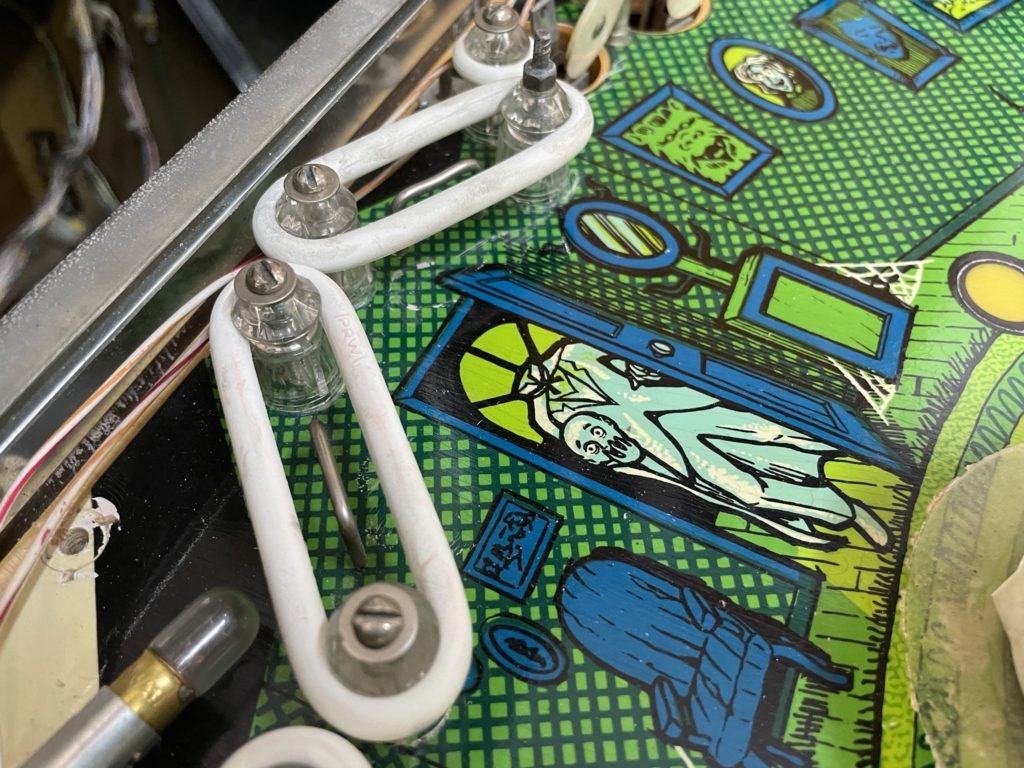
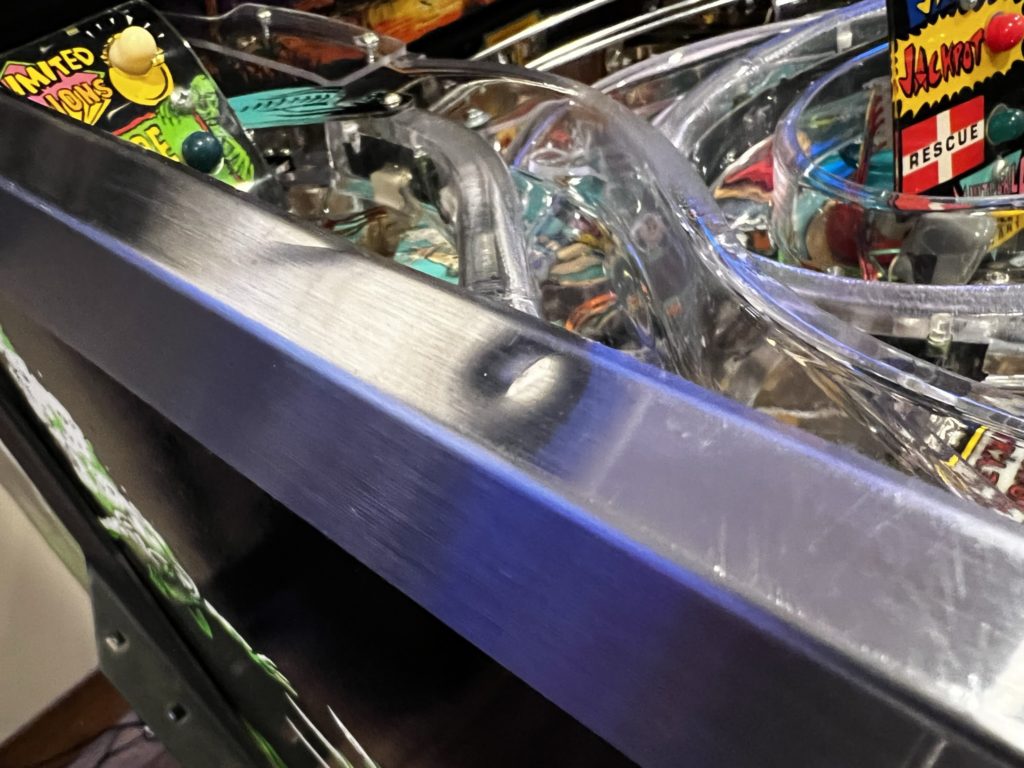
Glass has a permanent “wear mark” (right side of spinner gate rubbed in transit). Even though there is clearance from the spinner frame to the glass, when the game is on its end, the PF is so heavy that in transit, it pulls toward the glass and the spinner frame rubs until it has created a permanent mark.
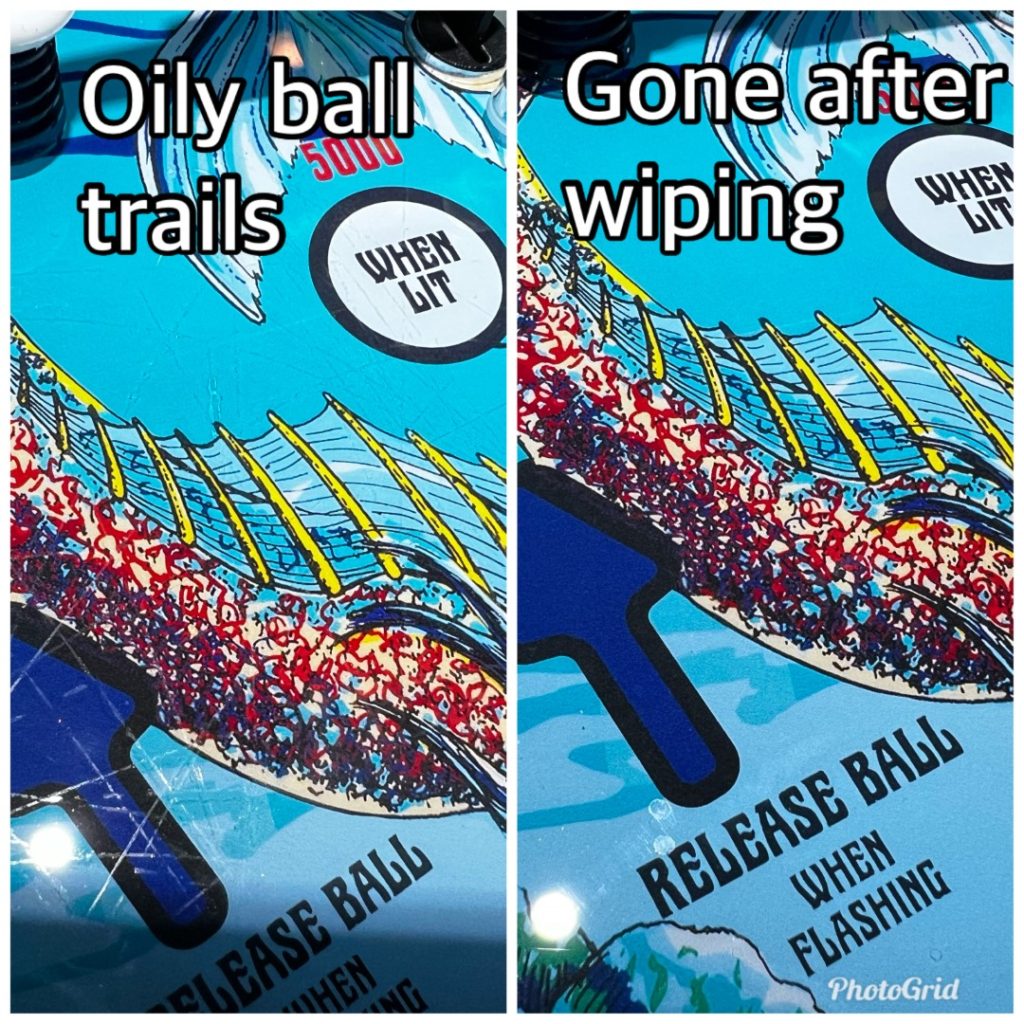
There must be some oil residue remaining in the ball trough as I just about panicked when I saw the below image. It looked like playfield scratches but turned out to be ball trails of oil or some substance. They have lessened with 50+ plays but still appear. Good news? They wipe right off with a cotton cloth
Oily balls trails that simply wipe away – still not sure where the residue is coming fromGate wire is too short within its frame (see right side)See black wear mark at tip of white arrow (it’s under the glass and a permanent mark)
In Love With A Mermaid
You know, this game has a thousand reasons to love it and almost none in the negative column. Yes the code has a few bugs but the Haggis team is diligently working to improve it (my game came with 0.76 installed), but aside from that and some “normal boutique pinball tweaking upon arrival”, it’s one heck of a game. It’s a special game and that specialness is reflected in the dozens of “extras” I keep finding as I play it. Who does this? Who invests in over the top features? Haggis – that’s who. Let me introduce you to an extremely passionate group. I know this not because I’ve met them, but because I own a copy of a game that reflects that passion:
CEO: Damian Hartin
Game Developer: Greg Sealby
Creative Director: Scott Seedsman
Musical Director: Casey Dean
Mechanical Engineer: Lachlan Dowd
Game Designer (2.0 Rules): Martin Robbins
Price: $8,900 USD + shipping
Passion Looks Like
People who really care about what they are doing end up building, creating, designing or sharing some of the most wonderful things on earth. This Fathom Mermaid Edition is no exception. What follows is a long list of special features, small design improvements and overall thoughtfulness that can only come from the minds and hands of people who care deeply:
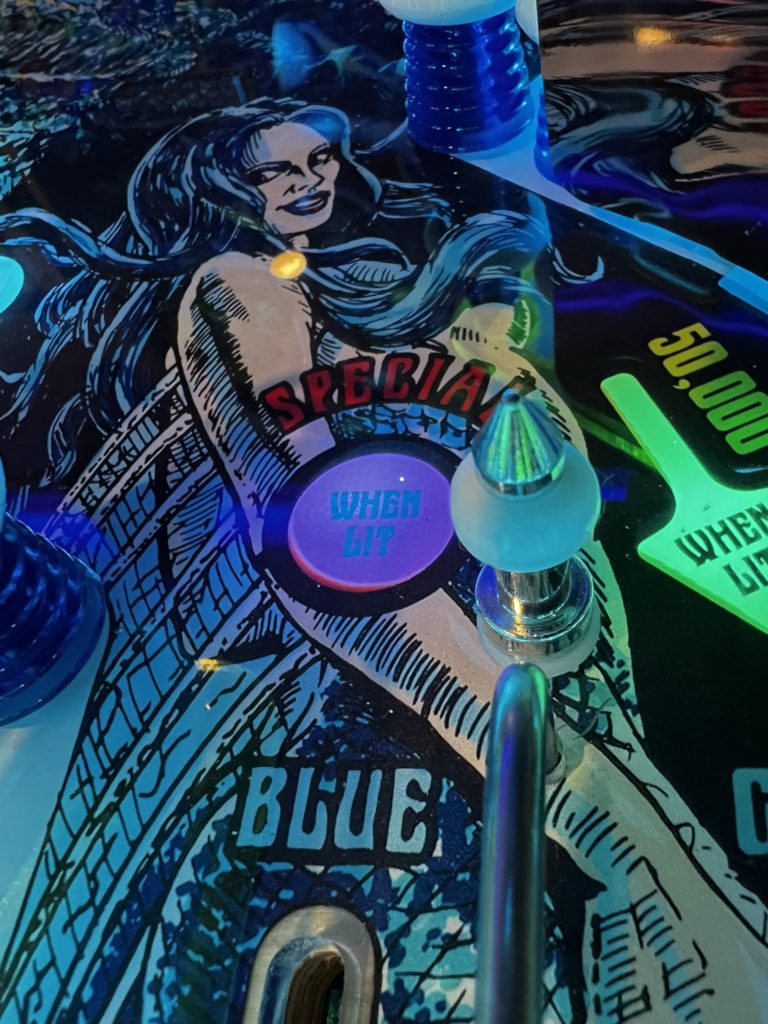
Score display changes color (to red) when under Mermaid attack
The backbox lock is on the lower left side of the head (where you can reach it)
There is a built in projector to give the appearance of being near or under water
The implementation of the small apron screens is simple genius as a perfect way to deliver a 2.0 experience but NOT ruin the classic game looks or feel
The pop bumpers RGB implementation is just perfect. They turn red to give you visual cues when adding to Super Jackpot or battling Mermaids
The signed Haggis comic/poster is well done and is meaningful to me (framing IP as we speak)
The game comes with pre-installed Titan flipper rubber
After 50 games or so, I still can’t see a single mark on the playfield due to Damien’s specially engineered acrylic overlay
Rubber feet and leg protecting washers are provided in the goodie bag
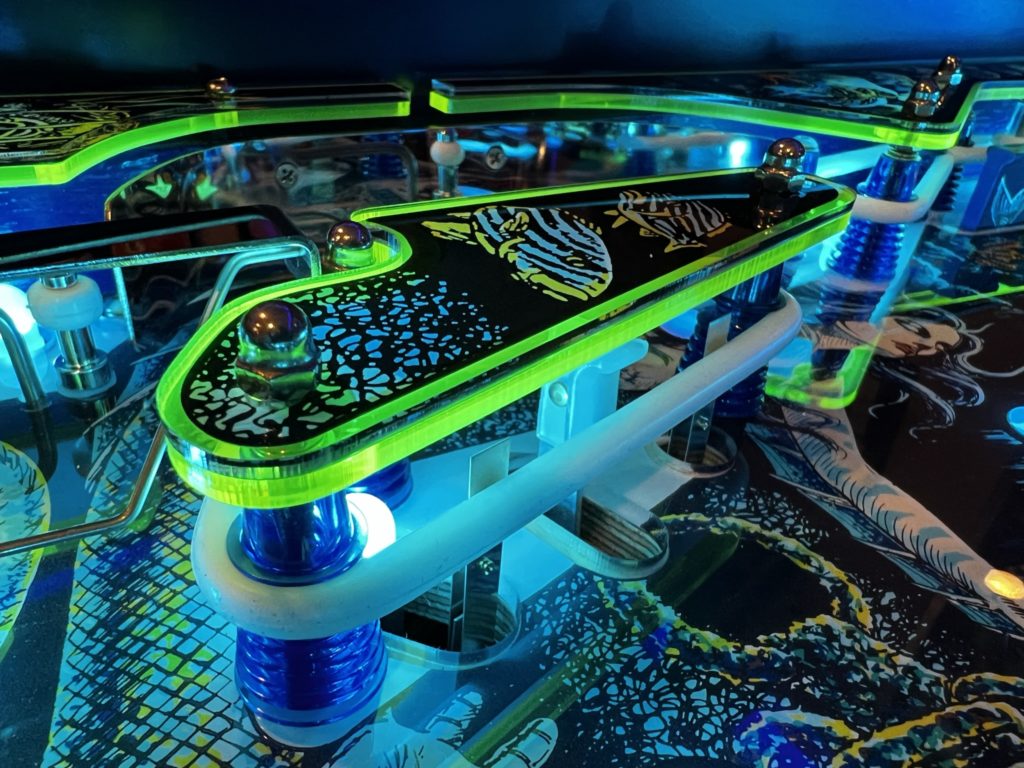
The game has multiple areas where clear/mirrored acrylic is laser cut and inserted into the cabinet. This is purely cosmetic, adds not incremental functionality BUT looks amazing, rich and custom
The coin door is skinned with a mirror polished stainless plate. In fact all of the exterior metal on the cabinet is the same high polish mirror finish
The playfield service mechanism is a godsend given how heavy this playfield is. Although heavy, the mech makes managing it much easier than the older style with a prop-rod. It has wheels in the back that roll forward to a very positive stop and it can be moved up completely vertically for servicing.
The playfield glass has highly polished edges – who does that?
The back glass IS a back glass
Why She’s Special
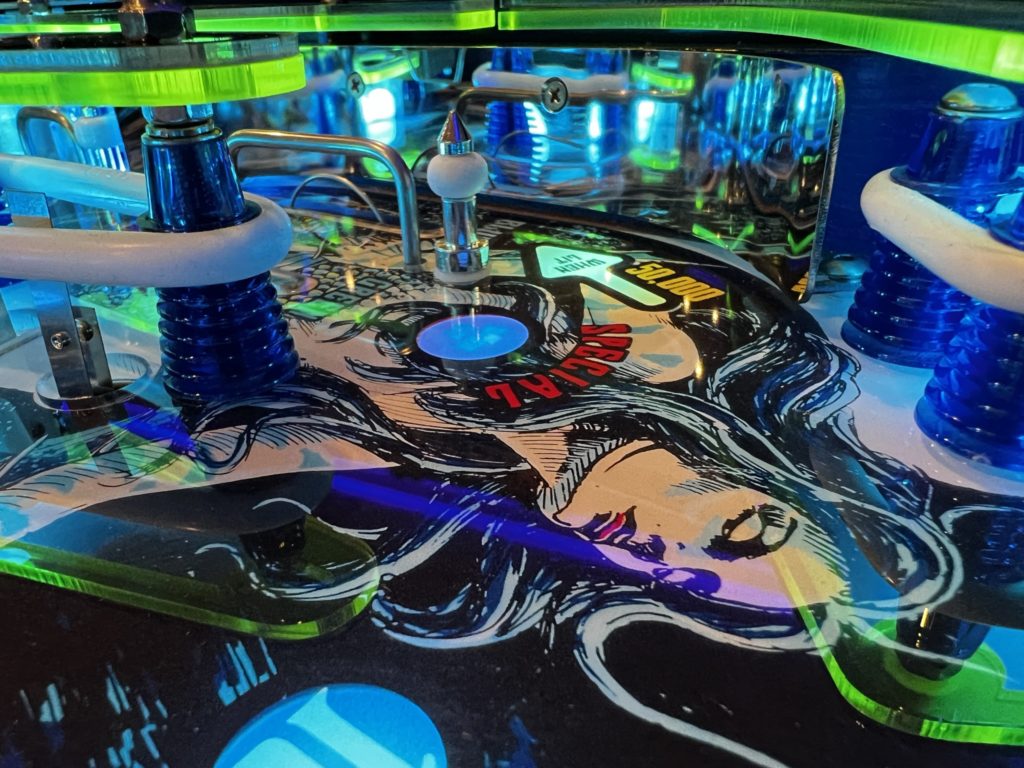
It just makes sense for me to refer to my last blog post to attempt to explain what I love about this game. That post was written entirely on the subject of trying to understand why I like some games more than others. When I reviewed the content, it became very clear why Fathom Mermaid Edition is so special. Two notes on my comments that follow. First, my thoughts are based almost entirely on the gameplay for the 2.0 code and second, the game is still new to me and is my understanding of the current code:
Achievement
Part of the good feelings I get here are related to the clear goals listed below. I know what I need to do (or at least I know that after a while, I’ll know). Yes, the code is new to me so I’m no expert but this is not a complicated machine. When I complete a set of upper lane roll-overs, I look forward to the RGB color change in the pops. When I make the skill-shot I appreciate the small screen telling me so – and this was not possible on the 1981 version. I like the idea/story of collecting Mermaid artifacts and being able to see what I’ve done as the game progresses.
Clear Goals
The game mechanics have not changed from 1981. They were simple then, and remain that way today. The 2 scoops present themselves with an obvious goal to “shoot them” and the strategically placed drop targets do the same. What has changed in the new code is how all of these mechs interact with the new rules. The reinvented “story” now 40 odd years into the future did not muddy that original clarity at all. Blue targets qualify modes/multiballs by hitting the lagoon scoop and green targets qualify Mermaid battles at the right side cave scoop. Hitting the 1-2-3 targets in sequence qualifies mermaid Multiball
Moments:
There are “moments” in Fathom that just could not exist without the 2.0 code. As I said in my prior blog post titled “Understanding Why” – moments matter to me. The well integrated (but simple) projector gives the illusion of playing under or around water and adds tremendously to the overall gameplay experience. The incredible use of color in the RGB pop bumpers gives me a burst of color and visual cue when I’ve completed another set of rollover lanes. I love the music shift to pounding, pulsing techno beat when I’m in a mermaid battle, along with the light show, the threatening female call outs and the red score display are another anxiety (good thing) inducing moment. Ripping the spinner makes me feel like I won a million dollars due mostly to the incredible sound. Not just the spinner sound but the equipment and speakers used to reproduce it. I actually look forward to each “end of ball” musical crescendo as it’s one of the best in pinball. Sometimes I “short it” by double flipping and create my own musical ending to the last ball in play – priceless!
Shot Variety:
While Fathom may not compare to a Keith Elwin game in terms of shot variety, there are enough different shots to keep my interest AND several of them are challenging. Fathom is no one hit wonder where once you master that “one shot” the game becomes easy. The shot to the Lagoon and the Cave are both a challenge. Knocking down the 1-2-3 drops IN ORDER is a challenge and in the 2.0 code, getting through all the modes to arrive at Mermaid Treasure (the wizard mode) is downright difficult. Along the way, there are plenty of targets to shoot for and in the case of the “blue vs green” drops, each accomplishes a different set of goals. I think Fathom had shot variety as a strength in 1981, that strength has been built upon with Marty’s new 2.0 code
Fathom was a Christmas 2022 arrival so why not – Merry Christmas colors!
She’s Sensitive
One thing to note, and take it with a grain of salt. This was MY experience for sure – the cabinet flipper switch gap is hyper sensitive to being set perfectly (I’m specifically referring to the right side double stack switch). First, I am certain my switch stack had a continuity issue between the contacts and the copper leaves. I was able to measure it using my multimeter out of the game. The second switch (runs the upper right flipper) would on occasion not function at all. When I tested the switch for continuity from one blade to the other, it tested “open”. If I wiggled it around a bit I could get it to test closed so I ordered a new switch. When I received it (overnight – thank you Pinball Life!) I gapped it before soldering it to the short wire harness (thank you Haggis!) then after screwing it into place I played a test game. Now the flippers felt stronger and the upper was functional but had some flutter and issues with “hold up”. I pulled the switch again and very carefully and deliberately gapped it super tight, paying attention to moving the back support blade (non-conducting) toward the outer cabinet to give as much back pressure support as possible to the contacts. I also used a small piece of 4,000 grit sandpaper to burnish the contacts. Sandpaper on high voltage contacts is not advised so YMMV. This end result was a game changer and the game now plays with zero flipper issues
Simply a beautiful playfield enhanced with modern lighting
Summary
The Haggis team has accomplished the impossible. They’ve taken a beloved game from the 80’s and made it SIGNIFICANTLY better in every possible way. The playfield should last forever. The gameplay in 2.0 mode is compelling, interesting and more fun than the original. The sound and lights show are almost without modern peers. The storyline and code as currently integrated checks most of the boxes of “why I love pinball. Simply put, the Haggis Fathom Mermaid Edition Pinball is a monument to how all pinball should be built – with care and attention to detail. Find one to play, you’ll be impressed.
Here’s a link to the TOPcast episode (look for #56)
Here’s a quick game video of me playing on code version .82
The excellent launch article written at TWIP can be found HERE
The “Fixes” (more images follow this section)
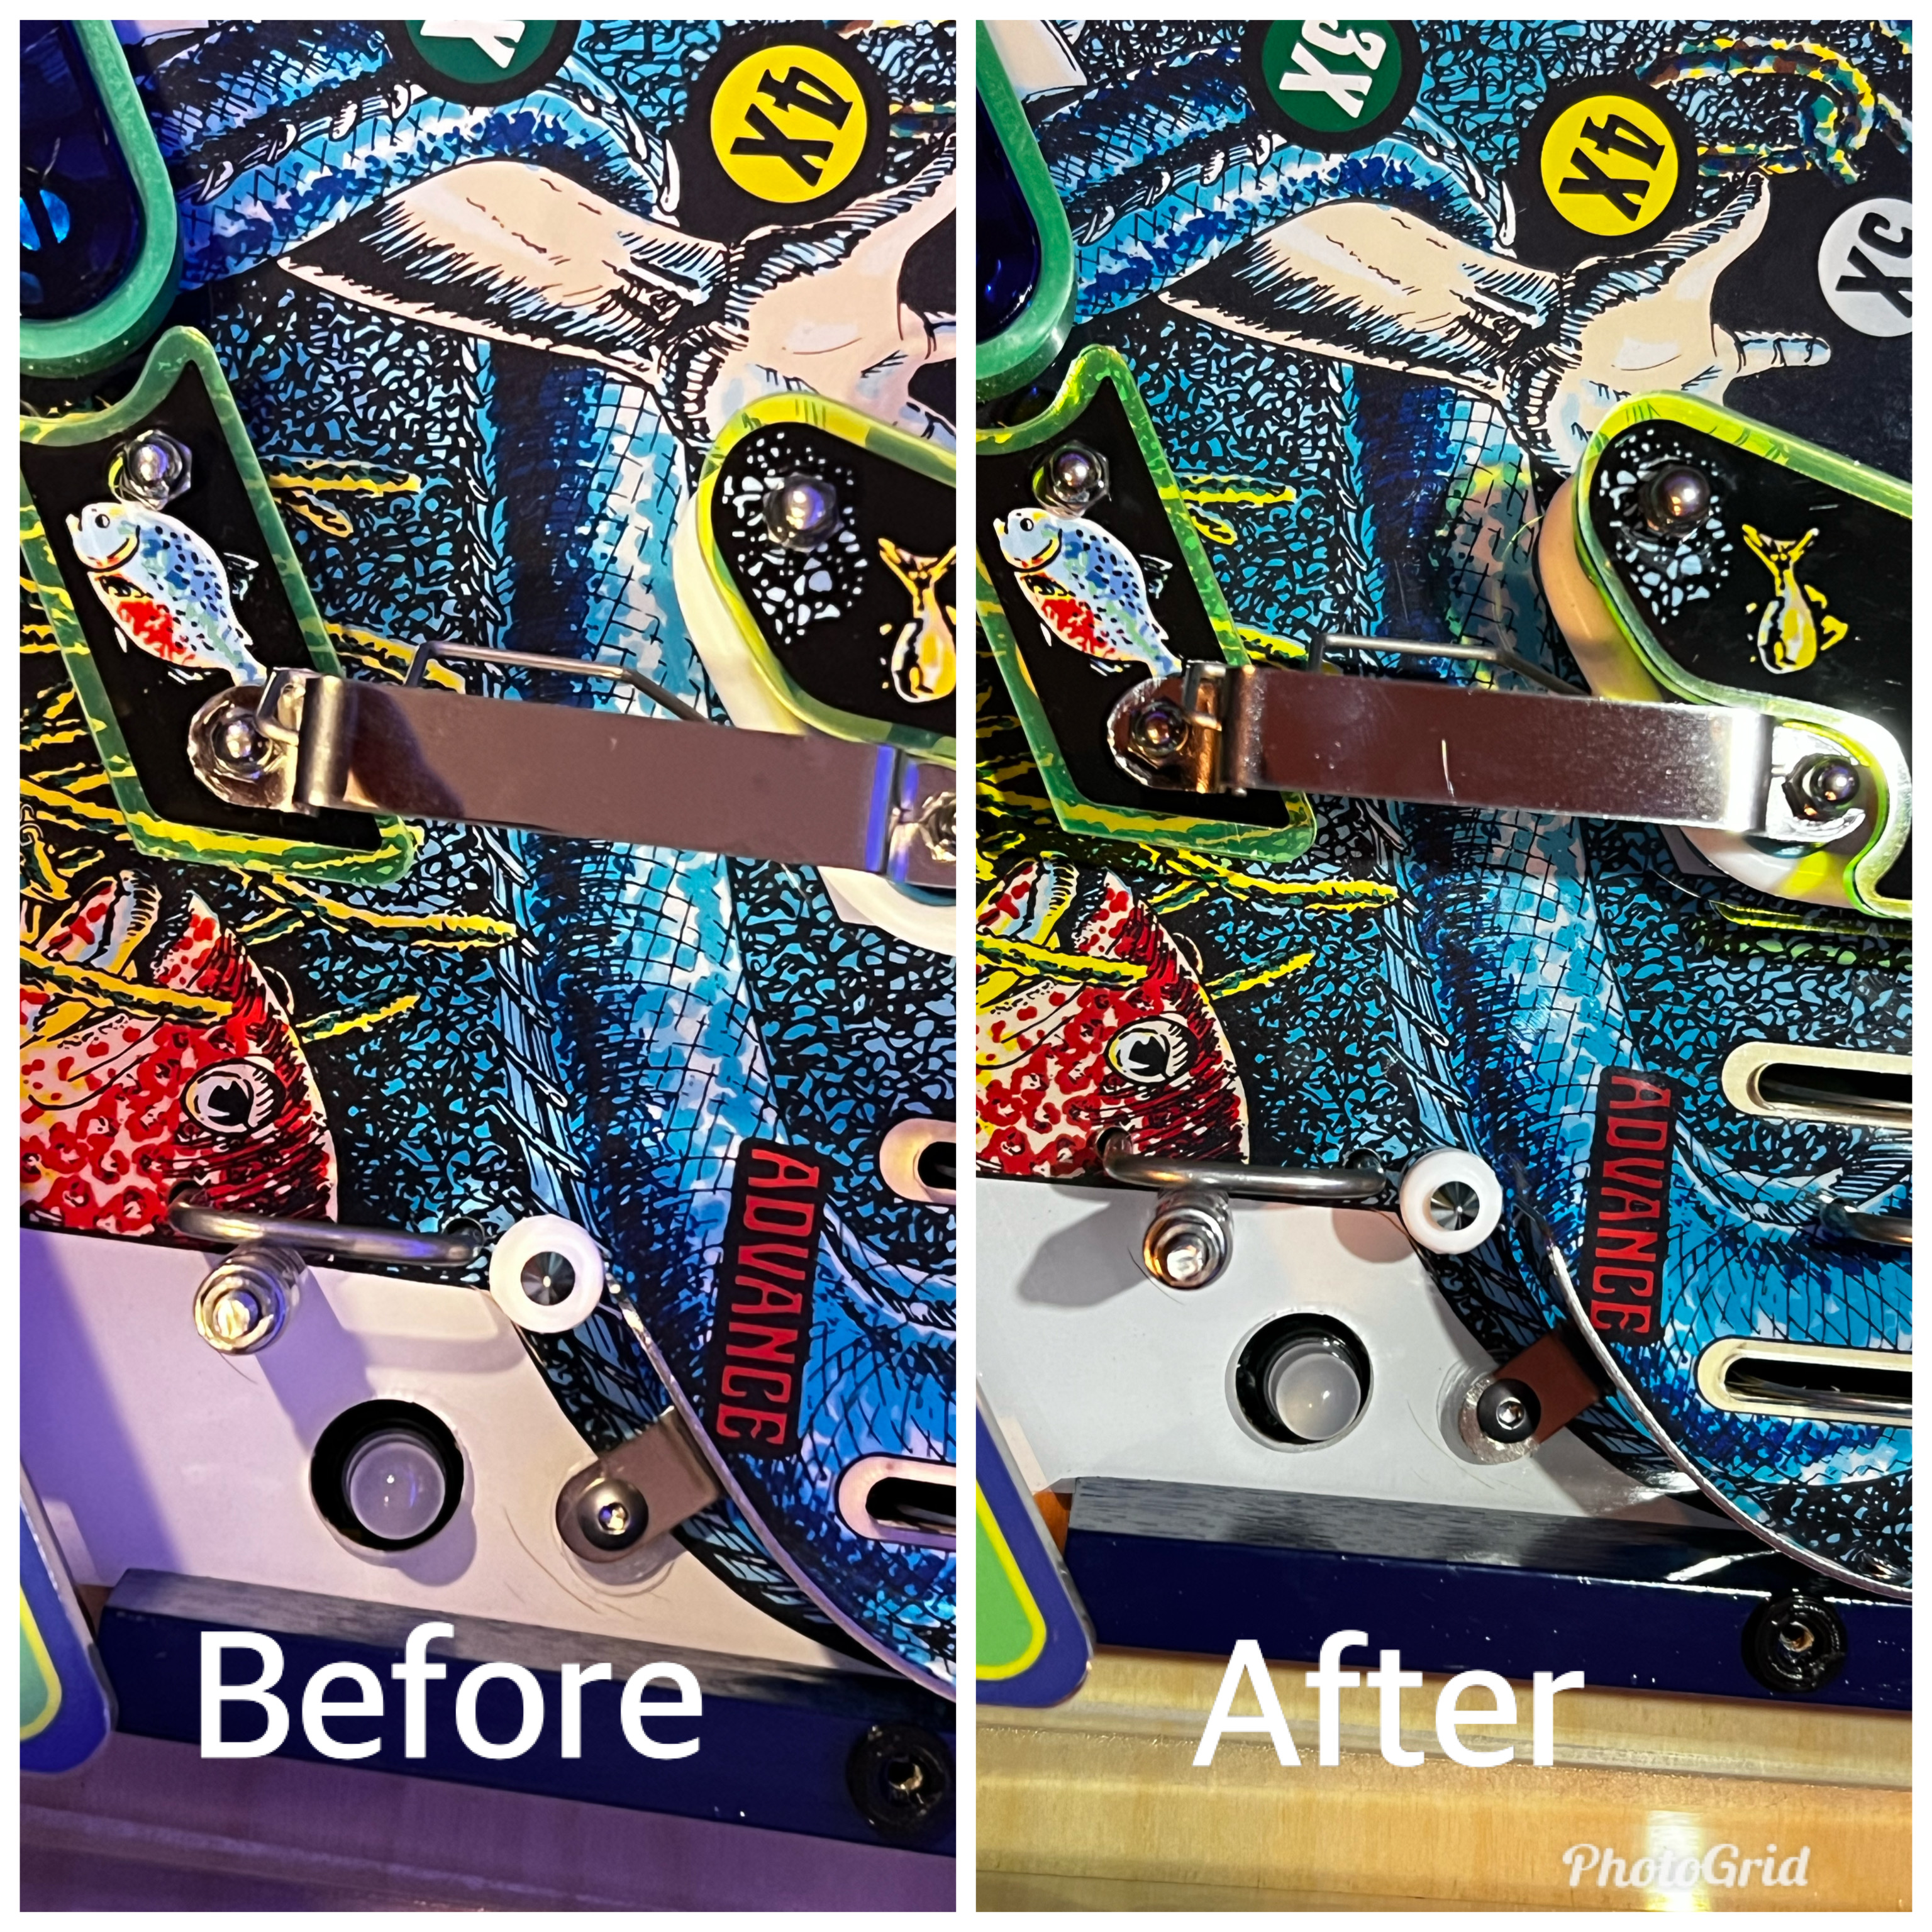
The Flippers:
The flippers required ordering and soldering in a new double stack flipper cabinet switch stack, then burnishing the contacts with 4000 grit sandpaper and then carefully gapping the new switch stack with very minimal gap and maximum back pressure/resistance from the support blades to ensure a fast contact and a strong/pressured one.
The Ball Launch:
The manual ball launch issue was because the auto-launch was not making contact with both sides of the ball (see gap at red arrow in image). This was pushing the ball away from the rubber tip of the plunger, creating too much distance to properly launch the ball when plunging by hand. I pulled the auto plunger and gently bent both tabs (see white arrows) toward the right. Once bent to the right it allowed the ball to drop back about 3/16” closer to the plunger. While I had the playfield up I switched out the silver plunger spring for a blue one. Finally, the drain inducing outlane was the most complex to correct.
Fixing the manual ball launch involved fixing the auto-launch first
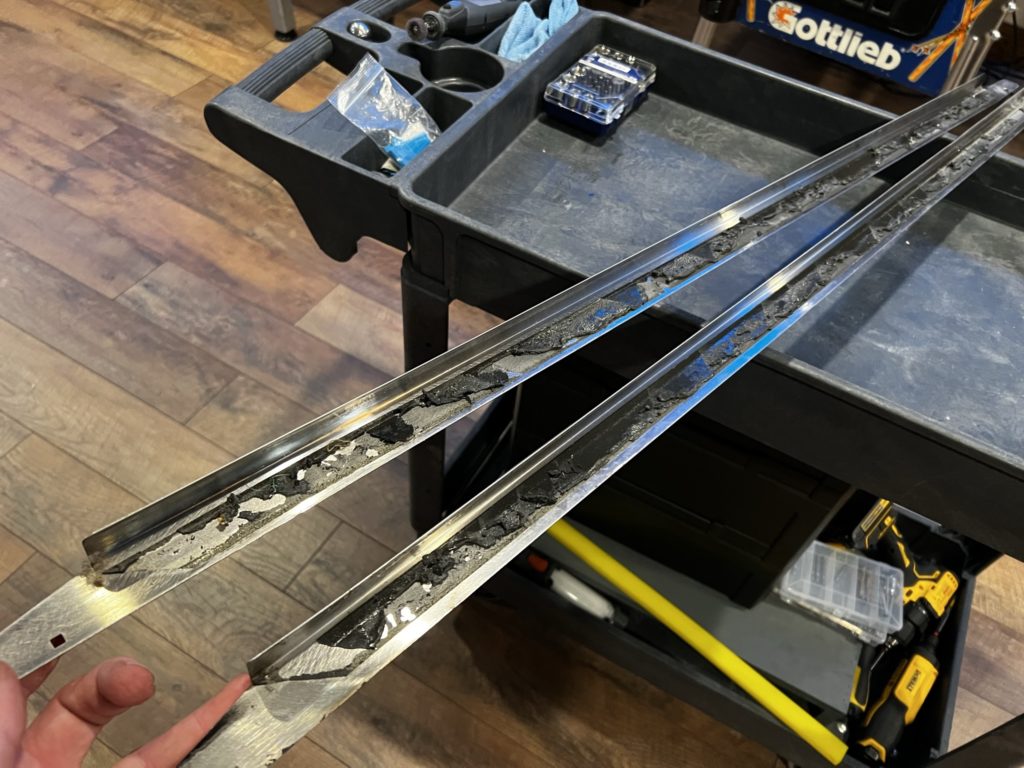
The Outlane Drain
The rightmost outlane is NOT a drain. Rather it’s a relatively safe and repeatable return to the right flipper. On my game, the ball would hit the small rubber on that small post just before the drain hole, then bounce into the upper right corner of the small lane guide plastic, then into the back of the sling rubber and finally back down the drain. It was pretty clear by looking at the left side (a mirror of the right) that the stainless ball guide needed to be bent more to cleanly feed the ball to the flipper.
Here is what I did:
use a Dremel to oval out the holes on the small plastic lane guide (do the green protector and the printed plastic)
this allows you to drop those plastics and open up the lane (my ball was hitting the leading edge/corner as it tried to enter)
next remove the two plastics that sit on the rail and cover the “C” shaped stainless steel lane guide
pull the “C” shaped stainless lane guide (use 7mm socket and an Allen key to remove 2 bolts and nuts in 2 mounting tabs that go thru PF
remove the 2 Phillips screws that are inserted sideways into the rails using a stubby screwdriver or right angle screwdriver
pull the guide with the PF flat as there are 2 thin, white nylon washers under each mounting tab
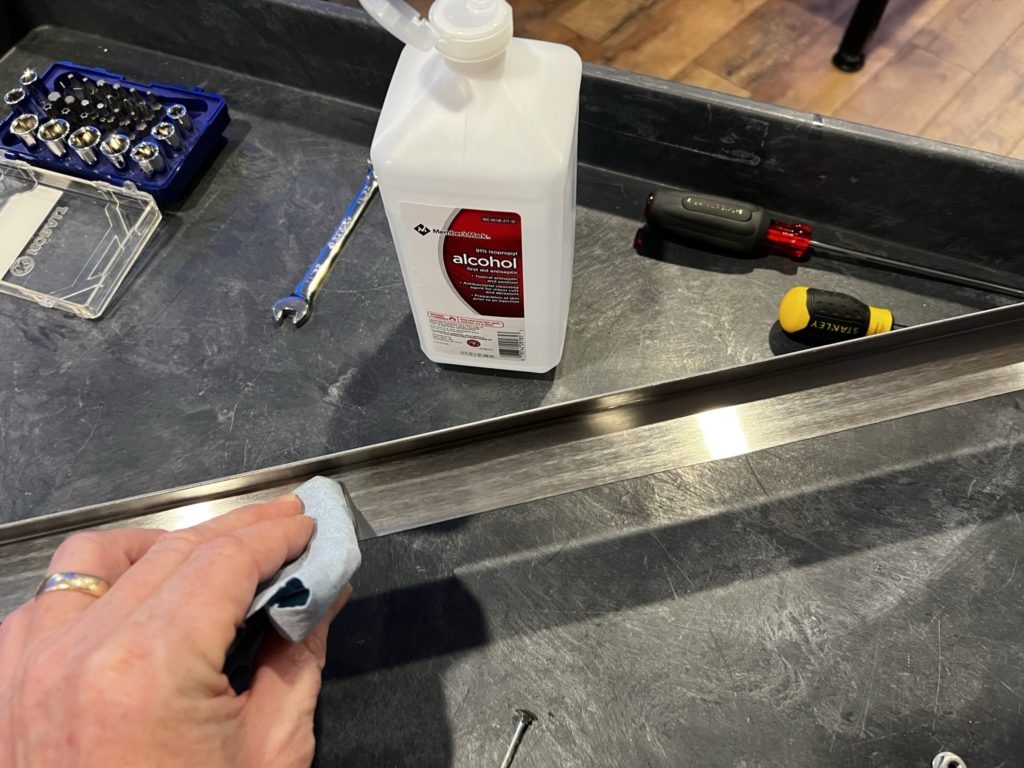
Now, time to bend the guide:
put the end of the lane guide (up to the first mounting tab) into a bench vise (protect it with tape of thin rubber) and gently bend
note you’re bending only a 1” or so section of the guide, starting with the first bend as close to the mounting tab as you can get
start NEAR the mounting tab and work your way toward the end, it bends easier than you think – you should bend 4 times in that total inch
each “bend” should be just enough for you to feel the metal “give”, then stop, a little is a lot
if you don’t start at the mounting tab, you’ll remove the bend you just made when you put it back into the vise!
More Game Images
FATHOM REVISITED RULES v0.82
MERMAID MULTIBALL • 1,2,3 in sequence starts Mermaid Multiball – 2 ball • 1,2,3 down during Mermaid Multiball = Jackpot • Jackpot value increases with each set of banks down • Super Jackpot awarded after 5 sets of banks down • Underwater Breathing is awarded by getting the Super Jackpot which enables the player to have enough air to get to the mermaid treasure
LAGOON MULTIBALL • Hitting the blue drop targets on the left target bank lights lock at top saucer for Lagoon 3 ball multiball • All blue inline targets down score Super Jackpot in saucer – holds ball for 10 seconds • Both balls in saucer lights Super Jackpot at Extra Ball target • A Navigation Device is awarded by getting the Super Jackpot which is needed to navigate the caves and find the mermaid treasure
MERMAIDEN BATTLES • There are 4 mermaidens to battle • Uses a “fighting game” mechanic with health bars – time battle • If battle is won, then Cave Escape begins immediately • Successful Cave Escape gives lit perks to the lane returns during Mermaid Queen Battle
CAVE ESCAPES • After defeating a Mermaiden, others start attacking and you have to return to the boat • Here’s how to return to the boat: o JETSKI – use rollovers to get speed to return to the boat o WINCH – hit drop targets to rise up to the boat o SCUBAJET – spinner primes the Scubajet, then any scoop to get to the boat o DOLPHINS – pop bumper hit make Dolphins swim to the boat
MERMAID QUEEN • 4 Mermaidens to battle along with the Queen • Mermaiden shots are: Lagoon targets, Cave targets, left bank Drop targets and Pops • The Spinner charges a Sonar Bomb to use as an extra hit to the Queen • Final shot is to the Lagoon to destroy the Queen • After Mermaid Queen is defeated, take victory laps • Other perks: 1,2,3 targets in order gives a Mystery Award • The Mermaids Trident grants access to the Treasure Cave
FATHOM JACKPOT • Need to progress various playfield shots to light the Fathom Jackpot at the right Stand Up target • Must be completed on 1 ball to light (can be set to progressive in menu) • Shots: left bank Drop targets, Spinner and Lagoon Drop targets, ABC lanes, Pop hits x 50 and final shot to the Extra Ball stand up target
MERMAID TREASURE LIGHT • Lit at Lagoon saucer • When successfully collected: o Trident from Mermaid Queen o Navigation Device from Lagoon mutliball o Underwater Breathing from Mermaid multiball o Treasure Key from playfield Super Jackpot • If you fail to complete the wizard mode (drain ball) you lose the Treasure Key and will need to get the playfield Super Jackpot again
MERMAID TREASURE GAMEPLAY • Work sequentially through playfield elements to get to the Treasure Room • Navigation Device needs to be powered up (spinner and pop hits) to then light the way to a room that is locked • A shot is lit to progress through each locked room: ABC, 1,2,3, Cave drops, Lagoon drops, Left bank and final shot to the Cave
Understanding Why
I’m at the point in my collection that I want to weed out the games I just don’t play much and add games that would become favorites. To begin to do that I thought I’d create a list of what games I spend the most time on and then try to understand why. Find out what drives me to spend more time playing one vs another. The simple answer is always “well, you’ll want to play the better games more often!” OK, that’s obvious but not always true and when I reviewed my list, it was NOT obvious what exactly constituted a “better” game. In fact some of my more frequently played games are not even in the top 100 on Pinside. So what exactly is going on here?
Spiderman with almost an unlimited shot variety
If I can drill down into the essence of why I choose one game over another, it will help me in my above mission to right size the collection to have games I’ll play more often, even if I end up with a few less games. Let’s start with the list. I’ve broken it down into 4 categories ranging from playing them often to almost never. Below you can see how the some of the games in my collection shook out.
After review, we can dig in to what I found and what might help you make more informed decisions about future adds to your collection
For example, I play this group of games OFTEN:
Godzilla
Star Trek
Iron Man
Bride of Pinbot
The Simpson Pinball Party
The Flintstones
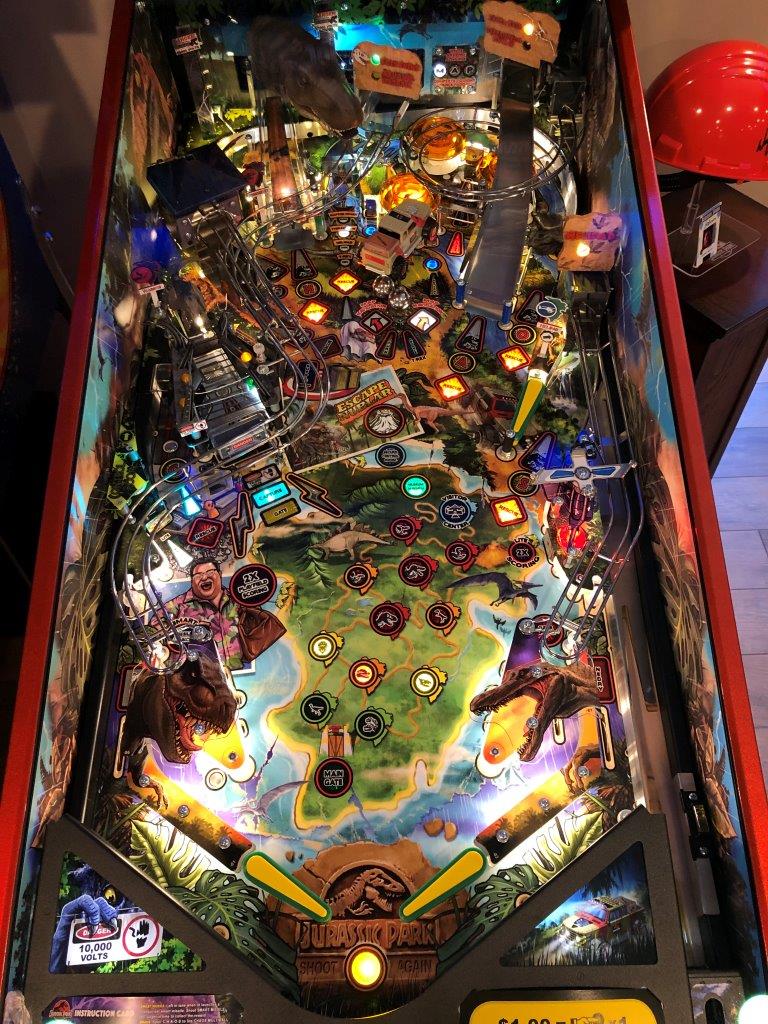
Jurassic Park (Stern)
Ultraman (new to collection)
I play these games OCCASIONALY:
Metallica
Gun’s n Roses (JJP)
Pirates (Stern)
X-Men
Spiderman (Stern)
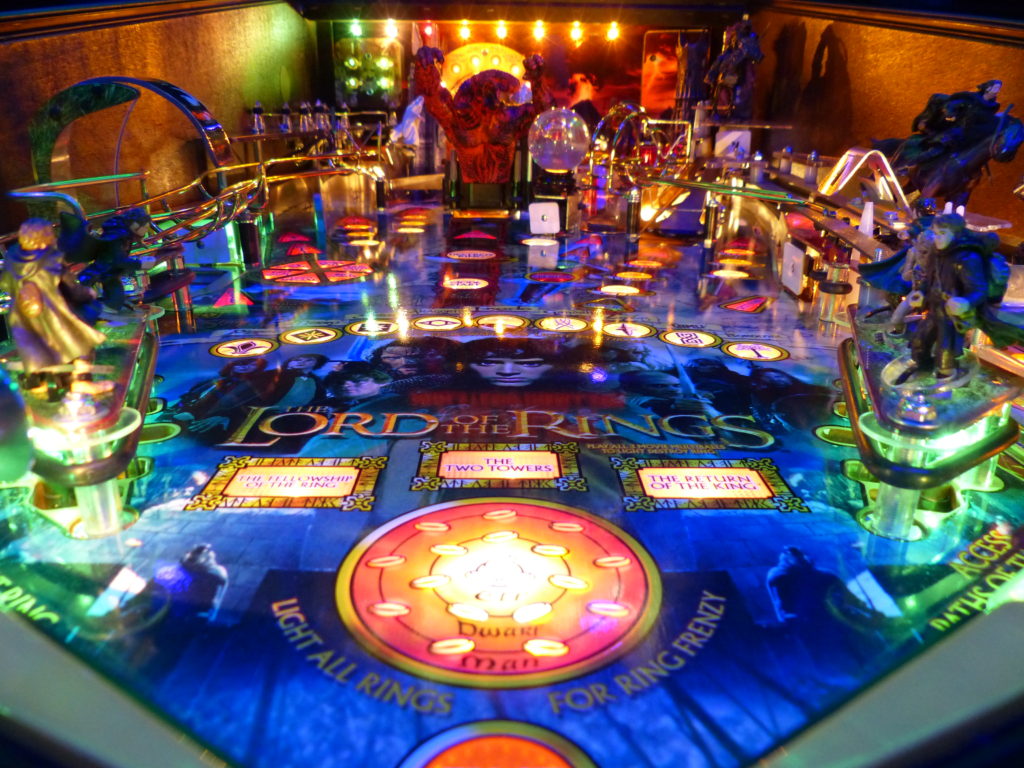
Lord of the Rings
Game of Thrones
Time Machine
Wipe Out
Theater of Magic
Creature
Haunted House
Bride of Pinbot
I play these games RARELY:
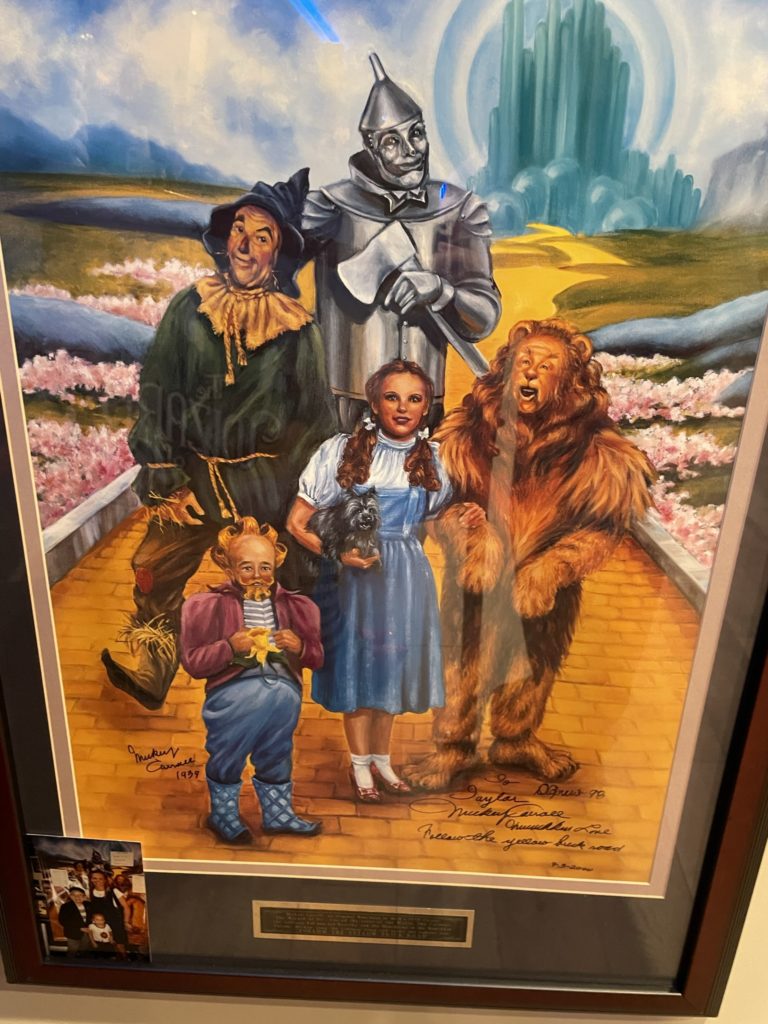
Wizard of Oz
Medievel Madness
AC/DC
Batman ’66
Addams Family
Ghostbusters
Dr. Dude
Houdini
Johnny Mnemonic
I almost NEVER play these games:
Aerosmith
Kiss
Last Action hero
Judge Dredd
Fire
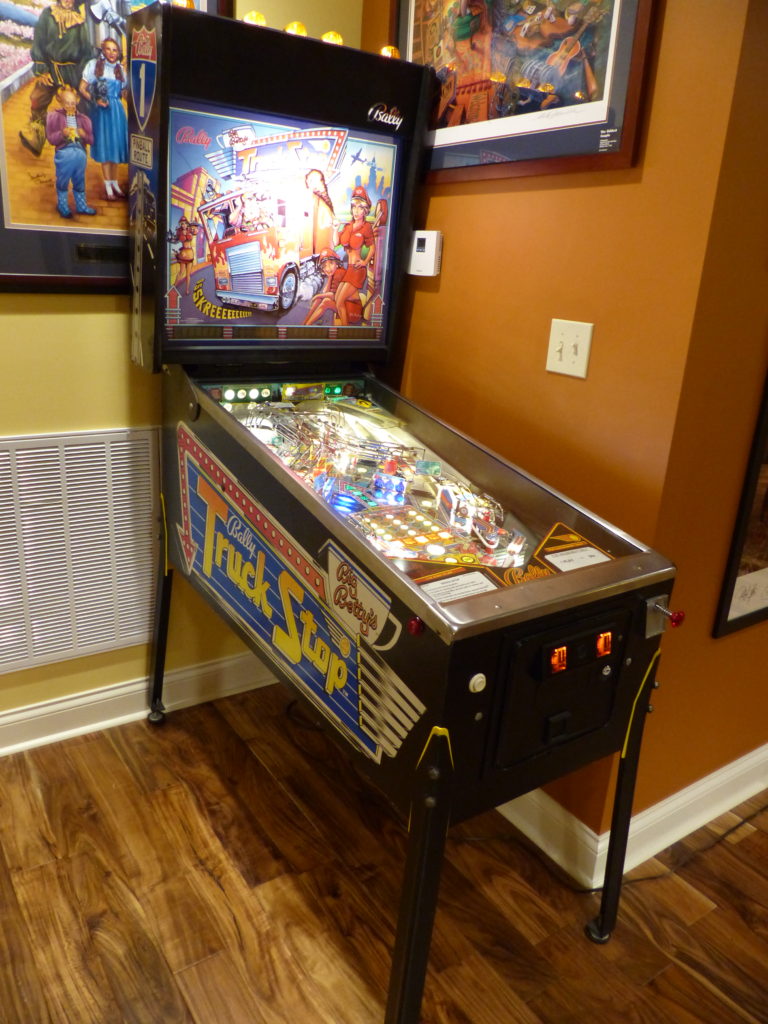
Truck Stop
Elvis
Harlem Globetrotters
Let’s start with what was obvious to me and maybe not so much to you. There were a few categories that were very easy to bucket with clear “reasons” why I played or did not play that title as much.
Bride of Pinbot an occasional player with easy to understand rules
WHY GAMES ARE PLAYED “OFTEN”
ACHIEVEMENT – This was harder to nail down than I thought, but as I examined the games that I play often, it became more obvious. I play these because of a sense of accomplishment. I can achieve things in these games. I am able to progress and in the process experience incremental gameplay (more fun?). Sometimes the incremental gameplay is offered as a performance reward – i.e., I was able to get further through the game than others. Sometimes it’s due to the fact that the game has so much depth that just playing it (at an average skill level) delivers new gameplay almost every time. A good example of this is “The Simpsons Pinball Party”. The game is so deep that only a handful of highly skilled players could ever hope to see the end of it. However, if you play it enough, the code has so many modes and methods to play that you will likely be pleasantly surprised by achieving or seeing something you never saw before.
CLEAR GOALS – When I see Jurassic Park in the top tier “play it often” list, I shake my head and wonder if I’ve made a mistake. Nope. I play it often BUT I never do that well on it. By all accounts, it’s another “tough Keith Elwin” game. I agree that it is. There are more than one shot in the game that consistently exceed my skills. Then why do I find myself playing it over and over? My scores always end around the same mark as does the numbers of paddocks that I clear (maybe 2 on average). The answer to this game is the absolute clarity in the mission and game goals. I know what to shoot for. I know what to do even if it’s hard to accomplish. The key shots are the “Rescue” markers and those inserts are orange, easy to see and very easy to understand. Make those shots, clear the paddock, rinse and repeat. Yes, there are LOTS of other things to do in the game and plenty of toys and gadgets (who does not LOVE a T-Rex that eats and throws the ball). The theme is also beloved by all – including me, but in the end, I continue to play the game because the goals are easy to understand.
Interestingly of the two “related” games in my most often played list (Godzilla and Ultraman), only Ultraman fits the attribute of “clear goals”. Maybe because it’s easier to progress in the game for an average + player like me or perhaps because the rule set is so much simpler. Either way I don’t find Godzilla to present nearly as clear of goals as Ultraman does. That’s saying something when Ultraman code still has a ways to go before being considered polished or complete. Yes, I get the storyline of Godzilla easy enough. Play as Godzilla and beat all the other Kaiju to control the cities, but in practice and in gameplay, the complexity of the rule gets in the way of crystal clear goals and progression.
STORY & MOMENTS – I’ve often referred to “Star Trek” as my favorite pin in the entire collection. As I’ve contemplated this blog post, it’s become even more clear that my gut was right on this one. The reason is the “Story” it tells and my role in it. You feel like you ARE riding along with Captain Kirk on the Enterprise. You feel like you ARE fighting against the Klingon warship. The story is simple but the game design is so powerful in how it reinforces it. The Enterprise sits to your right. Dead ahead are the bad guys in the Klingon ship and one of the ball locks sits squarely underneath. Steve Ritchie and team did a fabulous job engaging you in this story. You have missiles to fire at the Klingon ship. No worries if you run out of ammo – use real pinballs to blast away at it. It’s hard to not feel like you’re really fighting when the Klingon ship FIRES BACK at incredible speed. Intertwined in all of this are some incredibly satisfying moments and shots. The the entire playfield goes dark and the mini laser paints everything with red star dust is an unforgettable moment. Add to it the Klingon leaders’ “Foolish Human” callout, and fiendish laugh that follows and you’ve got a top 10 moment in all of pinball. The shots in the game are all easy enough for an average player to progress deeply into the game and the most challenging shot (Steve Ritchie’s signature “warp ramp) is incredibly satisfying when hit – especially when you are able to combo 2 or more in a row! The sound, music and callouts (they are excellent) all work together to support the story and keep you in it -rather than take you out. Even the start of the game begins to set that atmosphere with a simple “Welcome Aboard” and a rather quiet background pallet of sound, at least until gameplay begins.
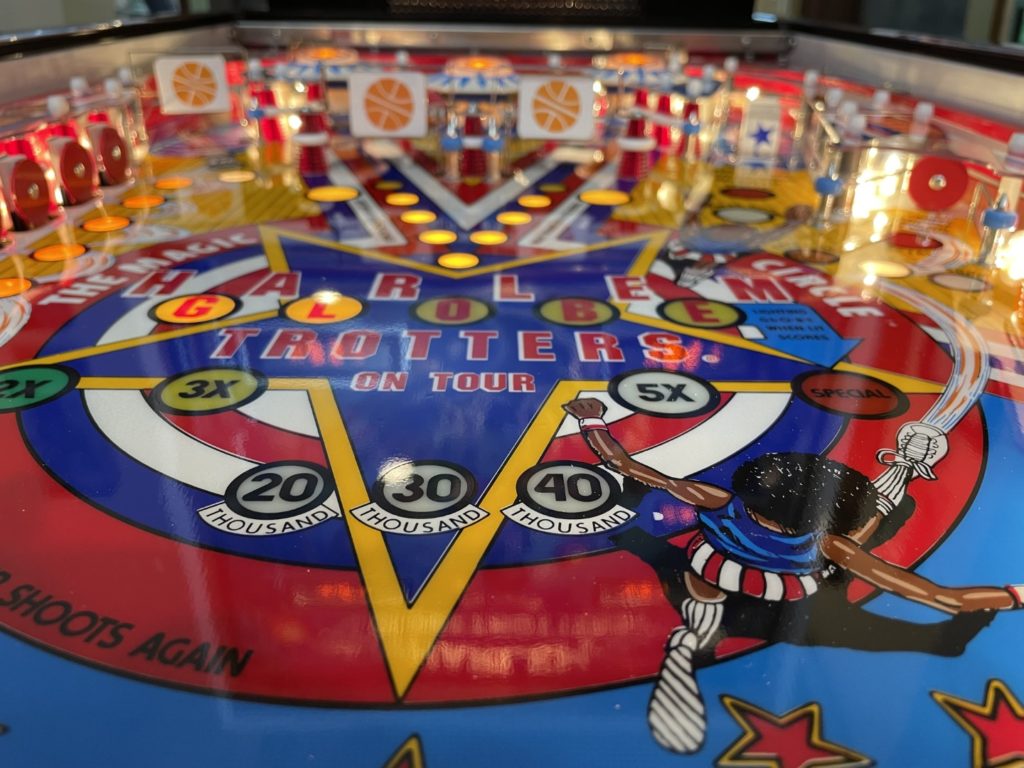
Globetrotters … it’s harder than it looks and sometimes “not-so-fun”!
WHY GAMES ARE “NEVER” PLAYED
NOT MY PIN – For example, “not my pin” would be a category for sure. There are several of these that I would not have purchased at all BUT my wife wanted and claims them as hers: Wizard of Oz, Elvis, Kiss and Aerosmith are great examples. I was eager to support my wife in acquiring these but the reality is that she rarely plays anyway and for the most part these 4 titles are not my cup of tea – so … I don’t play them either! Now does each of them have something unique to offer? Of course. Wizard of Oz is a stunning world under glass example of a pinball machine. It likely changed the course of all modern machines forever and for the better. Still, it’s a hard game with typically short ball times and has some “clunkyness” to the shot geometry. There are the “JJP flippers” to deal with and when you combine those negatives it becomes a game that I only play when we have guests over (they are drawn to it like moths to a flame).
HARD GAMEPLAY – The other obvious bucket to me was that many of the games in the rarely or almost never played categories are very challenging to play. Progressing through the game is tough for me. I’m an average player in the Pinhead world. I have moments of brilliance, but I’m still average. To top it off, I’m not a fan of learning all the complex rules. A perfect example of this was my (formerly owned) Avengers Infinity Quest LE. To me it presented two huge negatives that led to its transfer of ownership out of the loft. The rules are insanely complex and the shots were just a bit beyond my skill level. As a results (and like many others I’ve encountered) I could never progress through the game. Add to that the fact that the game never felt cohesive and a little “cold/sterile” and it’s one of the few games that I’ve not missed once gone. If you want to read some positives about the game, you can check out my original review right here on the Pinball Loft blog.
Iron Man – Butt kickin’ fun
WHY GAMES ARE PLAYED OCCCASIONALLY
UNIQUE GAMEPLAY – The middle ground bucket of “occasionally play” somehow seems easier to understand the “why”. For example, JJP Gun’s n Roses is a challenging game that can end with huge jackpots or a nearly barren scoreboard. That kind of scoring schema and variation might lead you to rarely play the game. In my case, I keep coming back to it because it does something that NO OTHER pinball I own does – it transports me to the show, to the actual GnR concert. The experience of starting a song, picking your favorite and simply “playing along” is unique and not too many days go by that I am not hankering to do it again. Creature is the same way. You can play that game and not make it to Creature multi-ball or you might. When you do, you are rewarded with a pretty unique experience – in the case of Creature, it’s not a song but an amazing ball path that is only accessible at this time, and a cool goal to “find the Creature” as you keep 2 balls alive. It’s that unique series of moments that I live for and keeps me coming back to Creature for one more try.
SHOT VARIETY – This is another attribute of games that will keep me coming back. They have a wide variety of shots. The shot also feel unique to that game – in other words, they are not simply a ‘bunch of shots” but more and large amount of unique shots. This keeps me coming back to those games because no other games can “scratch that itch” so to speak. Stern Pirates is a fanstastic example of this. The monkey loop, the treasure chest, the left ramp, the ship shot and the one behind it for the Kraken … all of these feel special and unique to that game. While it can sometimes be a long player, it never descends into “boring” because of the the shot variety. Metallica would fit the same mold. Maybe a tiny bit less so because of the predictability of the 2 ramps and L/R orbits, but there is a lot of variety nonetheless. Hitting the “fuel” shot after a right ramp always feels (and sounds) good. I’ll add Game of Thrones here as well. The shot variety and “shootability” of those shots is excellent. It offers 2 clean orbits, a kickback, 2 ramps and an engaging upper playfield. I’ll be honest and share that for the first few years in my collection it did NOT get much gameplay, but I recently spent some more time on it both learning the rules and dialing in the necessary shots. Like most games, if you are not progressing into the game, you really are not getting the full experience. When I finally passed a billion points and had defeated multiple houses, and gotten to the “Hand of the king” mode – the level of engagement soared.
Spiderman falls squarely into this bucket as well. I have the later release comic version and love the artwork, but understand the weakness of the updated callouts vs the original release. To be honest, were it not for the weak callouts, this game would quickly move into the “often played” category. As it sits, it presents an incredible variety of shots. Most of these are smooth, interesting and repeatable. In particular, the left and right ramp shots along with the Ritchie signature upper flipper ramp shot are just plain fun. Just hard enough, but not too hard and always a feeling of satisfaction when completed. Being able to routinely hit those ramps, is of course critically important to being able to progress in the game. If you can do it Spiderman is a game that an average to slightly above average player can master. You can have long ball times but not get bored along the way.
A million shots to make and a great storyline with many “moments” – “To War!”
WHY GAMES ARE RARELY PLAYED
TOO MANY NEGATIVES – This is a tougher category because absolutes like “never” seem easier to explain. In the case of games that I rarely play, it’s a bit tougher to nail down exactly why. I’ll start with the clearest example – Johnny Mnemonic. By all accounts it’s a fast and uniquely designed George Gomez game. It’s got tons of speed, flow, plenty to shoot at and a very cool mech in the mechanical glove. When I play it, I do enjoy the game. Unfortunately that is not very often. There are just too many negatives. A laundry list of the things that “bug me” about the game pretty much sums up why it’s in the rarely played category:
Theme sucks
Dated references
Hand mech is soooooo slow
Video mode is terrible (and slows game)
Movie may be the worst I’ve ever seen
Cabinet art sucks (like really bad)
Scoring by the millions/hundred millions is just goofy
Just one of the items on my list would not necessarily put this game at the bottom, but taken as a whole I just don’t get excited pushing the start button on this title
SUMMARY – It’s been interesting asking myself some very direct questions about this subject. I’ve absolutely learned a few things in the process. They may be obvious to you but were a bit of a revelation to me.
My first big takeaway goes back to my comments on Game of Thrones. If you can’t get deep enough into a game you may forever not enjoy or appreciate it. Think about how to apply this logically. When asking for or simply reading game feedback on Pinside, pay attention to the reviewer. How skilled of a player are they? Most importantly how closely do YOU match up to their skills? If the two of you are close and all other things being equal, at least you’ll know that the DEPTH part of your experience is likely to mimic theirs, thus validating the review. I’m sure some of the wide variety of reviews on a single game can be attributed to this phenomenon. Sometimes it’s obvious with comments like “too easy”. Other times it’s more obtuse and hidden in comments like “not my cup of tea” … I get that statement, but we are then left wondering “why”?
Another key takeaway was that when I have a lack of emotional investment, it leads me to almost completely disconnect from a title. The games I bought on behalf of my wife sit idle most of the time. I also discovered that there is more to the why than simply “not my pins”. Aerosmith pro for example has a killer soundtrack (love Aerosmith) and amazing artwork by Dirty Donnie. It fails me terribly on the gameplay side. Shallow shot variety and boring shots add to the fact that I didn’t pick this title. I’ll rarely start a game unless a guest wants a 2 player. Fair criticism? Not sure but there it is.
Maybe one of the biggest takeaways from this effort was understanding how important shot variety, repeatability and satisfaction played. I used the shot variety standard to highlight games in the “occasional” category but the same logic applies to MANY of the games in the “often played” category as well. Jurassic Park, Godzilla, and The Simpsons all have incredible shot variety. When I examined the occasionally played games, I found the same and mentioned specifically in my comments above that Stern Pirates, Metallica, Game of Thrones and Spider-Man all possess this important attribute. Studying playfields and reviews of both existing and newly introduced games should help guide me to more satisfying titles (to me) in the future
Lastly, I now know that I need to be very aware of complex rulesets. Not to simply write off that title, but know they are there, then discover if and how they may potentially impact my enjoyment of the game. It’s a double edged sword. Games like The Simpsons present no issue as they have a long list of other wonderful attributes, while as I mentioned before Avengers was both complex and difficult so was not a game that gave me a ton of enjoyment. The rules and shot difficulty just got in the way of enjoying the game.
Jurassic Park with shots galore, deep ruleset but easy to understand goals
Listen, we are ALL different. We have different desires and wishes in a pinball game. We present wildly differing skill sets. We don’t all play the same (calculating trappers vs on-the-fly shooters). These differences allow us to review and enjoy games that others do not. How else can you explain the fact that with nearly 40 games in the Pinball Loft, I’ve played Ultraman almost exclusively for over 4 months? Do your own version of this exercise. Ask yourself these hard to answer questions and along the way you too can uncover helpful insights into why you like what you like. The outcome won’t direct you to the exact right game, but can serve as a guide to ensure the titles you select are more likely to be ones you really enjoy.
Recalling Greatness
Recalling Greatness
nos·tal·gia (noun)
“A sentimental longing or wistful affection for the past, typically for a period or place with happy personal associations”
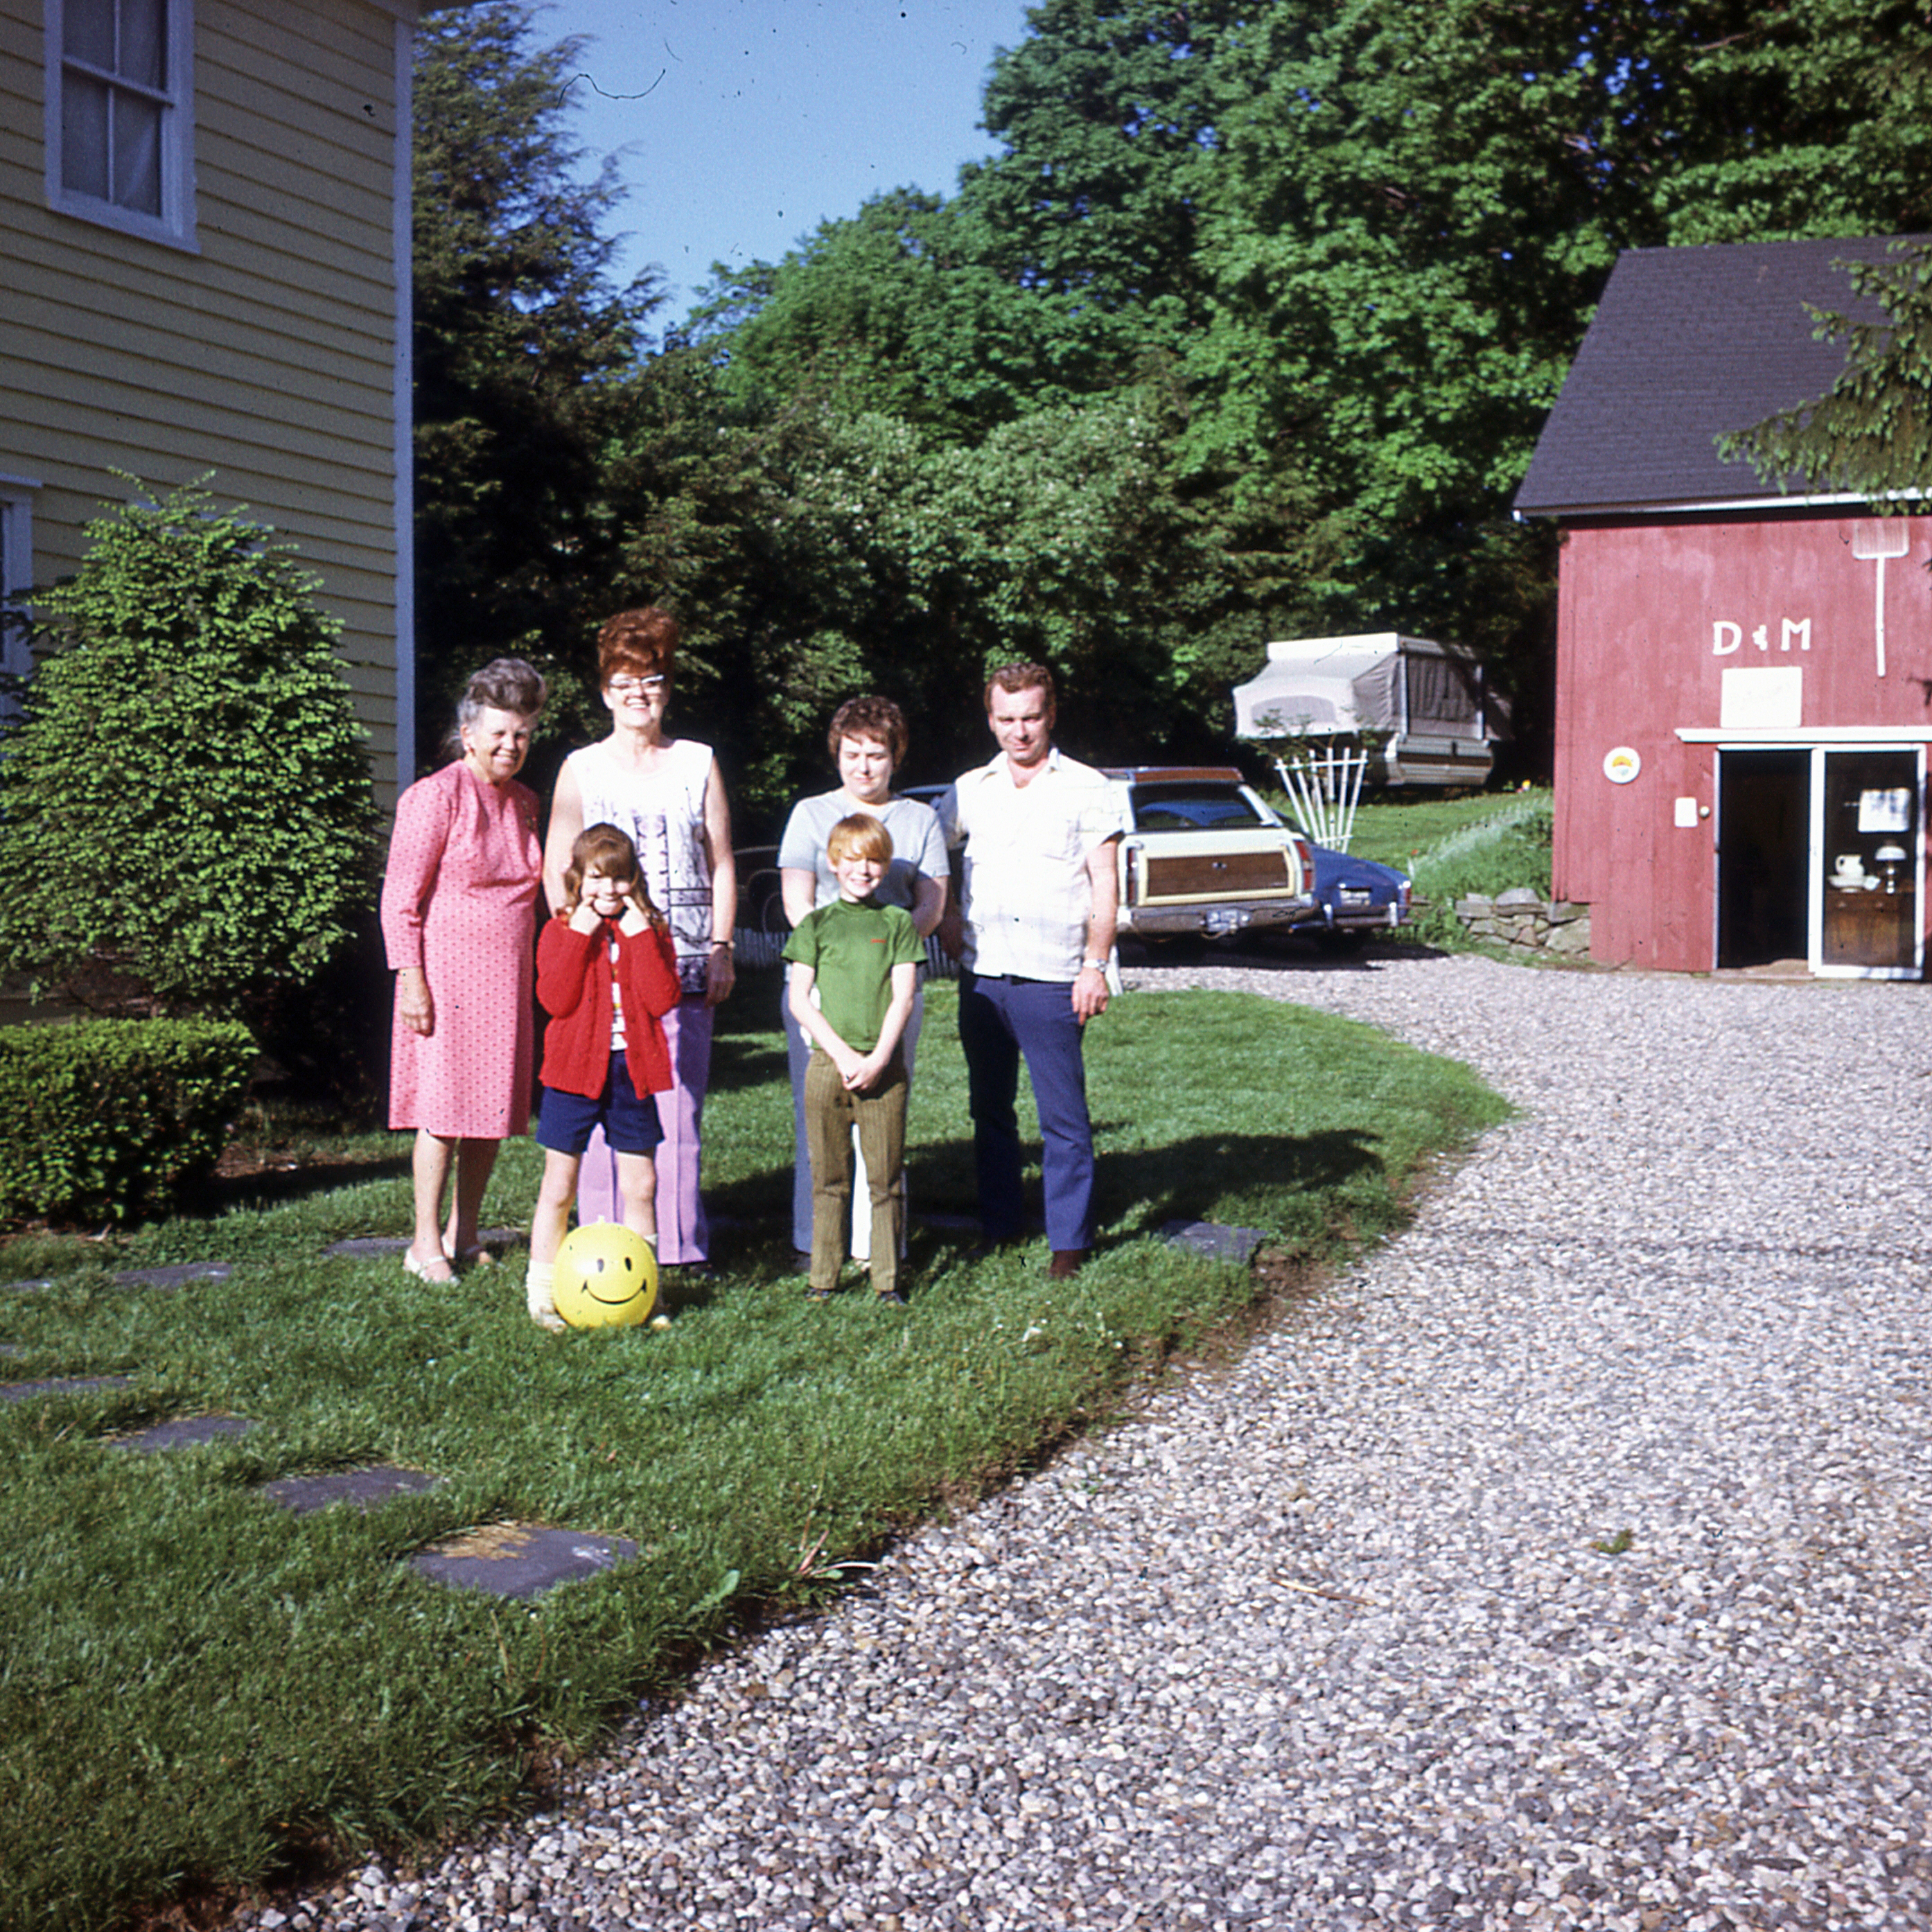
A sentimental longing or wistful affection for the past, typically for a period or place with happy personal associations. I’ve always been a collector. From the time I could understand that there were “more than one” of something. Mom and Dad were lifelong antique dealers, so access to “old things” was a blessing for somebody like me
Entire family outside the D&M Antique Shop – my Mom and Dad’s business
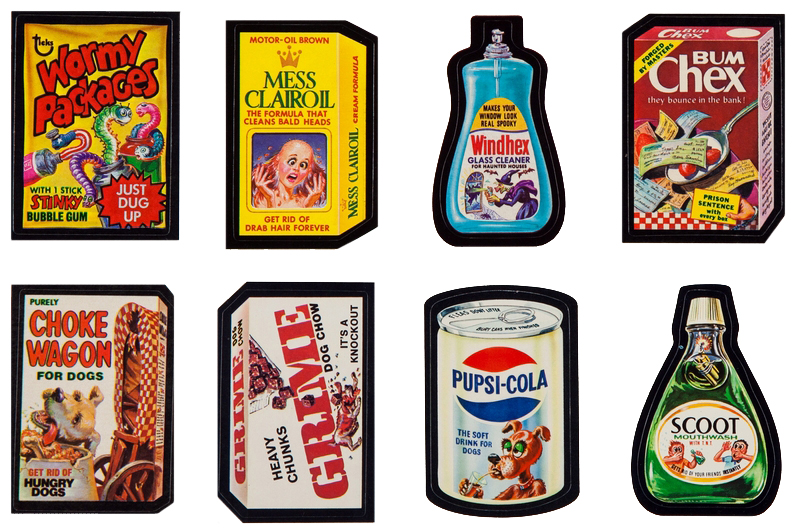
It all started in 1973 with Wacky Packages. This was before today’s network of convenience stores that now appear on ever corner, so I walked the short distance from our house the “drug store” to buy them. I still vividly remember the excitement of the journey to the store, paying with a few quarters and the intense hope that opening each new pack would bring. Topps did a great job mixing up the cards and stickers because I remember more pleasant surprises at finding a sticker I needed vs a duplicate of one I already had. The journey didn’t end there either. Monday meant I was back in school and could now trade any duplicates I had with other kids that were collecting as well. It was a cool time.
The Wacky Packages obsession followed with comic books (supplied by a kind soul from my Dad’s workplace). Dad’s friend gave him a paper grocery bag of a hundred or so comics every 3 months or so. I sooooo looked forward to getting those as a kid. Soon after I was old enough to collect pocket knives, harmonica’s, antique compasses and more odds and ends. The drive to collect didn’t end as a teen. I ramped it up a notch and began to collect beer cans – thousands of them before I was done, then old beer signs and lights as I got old enough to purchase them at antique stores and flea markets.
Samples of a few of the early Wacky Packages I collected
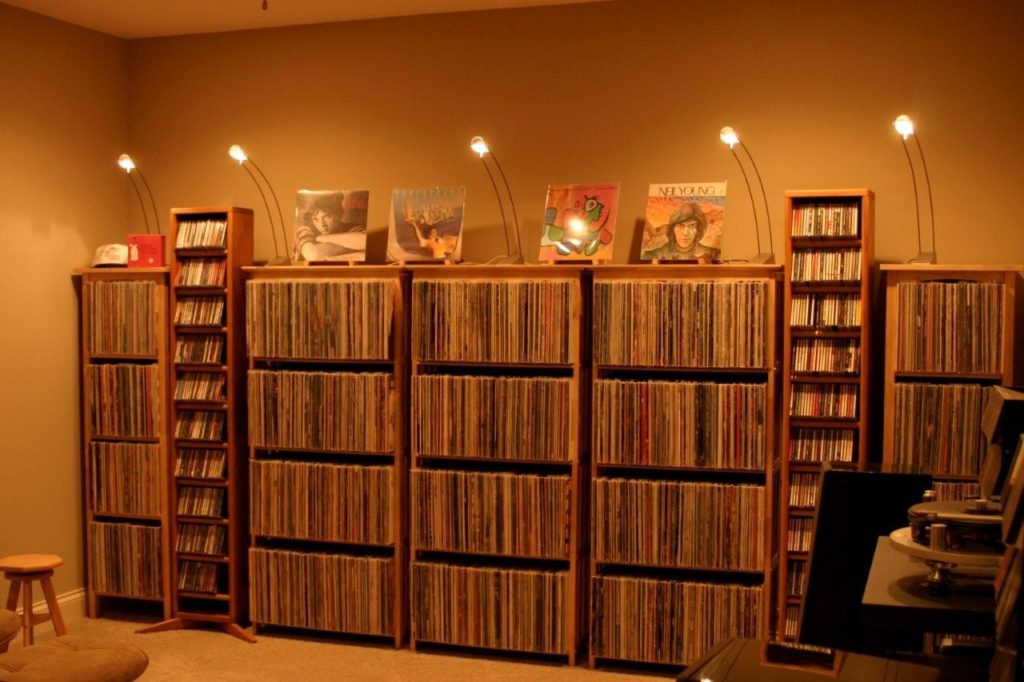
As an adult, the business of raising a family and the intensity of the workplace didn’t slow my collecting down one bit – the only thing that changed was what I collected. By the time I was in my 40’s I was collecting music (over 7,000 lps and thousands of CDs) and in-line with the entertainment category – I collect movies. I sold most of the record collection years ago but the movies continue to pile up with “classics” being my current favorite genre (think 60’s James Bond, Fred Astaire and 30’s Universal Studio Monster films). Then, a bit more than a decade ago and much more on topic – Pinball came along.
My music room. Over 7,000 lps and running a JA Michell Gyrodec SE
The story of how I got into Pinball is hosted right here on the blog – check it out if you’re interested. Today, I wanted to reflect on my lifetime of collecting, how nostalgia has always played a role and why Pinball has such a strong nostalgic pull.
I think of myself as an “old soul” or someone that appreciates the past. If you have similar leanings, I’ll bet it’s the same for you. The reason we collect is to REFLECT. Not that I want to “live in the past”. On the contrary, there is no way would I want to go backward, to live a life during an earlier time in history. My time as a late baby boomer was “just right” for me, but I absolutely appreciate certain aspects of what happened in the past. Sometimes the distant past and, as I get older now, more likely to be in MY past.
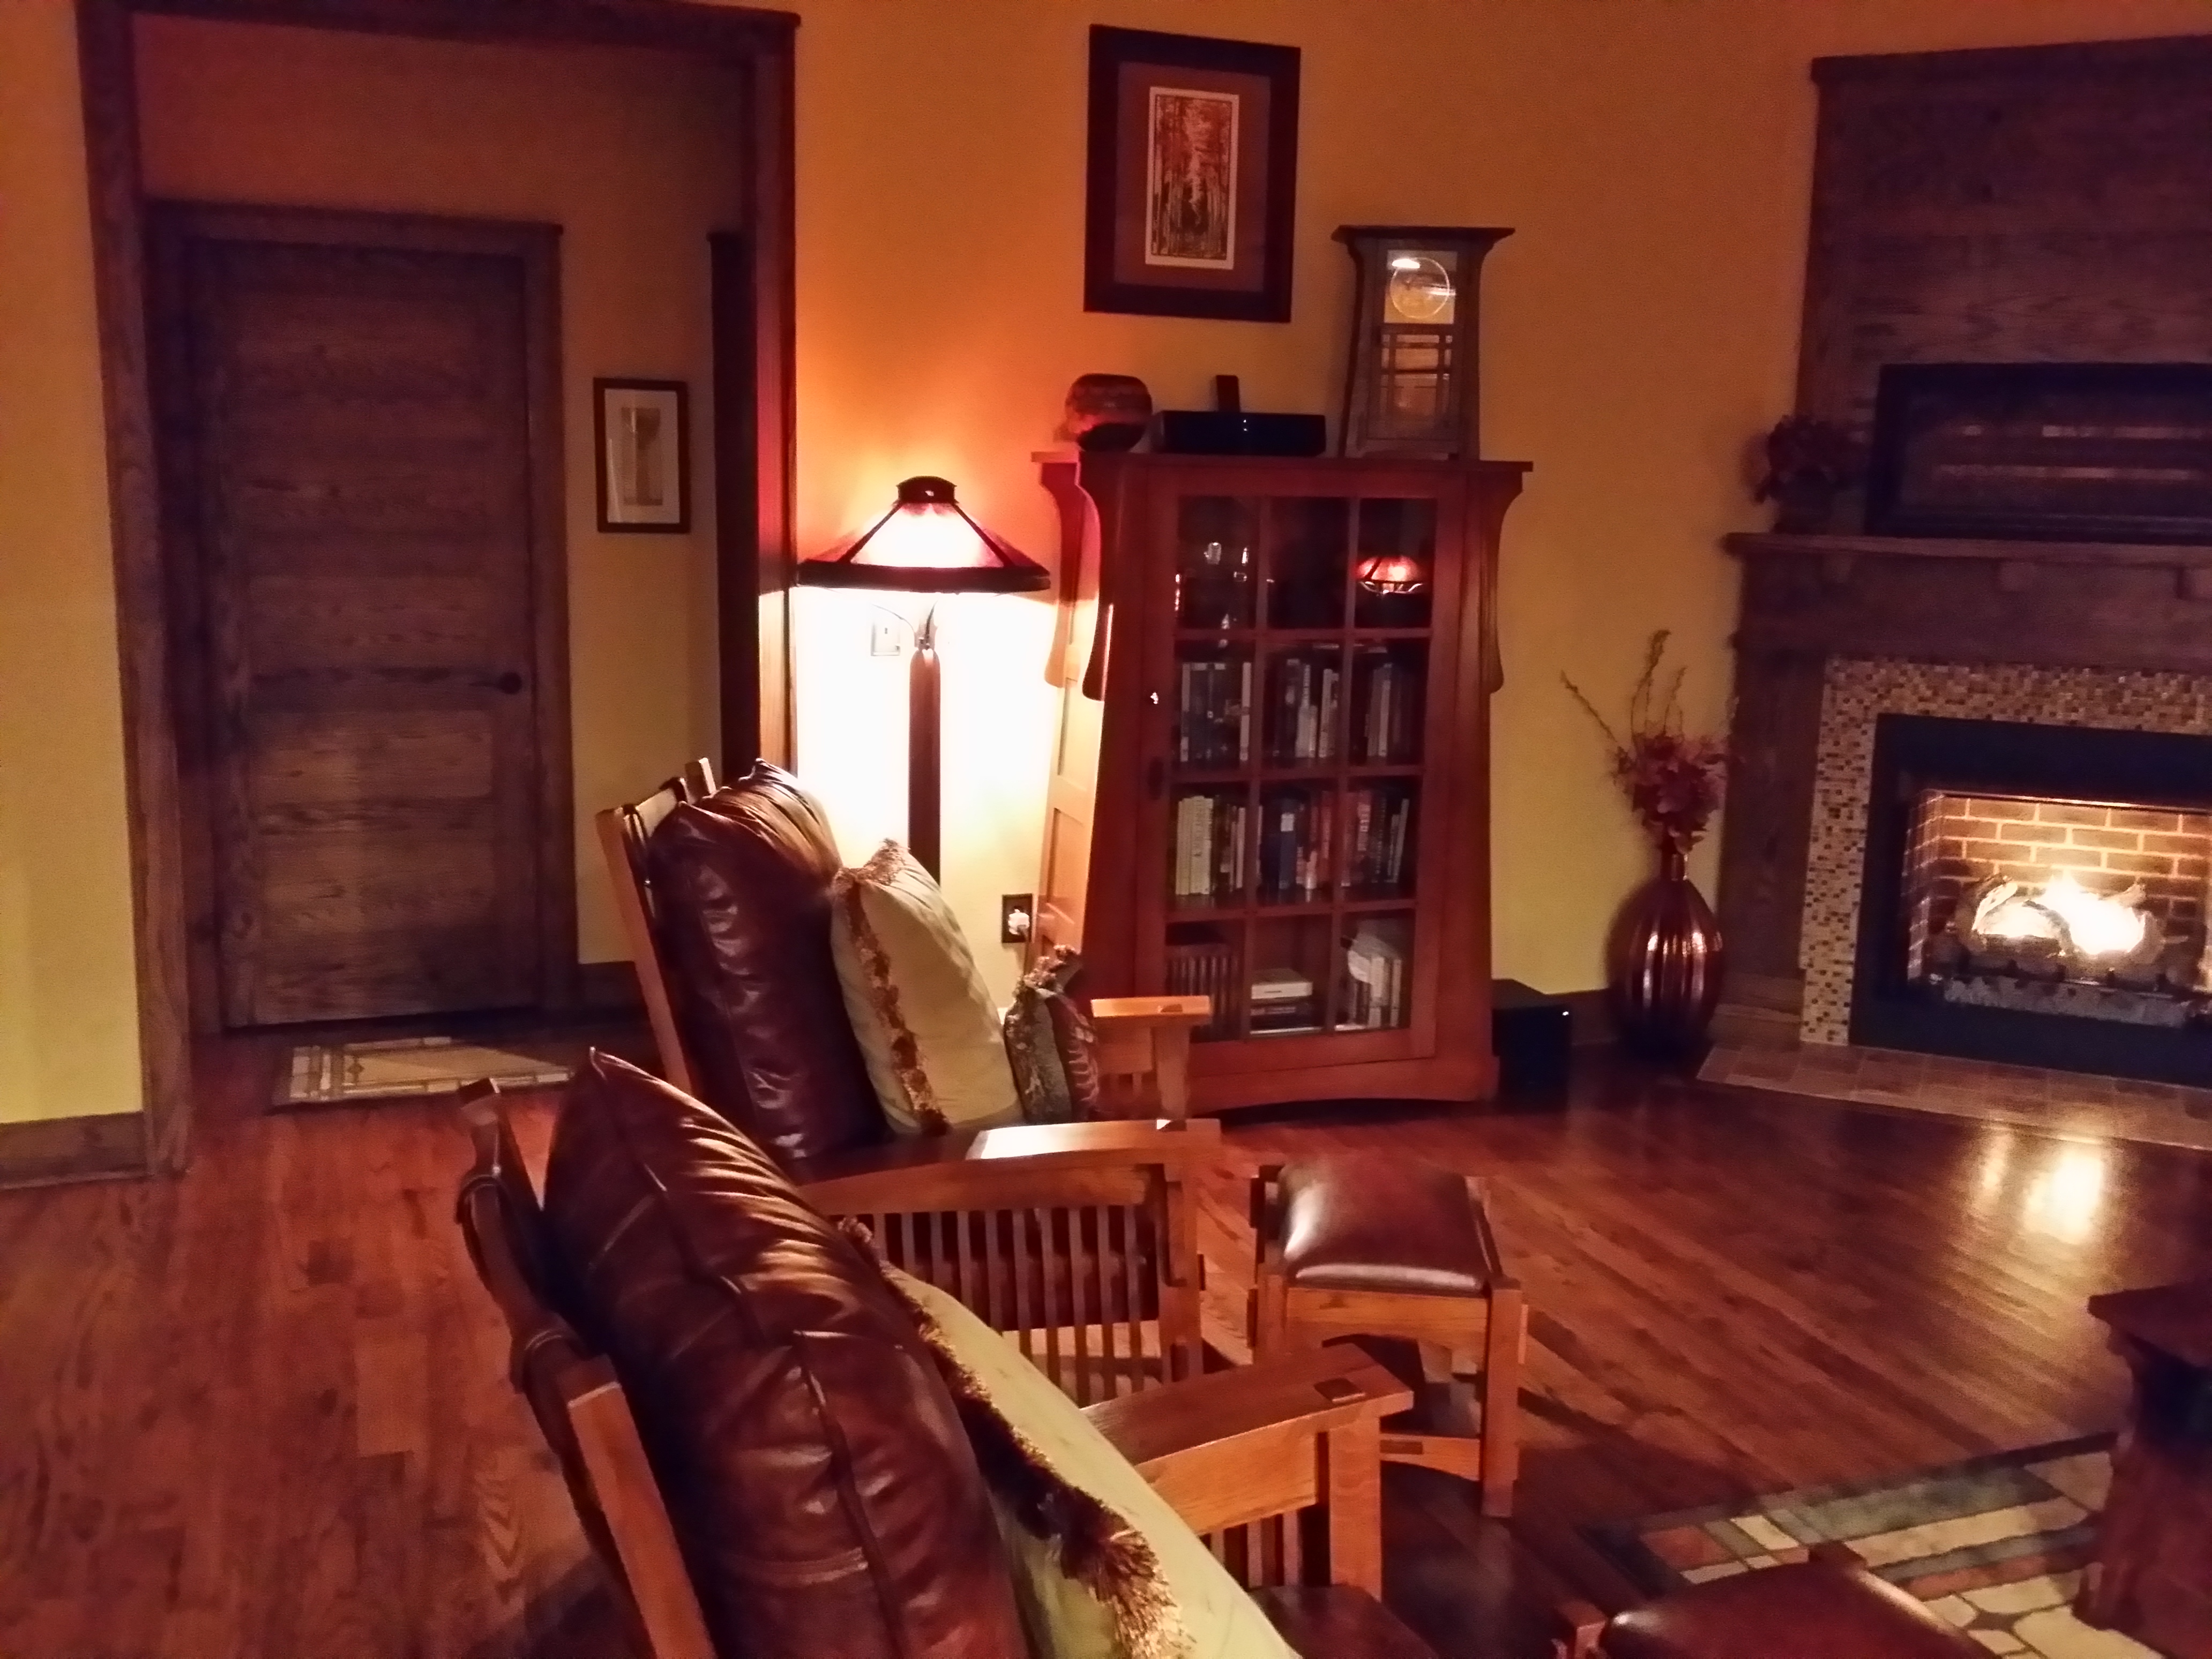
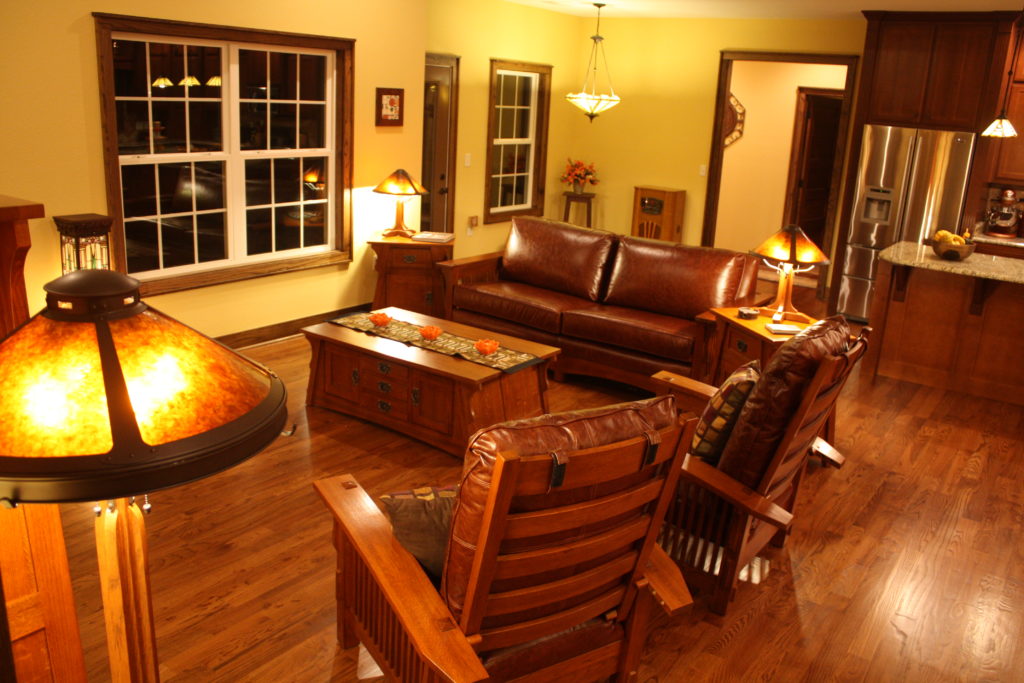
If I look back at everything I’ve collected over the years, the “reach back” so to speak was always about going back in time and feeling what it was like. It’s been about wondering and then discovering the answers to that wonder. It’s been about finding out, by holding, playing or watching something to see what it was like back then. What was “different” and why. A few years ago, I went so far as to outfit our entire vacation home in period correct mission furniture and decor. If you popped in for a visit, you would be hard pressed not to think you had just walked into a turn-of-the-century home in Chicago with a design ala Frank Lloyd Wright. I wanted to literally “feel” what is was like to live in that era – if only in my home through the furniture and surroundings. Over time, I’ve come to experience nostalgia in 2 distinct ways. Historically (like the example of our vacation home) and Personally (like the Wacky Packages). A few examples follow and because I wasn’t sure how to wrap them into a story, I’ll address each individually.
Our summer home – Mission style down to the trim and fireplace designMission style reproduction furniture
Historical nostalgia:
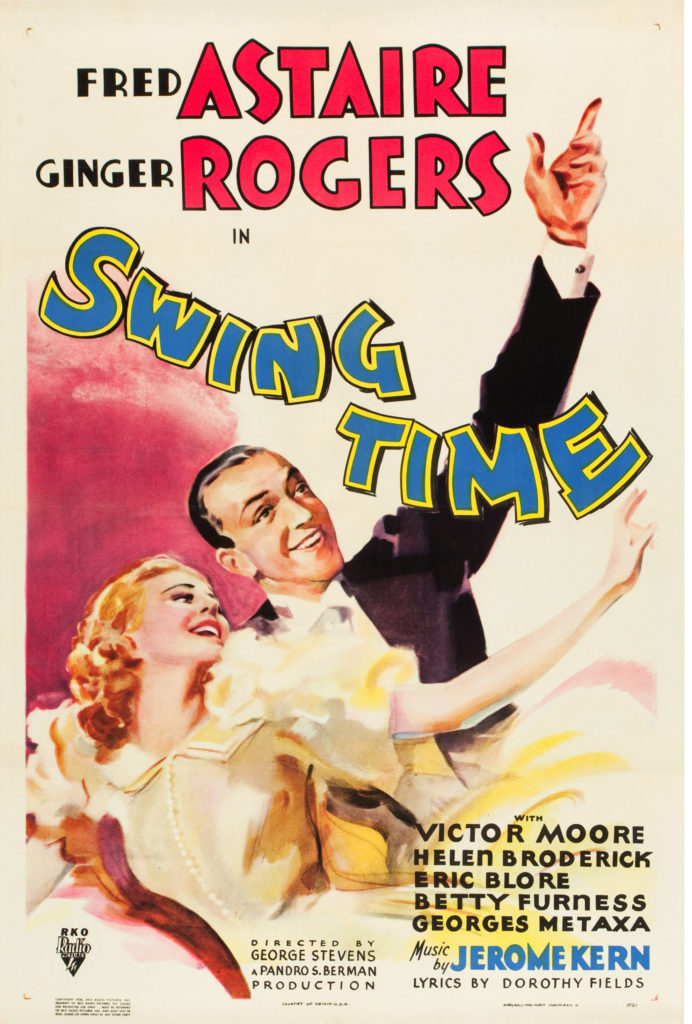
Fred Astaire & Ginger Rogers
The spectacle of Fred Astaire & Ginger Rogers dancing in “Swing Time” in a beautifully designed Van Nest Polglase movie set will never be replicated. We can only watch in awe as Fred and Ginger perform 4 of the most celebrated dances of all time inside one of the most beautifully designed sets of all time, to some of the most classic music of all time (“The Way You Look Tonight” – Jerome Kern). All of this released in 1936 to great success, but now considered to be a top 100 film of all time. A classic. Why a classic? Honestly it’s hard to articulate, but I’ll start with something obvious. Greatness. Better yet, combined greatness. In one spot and at one moment in time, 2 of the best dancing partners, the best set designer and the best music writers all met to create magic. I can watch that movie now and “feel it” and to experience that level of greatness now is to understand what it must have been like in the RKO 1930’s movie making years. This is the nostalgia that history buffs can related to. It’s a big piece of what drives my interest in Pinball, but as you’ll see in the next example, not all of it.
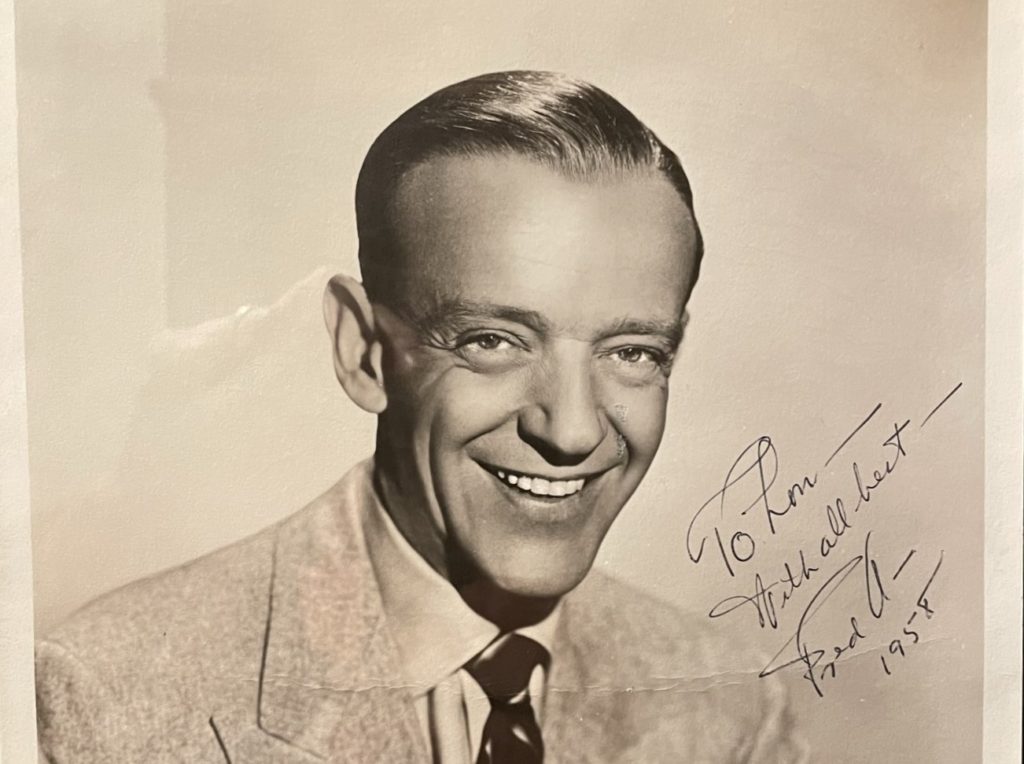
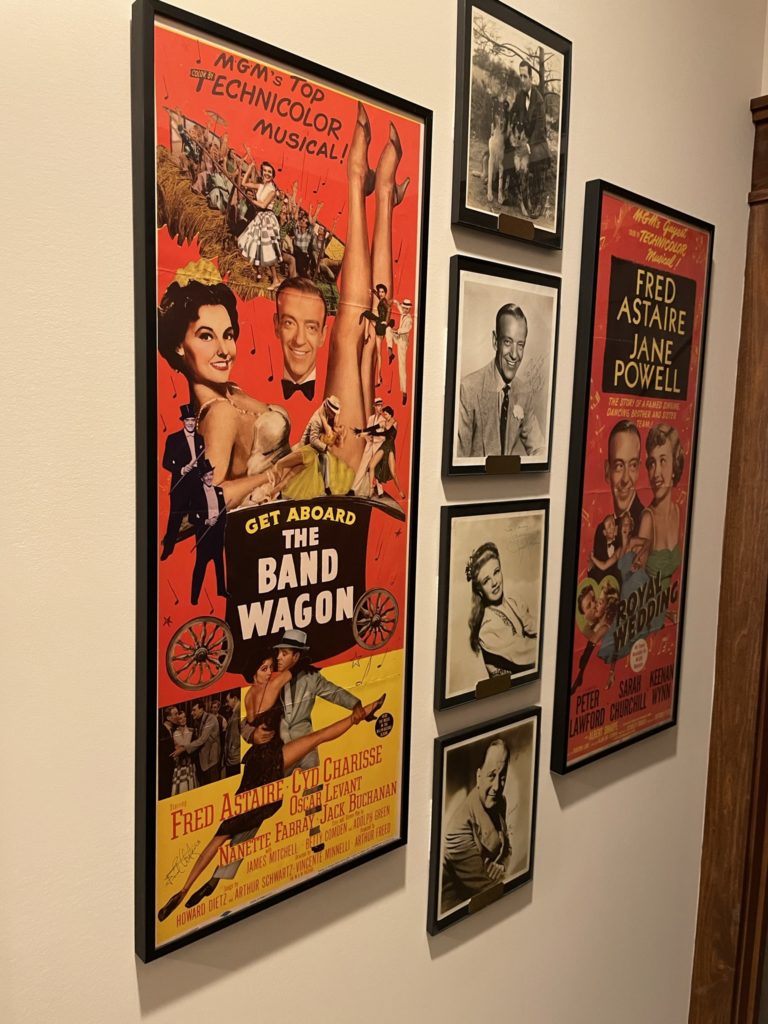
Astaire and Rodgers – Some of the best dance sequences ever put to filmFred Astaire autograph – Hanging on our wall at entrance to the theaterFred Astaire and Ginger Rodgers memorabilia
Personal nostalgia:
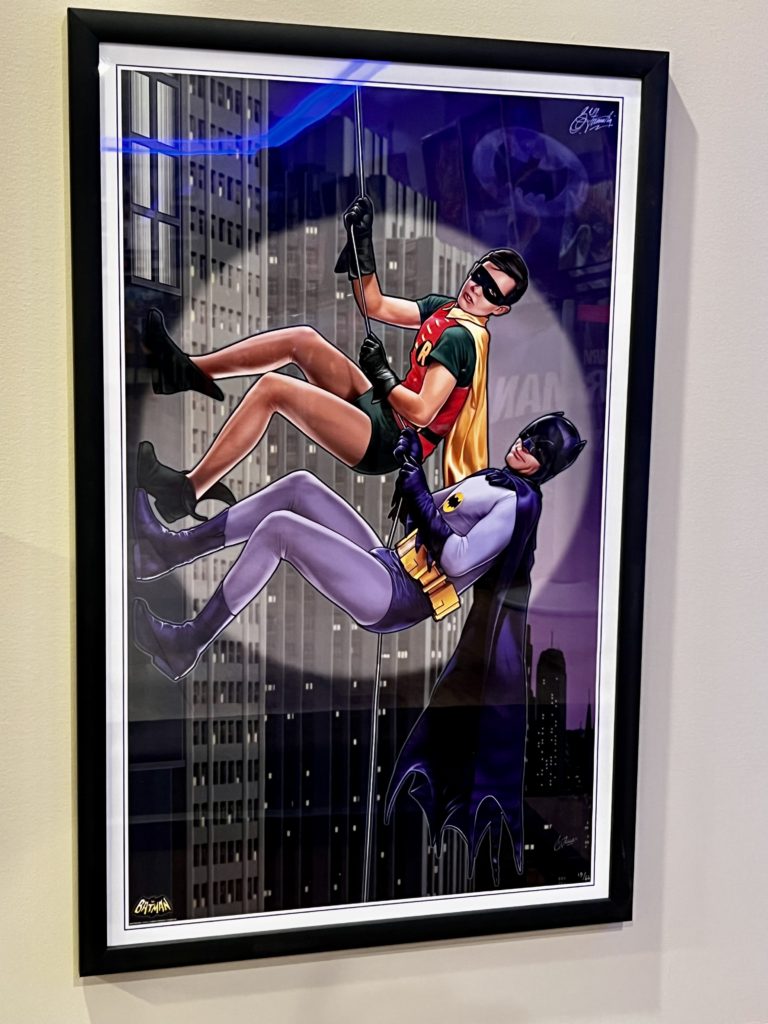
Batman ’66 – Adam West & Burt Ward
With Batman and Robin, the “look back” is more based on a heartstring tug than on an historical one. I like Batman because I have fond memories of it as a kid. I don’t have clear memories of the original releases (weeknights in the late 60’s) because I was only 3 when the first season hit TVs in living rooms across the country. However, coming home from school as a latch-key kid meant hours of late afternoon television and the Batman syndicated re-runs were always there. Memories during this time are good ones. Afternoons seemed to go on forever. Mom kept lots of snacks available and I almost always did my homework on the bus on the way home so my time was mine! I thought Batman was cool as heck. I was too young to get the “camp” humor, but instead enjoyed the storylines and the fact that Batman and Robin were the good guys and at the end of the show, they always won. Being a short, skinny red-head kid, I needed a hero that would always win. I wanted to see that the bad guys got their just deserts. At the time, I had no idea that Batman was a cultural and merchandise phenomenon, I just liked the show and much of my nostalgia around Batman is based on how I “feel” when I think back to that wonderful, carefree time.
Chris Franchi artwork – simply the best at capturing the 1966 Batman era
Pinball nostalgia:
I find it interesting that in prepping for this post, I had not considered that Pinball would fit “both” categories of nostalgia for me. I enjoy both the history of it AND (when the licensing is right) the personal memories of it as well. When I buy an older/classic game, I’m driven to learn all I can of it’s history. I want to know who made it. What they were thinking in the process. What drove them to certain design decisions. Importantly as well … what are they doing today? What has been “thier history”. Have they since exited the industry? Did they leave pinball land (Chicago)? Did they move to a related industry? Did they become famous in some way? I’ll want to learn about everyone involved in the game – not just the designer. How many did it sell? What made this game unique or special? The list goes on and on and if I hit a dead end, I may chase it for months before I give up (i.e. what happened to Dan Langlois – Truckstop, Radical, Black Belt, Gilligan’s Island)
Love my Truckstop – but what happened to Dan Langlois? What personal legacy did he leave?
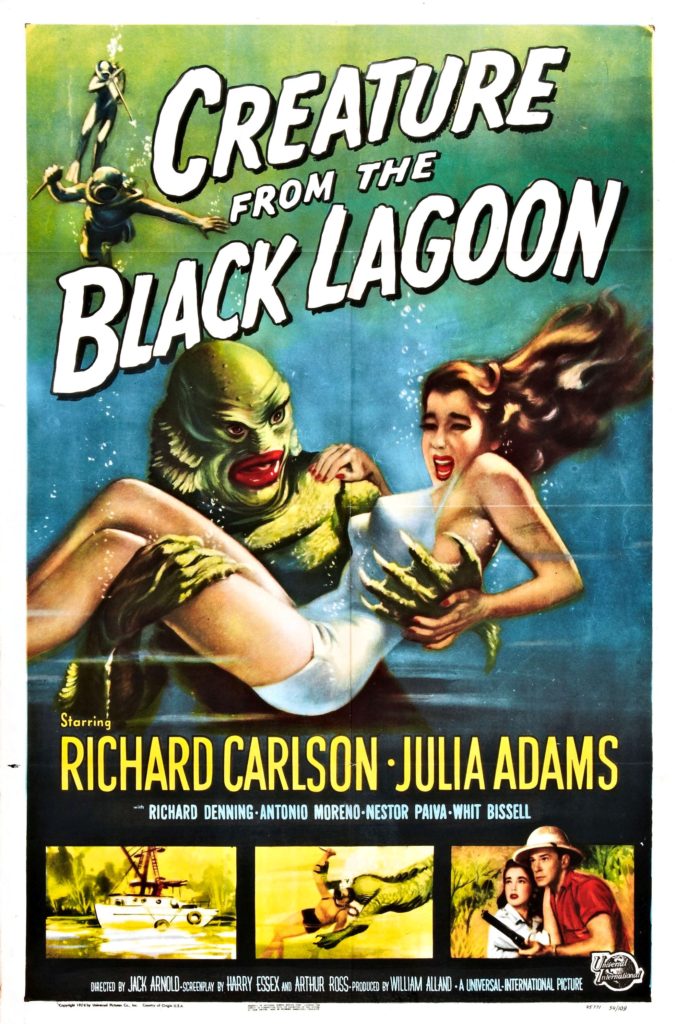
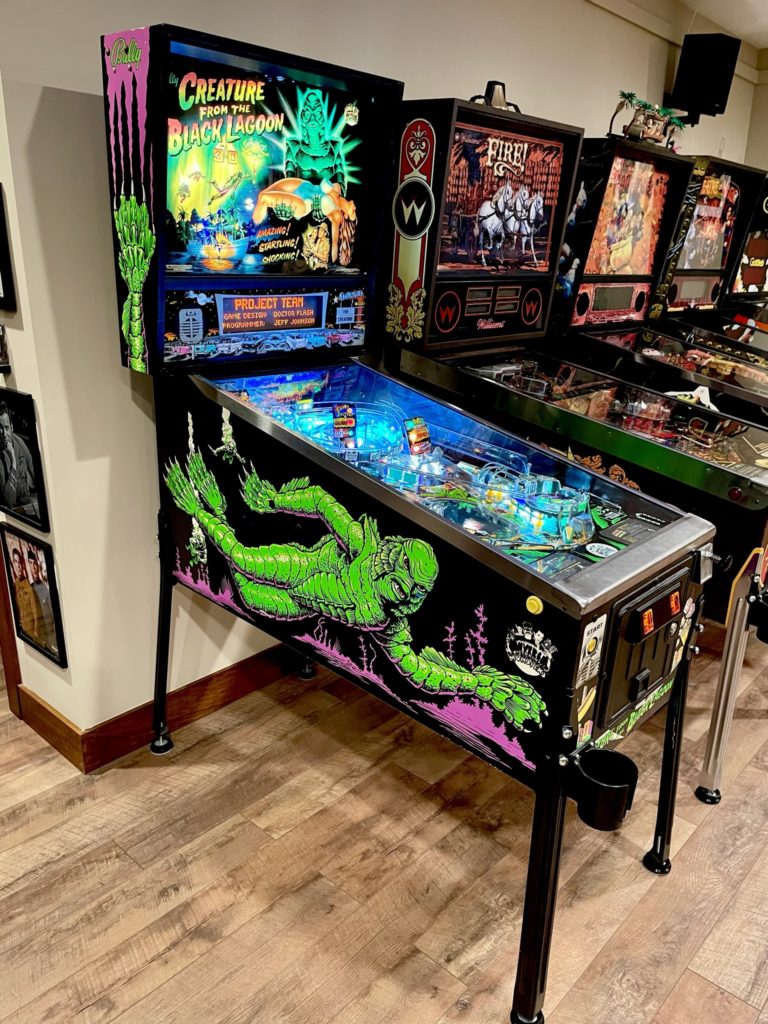
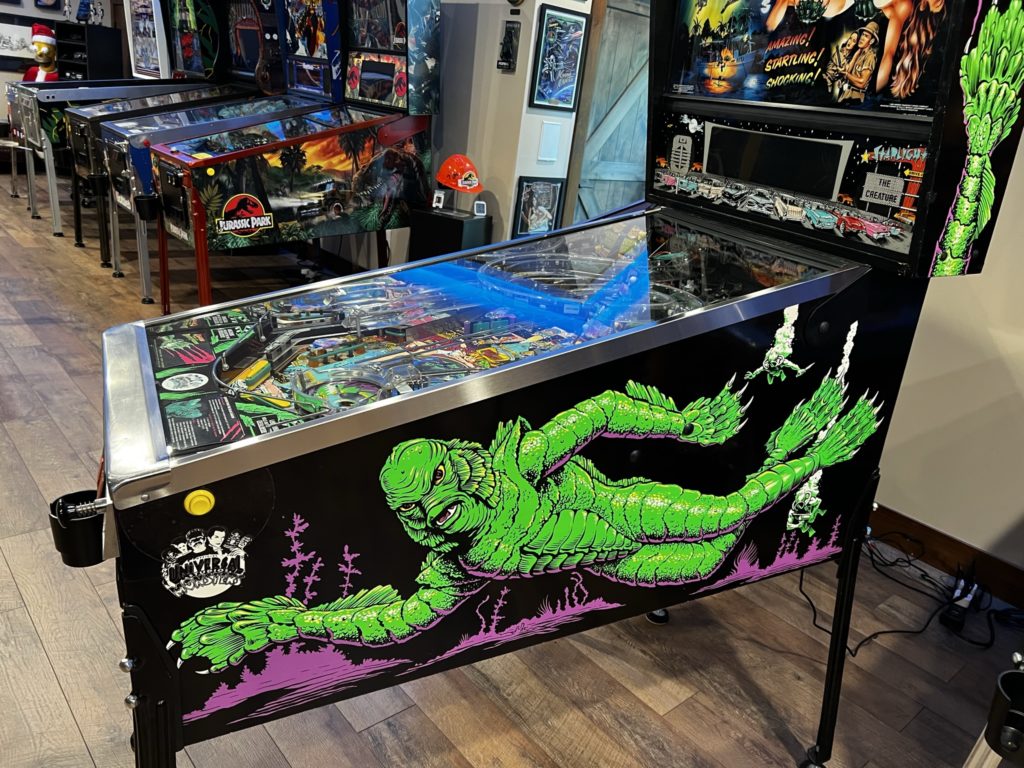
Creature from the Black Lagoon:
A double dip of nostalgia
Sometimes the history of the game coincides and aligns to drive nostalgia for the history of the theme as well. I recently picked up a Creature. You can read about it here. I found myself spending a ton of time researching this game. Until today, I did not realize completely why. It’s clear now. With Creature, you get both. All of the “who did what” that comes with the design history, PLUS the “holy cow there was a real movie” history as well. I’ll start with the latter.
Creature – the movie
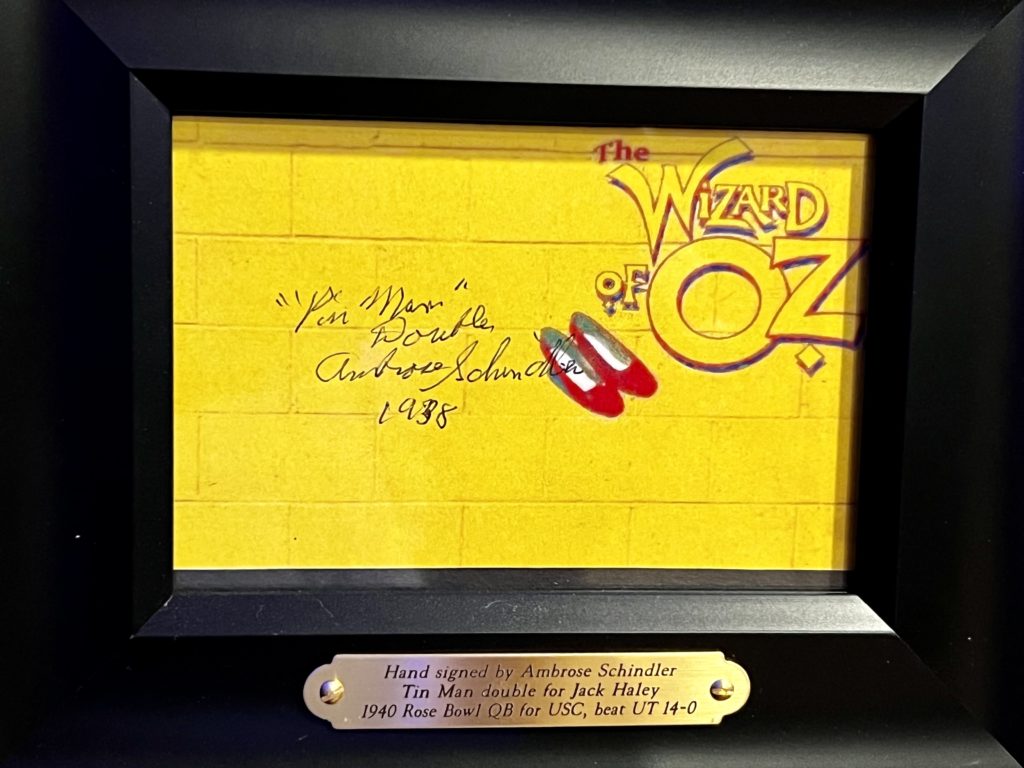
My deep dive into the historical nostalgia started with the movie. I watched it in 3D twice and as one might have 50 years ago – as a matinee! I went into our theater on a steamy summer day around noon, got myself a snack and a cold drink and just “enjoyed it”. I liked it so much I asked my daughter to join me a few weeks later and watched it again (she liked it too). Digging in, I discovered Riccou Browning (guy in the rubber creature suit) and Julia Adams (female lead) and proceeded to hunt down autographs for each of them. I later used the promotional plastics that were originally supplied with the pinball game to create a custom framed piece to highlight those autographs. Why? Those signatures are a lasting piece of each of those folks and, by gosh – they were there! If the movie connects with you, then in a small way, owning these autographs brings you a tiny bit closer to them – I’m keeping a little piece of that special moment in 1954 alive.
Signed by Ricou Browning and Julia Adams from the 1954 feature film
At this point I’m reminded of my earlier comments about greatness. The movie is interesting because it’s a good movie. If I had researched the 1954 movie to discover that it was a 3rd rate release with little love or appreciation, I would not be writing about it, but it was regarded as a good movie for it’s genre. The Universal Studios “monster movie era” from the 30’s to the 50’s was special. Some say the first Creature film was one of the best. I would agree. The monster as envisioned by the uncredited female studio artist Milicent Patrick is just perfect. He is both lifelike and out-of-this-world at the same time!
Soon after I got the game, I was chatting with my next-door neighbor about the movie when he shared with me that he was close friends with Ginger Stanley’s son and he was sure that she was in “those movies”. A quick internet search showed that indeed she was! Ginger was the stunt double in the third and final Creature film “The Creature Walks Among Us” released in 1956. That meant that she was the one on film during all of the underwater scenes. She was still alive and doing quite well. As I write this he is arranging for me to have a call with Ginger to simply chat about the movie – I’m giddy about it!
Why so much interest in a movie? The Creature movies take me back to a time (before I was born mind you) where the “violence” in a movie might only go as far as a punch and a bloody lip. Where death takes place “off the camera view” and outside the viewing area of the audience. You know someone was killed but the graphic details are missing. The movies are in the monster/horror genre but not “horrific” in imagery. There are no beheadings, no internal organs exposed, and no cussing. These movies are entertaining not shocking. They leave memories not nightmares. To use an overwrought phrase – they are good clean fun. I see enough misery on the news and Facebook. I want more entertainment and less shock and awe in my movies. 50 years ago they made movies like that and I’m feeling nostalgic for them.
The now famous Universal Monster movie – Creature from the Black Lagoon
Creature – the game
I think the “greatness” comes in for Creature Pinball when the totality of the game is considered. A good monster movie, tied to the much loved Bally era of pinball, integrated into a the home run theme of a “drive-in”! Taken all together, It’s a winning recipe and one that brings both types of nostalgia to the forefront. If I was to pick just 2 images to use to “picture” 1950’s America, one would be a ’55 Chevy Bel Air, and the other would be a Drive-in movie image:
– What baby boomer did not spend time at a drive in?
– Did not “kiss their date” (or more) at a drive in?
– Does not have fond memories of a drive in?
The pinball game is based on a “Drive-In” movie themeCustom lit pop bumpers on my Creature from the Black Lagoon Pinball
Digging deeper into the historical side, I was always struck by the original music in the pinball game. It sounded so “50’s” that I searched for hours trying to find the song and writer but to no avail. I used Shazam to try to ID the song – still no luck. Of course there are licensed songs in the pin. We know their titles as they all were famous when the game came out in 1992. I’m referring to the music that plays when the game ends. There are no lyrics but, if you are like me, you were sure trying to add some as you hummed along. The song seemed so familiar. It just HAD to be a famous 50’s song right? Nope. That music was an original composition from Paul Heitsch. Paul is now fully committed to the world of audio books as a highly regarded voice talent. I reached out to him via email a bit ago and will amend the story here if I get a reply. In short, bravo Paul for creating a piece of original music that captures the essence of the 50’s and drives a level of nostalgia even from it’s more modern origins -well done sir!
Swinks Snack Bar mod installed in my game – nostalgia in the flesh!CFTBL as we Pinheads call it – in all her nostalgic glory
Intersecting Greatness
As I walk around the Pinball Loft, I can see the nostalgia driven collector in me everywhere. Jersey Jacks Wizard of Oz Pinball arrived as a 50th birthday present for my wife, but so did a dozen autographs ranging from Mickey Carrol to Ray Bolger to much lesser known associates like Sydney Guilaroff (Judy Garlands hair stylist) and Ambrose Schindler (He was a Winkie Gaurd and Jack Haley’s stunt double for the Tin Man character). You might wonder why I would go to such lengths to collect an autograph from Ambrose Schindler. After all, he’s not credited in the movie. Well, his connection to my story and my home town in East TN is as fantastical as the movie itself was. You see, a year after the release of Wizard of Oz, Ambrose was the starting quarterback for the USC Trojans in the 1940 Rose Bowl where he scored BOTH touchdowns (passing and running) to win the game over MY University of TN Volunteers! At that point in time, UT had been undefeated in 23 games and had not been scored upon in the prior 16. Truth is much stranger than fiction and all of these people, characters and connections fascinate me. Why? Greatness. Wizard of Oz is considered by many to be the single greatest film of all time. The movie almost didn’t get made, almost didn’t get made in technicolor and almost didn’t have Jack Haley as the “perfect” Tin Man. Sometimes I wonder if nostalgia and fate are intertwined. The prior story hints at it but the next story cements it.
Ambrose Schindler – Truth is much stranger than fictionSydney Guilaroff – Hair dresser to Judy Garland
Our little girl was just 5 years old in the year 2000. We were visiting Nashville just a few hours west of our Knoxville home and saw a poster/lithograph shop in the mall with a short line of people streaming out the door. It appeared they were waiting for something or someone. We peeked in and saw a sign saying that Mickey Carroll, one of the surviving Munchkins from the Wizard of Oz movie would be there signing autographs. We jumped in line and (it wasn’t a long one) and were soon face to face with all 3.5 feet of the sweetest gentleman you would ever want to meet. Mickey was personally recruited by Judy Garland to be a cast member on the Wizard of Oz movie. They met when both were under contract to MGM and attended school together (along with Mickey Rooney). I learned that he left acting in the mid 1940’s and went back to the family business of manufacturing headstones for gravesites. He sold that business in 1996 and then did charity work and autograph appearances. He spoke to our daughter for a length of time, we got to have our picture taken with him and he signed a large poster print that would be framed for us before we left for the day. Taylor, that little girl of ours, got married last fall. She’ll soon be 27. Mickey is gone now. 9 years after we met him that day in Nashville. The rest of the cast is gone as well. Jerry Maren, the last surviving Munchkin in May of 2018 at age 98 and Ambrose in 2018 at age 101 was the last. Each was a piece of greatness. For me, each created a feeling of nostalgia for the year 1939 when everything came together perfectly to create a nearly perfect movie.
Poster signed for our daughter by Mickey Carroll
One more and I’ll wrap it up. I was always nostalgic about it but my purchase of a Space Station pinball just reinforced that nostalgia. You guessed it, I’m talking about the Apollo space program of the 1960’s. If you’re a baby boomer, you LIVED this. When I was a kid, there were Halloween space suite costumes, space books in school, planetary studies, rocket ship models and endless sci-fi shows related to space. As a nation we were transfixed by it. Kennedy’s challenge to reach the moon is still regarded as one of the boldest and best mission statements ever written, proclaimed and then achieved. He challenged us to “Land a man on the moon and return him safely to earth, before the decade was out”.
We did it. We landed on the moon in 1969. Many will say that it was the greatest achievement by men in history. It would be hard to argue that it was not. The math we used to get there was re-calculated on slide rules as computers were very new and not yet fully trusted. At 160 million horsepower, the Saturn V rocket remains the most powerful machine every created by man. We flew nearly a quarter million miles in total and we came home safely. To put a cherry on top, the average age of the team in the control room at the time was 28 – remarkable. How incredible is it that many who witnessed the moon landing remembered life before cars, electricity, telephones and indoor plumbing. I was around in 1969 and at 6 years old have vague memories of the events but no context of what was really underway. As an adult, I now appreciate the scale of the effort and have a deep nostalgia for what was achieved more than 50 years ago.
Apollo Mission Directors – young men that got us to the moon
I started collecting memorabilia connected to the Apollo missions a while ago. Finding the autographs of Gene Krantz, Chris Kraft and Glynn Lunney was accomplished quickly and all hang on my wall with pride. Harder yet was to find an actual piece of that Saturn V rocket. After a year of looking I found a stainless steel fuel filter (still in the bag and sealed with the original 1969 Rocketdyne inventory sticker) from one of the 5 fuel pumps that moved the fuel into the rockets burn chambers. It’s a NOS piece, that has never been to space, but rather was a spare part produced by Rocketdyne for NASA. It’s beyond cool just to hold it.
The Saturn 5 Rocket fuel pumps had 55,000 horse power EACH. That power was used to send 3 tons (6,000 pounds) of fuel to each of the 5 engines every SECOND for almost 3 consecutive minutes. To put it in perspective, the 5 fuel pumps alone developed 275,000 horsepower and in 3 minutes pushed over 5 million pounds of fuel through the rockets. Impressive and a level of greatness that has never been duplicated. Today, the Saturn V rocket stands as the most powerful machine ever built by man. Hanging in the Loft is a small piece of that greatness right below the autographs of 3 of the young men that helped us get it done.
Stainless steel filter from an Apollo Saturn 5 rocket
So what to do about nostalgia?
Go ahead and celebrate it! Enjoy history’s greatest moments. Notice and appreciate the past but – watch for moments of greatness right now.
TODAY’S moments will be the nostalgia of our children. Those people, those movies, those events will be the things our kids look back on with fondness
Along the way, If you get a once-in-a-lifetime chance to shake the hand of someone that got a once-in-a-lifetime chance to be in the greatest movie of all time – take it
Engage in those moments, attend those events. Wait in line for a bit. Be the person to say “I was there”
Get Off My Lawn!
I love spending time with guests up in the Pinball Loft, especially when they are interested in the history of Pinball or to simply watch them really enjoy playing the game.
Alternatively, when I get the occasional younger visitor, I’m invariably disappointed to learn that they simply don’t care about pinball
Pinball analogue glory
I’ve had enough folks visit the loft over the past few years to notice a few things about the above situation. I’ll start with the positives. When a new guest pops their head into the Loft, it’s always the same “Disneyworld” type response. Wow! Holy crap! Whaaaaaaaat?? You’re kidding ME! My gosh! … and a dozen other superlatives. I absolutely love to see their faces when they peek around the corner after the long climb up the staircase and see 40 games lit up and a life size Spiderman and Iron man watching over them. It still puts a smile on my face to have them experience the same wonder that I experience when I’m around Pinball.
Life sized, reach out and touch super hero’s in the Loft
Once in a while, but not often, one of those visitors will be a “player”. Someone that’s been around Pinball and played the game. If they haven’t fallen in love with it, then they have at least mastered some of the basic skills and they enjoy the game. I absolutely adore spending time with these “interested and capable” players. They don’t have to be accomplished on the skill side, but flipping with one flipper at a time is a great foundation. With even that basic skill, the 2 of us can enjoy a few games while accomplishing objectives along the way. After all, “playing the game” is all about getting somewhere, stacking up a score, etc. When I get to play with someone that can do that – whatever their overall skill level, it’s a joy. We are connecting on the same wavelength – playing Pinball, achieving game success and learning about each other along the way. Love it!
Keith and Bonnie enjoying a game together
Younger folks, on the other hand just don’t seem to care. Not all of them, but in my small sampling – “most” are not interested. I’m instantly deflated when I sense this. Don’t get me wrong. If the young person plays NO games (not video games, nor outdoor sports) then so be it. They may be adverse to the competitive nature of games. I may not understand that but can appreciate the fact that they are not competitive. I’m talking about the youngsters that DO play games/sports. They are competitive. Many play video games for hours on end. In fact, statistics show that over 70% of Gen Z and Gen Alpha kids play video games on a regular basis. For some of these kids, it’s as much a social event (though it’s done online) as it is “gaming”. While I can appreciate the interest in video gaming (I played a bit in my college years long ago), I don’t understand the “ho-hum” response to Pinball. Not at all.
The Loft is a gathering place to socialize AND play Pinball
After all, Pinball provides everything that video gaming does and so much more. Socializing? Sure … you’re in the same room! Yes, I understand that during a single Pinball game you are playing alone, but multi-player games allow you to at least compete for score. Video wins here to some extent because in the virtual world, you compete “real time” against other people – in Pinball, it’s turn based. Maybe I give a point here to video for being more direct in a competitive nature. When it comes to unique gameplay, Pinball gets the nod. Every game is analogue, every game is one-of-a-kind unique. Video can’t deliver that (though it can appear to). Pinball’s physicality also gives it a check mark in the win column. It’s real, not digital. You can see, touch and work on the game. You sometimes have to travel to play one. It invites you INTO the real world, not OUT of it like video games do. Again, nothing wrong with a virtual world. I worry though that some younger people might get lost in it.
The physical “world under glass” of Pinball – one advantage over video games
We had some relatives visit last year. Their 22 year old son was with them. His reaction when seeing the Loft for the first time was almost the same as others – if a little muted. He still had a smile on his face, but if a face could have a “comma”, his did. After that “comma” were the words “so what”. Not in a snarky way, but in a “doesn’t mean that much to me” way. He played a game of Ghostbusters, shrugged he shoulders, struggled to make eye contact (or any form of contact) and asked if he could be excused. His 3 minutes in the Loft were over. He didn’t get it and he didn’t care about it. He was respectful, but wanted no more of it. Like I said, I’m saddened by that. It’s not the first time it’s happened (or the 2nd). This is a pattern I see repeated in my interactions with younger folks even outside the Loft and Pinball community. No, I’m not referring to the lack of love for Pinball, but the the fact that social skills seem to be on the wane. I’m not sure why. It might be the sometimes isolated world of video gaming, it might be that ALL of us spend a lot of time staring at our phones. Now before this turns into a “get off my lawn” diatribe, I’ll share that I also know many folks (young and old) who play video games and are highly socialized, great communicators and have a variety of interests alongside video gaming (including Pinball). This commentary is more about the disappointment I feel when I share something I love with someone that could care less. I’m not really worried about the “next generation” and the “future of Pinball”. It’s not a judgmental moment for me either. They either like Pinball or they don’t. I’m curious as to why …
Why don’t they see the stunning artwork, glorious sounds and insane LED light shows?
Why don’t they appreciate the randomness or the analogue experience?
Why don’t they want to control the ball and bend the machine to their will?
Why don’t they get excited to “play for free”?
In other words … why don’t they respond like ‘I would have” when I was 17 years old? Probably a lot of reasons. Some of which I may get right in the next few thoughts – most of which I’ll probably miss (I’m not 17 anymore).
My sister and I in the ’70’s – entertainment was indoor games or outdoor fun!
I think the free play part is a lot about the different era’s we are living in. When I was a kid in the 70’s entertainment was found OUTSIDE the home. Many homes didn’t even have a way to play music. Those families wealthy enough to afford a record player had just a few records (see image of my Mom and Dad’s Magnavox console). If you wanted to hear a favorite you “waited” to hear it played on the radio OR you played it on a Jukebox at a bar or diner. You WENT to the movies, you did not play a movie on your DVD player or stream it via Apple TV. Much of the structured entertainment of years past was “pay as you play”. Today, our homes are entertainment centric. Pick any movie and stream it on demand. Pick any video game and play it when you feel like it. Pick any song and hear it when you want to hear it and where you want to listen. Today’s entertainment is pay in advance (buy the console, monthly subscription) and consume as you wish. Free Play means nothing to today’s 17 year old. All of his entertainment is “free play” (with a small monthly fee that he may or may not be paying).
A generation ago many Americans got their (on demand) music from a Jukebox in a public space
How about all that art, those lights and sound? As good as it is in all of it’s “right in your face real” glory, it can’t really compete with the digital world can it? The impossible IS possible in the digital world. Colors can be digitally saturated. Movement can be enhanced. Sounds are reproduced in the highest fidelity and pumped directly into the ears via headsets. The modern video game presentation is a high end, Hollywood capable production designed to work perfectly and flawlessly to great effect. The modern pinball game, is more an assemblage of those 3. Imagery, where it relates most to the game is rarely looked at (DMD or LED panel in the backbox). The visual elements that do the MOST communicating to the player are “blinking lights” for gosh sakes. The lights, the sounds and the imagery on the display are all delivered on independent platforms. The video games digital platform forces (very effectively) all of these elements to move/behave together. This is both a disadvantage for Pinball and at the same time, what makes it so unique. When Pinball pulls it off, it’s magic. Unfortunately, video gaming has an advantage embedded in its platform.
Modern pinball games are a work of art. Jersey Jack GnR CE
My last point is to address why there seems to be little interest in the gameplay. Why some young players just don’t care to want to “play well”. One word. Fantasy. I think Pinball will always struggle to “take you somewhere else”. It’s less immersive than a video game. I’m not sure I want it to be. After all, in Pinball you are playing a physical game. Though the goals and the theme may change, you are always left with a silver steel ball and some flippers to get the job done. You KNOW you are playing a physical game. You are AWARE at almost all times that you are standing in front of a plywood box. Yes, we all get “lost” sometimes in the moment. When the call-outs on Lord of the Rings Pinball game scream “To War!” … for a ever so brief moment, you might just think of yourself as one of good guys ready to fight to the death, but then you see the blinking lights and you know your real mission is to hit those shots, not swing a sword. Video games are different, they are MEANT to immerse you. They are DESIGNED to push you away from reality into the fantasy of the game. They tell stories in a way that even when poorly accomplished, are still recognizable and enjoyable. Pinball can’t win here. Pinball CAN improve here (think JJP Guns ‘n Roses concert in a box) and MUST get better at gluing together it’s disparate elements into a more cohesive story – but ultimately is outmatched by a game that has VIDEO as it’s primary delivery mode for gameplay.
Am I angry and upset about all this? No.
Do I think “kids today” are lacking something I had when I was their age? No.
Do I hate video games and think they are the beginning of the end of civilized society? No.
I do wonder though where this all leads. I wonder if the new digital world of entertainment is “better” than the analogue age I grew up with. I’m not sure. After all, escapism can be found in many things – from drugs/alcohol to untold variations of other (less destructive) forms of entertainment. I know it appears that I set this conversation up as video games vs pinball. It was done simply to compare the two and potentially discover the strengths of each. Young and old alike have a huge variety of entertainment to choose from and “not choosing” pinball does not immediately translate to “dislike”. After all, I was almost 50 years old before I discovered my love of the game. If pinball is to remain a viable form of entertainment into the future, it requires that a new generation of players discover the same thing I did – a love and appreciation for a hands-on game, that in its modern form, has brought joy to so many for more than 75 years.
I hope they do.
Spooky Swap
Part 1 of 3: Haunted House Pinball
It’s October as I begin to write this. No, I’m not rushing to finish up my Gottlieb Haunted House playfield swaps because it’s October (Halloween), it’s just time that I get to work on it. I also know that there is no way I’ll get the game done by Halloween but read on to see how it all ends!
More than a year ago my buddy Keith Burns called to let me know that a friend of his had a pinball machine they wanted to sell. By the description it sounded like a Gottlieb Haunted House. I called the number he gave me and talked with the gentleman about the machine but the price was just not quite right for the condition it was in. I had always wanted a Gottlieb Haunted House but it needed to be in pristine condition or “cheap” so I could restore it. He sent pics and could see obvious amounts of wear on the playfield – pretty common on this title. I decided to pass on the purchase.
A year later and I heard back from Keith that his friend was still looking to sell – and this time at a lower price. His buddy shared the new price with me via text, and I bought it on the spot with a three word reply “I’ll take it”. I was assuming that it was a mostly working machine (it was) My plan was to order 3 new playfields from Mirco in Germany. Then get a new set plastics, new Pops and any new posts/hardware needed to make it look/function great.
On the way home from Nashville with Haunted House
I drove to Nashville to pick it up and arrived in the early afternoon in May of 2021. I took my wife’s new Jeep on it’s virgin pin hauling trip. When I arrived, I was surprised to see another pinball game in his house. It sounded like he was a relatively new pinball person and was probably only casually involved in the hobby. I was correct on both accounts, but still he had another game. The other game was a pimped out Munsters. I stared at it for a bit trying to discover what trim level the game was. After a minute of looking it over, I told the owner it looked like a Munsters refinery edition. He said he bought it from a neighbor and that the owner told him it was a game that a company had “put a lot of extras” into. When I bent down to open the coin door the sticker on the cabinet gave it away – it WAS a Refinery Edition. In fact, I told the owner there was likely a picture of this exact same game on the internet. We went the the Refinery site and sure enough – his game was right there. Too cool
I played Munsters for a bit (enjoyed it thoroughly) and noticed a machine gunning sling shot. I asked if he would mind if I gapped that switch to fix the problem and he was happy to have me do so. Once the sling was corrected, I started over to check out the Haunted House. The cabinet was in fair condition, all the damage was in the rear. It could be fixed but would need glue and bar clamps to do so. It had a beautiful backglass with hardly a mark on it. The electronics were good, and the mechs were all there and functioning. The game did play but roughly (flippers sticking occasionally, a few lights out, basement kicker was weak, etc.) No matter as my plan was to do a complete (3) playfields swap. So, I bought and loaded up the well played, well worn Haunted House
Gottlieb made 6,835 Haunted Houses with the first games hitting the streets on June 1st 1982. John Osborne is the game designer and David Thiel was the sound man. We have Richard Tracey and Terry Doerzaph to thank for the the stunning playfield and backglass art – it was retro (even for its day) and is beautiful to behold. It’s a system 80 widebody with a simple painted scheme cabinet. That is the only thing “simple” about Haunted House. It’s a complex and heavy beast of a game. It has 3 playfields: An attic upper playfield, a main playfield and a basement lower playfield. It has 8 flippers, 4 pop bumpers and 2 score display areas (one is for the bonus). It has 4 of the proprietary Gottlieb “kicker targets” and even has a mechanical “trap door”. It has a unique centrally located target that “swallows” the ball (and drops it to the basement) and 2 VUK mechs. When released it held at least 2 records – the first pinball with 3 playfields and the most flippers ever (8 total). It weighs as much as a Volkswagen and has the reputation (to continue the cargument) of a Yugo. At times it can be a challenge to keep running.
John Osborne is credited with nearly a dozen games – Volcano being another of his solid state designs. Osborne recalls how he came to build the Haunted House design during a TopCast recording a few years ago. He said he was made aware of a Bally game (Xenon) that had a plastic tube carrying the ball from playfield to playfield. This was some of the inspiration to create Haunted House. In response to the Bally Xenon game, Gottlieb leadership asked John Burris to design a 2 level game (he went on the design Black Hole), while John Osborne was asked to design a 3 level game (Haunted House). Kicking slings would not work due to the open window sitting in the middle of the playfield. John recalls the fold down drop target (and his subsequent patent on it) and how he purposefully placed it between 2 “normal” targets – to enhance the surprise! He also wondered aloud if the game ever made money for Gottlieb as it was so complex and unique in its design. He also squashed the idea that he ever planned to have a multi-ball in Haunted House. Due to the multi-level design, ball control and code management would have been almost impossible. It was fascinating listening to John answer the interviewers question concerning game rules and code. John responded by saying that he did not “recall how the game was programmed or the rules”. He went on to explain that during that time games were programmed separately from the the influence and impact of the game designer. He shared that this was a relatively new approach and one he clearly did not agree with. He revealed that Richard Tracey (the artist) came up with the idea of running light strings to highlight the lighting in the backbox. John recalled a device he “found” that resembled a trap door and asked the tool room team at Gottlieb to build a pinball based mech. This was the revised version that made it into the Haunted House game. He also recounted how the upper left of the game would likely be very dark. He knew he needed to address it and remembered that he had seen in prior games a “baby bottle” nipple shaped post that had room for a light in the middle. He went about designing his own version for which Gottlieb agreed to build out the tooling for it. The end result were the 2 “post lights” in the upper left corner of the main playfield. Listening to the interview I was struck by something that should have been obvious beforehand. The addition of the basement forced the introduction of the large transparent window into the middle of the main playfield. This forced John to make significant design changes to accommodate for that – one of which is mentioned above. Haunted House was John’s last designed game but he remained connected to pinball. Interestingly, he is credited with “saving the Gottlieb sign”. The one that was mounted on the factory. No small feat. Follow the link for an interesting story and some pinball history.
Well packaged Mirco playfields show up from GermanyGetting ready to unwrap all 3 playfields – exciting start!Just beautiful … but representing a ton of future workClose up detail of main playfieldClose detail of main playfield – right sideMain playfield detail – left sideFlipper area – main playfield
I got back home and immediately went to work to find and order the 3 Mirco playfields. The first few searches turned up pricing of over $1,500 dollars and was a bit of a shock to the system. I finally went to Pinside where Mirco advertises and found the complete set for a more reasonable $1,100 delivered from Germany. Next I had to find a new plastics set. Unfortunately, none existed in the US so I ordered the plastics from overseas and had them shipped to my UK address, then forwarded to the Loft here in the good ole USA. Finally it was time to scour the top and bottoms of the old playfields to put together my order from my friends at Pinball Life, Marco and Pinball Resource. You can see in the images that the reproduction plastics vary in print and color from the originals. They are not perfect and lack some detail but if yours are broken …
Plastics set I ordered from overseas- new on the leftNew plastic on topNew on the leftNew on the left
It was time. Time to really kick the process into gear. That moment always begins with stripping the top of the playfield and taking careful notes and hundreds of pictures along the way. I bagged all parts and took photos from many angles before removing them. The plastics on the topside of the main PF were in great shape (except the “Secret Passage” one which is always destroyed). Once the plastics were off, I removed all the star posts, then used a small flat bar and a block of wood to gently pry up all of the (many!) wire ball guides in the game. I unplugged all the of connectors from the main PF to the lower PF, the cabinet and the circuit boards in the head. I then removed the small upper PF (easily accomplished with just 2 nuts) and followed that by removing the main PF from the cabinet entirely now that it was no longer plugged in to anything. Removing the flat metal ball guides was an interesting challenge. They are held on with specialty ribbed nails directly pounded into the playfield rails. After posting a question to Pinside on “how to remove them” I settled on using a stiff putty knife to pry in behind them until the head was exposed enough to grab it with some pliers. I was able to get the nails out with little damage to the rails. I was MORE concerned about damaging the guides and nails as I had new PF rails already in hand. The guides are all drilled for 2 nails per point of contact but interestingly enough, only one of the nails are used because one of them would contact the ball during travel so it was left off at the factory. I spent $40 buying new “eustachian” style nails from Ebay only to later simply re-use the existing nails as they were in good shape after extraction
Clamping and gluing the cabinetNew trim for the backglassSimply cut to length (it’s plastic and cuts easily)Inventory of the parts I will need to orderTaking lots of photos as I disassemble the playfield (note the wear)More and more photos – 200+ images to document each square inch
With the main PF now out of the game and baggies full of parts sitting everywhere, I turned my attention to the brand spanking new (now completely empty) Mirco playfield. I started on the back adding the T-nuts as they require using a plastic face hammer to pound them in. Next it was on to the wire guides. I use a 1/2″ thick block of poplar as a guide to seat the correct depth. I first reamed each hole out with the hand tool in order to remove clear coat around where the wire intersects the playfield. This prevents the wire from potentially lifting the clear coat as you pound them in.
Use a magazine to support the inside edge of the PF as you pound these T-nuts in
Speaking of pounding … the ball guides turned out to be VERY hard to pound in. I should have sharpened the ends because in all of the “violence” it took to seat them to the proper depth, I introduced some hairline fractures into the edges of the clearcoat on 3 inserts. I’ll be honest, when I noticed them (days later) I was pretty upset. I took an hour to cool down and simply set it aside to continue the mission to swap the playfields. The damage was small. The clear was not lifting (and would never lift later). On 2 of them you could not even feel the fracture with your fingernail (was under the surface). I would add a pre-cut mylar circle to each insert to ensure no chipping would occur at the fracture points (I did that) and move on. So I did. After all … I have 40 other machines that at any moment have SOMETHING wrong with them mechanically or cosmetically. The minute you start playing one is the same minute they are no longer perfect. The playfield looks amazing, and I would have to point to the spots for you to see them and game play is not affected in one bit. Time to get over it.
I use a 1/2″ piece of poplar scrap to set the correct height of the ball guides in the new PFClose up after install – you can see the clear I removed using the reamer/countersink
Next phase was on topside of the new playfield. I wanted to build new black colored rails as a replacement for the beige colored ones. I saw this done on Pinside by Chris at HEP and really liked the look. This effectively removes the beige/bland stock rails and replaces them with a nice “haunted house style” black. The contrast is perfect for this game. I ordered the blank “sticks” from PBL and cut them to length, then drilled out access holes in order to jigsaw the slot out that holds the upper ball rail wire guide. Installing required looking at the pics I took to ensure proper starting/ending spots – remember these are new rails and as a result they did not have drill holes in them for placement reference
New (custom fabricated) black rails installed – copied this from Chris Hutchins at HEPDoesn’t look like much but 90% of topside work is done here (pops take a bit of time)Setting the eustachian nails using adjustable pliers – no need for a hammer here!Cutting and trimming a pop bumper mylar ring – see next image that shows AFTER installMylar ring installed around pop bumper – virtually eliminates wear (note this is the adhesive type)
Back to the old playfield now in order to add Molex connectors to all major mechanisms. Again this is a copycat process I took from Chris at HEP. Others poo-poo the process and say it’s not necessary. I think they focus on the fact that many times this is done with the reason that “in the future” you can remove mechs quickly for service or repair. This was NOT the reason I did it. I just wanted a way to get the mechs off the playfield and away from the already too complex wire harness, switch and lamp wiring. For THAT purpose it was extremely helpful and I think took the swap from “impossible” to very doable. This is especially true for a game as complex as HH.
Molex connections added to the major mechs to facilitate the PF swaps (thanks HEP!)
So I marched on. The pops, scoops, slings, flippers, kicker targets etc. all had molex connectors soldered to both the harness and the mech to allow me to easily disconnect them from the PF harness, making it much easier to first remove the mech, then to remove the harness and solder it back to the new PF later.
Major mechs pulled, labeled and in individual bags with hardware
After building and soldering in the connectors, I removed all the mechs/solenoids from the backside of the playfield, along with the mounting screws and dropped them into a quart baggie. Each was labeled A- N as were the Molex connectors. I even ordered wiring that would allow me to build the molex connectors in a consistent manner, using green where Gottlieb had and plain white wherever they had used a base white (then added a colored stripe). I could have added a sharpie stripe to each of my plain white wires but chose not too. The molex connector only fits one way and I did not concern myself with the need to make it “match”.
Old playfield images of molex connections installed on mechs – note the green wire spool
While waiting for parts, I noticed the “Secret Passage” plastic that sits at the middle/top of the main PF was broken (as are 99% of them in the wild).I spent a few hours in Photoshop, recreating the artwork from the broken pieces. This involved scanning in the pieces on my flatbed and simply filling in the missing art where the plastic had cracked. There was also quite a few areas of damage and scratches that needed to have touch ups completed. I completed all of those in about an hour. I then did a test print and it came out really well – nice colors and the scale was correct. I have the commercially available protector that I will install after I create the new full art plastic
Back to the top of the PF it was time to prepare to add the Pops. My prior experience with installing pops (Bride of Pinbot, Harlem) was the process of hammering in Pop nails. I was surprised to see that Gottlieb did it differently and in a way that did not use a hammer or pop nails. The Gottlieb install involves the use of a pop bumper backing plate to mate with 2 machine screws that penetrate the pop body and are then mated into the plate on the bottom of the PF. Not sure if one is “easier” than another OR what one is more robust from an engineering perspective, but the Gottlieb system works and other than some “two sides of the PF” juggling at once to get those 2 machine screws mated to the base plate, the install was straight forward. To prep for the Pop installs I laid down mylar discs. I used the adhesive style as the Gottlieb ones (loosely installed) had a reputation of grinding the playfields over time. As I shared previously, it was at this point that I added 3 small mylar spot circles on top of each of the inserts where I had introduced hairline fractures while hammering in the ball rail guides. Once installed both the fractures and the mylar were virtually invisible
Kicker target refurbed and new clear faceplate installed (switch gapped, nylon sleeve replaced)
Before adding the mechs or large wiring harness back to the new PF, I had to add all of the new lamp sockets and the 5 volt power wiring. Gottlieb, like many others, used a bare wire that was stapled to the bottom of the PF. As I did in my Harlem restore, I chose to use an insulated wire. The other wrinkle was that because there were no 2 terminal sockets available for some of the lamps, I had to employ “solder tabs”. Wonderful, cheap and highly effective, they allow you to solder to the “body” of a single terminal lamop socket in a clean and functional way. I added all my new lamp sockets and tested each to ensure I had all wires going to the appropriate terminals. The testing part turned out to be important as I was “mixing” twin terminal sockets with singles – it’s easy to make a mistake and solder your 5 volt supply wire to the center terminal of a twin terminal socket. A simple check for continuity using a DMM saves a lot of headaches down the road. Remember, these wires are virtually buried under a mass of mechs, switches and wiring harness once that stuff is all installed. Got to get it right the first time. Oh, and before I forget, add the LED’s as soon as you are done with this part. You have even choose to add them before mounting the sockets. They are a major pain to add later
Pop bumper, ball launch and a few lamp sockets installed on new PFNew playfield with point to point wiring and new lamp sockets
Now it was time to add back all of the remaining mechs. I did this BEFORE adding back the wiring harness as the mechs require quite a bit of “fitting finesse”. The location of the armatures and solenoids determine how smoothly they move when activated and you simply need “room” to pull this off. Once the mechs are installed, the harness will lay naturally in between them. I started with the pop bumpers as they are the most complex. I completed the first one rather quickly and moved on to the second only to discover the pop bracket and much of the associated hardware was a McGyver fix that an operator had pulled off years ago. The bracket had the mounting holes all “yoked out” just to make it fit, the fiber and metal plunger centering pieces were not correct and neither was the plunger. I jumped on Ebay and ordered an pulled pop bumper from a Mars God of War to replace it. That part came quickly and I added the second pop bumper as quickly as I did the first.
Adding mechs back to the new playfield
The process was simple, even if the work was tedious. I grabbed the first baggie labeled “A” and installed a kicking target mech and worked my way around the PF until I had gotten all the way to “N”. I skipped the 4 flipper mechs as they could be installed almost last and needed to be rebuilt. I replaced the coil sleeves on every mech along the way and in the case of the kicking targets, I replaced the high voltage switches as well. 3 or 4 hours later all of the mechs were bolted down and awaiting a wire harness to be attached to. I moved to the back side of the original PF to begin the process of documenting the wiring color codes for all the GI and controlled lighting circuits (see notes at end of this post for wiring details)
I used a sharpie to assign a number to all of the PF lights and then captured an image of it, while writing down what color/stripe went to each assigned lamp number. Once completely documented, it was just a matter of a few minutes to unsolder all the signal wires to the controlled lamps. Unsoldering the larger voltage supply wires took a little longer as they were attached to the lamp bodies and by nature were acting a pretty good heat sink and reducing the effectiveness of the iron.
Harness moved to new playfield – note the blue tape holding switches (and their screws)
With the lamps all free, I now had to unscrew and blue tape mark all of the switches, stand up targets, fuse blocks and harness clips – my plan was to leave ALL of them still attached to the harness. This part was slower going but not terribly so – and it went off without a hitch. I would pull the switch, wrap the original screws with it and mark it with the corresponding number on the PF. This process also included pulling the metal subways off the PF and first disconnecting the switches that were mounted on them. In a few hours total, the harness was free from the old PF. I carried the now disconnected harness up to the Loft to gently lay it down on the backside of the new PF sitting on my rotisserie. One of the key things I had done in prep for this moment was to use a sharpie to draw a line (directly on the wire harness) on each side of every harness clip. That way, if the clip moved as I was transporting the harness, I would know it’s original location. Assuming the dimples on the backside of the new PF were accurate (they were), this allowed the best chance of getting the harness placed exactly where it needed to be to allow perfect connections to the new lamp sockets. The plan worked and in the entire process I only had one wire that was a “stretch” to fit.
Harness transfer – top of PF view
Installing the harness to the new playfield went WAY faster than I anticipated. I’m guessing that it was no longer than 4 hours in total – maybe 5. I did the work over the course of 2 evenings. The process is NOT simply soldering it back in. Every time I came to a switch, I cleaned and gapped it and made sure the gap was “functional” post install. This saves a ton of headaches down the road. I started soldering at the least complex area of the PF (the bottom) and worked my way up. The last few bits to get done were the metal subways and the metal frame parts around the basement window. Nothing was difficult or extraordinary about this part of the process. Lining up the subway below the trap door was tricky but I had excellent pictures and some measures I had taken prior to removing it. I would suggest to anyone to do the same. I guess the high level process for those of you all attempting the same type of work is to do the work in the order as follows:
T-nuts hammered in
Ball guides hammered in (topside)
Lamp sockets wired in (just the 5 volt wire)
Mechanism/solendoids mounted
Wire harness soldered back in (GI, controlled lamps and switches)
Subways bolted back on
Flipper mechs added back
Basement numeric display
Bottom of PF hardware (props, apron rests, etc.)
Harness connected and installed on new playfield
I got home from work and Miss Tami was out mowing. I thought I would use the “me time” to drag the Haunted House cabinet up into the Loft. For a few months now it has sat down below the Loft in the garage area. I’m pretty close to having the main playfield completed and will need a place to put it when done as I complete the other 2 playfields. Seems like the safe place to store it would be the cabinet it would spend the rest of it’s days in. What I thought was going to be a 30 minute job with my Escalara, turned into a 2 hour job instead.
How you move a heavy pinball game alone here on the ranch!Bondo works great for small (and quick) cabinet repairs
After I unbolted the head and carried it upstairs, I came back down and was reminded how much “love” this cabinet really needed in order to be presentable. There was a large chunk of wood missing from the left side of the neck, there were pieces missing from the left rear edge and the right corner had quarter size chunk of the plywood torn off. The BEST news was that all of this damage was “in the black”. In other words, the black painted part of the Haunted House artwork. None of it carried into the green or yellow (lightning bolts) paint color. That meant I could Bondo, sand and paint those areas pretty quickly. I decided to get the Bondo and sanding done right then and there. I mixed up the Bondo and had it applied in less than 15 mins. I used a little trick I learned when shaping rusty fenders on a car when I was a kid too. If you wait unti right when the Bondo hardens and can no longer be effectively blended or spread – then wait another 3 minutes or so, you can carve the Bondo pretty effectively with a sharp razor knife. This saves many, many minutes of sanding due to being able to remove excess material very quickly. Then, by the time I’m done carving to shape with the knife, the Bondo has set enough that it can be sanded. I had all the repairs done and sanded in an hour. I painted them several days later with a small brush and some satin black paint.
Next up was the process of rebuilding all 4 main PF flipper mechs. I wasn’t sure how much of a challenge this was going to be. After all, it wasnt just the 4 main PF flippers, I had 2 more sets to tackle as this game has 3 playfields. I grabbed the Pinball Resource kits that I had ordered months ago and popped open the packages. The kits include the shaft and link, new flipper shaft bushings for top and bottom (there are 2 in the Gottlieb design unlike Bally/Williams), new return springs, new coil sleeves, switches and coil stops -plus a few extra screws. I pulled one of the flipper mechs from its labeled baggie and quickly dissasembled it. Other than soldering in the new switches and gapping them, the process for putting them together goes quickly. The slowdown comes with the transfer of the old pawl to the new shaft and link. On Gottliebs you need to drive out that roll pin from the pawl and then reseat it. Takes a few minutes but again, it’s straightforward. Use a cracked open vise and a roll pin punch and you have it out in no time.
Mounting the rebuilt flipper can be as simple as lining up the dimples and putting the 6 small screws in that hold it to the base of the playfield. I like to add one more step. With the bottom of the PF facing up on the rotisserie, I will place the flipper mech so that the mounting holes line up with the dimples, then crawl UNDER the PF with a flashlight and check the flipper bushing to ensure it is centered in the PF hole that is cut out to accept the flipper shaft. In all cases the Mirco playfield was either exact or very close (within a millimeter) but even that millimeter can make a difference if the shaft makes contact with the playfield and binds. The method I used was to center it visually from below, then go topside to see how closely the dimples were aligned. I would then find ONE of the dimples that was perfect and set that screw tightly. Then check again under the PF to see if still aligned. If so, back to the top to add a second screw on the opposite side of the mech. With 2 screws in place the mech was rock solid and I could safely add the remaining 4 screws, drilling a new dimple if needed. This process made certain that a dimple that was off by even a tiny bit did not pull the mech off-center as I seated the screw. I got all 4 flippers done in just a few hours total.
Rebuilding the upper PF flipper mechs
I was in the home stretch of the main playfield now and the only remaining work was to add the numeric display, the pop circuit boards and the large steel hardware that is used to secure, center and support the PF (example: the 2 vertical steel pieces used to support the PF when performing maintenance). In order to get the last bit done, I had to remove the playfield from my rotisserie. The perforated steel supports that hold the PF on each end were in the way of several of the mounting points. I asked Miss Tami to give me a hand and we carefully unscrewed the PF and moved it to a large padded stool that I use for this type of work. Adding back the remaining parts was completed in short order – the bottom of the main playfield was now completed!
New playfield backside is done!
Now my focus was to quickly finish up the 2 remaining playfields. It was only a few hours into the work that I realized that “quickly” was not going to happen. The process is exactly the same no matter what size the playfield! I began with the basement first. Populating the topside was quick and in a few hours I was ready to flip it over and get to work on the underside. I mounted all of the necessary bayonet lamp holders next and substituted some of the original design single tab for newer dual tabs. The plan was the same as the main playfield – eliminate the bare braided wire. Next was to solder in the point to point new wire that would carry current to each lamp. Even something that appeared to be as simple as this takes a bit of thought to ensure that in each case the right tab is connected the right “next tab”. It’s in this situation that the continuity setting on my DMD gets a workout! Once the wiring was complete it was time to prep the old playfield to remove mechs and eventually the underlying harness. The same process I used on the main playfield was used here. I wired every major mech with a molex style disconnect so the mech would never need to be unsoldered or soldered again – simply unplug it and it is no longer connected to the playfield except through screws/hardware. This allows me to unscrew the mech separately from the playfield, move it to my workbench and clean and refresh it as needed. The larger benefit is that the playfield harness is now exposed and more easily moved without all those mechs hanging off of it. In the case of the drop target mech, I left it completely connected. There are 13 individual soldered wires on that mech and it was easier to just move it with the wiring harness
Part 2 of 3: Haunted House Pinball
In the case of the drop target mech, I left it completely connected. There are 13 individual soldered wires on that mech and it was easier to just move it with the wiring harness. I finished up wiring in all the Molex connections and headed downstairs for dinner, not knowing that it would be 4 months before I TOUCHED Haunted House again …
OK, life happens, but it’s almost July and it’s time to get back at it. I set a goal to have the entire game completed by Halloween. The week prior, I saw a FB post about a discount tool site that had a Ryobi cordless soldering stations for $27. I was just curious enough to look it up and read a few (surprisingly positive) reviews. For under $30 I thought, why not try it? I ordered one and when it came time to solder and de-solder the basement playfield, I used it and LOVED it. Heats up to 900 degrees and is very portable. All the work described that involved soldering on the basement playfield was done with this cheap but incredibly effective tool.
Ryobi battery driven soldering station
I planned to start again on Haunted House the weekend of June 19th but … you guessed it – Father’s Day arrived. Truth be told, I was happy for the pause as work was insanely busy and I needed a day over the weekend to just slow down. My family surprised me with a fun packed day. We started early and jumped in the Jeep to drive to House Mountain for a day hike. House Mountain is just outside of Knoxville and an easy drive. The main part of the trail runs along the mountain ridge/spine and is an easy to walk (sandy and soft). Getting to that trail is far from easy and is covered in rocks with some trails going up near vertical as you ascend. It’s a workout for sure, but the hiker is rewarded with multiple vistas at the top along that ridge trail with views out to several states in the distance. It was a hot day made much cooler by spending 90% of our time hiking under the dense canopy of oak, hickory and tulip poplar trees. Other than getting “lost” (or as I call it “making our own trail”) the trip was uneventful but physically challenging for all. Fathers Day Sunday was over, the work week was ahead and next weekend was all about Haunted House!
Tami and I atop House Mountain during our Father’s Day hike in East Tennessee
The weather leading up to this late June day had been sunny, hot and dry. Today was different. Lot’s of clouds. Still hot and very humid, it was going to be a perfect day to work inside. I headed up into the loft at around 10:30 on a Saturday to begin where I had left off. I had almost completely finished the topside of the basement playfield a few months earlier so I focused my attention on the bottom side. I already had the lamp holders installed and wired in prep to move the mechs and wire harness over. There are probably a hundred ways to complete a playfield swap. YMMV but I saw the smaller/less complex basement playfield as an opportunity to move a bit faster by moving around the playfield in a clockwise fashion pulling mechs (and rehabbing them) as I went. The large mechs were easy (except for the Pops) as they simply required that I “unplug” the Molex connectors that I had soldered on a few month ago. Lamp wires were recorded so that a quick touch of the soldering iron would release the harness from the playfield (remember, the bare wire and the lamp socket would stay behind as I had those installed and waiting on the new playfield). Switches were simply unscrewed with the screws left in the mounting plates and some wide painters tape holding them in place for the transfer.
Back plate comes off with just 4 screwsNew targets install with just the return spring – note the center located armature
When I came to the drop targets, I had to slow down and remove the backer plate (4 screws) and replace each drop with a new one. I use a curved angle pick to grab the tiny bale on each spring that holds them into the frame of the mech – it also works well to put the new drops back in. Once I had all the solder points to the lights unsoldered, the only thing left to do was remove the dozen or so screws that hold the harness to the back of the playfield. With that accomplished, I asked my daughter to help me lift the entire harness along with its (still attached) switches and drop target mech. With a “1-2-3” and a smooth motion, we lifted and landed the harness onto it’s new home. Now the real work starts. I won’t go into as much detail as the earlier swap because the process is the same! Align switches before using the provided dimples to drill pilot holes – they are close but not perfect. Gap all switches as you go. Replace all coil sleeves wherever there is a coil. Rebuild the flipper mechs, solder back on all lamps wires and finally, screw the harness back in place. 6 hours later the basement playfield “backside” was complete.
I was putting all my tools away when I noticed the pile of silver metal that had been laying on the storage rack in my tool room. I recalled it was the surrounding metal for the topside area of the basement playfield. I ALSO recalled that I had not installed it yet because the bottom of the playfield needed to be done first AND that Chris Hutchens at HEP had painted his black and I was planning to do the same. Oh heck, I was tired but I grabbed the pile and headed to the pole barn to shoot as few coats of black semi-gloss. That task was completed in short order and I took a break to eat some dinner. In between work sessions I ran out to the pole barn to see if my newly painted basement surround metal had dried. It had, but I was disappointed to see I had missed a few spots. I sprayed it with another light coat and made a mental note to grab it the next evening after work and install it.
Basement playfield with newly spray-painted surround and plastic protector installed
After dinner, I told Tami that I was headed upstairs to play a game or two. I had done some tweaking to Ultramans upper playfield and wanted to get a sense of the impact. I played a few games and then thought about how I had not even looked at the attic playfield to get a sense of what was ahead of me. I walked away from Ultraman to pull the attic playfield out of storage. A few minutes later I found myself pulling out the portable work table, the old attic playfield AND my toolcart to do “just a little more work” on Haunted House. 3 hours later …
Starting to de-populate the attic playfield
I de-populated the old playfield topside and re-populated the new one. It’s not a large playfield by any means but my-oh-my, there are a LOT of parts up there! You’ll spend at least an hour pulling and re-installing ball guides as there are close to a DOZEN in that 1 square foot area! Pro-tip … sharpen the guides to a point on your work bench grinder. They will pound in much easier putting less stress on the playfield and/or clear coat. It goes without saying, use a plastic mallet, not a framing hammer as you’ll have much more control on the seating depth per stroke. I also use a piece of 1x wood that is 1/2″ thick as a measure to slide under each guide. The wood gives me an excellent visual of how far I need to go before I’m at the correct depth.
Note the hand drawn numbers next to the lamps – I’ll record the wire color that matches each
Once the ball guides are in, you can move on to the many star posts that need to be installed. I was pulling them one at a time in order to know for sure which post had a screw top vs acorn nut top. That allowed me to buff each with a dremel as I removed them, then add a fresh clear star post before mounting into the (for sure) correct mounting spot. It is EASY to get confused here as there are around 20 posts so this method worked best for me. I also pulled the rubbers as I went and added a fresh Titan rubber as each new pair of star posts were installed. This saves time “guessing” what size goes where later. I saved the pop bumper and target switches for later so that I could flip the playfield upside down and not have it rock all over the place (rocking on the pop bumper as the high point). With ONLY the star posts installed, they are all level with each other.
Bruce Cockburn “Noting But a Burning Light”
It was now Sunday and after returning from church I decided to play some music up in the loft while I worked. I mostly listen to podcasts but was all caught up on my favs. Scrolling through the 10’s of thousands of artists and songs I stopped on an old favorite. The 10,000 Maniacs. The album was “In My Tribe” an old favorite of mine. I listened all the way through and enjoyed the break from podcasts so much I scrolled again looking for more. My next selection was Bruce Cockburn. I was introduced to Bruce by a dear friend in 1977 or maybe 1978. A Canadian singer songwriter that should be 10 times more famous and wealthy than he is. He has had a few “hits” over the years (check out his “If I Had a Rocket Launcher” from his 1984 album “Stealing Fire). He has also produced album after album of thought provoking and sometimes unforgettable music. I have several Christian albums that I call favorites. These are “I heard them once and fell in love for a lifetime” albums. These are albums that I own multiple copies of. I listen to these recordings every year, multiple times per year EVEN as my listening occasions have dwindled – these albums still make the cut. One of those is from Bruce Cockburn titled “Nothing but a Burning Light”. If you like his music, and if a subtle but profound Christian message appeals to you, give it a listen. There have been MANY times I’ve found tears in my eyes as I’ve reflected on the lyrics in these songs – none more profound than the song “Mighty Trucks at Midnight”. A stanza from the lyrics follows- highlights by me:
I believe it’s a sin to try and make things last forever Everything that exists in time runs out of time some day Got to let go of the things that keep you tethered Take your place with grace and then be on your way
Those last 2 lines ALWAYS hit me. Sometimes like a gut punch (feeling guilty as charged) and other times like a simple reminder to keep in perspective what’s important in life. We are not on this earth for long and although Pinball is fun, it’s not what’s really important. Not all of this Cockburn album is full-on serious but it’s all reflective and passionate music from a God connected guy with a talent to articulate that connection in song – check him out if you are so inclined.
Oh, by the way … the OTHER Christian album on my all-time fav list is by none other than Billy Joe Shaver, and is titled “Victory”. For much of his life, Shaver was a hell raiser to say the least. alcohol, drugs and illicit sex were a big part of Shaver’s life – until he met Christ and was changed forever. He wrote and recorded this album after his conversion. It’s titled after his mother’s name – Victory, but clearly the titled plays two roles here. Before he passed away in 2020, Billy Joe Shaver would claim Kris Kristofferson and Willie Nelson as best friends, watch his son die from heroin overdose, marry the same woman 3 times, cut off 2 of his fingers in a sawmill, be inducted into the Nashville Songwriters Hall of Fame and be credited with single handedly starting the “Outlaw Country” movement by writing the songs for Waylon Jennings 1973 “Honky Tonk Heroes” album. He was quite a character. Billy in his own words as he reflected on what drove his conversion to Christianity:
“I was in Nashville with my family, but I was chasing women, doing drugs, smokin’ Camel cigarettes. I was almost dead. I got so I couldn’t even put a sentence together, much less write a song. My family was going all to hell over it…” https://www.austinchronicle.com/music/1998-08-14/523770/
Back on topic … it was time to move to the backside of the attic playfield. This part went quickly for a few reasons. First, I did not wire-in the Molex quick disconnects. There are only 4 major mechs: Drop target bank, Pop bumper and the 2 flipper mechs. I decided to document the wire colors, photograph each of them and simply de-solder them. This saves a ton of time – like hours. For smaller playfields it’s a great time trade off. Second and more obvious … the playfield is small, simpler and has less solder points. I had the lamp wiring documented, photographed and de-soldered in 15 minutes. With the major mechs un-soldered, they could now be unmounted and set aside for re-build, new sleeves, etc.. The flipper mechs go first and are just 6 screws each (after removing the flipper shaft and bat). The pop bumper coil and frame can come off (3 screws on the frame and two nuts on the pop ring). From here its a matter of unscrewing all switches (no need to de-solder wiring), the wire harness and any remaining mech frames that are going to be moved “en-masse” with the harness transfer (like the drop target bank).
Adding the plastic protector to the left side of the basement before install of printed plastic
I spent an hour adding new lamp fixtures and pre-wiring the common/connected wiring (bare wire on the old playfield) so it would not need to be done after the harness was moved over (and in the way!). Interesting to note is that the style of fixtures used on the upper/attic playfield are tough to find. These are single tab horizontal mounted bayonets. I used a twin tab substitute as I was going to add insulated point to point wiring so it did not matter. What was cool is that I got to use the same dimples for mounting because even though the lamp fixture was much shorter, I was using flex head LEDs for lamps and their length made up for the difference in the original spec – perfect! The lift and move to the new playfield went just like the other 3 although now on a much smaller scale. Everything lines of nicely, the flipper mechs and pop bumper mech are not in the way (not yet mounted) and there is plenty of room to work with. Because I have pre-wired the lamps (replaced the bare wire with a point to point insulated wire), the only soldering that needs to be done are the controlled lamp power supply lines, the signal control wires (one per lamp) and the 2 pop wires. This was completed quickly with the new Ryobi cordless station set on 900 degrees. I repeated the process described earlier to replace all the drop targets, put new sleeves in all the coils, rebuilt both flippers (I’ve lost track of how many now!) and gapped switches as they were installed.
Part 3 of 3: Haunted House Pinball
Time to wrap this one up. The remainder of the work in front of me seemed never ending but it’s this exact moment in restoring a pinball where I always overestimate the work and time it will take to finish up the game. Case in point- today. I started working a bit on it during a visit from a dear friend – my wife’s uncle Paul. He is not only family but a wonderful guy as well. We love having him around. When Tami and he were busy visiting, I would spend 30 minutes here and there getting one specific part of the work completed. I did not want to spend too much time on the game as his time here was limited and I wanted to catch up with him. This day was Thursday June 30th and by July 2nd, I would be done with the game. Completed. Finished. As I looked at the work ahead of me, I had no idea that finishing in 2 days was possible. Paul left early Friday morning for NY and when I got up, I dug in. What follows is the list of work I completed but I won’t give a running commentary. I’ll save that for the summary at the end.
Add back all the metal framing to the attic playfield
Mount the transparent green playfield
Add mylar to multiple locations
Add plastics and acorn nuts to all playfields
Add colored LED bulbs to backbox
Install the lower (basement) playfield
Install all topside ball gates (4x on main playfield)
Loosely install main playfield ramp
Install the attic playfield onto the main playfield
Attach ramp to attic playfield
Install the main playfield in the cabinet
Connect all harness wiring and plugs
Install the apron
Clean and gap the flipper cabinet switches
Add a new ball
Turn on the game (1am)
It was midnight. A few hours earlier, I had asked my bride to assist me in lifting out the main playfield while I did a few more things to the basement. i needed her assistance because the main playfield was now VERY heavy with the attic installed AND (as you know) the main PF in Haunted House has wiring right to the very edges on the underside and you have to be careful setting it in place not to disturb the wiring or hit the relays that are exposed near the topmost part of the playfield. Now I had to put it back. I ran downstairs but was too late. She was sound asleep. I was desperate. Should I wake her? Should I try to lift the main playfield into the cabinet alone? Surely the latter was impossible. Surely she would want me to do the former – just wake her up, right? Not a chance. I grabbed the playfield with both hands and walked it over to the front of the game. Moving it was difficult. I had NO IDEA how I would successfully lift it AND even less of an idea how to get it into the cabinet without destroying months of work. I was tired. I should have gone to bed. Instead, I decided to develop a plan and give it a go. I finally hit on the idea that the ONLY way I could safely “rest” the playfield before lowering it in, would be to place it on the props that were installed underneath it for that very purpose.
Time to add the apron
The challenge remained about how to manage the wiring harness. I had visions of getting the playfield up in the air only to have a harness/plug snag on something and then be caught between a rock and a hard place. In the end, I left the harness hanging down on the underside of the playfield, thinking I could pull it backward around the basement once I got it in there. OK – here’s the plan. The playfield is leaning against the coin door, topside facing me. I grab the playfield about halfway down, push inward on each edge and press it upward to the ceiling. Straight up. Balancing as I press. Once the 2 props clear the lock down area, I gently set it down (still standing vertically) on those props. Now I gently wiggled it back and forth until just one of the props engaged a “tooth” on each edge of the lock down area. I did the same for the other side, then moved along the edge of the cabinet to gently lower it down, inch by inch (all the while watching the props to make sure they didn’t slip. Using this method, I was able to (alone) lift and place the entire main PF and attic PF of a Gottlieb Haunted House. Stupid. (but effective)
I fired the game up around 1am on July 2nd and it came to life! I added some credits and in a few seconds was playing my first game on the virgin playfield. Functionally, the game was operating properly. What a relief. This restoration was complex and required focus and attention to detail. I was so happy to see that overall it had gone well!
That’s not to say I didn’t have a few things to correct. One issue was the weak flippers (2 of them). I had carefully gapped the EOS switches BUT I had not paid attention to ensuring that they were tightly CLOSED when at rest. If they are not closed, then the flippers (if they flip at all) are like slow motion noodles. I re-gapped the offending switched and had VERY strong flippers again.
The basement up-kick acrylic tube needed a bit more space above the VUK mechanism. The wire guide and the plastics to the left of that tube were pushing the acrylic tube to the right and when seating the main playfield were putting unnecessary pressure on the tube. Given the playfield was now installed, I chose to use my Dremel to elongate the plastic mounting holes giving me enough space to now move that plastic more to the left (outside edge of game). I then bent the wire guide just slightly in the same direction. Now when dropping the main playfield into place, the tube fits nicely with no binding.
Hand drawn map to screw holes that needed to be yoked out using my Dremel tool
Installing the transparent green acrylic playfield was not easy. The issue it presented was related to the T-nuts that you will need to pre-install in the playfield. Once they are hammered in, the location for the screw is locked in as well. I suppose it’s an impossible ask for the makers to align the countersink perfectly to the T-nut location. They were “close” but not close enough. Could I get the machine screws in? Yes, that was easy – the holes were very close to perfect alignment and they were a larger diameter than the screw providing some flex in the placement. The problem is the countersink. The countersink pattern, for the most part was not aligned. This allowed me to get the screw into the T-nut under the playfield but not be able to tight it down because it left the screw head proud to the playfield (and easily hitting/deflecting the ball). I marked the direction that the countersink would need to be biased on a piece of paper and then removed the entire green acrylic playfield and took it outside. I used my Dremel to create a wider arc in the countersink in the direction I had previously marked. The process of removing that small amount of material worked and I was able to install the acrylic playfield and keep the screws flush.
Note the exposed edge of the upper playfield – the ramp was sitting too lowSmall strip of dense foam installed under the connection point fixed the leveling issue
Another small obstacle was the main playfield ramp. It connected/met the attic playfield just fine, but it was lower than the attic at the transition point. Low enough that repeated ball strikes would quickly damage the leading edge of the attic playfield plywood. I cut a piece of target foam the width of the mounting channel that sits at the edge of the attic and pushed it into place with a thin file. When I reattached the ramp, it was perfectly level – note that this is also one of the areas I added a small piece of mylar to. I added a 3/4 sheet of mylar on the entire basement playfield. It was easy to see the worn areas on the old one and given the area that was impacted was large, I just covered the entire lower 3/4 of the basement. I added 2 pieces of mylar on the main – one at the basement kickout and one at the saucer. Both pieces are about 1.5″ wide by 4″ long. The attic playfield got a piece at the ramp (as mentioned above) and a piece where the ball pops onto the left side out of the VUK.
Plastics installed, spiderweb cover installed and lower playfield bolted into the game
Adding the plastics was a pain. Acorn nuts suck. Big time. My method is to use my 5/16″ nut driver and cram a balled up wad of painters tape into the tip. I’ll add one small folded up piece of tape at a time until the acorn nut is no longer able to drop fully into the nut driver head. This gives you the ability to apply downward pressure to the nut as you turn it, thus allowing faster installs. Notice I said faster not better – they still suck vs a nylock nut! Of note also is that I bought the plastic protector for the long left plastic in the basement – the one that is always broken. It’s cheap and is available from Marco.
Finished game
One other “tweak” I had to make was to orient the upkicker acrylic tube that comes from the basement. I originally had it so the “point” end was facing the player. It won’t work because when installed that tube comes very close to the basement playfield and in that orientation, will hit the ball. In my case if was so close it simply stopped the ball from entering the VUK mech. I tilted the playfield up, loosened the aluminum band holding the tube and rotated it so the point of the tube was pointing to the left cabinet side, allowing lots of room for the ball to now enter the VUK. Problem solved!
Finished game
Playing Haunted House in this freshly restored form is a reminder of what it must have been like to first see one placed on route in the early 80’s. It’s a stunning game visually and blazing fast gameplay at times (yes, molasses slow at others). It’s a simple game but presents challenging shots as well. Even getting the ramp shot from the left flipper is no gimme. The basement is a fun challenge and presents multiple targets not just a one and done. Knocking down drop targets appears to be a task that is vanishing from modern pins but in Haunted House you get 2 banks of them. The attic drops are cool because they are visible, and quite easy. The basement is a little tougher for a couple of reasons, not the least of which is they are hard to see.
Finished game
Playing it now also brings a little anxiety. I’ve spent countless hours (200+) and untold amounts of thinking and planning to pull this off. I play with a little voice in my head telling me that I’m about to break something! Obviously this is true … if you plan ANY pinball long enough, something will break. Fortunately this particular example of Haunted House is protected better than most. It has freshly rebuilt flippers, a mylar protected playfield and hundreds of new parts. It’s been a functioning and playable machine for the last 40 years as of this June. I’m betting on another 40 more!
Finished game
Haunted House Spend: Total $4,000
$2,000 base game
$1,100 3 pieces Mirco Playfield’s
$275 Pinball Resource parts
$82 Marco (lamp sockets)
$75 Pinball Life (lamp sockets)
$75 Pinball Life (PF rails)
$200 plastics
$50 apron decals
$150 LEDs
Haunted House Wiring & Notes:
Finished game
Main playfield controlled lamp & GI wiring colors:
1 red green and green gray
2 purple black 2x and red gray
3 purple black 2x and red gree
4 black 2x and purple gray 2x (GI)
5 black 2x and purple gray 2x (GI)
6 bare and orange gree
7 bare and orange black
8 bare and brown purple
9 bare and brown blue
10 bare and purple green
11 bare and purple black
12 bare and brown purple
13 bare and purple red
14 purple black 2x, bare and purple orange
15 bare and green
16 bare and purple gray
17 bare and yellow green
18 bare and red orange
19 bare and green blue
20 bare and purple orange
21 bare and green black
22 bare and brown green
23 Special thru PF
23 black 3x and purple gray 2x and white single wire out to 23B AND single wire out to 24 lamp
23B bare and white wire from 23
24 black 3x and purple gray 2x and receives a single white wire from 23 to the purple gray connection
25 bare and purple gray 2x (GI)
26 purple black 2x and yellow green
27 black 2x and purple gray 2x (GI)
28 volt lighting circuit:
28 volt High voltage GI LEFT
Bare is fed by green 2x on lowest lamp on flipper end
Signal is all purple gray 2x (at each lamp)
28 volt High voltage GI RIGHT
Bare is fed by green 2x on second to lowest light on flipper end
Signal is all purple gray 2x (at each lamp)
Main PF Controlled Lamps LED colors – Bayonet flex heads:
1 orange
1 green
2 yellow
8 Sunlight
Bayonet 44s:
9 Sunlight
4 green
2 red
Backbox LEDs: 56 pieces plus 1 flasher #455
Basement playfield controlled lamps wiring:
1 green 2x, black common
2 none (new wiring – was purple and common)
3 none (new wiring – was white and common)
4 green 2x to black new wire tab
5 none (new wiring – was bare wire and common)
6 green 2x to black new wire tab
7 none (new wiring – was red and common)
8 green to open tab, purple pop bumper to common, blue/red pop bumper to open tab
9 blue orange 2x and common
10 green orange 2x and common
11 yellow orange and common
12 green orange and purple black on common (+ common)
13 orange and common
14 blue orange and common
15 purple and common
Attic playfield controlled lamps wiring:
1 tab purple/blue
2 tab purple/green
3 tab yellow/purple and heavy purple blue to common
4 tab purple stripe 2x and green/purple pop bumper plus common black stripe 2x AND green/light green pop bumper
5 black stripe and common
Upper playfield flipper wiring:
Right Flipper: Green to outside lug, non banded diode Black/yellow stripe to outside lug, banded side of diode
Left Flipper: Green 2x to non banded side diode Black/green stripe to outside lug, banded side diode
Star post counts:
22 clear posts on upper
19 clear posts on lower
26 clear posts on main (2 pieces are taller)
Zoom for main PF wire numbersZoom for basement PF wire numbersZoom for attic PF wire numbers
Pinsound Buzz
I first purchased a Pinsound board several years ago as a means to “fix” an intermittent sound issue with my Data East Last Action Hero. It definitely did the trick but it seemed to me a bit of a waste to have this expensive piece of hardware on a game a I rarely played. Nothing wrong with LAH, I just don’t play it much. I ended up removing the Pinsound board and repairing the original sound board. I dropped the Pinsound board back into it’s original box and promptly forgot about it for almost 2 years.
Half a dozen new pins later, I found myself with a Creature from the Black Lagoon and a desire to upgrade the sound on the machine. The original sounds are good for the era of machine, but they are not FLAC level lossless by any stretch of the imagination. I wanted to see what could be done with the Pinsound board and an upgrade in speaker hardware. After pulling the Pinsound board out of the box in the bottom of my parts closet, I decided to go all in and order the complete Pinsound speaker upgrade kit as well. The feedback I read was that the speakers combined with the Pinsound board, were a perfect match from a balance of speaker impedance and board power. Folks said they sounded nice, had clear midrange and highs and could play as loud as needed with low distortion.
While waiting for the speakers to arrive, I thought it would make sense to quickly install the Pinsound board and get it working ahead of time. Pulling the old sound board was a very straightforward (and fast) process. A few minutes later and I had the old board sitting on my bench. You have to pull the ribbon cables in order to get to the board, so be extra careful as you do it in order not to stress the cable or bend the board based pins. Take some photos so you are 100% certain of the cable orientation (red stripe). Getting the new Pinsound board installed was simply the reverse of that process and in about 10 total minutes I had the board mounted using the Bally factory mounting points and screws.
If you are not aware, all Pinsound boards require a file to be downloaded to a USB stick. So I went to the Pinsound website to gain access to the original CFTBL sound file for download. After download, the file is moved to the memory stick and then inserted into a provided slot on the Pinsound board. You don’t do any post processing of the file you download. It comes down as a “zip” and you move it to the USB stick in that original condition. Once inserted into the Pinsound board and powered up the board does the unzipping and builds the folder structures on the fly. That same file is what you are listening to as you play the game after install. Remember, your original sound ROM is now gone – it was removed from the game when you pulled the original sound board. In many cases, you’ll have access to several versions of the game sound file. The original will almost always be available, and there will sometimes be several (many on occasion) new, custom made sound files created by the Pinball enthusiast community. I chose the original CFTBL sound file for my initial installation. Note that there are 2 slots in the Pinsound board to house individual sound files, making it possible to (at game launch) to choose which version you want to hear. Very cool feature indeed!
I finished placing my wiring back on the Pinsound board and moved the downloaded sound file off my laptop to the USB stick. Inserting the USB takes just a second and a second later, I turned on the machine. I left the backbox open because the sound controls that allow you to dial in the Pinsound output are all on the board itself and you almost always will need to tweak those dials. The dials on my (few years old) Pinsound are in this order (L to R)
EQ sub-bass
EQ bass
EQ medium
EQ treble
EQ sub-booster
After booting up the machine, I waited patiently for the familiar “Pinsound boot” chime but it never came. I pushed the start button and the game started but without sound. Not even a peep. I powered down and double checked the file structure on the USB – it was just perfect. I tried it again. Still no joy. I tried another USB but to no avail. Finally, I put a minute of thought into it and considered that if the Pinsound chime was missing, maybe the connection to the speakers was not correct. I reviewed the placement of the speaker output wires on the Pinsound board and found the issue right away – I had plugged those wires into the “WPC DCS” output terminals, exactly one segment to far to the left. I unplugged them, moved them to the right in the correct Williams WPC89 spot and BOOM, I had sound. With my mistake cleared it was time for a game and a listen!
The game sounded immensely better. I could tell right away. I could also tell that it needed some dial twirling to get it perfect. I spent a few minutes dialing up the treble (I’m 59 and almost deaf in my left ear) and making some small adjustments to the remaining dials. I played a few games and really enjoyed the clarity of the new sound board and sound file. Call outs were easier to understand, the dynamic range between callouts and sounds was dramatically increased and the music was crisper. I was really focused on just playing the original sounds so did not order the Pinsound Headphone Station. You’ll need that piece of hardware if you decide you want the flexibility of switching (even on the fly) between the original sounds and alternative sound packages built by other pinball fans. the Pinsound Headphone station provides and externally accessible knob that you twist to cycle from one sound package to another. You CAN still switch sounds packages without that hardware, but you’ll need to stop the game and manually plug in the new sound package on a dedicated USB drive. Not a big deal as I don’t see folks (unless you are in the process of developing your own sound package) needing that kind of flexibility. Alternatively, to save you from opening the backbox all the time to get to the Pinsound board, you could run a simple USB cable extension to your coin box area and make the USB drive swaps right there – more convenient for sure. Bottom line is that simply installing the board was showing me I could get all of these benefits, much improved sound and it was still playing on 30 year old speakers! I couldn’t wait to get the new speakers in from Pinsound and see how much better it could be.
While waiting for the speakers to arrive from France, life at the ranch continued to march on. It was the start of June and that means time to pull honey from our Bee hives. We started bee keeping last year and had 3 hives in total. By year end, we had lost 2 of those 3 (unsure why) but one of the hives made it through the winter to enjoy some early warm weather in February. That hive was housed in what is called a Flow Hive. Flow Hives are made in Australia and are a very unique invention, representing the largest shift in bee keeping technology since the Langstroth hive/frame system allowed the commercialization of the industry.
I’ll keep it simple. The Flow Hive has a unique honey storage section made from artificial (plastic) honeycomb that can articulate from normal to “split in half” in just a few seconds. This allows you to harvest honey (when the plastic storage area is full) by simply inserting a long “key” into the rear if the hive, turning it, cracking those thousands of honeycomb cells open and allowing the honey to simply run into a channel that is built into the Flow Hive system and out the back into a waiting jar! No need to disturb the bees, no need to open the hive. Just crack those cells, collect the honey and pop a label on it. Unfortunately for us, sometime around March, we noticed fewer and fewer bees around the front of the Flow Hive. By the time, I opened it for inspection, there were less that a dozen living bees left. Ugh. We lost our last hive. It was very disheartening to say the least. Thousands of dollars wasted and hours of time gone and no bees left to show for it.
Harvesting honey from the Flow Hive right in the kitchen
It was bitterly cold now so I waited a few days before pulling the brood box frames out to freeze them for later use. Frames that have built out comb are like gold. 75% of the work a bee colony does is to create the comb to raise brood (baby bees) and store honey. After freeezing to destroy any pests, the comb will be reused to give the next colony a BIG head start. When it finally warmed up enough for me to get into the hive, I noticed that the honey super (yes, that plastic one on top) was heavy. Like full of honey heavy! I carried the whole thing inside and plopped it on the kitchen counter for inspection. Sure enough, at least 3 frames of the seven were stuffed with honey. It was all capped and stored neatly just like it should have been. We suspected there was some honey stored and always planned to leave that for our first year colony to eat as survival food during the long winter. Well, it turned out they stored more than we thought and ate very little of it. We harvested the remaining honey and in the process, rekindled our passion to “try it again” this year. I ordered 3 more packages of bees for April delivery right away
This is what is called a “package” of bees – around 10,000 per box
Our bees showed up on time, and we installed a total of 2 packages and 2 nucs. Nucs get a much faster start than a basic package of 10,000 bees so those 2 hives grew the fastest. We lost a part of one hive to swarming but even that hive produced honey. In late May, I inspected all the hives and discovered that the 2 nuc based hives had lots of honey capped and it was close to harvest time. A few weeks later, my Pinsound speakers were confirmed to be on the way, but this early June day was going to be designated to focus on the bees.
The queen in her protective cage (along with 4-5 bees to attend to her)
We got back from a church function and got to work right away. I put together the honey extractor first as it would be needed to spin out the honey from the comb. Next my daughter and I donned our bee suites and marched out to the bee yard area. Sure enough, the 2 largest hives were full of honey with 8 out of 10 of the frames in the medium super and 2 frames in the deep super all full and capped. Honey should only be harvested when the bees have filled each honeycomb cell and then “capped” it with beeswax. Then you can be confident that the honey is at 17% moisture content and will not ferment after harvesting.
Tami and I ready for hive inspectionThat’s a medium frame full of capped and ready to harvest honey
We extracted 50lbs of honey (just over 4 gallons)! It was lots of work, but a simple process – Pop open the hives, remove each frame, blow off the bees and haul them off to the pole barn. Decap each frame using a special knife, drop 4 frames in the extractor, crank the handle, pull the frames and decap the opposite side and repeat the process. Chris and Taylor got stung once each (I escaped unscathed). Finally, honey is drawn out the gate at bottom of the extractor and run through a double filter screen into a 5 gallon food safe storage bucket. What we pulled will make over 30 pint jars. We spent more than an hour cleaning up the sticky mess and all headed out to dinner to celebrate.
Slicing off just the “wax cap” that the bees have placed on top of each cell of honeyA 4 frame centrifugal extractor – crank it by hand!
That’s extra wax running out with the honey, it’s then double screen filtered before packaging
The next day we tackled the Flow Hive because it was the easiest and to be honest, we were all exhausted. We pulled that honey in the early afternoon and, as described earlier in this post, it was fast and easy! Open the back, set up the shelf and a catch jar, then insert the long key to “break” the honeycomb. Watch the honey run into the jar! We finished that in maybe an hour and collected another gallon and a half from just 2 of the 7 frames! Done for the year at around 5 gallons total. Yea!
That’s a quart jar and look how fast it fills up in just 18 seconds! Checking on the “artificial comb” of a Flow Hive frame – yup, it’s capped and ready!Our branded, labeled and packaged Red Heaven Ranch Honey
With the honey harvest behind me, I focused my attention on the box that just arrived from France. My Pinsound speakers were here! I knew from experience that this was not a real complex install so I planned it for an evening project. I don’t know why, but the majority of boxes I receive as direct shipments from China or Europe are of a thinner/cheaper cardboard. The outer shipping box of the Pinsound package was no exception. It’s almost as if the cardboard is more “paperboard” than anything! No matter, the products inside were safe and sound. I opened the outer shipping box and removed the contents. One the inside boxes were opened I spent a minute looking for the installation booklet – only to discover that the “booklet” is just one 2 sided sheet.
The instructions are that simple. Step one is to remove the existing speakers and wire harness. Pinsound provides you all new speakers and a new “2.1” wire harness. I unscrewed the existing speakers in the speaker panel, unplugged the molex connector connected to the Pinsound board and fished the wires out from behind the ribbon cabling in the backbox. In under 10 minutes, you’ll have the old speakers on the topside out. Take a few minutes to dust off the grills that probably have not seen the light of day in years and you are ready to start the speaker panel install
Save the old speakers and harness – the modifications are 100% reversible
When you pull the DMD on a WPC machine you’ll notice the terribly undersized and tinny sounding right speaker. Mounting a larger (matching the left size) speaker was an issue that was solved a few years ago by several folks. All approached the solution the same way – create an adapter that screws to the reverse face of the DMD and using that adapater you can now mount the new/larger speaker. Pinsound’s solution was no different. Their adapater is black ABS plastic (other use wood or HDF) and getting it installed is pretty quick. Follow the instructions to put the new screws (provided) into the right holes so you don’t do something stupid like poke one out the front of the speaker panel. I checked the depth of the screws vs the holes vs the speaker panel BEFORE i screwed them in. In the case of this right speaker, you ARE making new holes in the back of the speaker panel (one of the few “non-reversable” moments in the install). After the adapter is in place (4 screws through the holes marked “B”), the new speaker can be mounted to it with little effort.
Right speaker installLeft speaker install
I mounted my speakers using the provided diagram so the orientation of the speaker terminals were closest to the player when the panel was pulled and laid down on the playfield rails. This is probably a great time to share the new tool I used to hold the speaker panel in place for all this work – the DMD slide buster magnets from Mike’s 3D Things on Pinside (see image). They are small but mighty and a “must have” for this kind of work (or anytime you pull the speaker panel to access the backbox). They lightly magnetize to the side rails and give you a scratch protective and non-slip surface to lay your DMD panel on while working in the backbox. Simple but very effective.
Mike’s 3D Things – the DMD Slide Busters are a must have!
With the speaker terminals mounted facing the player, it was a simple task to plug the wire harness onto the correct speaker terminals. The terminals and the wire connectors are sized to ONLY fit the correct position on the speaker (positive and negative accordingly). Once the topside was wired to the speakers, I tucked/hooked the wires into the very same retention clips used on the original harness and plugged the 2.1 molex connector into the sound board in the clearly marked (this time correct!) location
Cabinet speaker removed
Next it was time to install the cabinet speaker. The size compared to the original was surprising. It looked nearly twice the size of the original speaker. It is was so big that I immediately questioned how it would fit. Worry not reader – it fits just fine. Even though the cabinet speaker is mounted off center and close the left edge of the cabinet bottom, it still tucks in there perfectly. To install, you unsolder the 2 speaker terminal connection (or cut them close as they will not be use again).
Next, you’ll loosen and remove the 4 nuts holding the old speaker in place. Once loose, just lift the speaker up and out of the cabinet. Leave the ground braid wire and the speaker grill in place. Pinsound has provided a speaker adapter (similar to the one up top for the right side speaker/DMD panel) and you mount that part next. You’ll use the original screw studs (still sticking up from the bottom of the cabinet) to hold the new adapter tight to the cabinet bottom. Once the adapter is securely mounted, use the Pinsound provided long screws to affix the new Pinsound speaker to the adapter through the 4 holes marked “A”. Snug them down good but do not overtighten as you are setting a screw in plastic. Finish the job up by routing the subwoofer (the 0.1 part of the 2.1 cable harness) through the existing wire loops on the edges of the cabinet bottom, and connect the +/- wires to the cabinet speaker. Don’t forget to tuck in the old cabinet speaker wire with some electrical tape or a zip tie as it will not be needed again unless you decide to un-install the Pinsound speaker set. At this point the install is complete and you can move on to adjusting the sound to your preference
Pinsound spacer added before installing the cabinet speaker
How’s it sound? Fantastic! There is waaaaaaaay more bass from that cabinet speaker. Given the flexibility allowed by the Pinsound board to boost it, you can really dial in all the bass you would ever want. I will not be adding an external sub to this game – no need for it. Voices (call otus) are significantly clearer. Each dial on the Pinsound board has an extreme range of sound impact. Stay somewhere in the middle of the settings to start and I would not vary much before 10 and after 2 o’clock. The 10/11 o’clock settings will dial back that sound band and the 1/2 o’clock settings will dial it up. It’s all up to you and what sounds best to you. I’ll make some very basic recommendations. Don’t boost anything to the extent that it introduces distortion. If you are wondering if you have done that, just listen. If it sounds good, you are probably not introducing distortion of any significance. Be especially careful of the “Mids” dial as that can make the sound too thin when dialed back too much and can really muddy up the high end when dialed UP too much. Each game will likely be a bit different as the source material was handled/mixed different depending on the technology and/or the sound designer from that era.
Cabinet speaker final installation
The Pinsound system is a great way to upgrade an older Williams/Bally machine. The unique benefit that Pinsound offers vs other sound upgrades is the ability to load alternative sound packages. On top of that the Pinsound team provides a very easy to swap board and a high quality set of impedance matched speakers that allow those sound packages to shine. The system is 99% reversible (save for a few hidden holes created by screws) and is completely invisible once installed. Just power up your game to hear the tremendous benefits
Kang & Kodos
All credit for this idea belongs to thpletcher over on Pinside. I’ve had a Simpsons Pinball Party for a few years now and love it. I purchased it as part of a bulk buy from a friend of a friend a few years back. It was one of 5 games I brought home that night (OK that morning as we arrived home around 2 or 3am)
About a week ago, I was reading through the TSSP club thread on Pinside and I saw thpletcher’s post that he had purchased the Kang and Kodos 13″ plush from Kidrobot and used them as a topper.
Odd … because I had “almost” purchased the very same plush “just because” about a month ago – they looked cool but I just couldn’t get past the “plush” part and worried they would be droopy or misshapen. Besides, I really wanted a vinyl version. So I didn’t buy them. Fast forward a few weeks and I saw that Pinside post and changed my mind on the spot. The post provided no details except where to buy them and that the poster had added some lighting to illuminate them.
Before I jumped in, I read up and refreshed myself on the background of these 2 character of the Simpson’s universe. What I found is that they are way cooler than I ever anticipated. First, most people know that the Kang and Kodos duo are aliens in the series. They almost exclusively show up during the annual Halloween “Treehouse of Horrors” special episodes. They are not friendly. It turns out though that they do “love humans” – to continue the joke “they just can’t eat a whole one by themselves”. (ba dum tsh)
Turns out the Simpsons writers were heavily influenced by the original Star Trek. The Kang and Kodos’s names come from two 1960’s Star Trek characters – one alien and one human. Kang was a Klingon captain portrayed by actor Michael Ansara in the 11th episode of season 3 called “Day of the Dove“. Kang would then reappear in Deep Space Nine’s “Blood Oath” and Voyager’s “Flashback”, though for me – there is only one Star Trek and that’s the original Shatner based series. Kodos the Executioner was a human bad guy from the 12th episode of the season titled “The Conscience of the King“.
It’s an unwritten writers rule that Kang and Kodos must appear in every Halloween episode. Again, according to Wikipedia, “the writers say the duo will often be forgotten and are added at the last second, leading to brief appearances.”
With the cultural significance solidified and my comfort level with a “plush topper” increased, I ordered the pair from Kidrobot. In the meantime, I started planning how to provide some light up there. Early on I got the idea to use ultraviolet light. I searched for a few minutes for a nice bright LED style light bar but could not find the one I would need at around 24″ to 27″ (max width is 27 1/2″ up there)
I finally settled on the simplest solution – a UV LED Light strip. I bough a nice aluminum channel to stick it to and waited (impatiently) for all the parts to arrive. The UV LED arrived first. Great. I could get that bit installed and plop the plush up there when they arrived. The LED strip install went smoothly:
Cut the plastic diffusor to length with sharp scissors (27″)
Wipe down inside of aluminum channel with alcohol
Measure LED strip to best cut point – cut with scissors (around 26″ in this case)
Peel LED strip backing and adhere to inside (45 degree) flat face of aluminum channel
Wipe down underside of aluminum channel with alcohol
Add a piece of 3M VHB RP-16 tape to underside of aluminum channel
Fold the LED power supply cable back on itself and zip tie it into a short loop (see image)
Do the above step so the power supply cable does not hang over AND so it does not begin to delaminated the LED strip from the aluminum channel (takes the “spring” out of it)
Mount the aluminum channel with integrated LED strip right even with front edge of cabinet
Add the controller unit to the power supply cable end of the LED strip
I used some sticky velcro to hold the controller/LED supply cable junction to the cabinet top
Plug in the power supply to 110volt outlet (mine is controlled by Alexa to come on with the game)
The remote that comes with the unit (like most remotes) would be confusing to an Electrical Engineer, with a degree in Physics and a Doctorate in Computer Science. Thankfully, I only have a 2 year degree in Fine Arts but it was still a struggle. The Brightness buttons also control the speed at which anything takes place and the “Jump” and “Fade” buttons are reversed.
The “100” button on the tiny remote will get you back to “just the lights thank you” and that last hint is worth reading this far! I tell you all that because you can set a pretty cool “fading effect” using the “Jump” setting and then use the Bright/Dim buttons to control the fade to your liking – see video of the whole thing in action
Overall a simple and relatively inexpensive topper for your TSSP. I was worried about the “plush” part but to be honest they look amazing. I was worried the UV LED might not be bright enough – actually, it’s just perfect. I was also concerned about them being too large – they are close but they look fine, especially if placed against a wall OR in a row of games with toppers already installed.
Simpsons Tree House of Horrors XV (aired in 2004). Kang and Kodos are cooking the Simpsons
Bart: Am I the only one in horrible pain?
Homer: You’re the only one who won’t shut up about it.
Ultraman Starlight
There were moments when playing Ultraman that the lower center of the playfield seemed dark to me. I wondered if adding spots would help. Problem is I don’t like all the exposed wiring, the strap ties that you have to add (and cut later to access/replace rubbers etc) and the fact that they are visible above the playfield. I forgot about the issue until I was on the Comet website ordering some LEDs and saw their “Star Post Light Kits“. These are the round shaped 4 LED wafers that fit UNDER the star posts of almost any game. I thought, why not try these. They are typically installed under the posts in your slings but can be used almost anywhere there is a star post. You can get them in a 2 post or 3 post kit – depending on whether you want to do all 3 posts in your slingshot area or just 2.
Kit image taken from the Comet Pinball website
I ordered 2 sets of the 2 post kits. The kits come with everything you need to hook them up.
LED light wafer
Power harness that connects each wafer to a common power supply
Dimmer to dial in the brightness
Power supply alligator clips
The wiring order starting at the power supply side goes like this:
Connect power supply to existing GI lamp
Connect dimmer to the power supply cable
Connect the splitter/power harness to the dimmer
Connect each end of the splitter to each LED wafer (2 or 3)
Effectively you are powering each wafer from a single power supply cable and one dimmer
Cards come with the kit and scanning the QR code will take you directly to the install instructions
Install is fast on these and requires (for Ultraman) that you remove the sling plastics and plastic protectors on the right side of the game. On the left side, you’ll need to loosen the ramp by removing the one nut holding it to the sling area.
After all plastics have been removed – right sling
Once the plastics are removed, you simply unscrew the star post using a 1/4″ hollow nut driver, place the wafer below with the LED’s facing up and tuck the thin wires (2 per wafer) down behind your sling switches. Reinstall all of the stuff you took off, then lift the playfield to finish up the wiring.
Nut driver (1/4″) to remove 2 of the 3 posts, a standard Phillips will remove the outside one
Underneath the playfield you’ll need to find the end of the LED wafer wires and plug your splitter/power harness into each of them. Connect the dimmer to that and you’re almost done. To make the final connection and supply the power, you simply find the closest GI lamp and use the alligator clips. I placed the red clip on the bulb center and the black on the body. Polarity does not matter so where you put the red vs the black is up to you. If polarity in the electrical sense is a new term to you, just do what I did and it will work fine.
Alligator clip connections to the existing GI bulb
Lucky me, I got to install these TWICE. I actually placed the 2 wafers on the inside 2 posts (toward center of game) on my first install and after turning on the game, discovered I had made a pretty big tactical error. The lower posts on each sling (again closest to the playfield center and closest to the player) are VERY visible and when lit from underneath, BLINDING! To be fair, I am using cool white under a crystal clear post – it’s going to be brighter than any other combo.
Look left and you’ll see the dimmer, follow to the right and see the “Y” cable that feeds each light
I quickly removed that lower/center LED wafer and swapped it to the outside most star post (not visible as it is buried under the plastics). It was the right call. I could now dial up the brightness (almost to max) with no issue of being blinded during gameplay.
Such an elegant and simple solution – fits like a glove under each post
The incremental light is just what I wanted and the character (and appearance) of the game is not changed. The star post lights are tied into the large LED lamp that sits just low and behind each sling so the game code behavior that is coded to that lamp, is the same behavior that you get with the newly installed star post light wafers.
Second attempt at install, I moved the star post light wafer to the outside post
You can see in the images that follow that the lowest star post on the slings has no light. That’s the one where I originally had one of the 2 LED wafers installed on each side but proved to be too bright and shined directly into your eyes during game play. Moving the 2nd LED wafer to the outermost star post on each sling was a perfect solution. I could then dial them both up to almost max brightness, enjoy all that light output but no glare. I used the Cool White LED option in order to match the GI and post colors (clear) that was installed in Ultraman. For aesthetics, Comet recommends that you color match where possible. In other words, if you have red posts, use the red LED color option when ordering. If you are trying to add significant lighting to the dark center of a playfield, I would recommend using one of the 3 white options they offer (cool, sunlight or warm).
Left slingshot image – final installRight slingshot image – final install
Overall I extremely pleased with these lights and will be adding them to a few more games soon. Creature is the first on the list and I’m sure there will be more. The lights are effective, easy to install and inexpensive by any measure of “pinball mods” – try a set and enjoy better game lighting right where it’s often needed most.
Top image is final install, bottom half of image is first attempt that had too much glare
Clayton Q & The Creature
If you’ve read my post earlier on the Creature I recently acquired, you’re aware that although it was nice, there were a few bumps and dings in the nearly 30 year old game. One of those issues showed itself in the typical dents you find in the side rails. Most of the time these dents align with the exact spot where the head folds down to contact them. If the operator or owner is not careful when lowering the head, it’s easy to dent the rails. In this case, the dents were one side only and much higher up the rail than you would typically see. The damage looked like somebody had dropped something on the left rail to cause the 2 dents that were very visible (and ugly) to the naked eye. When I bought the game, I decided I would do a “mini-restore” on it so I knew in advance that the rails needed to go.
Up to this point, I had already done quite a bit of work on the game. Including a new LED edge lit Creature, lit pops and a few other things. The 3 things that bothered me most were all cosmetic. The lock down bar receiver, the coin door and the dented side rails. I ordered a new lock down receiver from Pinball Life and it came (as usual) in a flash. I removed the old receiver, taped off the area around the cabinet edge and shot some fresh black paint to cover up the various splinters and crud that had built up there over the years.
After a few minutes to allow the paint to dry and with the playfield tilted up and out of the way, I replaced the old receiver. It’s just a few bolts and 4 or 5 wood screws to replace. The biggest challenge here was that one of the holes (the hole farthest to the right from the players position) that the bolt goes through was not drilled in a spot far enough to the right side of the machine to allow it to be properly mounted. I used a large drill bit to “yoke out” the hole more toward the right side of the cabinet. I added approximately 1/4″ of more “play” to move the entire receiver farther to the right for final mounting. To be fair, the receiver mounted in the original position, but when I attempted to add the lock down bar, it was pushed to far left and would not drop down onto/over the right rail – it was “off” by around 1/4″. I did not take a ton of pics during the install but the process (less making that right side hole larger) was very straightforward
The coin door came a few days later and I was back in the loft to complete the install. As is the norm, these seemingly simple projects can get a little more complex than anticipated! The existing door was scratched at some point and someone attempted to paint it – it looked like they might have painted it with a stick because no paintbrush could leave it looking that bad. The coin slots were a mess as well being all dinged up and the straight edges/right angle corners now reduced to wavy and rounded. Just ugly. No matter – I had a new coin door. I was 4 bolts and 1 molex connector away from a new face on the Creature! Or so I thought.
The bolts came out quickly. The molex connector was even faster. I spent 30 seconds cleaning the cabinet decal that was hidden behind the old coin door metal surround and then just a minute or 2 bolting the new door back onto the game. Then the door wouldn’t shut. Ugh. The interlock switch can be mounted in several positions and the flap on the new door that pushes the button in can as well. It took a minute to get all that shifted, and I had to remount the interlock switch on the game a bit deeper to the left of the cabinet. 15 minutes later all was right and the new door was in place. It looked amazing!
So what remained of the cosmetically deficient items that needed attention? Just those pesky rails. I had ordered them when I ordered the coin door so they were already in hand. Now I just had to install them. Trouble is … I’ve never done it before. I like pictures and the written word (blog anyone) so it took a bit to find someone that had taken the time to document the process. I finally found a really good tutorial and studied it closely so I had an idea of what I was getting into.
I then decided I would shoot some pics/video during the install in order to fill in some of the gaps that the existing tutorial left open. For one, the images in the tutorial show the putty knife square to the rail when trying to separate the rail and foam tape from the cabinet. I would not do that. It was VERY hard to push through that foam tape with the entire width of the putty knife. Instead, go under the rail at a 45 degree angle. You are leading with one corner of the putty knife and it takes less pressure and moves faster. Also note that in the tutorial, there was a stove bolt and nut on each rail near the front (coin door) of the game – same as mine. There was also a spiral nail driven into each opposite end (near the head and hidden behind the hinge) – mine did not have that nail. It had a hole available to add a nail, but nothing inserted
With the new coin door installed and a brand spanking new lock down receiver, I simply could not ignore the dented rail any longer. Our weekends here at the Red Heaven Ranch are always jam packed with activity, or ranch work (or both) and this Saturday was no different. Today we were prepping for an evening concert event. Clayton Q and Randy Russell were playing a private acoustic set for about 25 people. There would be a lot of work to do beforehand and some of that would fall to me. If I was to get these rails installed, I better start soon and finish early!
Clayton just before showtime
I put the mowers back in the pole barn, burned some boxes and was walking back in when it looked like we might get some rain off in the distance. The rain never materialized but a beautiful rainbow did and I ran over by the mini’s dry lot to snap a picture. It stayed for over an hour and eventually began to double. I took several photos before it was time to get back at preparing for the concert
I finished all my chores and we were now ready for the 6:30 evening show. Time to get after those rails. I popped back over to the Loft and gathered all the tools and materials I would need to get my new rails installed.
The steps are simple, the work is tedious but it’s not hard: 1) Remove the single stove head bolt near the lock down bar 2) You “may” need to lift the playfield to get at the nut on the interior of the cabinet – I did not 3) Remove all 3 nuts on each side of the cabinet head that hold the hinge to the base of the head 4) Pull the 3 matching stove bolts out from the bottom (or watch as they fall out now that they are missing the nut) 5) Carefully rotate the hinge so it’s hanging down (don’t allow it to scratch your cab as it rotates)
6) Lay a double row (one on top of the first) of wide painters tape just below the edge of the old rail 7) Use your putty knife to carefully slide it (and an angle, not perpendicular) under the edge of the rail until it bottoms out 8) Work your way from the coin door end to the head end until the old rail is loose 9) Pull the old rail off the cabinet
10) Spend the next 30 minutes with Goo Gone and a plastic razor blade removing the old foam tape residue 11) Wipe down with alcohol when all residue has been removed 12) Optional: Grab a sharpie or color matched paint to fill in any scratches you made while removing the rails (not critical because the rail covers that damage) 13) Remove the old 2 layers of painters tape from the cabinet side and discard
14) Prepare new rail by wiping inside down with alcohol (promotes tape adhesion) 15) Add proper length of new foam tape (you did buy the tape, right?) 16) Stay about 1/2″ away from the edge that points to the floor when installed 17) Leave room at the opposite edge (1/8″) so foam tape doesn’t bunch up near the top 18) Leave the backing on the tape so you can do a test fit of the rail 19) Line up the stove bolt hole near the lock down bar (critical step)
20) Once aligned, carefully place a fresh piece of painters tape 1/2 of it on the new rail and 1/2 on the cabinet 21) Use this new painters tape as a functioning hinge to rotate the new rail off the cabinet but still attached at the tape hinge (see video that follows) 22) Remove the backing from the foam tape on the new rail 23) Rotate the new rail back onto the cabinet and apply pressure to adhere to cabinet 24) I took the time to Dremel polish each stove bolt before adding them back – you could skip that but mine were rusty 25) Next you’ll reinstall the 3 stove bolts on each side of the (inside) of the head – remember to replace the steel plate that the nuts butt up against
When finished, the outcome was better than I expected. The install took a bit longer but there were no surprises and no inadvertent damage to the game either. The rails from Pinball Life fit perfectly and the associated foam tape used for install (sold separately but you’ll want it) was just the right thickness. Overall impact is small in the grand scheme of things but taken in concert with the new coin door, the machine now has a fresh and clean look.
The Clayton Q concert was an absolute hit and I heard so many comments about how everyone had a really nice time. Clayton and Randy are incredibly talented artists, humble men and incredible entertainers. Clayton played his newest platinum single “Save Myself” and followed that with a few more of his new original songs. Randy played his acoustic like it was an electric and with incredible speed and finesse. Watch for Clayton’s original song titles like “Red” in the future as these are destined to be hits. A killer cover of Chris Stapleton’s “Tennessee Whiskey” was a highlight (they owned the song!) and the duo closed out the night with an extended version of “Sweet Home Alabama” with almost every guest singing along word for word! A good day for Creature and a wonderful night of entertainment for all.
Enjoy a few of Clayton’s video below. Be sure to check out the certified platinum “Save Myself”