Pinsound Buzz
I first purchased a Pinsound board several years ago as a means to “fix” an intermittent sound issue with my Data East Last Action Hero. It definitely did the trick but it seemed to me a bit of a waste to have this expensive piece of hardware on a game a I rarely played. Nothing wrong with LAH, I just don’t play it much. I ended up removing the Pinsound board and repairing the original sound board. I dropped the Pinsound board back into it’s original box and promptly forgot about it for almost 2 years.
Half a dozen new pins later, I found myself with a Creature from the Black Lagoon and a desire to upgrade the sound on the machine. The original sounds are good for the era of machine, but they are not FLAC level lossless by any stretch of the imagination. I wanted to see what could be done with the Pinsound board and an upgrade in speaker hardware. After pulling the Pinsound board out of the box in the bottom of my parts closet, I decided to go all in and order the complete Pinsound speaker upgrade kit as well. The feedback I read was that the speakers combined with the Pinsound board, were a perfect match from a balance of speaker impedance and board power. Folks said they sounded nice, had clear midrange and highs and could play as loud as needed with low distortion.
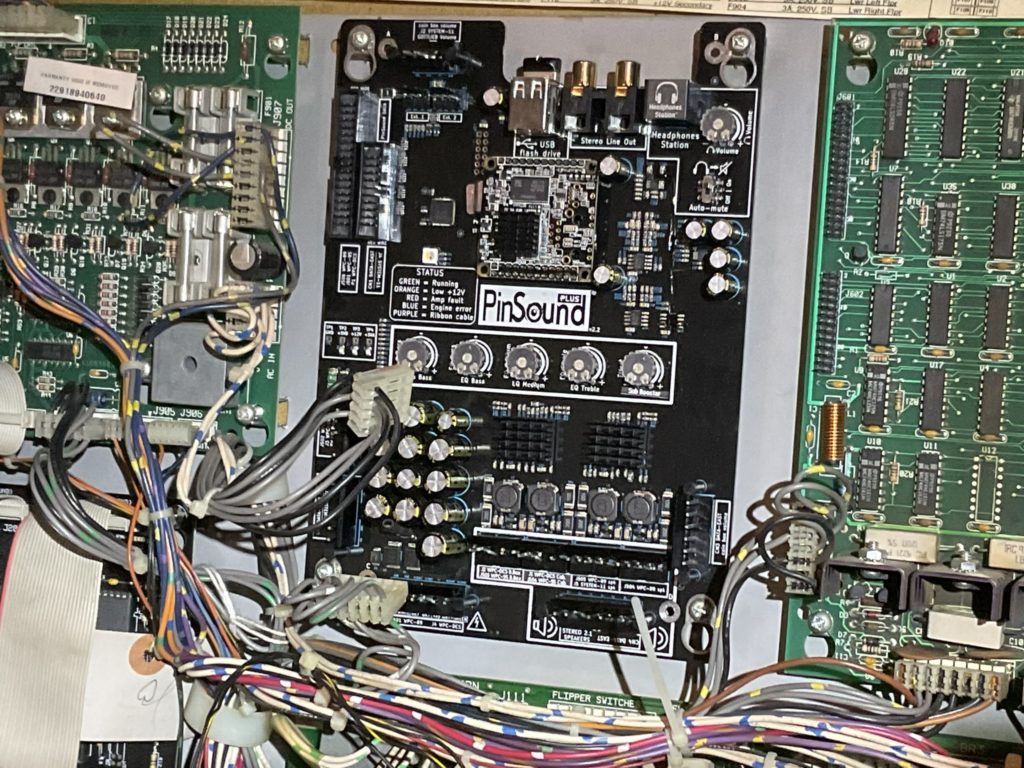
While waiting for the speakers to arrive, I thought it would make sense to quickly install the Pinsound board and get it working ahead of time. Pulling the old sound board was a very straightforward (and fast) process. A few minutes later and I had the old board sitting on my bench. You have to pull the ribbon cables in order to get to the board, so be extra careful as you do it in order not to stress the cable or bend the board based pins. Take some photos so you are 100% certain of the cable orientation (red stripe). Getting the new Pinsound board installed was simply the reverse of that process and in about 10 total minutes I had the board mounted using the Bally factory mounting points and screws.
If you are not aware, all Pinsound boards require a file to be downloaded to a USB stick. So I went to the Pinsound website to gain access to the original CFTBL sound file for download. After download, the file is moved to the memory stick and then inserted into a provided slot on the Pinsound board. You don’t do any post processing of the file you download. It comes down as a “zip” and you move it to the USB stick in that original condition. Once inserted into the Pinsound board and powered up the board does the unzipping and builds the folder structures on the fly. That same file is what you are listening to as you play the game after install. Remember, your original sound ROM is now gone – it was removed from the game when you pulled the original sound board. In many cases, you’ll have access to several versions of the game sound file. The original will almost always be available, and there will sometimes be several (many on occasion) new, custom made sound files created by the Pinball enthusiast community. I chose the original CFTBL sound file for my initial installation. Note that there are 2 slots in the Pinsound board to house individual sound files, making it possible to (at game launch) to choose which version you want to hear. Very cool feature indeed!

I finished placing my wiring back on the Pinsound board and moved the downloaded sound file off my laptop to the USB stick. Inserting the USB takes just a second and a second later, I turned on the machine. I left the backbox open because the sound controls that allow you to dial in the Pinsound output are all on the board itself and you almost always will need to tweak those dials.
The dials on my (few years old) Pinsound are in this order (L to R)
- EQ sub-bass
- EQ bass
- EQ medium
- EQ treble
- EQ sub-booster
After booting up the machine, I waited patiently for the familiar “Pinsound boot” chime but it never came. I pushed the start button and the game started but without sound. Not even a peep. I powered down and double checked the file structure on the USB – it was just perfect. I tried it again. Still no joy. I tried another USB but to no avail. Finally, I put a minute of thought into it and considered that if the Pinsound chime was missing, maybe the connection to the speakers was not correct. I reviewed the placement of the speaker output wires on the Pinsound board and found the issue right away – I had plugged those wires into the “WPC DCS” output terminals, exactly one segment to far to the left. I unplugged them, moved them to the right in the correct Williams WPC89 spot and BOOM, I had sound. With my mistake cleared it was time for a game and a listen!
The game sounded immensely better. I could tell right away. I could also tell that it needed some dial twirling to get it perfect. I spent a few minutes dialing up the treble (I’m 59 and almost deaf in my left ear) and making some small adjustments to the remaining dials. I played a few games and really enjoyed the clarity of the new sound board and sound file. Call outs were easier to understand, the dynamic range between callouts and sounds was dramatically increased and the music was crisper. I was really focused on just playing the original sounds so did not order the Pinsound Headphone Station. You’ll need that piece of hardware if you decide you want the flexibility of switching (even on the fly) between the original sounds and alternative sound packages built by other pinball fans. the Pinsound Headphone station provides and externally accessible knob that you twist to cycle from one sound package to another. You CAN still switch sounds packages without that hardware, but you’ll need to stop the game and manually plug in the new sound package on a dedicated USB drive. Not a big deal as I don’t see folks (unless you are in the process of developing your own sound package) needing that kind of flexibility. Alternatively, to save you from opening the backbox all the time to get to the Pinsound board, you could run a simple USB cable extension to your coin box area and make the USB drive swaps right there – more convenient for sure. Bottom line is that simply installing the board was showing me I could get all of these benefits, much improved sound and it was still playing on 30 year old speakers! I couldn’t wait to get the new speakers in from Pinsound and see how much better it could be.
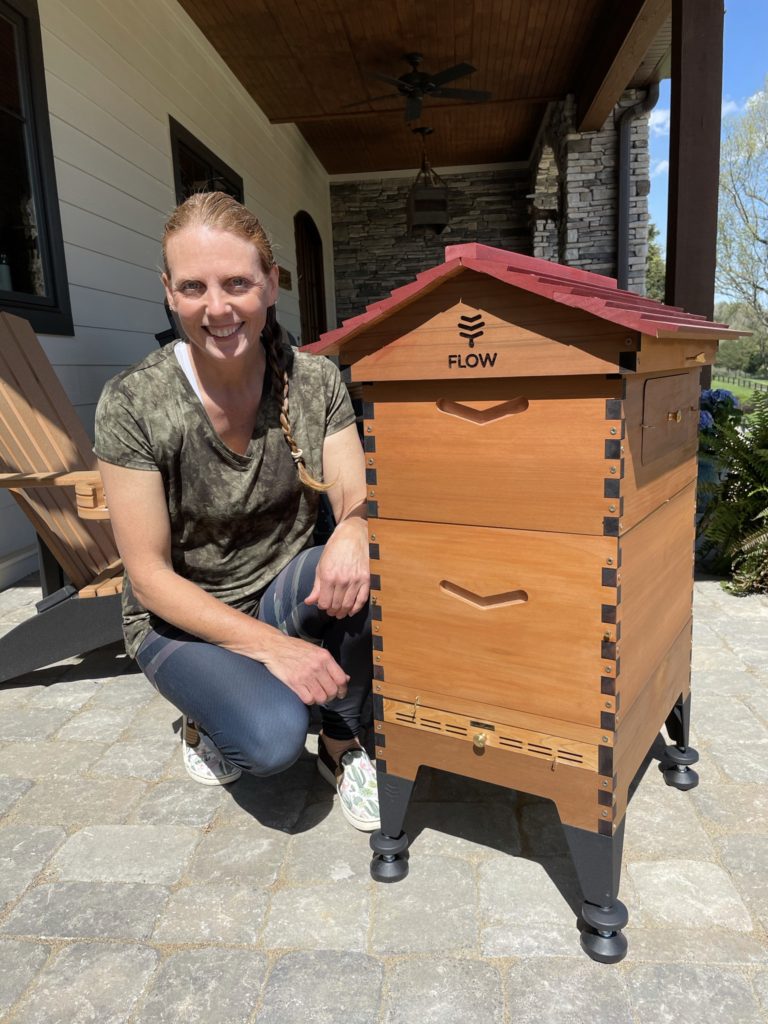
While waiting for the speakers to arrive from France, life at the ranch continued to march on. It was the start of June and that means time to pull honey from our Bee hives. We started bee keeping last year and had 3 hives in total. By year end, we had lost 2 of those 3 (unsure why) but one of the hives made it through the winter to enjoy some early warm weather in February. That hive was housed in what is called a Flow Hive. Flow Hives are made in Australia and are a very unique invention, representing the largest shift in bee keeping technology since the Langstroth hive/frame system allowed the commercialization of the industry.
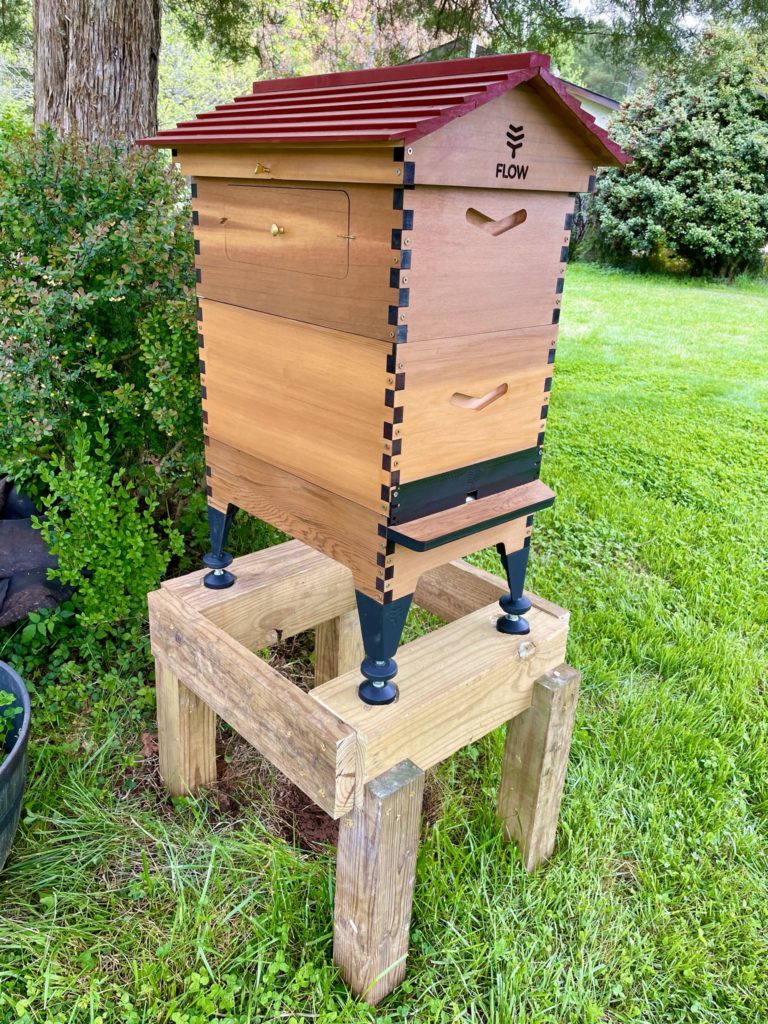
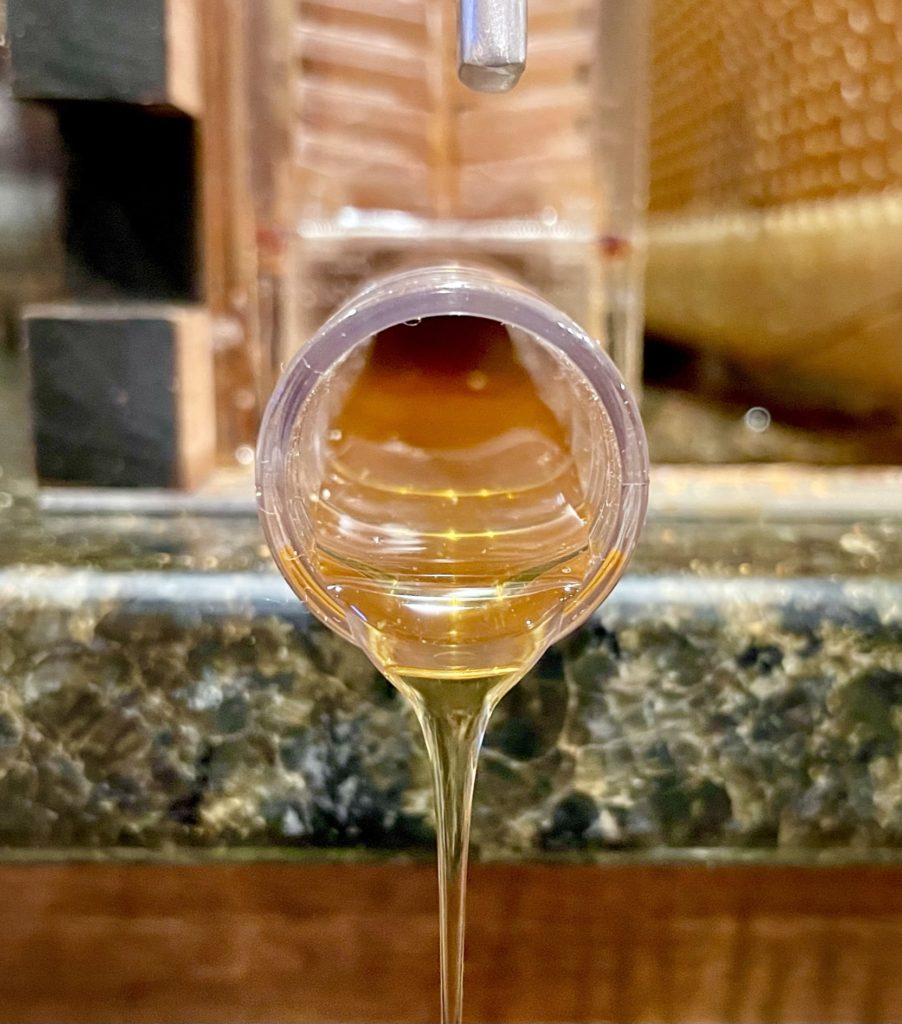
I’ll keep it simple. The Flow Hive has a unique honey storage section made from artificial (plastic) honeycomb that can articulate from normal to “split in half” in just a few seconds. This allows you to harvest honey (when the plastic storage area is full) by simply inserting a long “key” into the rear if the hive, turning it, cracking those thousands of honeycomb cells open and allowing the honey to simply run into a channel that is built into the Flow Hive system and out the back into a waiting jar! No need to disturb the bees, no need to open the hive. Just crack those cells, collect the honey and pop a label on it. Unfortunately for us, sometime around March, we noticed fewer and fewer bees around the front of the Flow Hive. By the time, I opened it for inspection, there were less that a dozen living bees left. Ugh. We lost our last hive. It was very disheartening to say the least. Thousands of dollars wasted and hours of time gone and no bees left to show for it.
It was bitterly cold now so I waited a few days before pulling the brood box frames out to freeze them for later use. Frames that have built out comb are like gold. 75% of the work a bee colony does is to create the comb to raise brood (baby bees) and store honey. After freeezing to destroy any pests, the comb will be reused to give the next colony a BIG head start. When it finally warmed up enough for me to get into the hive, I noticed that the honey super (yes, that plastic one on top) was heavy. Like full of honey heavy! I carried the whole thing inside and plopped it on the kitchen counter for inspection. Sure enough, at least 3 frames of the seven were stuffed with honey. It was all capped and stored neatly just like it should have been. We suspected there was some honey stored and always planned to leave that for our first year colony to eat as survival food during the long winter. Well, it turned out they stored more than we thought and ate very little of it. We harvested the remaining honey and in the process, rekindled our passion to “try it again” this year. I ordered 3 more packages of bees for April delivery right away
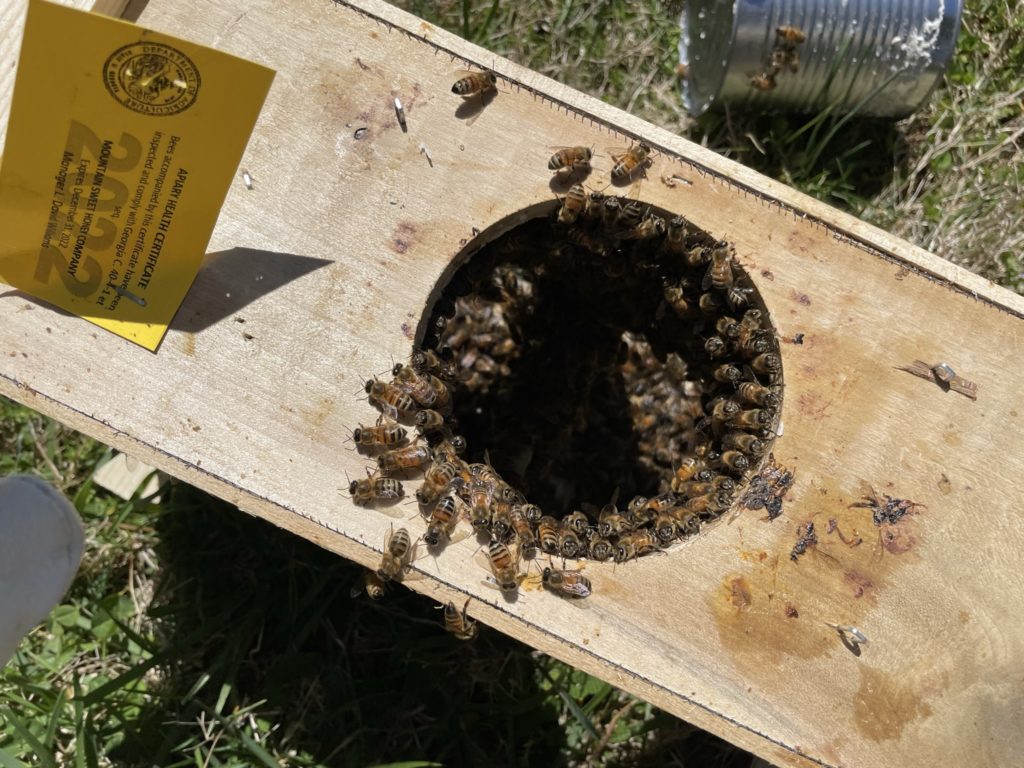
Our bees showed up on time, and we installed a total of 2 packages and 2 nucs. Nucs get a much faster start than a basic package of 10,000 bees so those 2 hives grew the fastest. We lost a part of one hive to swarming but even that hive produced honey. In late May, I inspected all the hives and discovered that the 2 nuc based hives had lots of honey capped and it was close to harvest time. A few weeks later, my Pinsound speakers were confirmed to be on the way, but this early June day was going to be designated to focus on the bees.
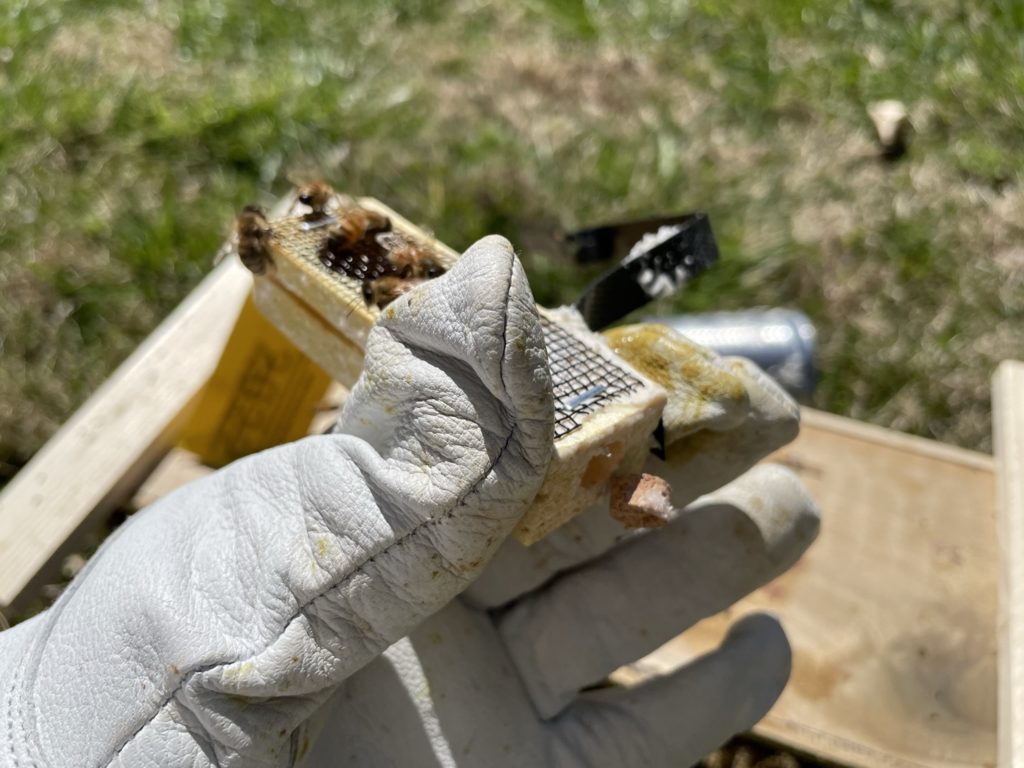
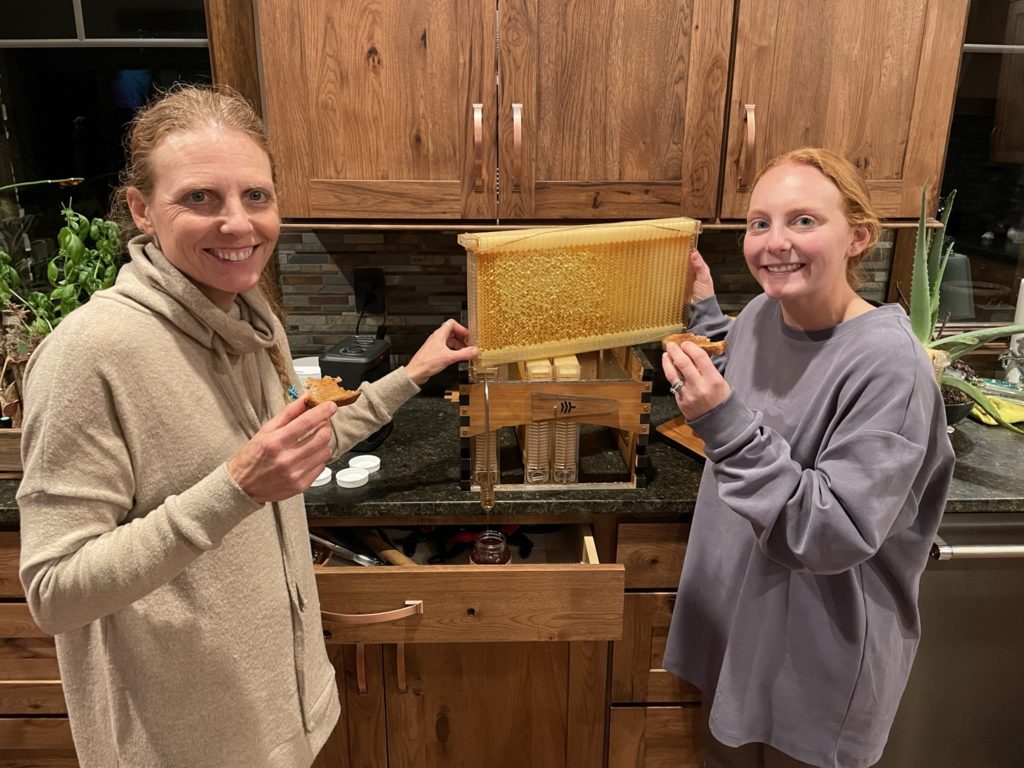
We got back from a church function and got to work right away. I put together the honey extractor first as it would be needed to spin out the honey from the comb. Next my daughter and I donned our bee suites and marched out to the bee yard area. Sure enough, the 2 largest hives were full of honey with 8 out of 10 of the frames in the medium super and 2 frames in the deep super all full and capped. Honey should only be harvested when the bees have filled each honeycomb cell and then “capped” it with beeswax. Then you can be confident that the honey is at 17% moisture content and will not ferment after harvesting.


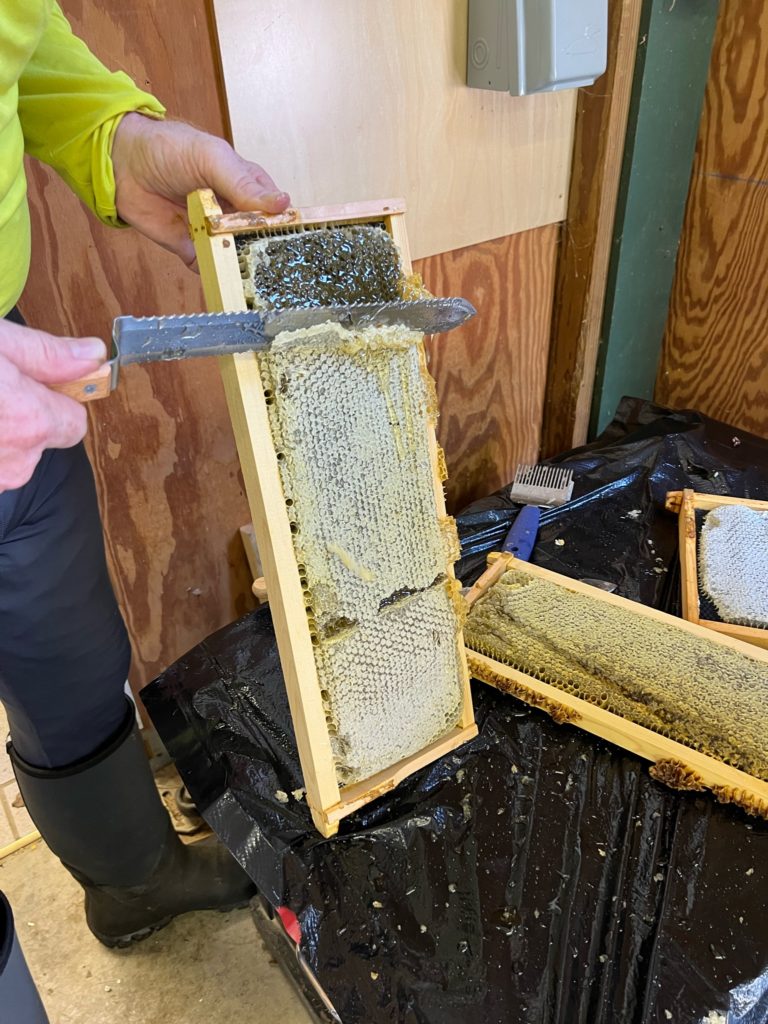
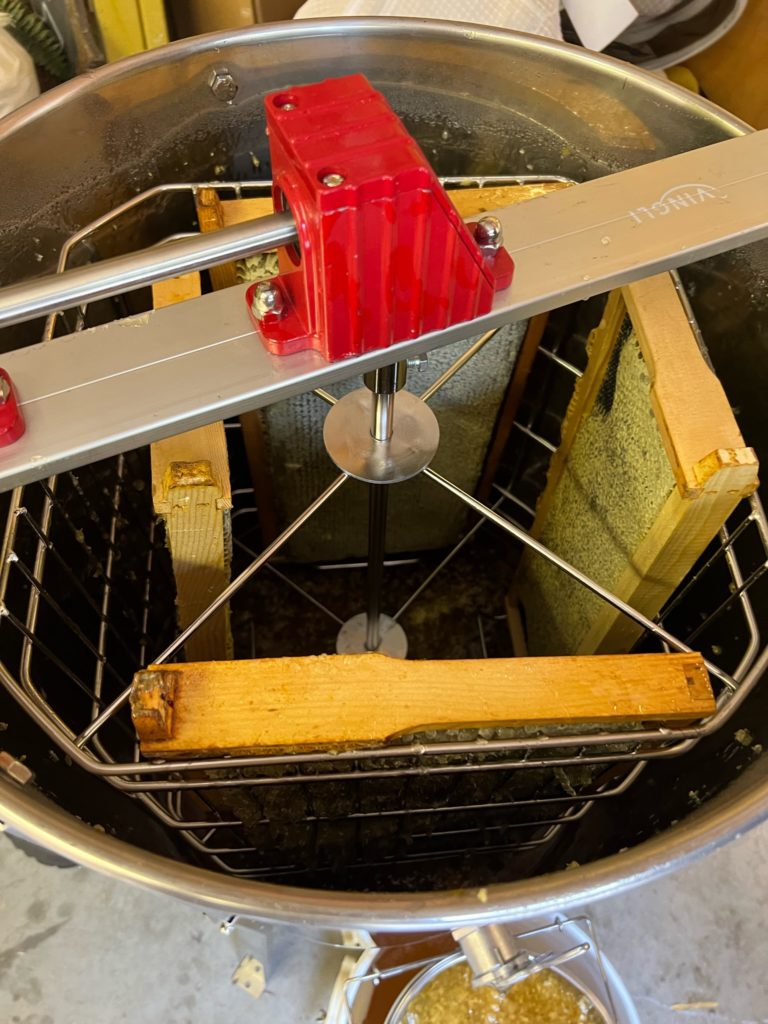
We extracted 50lbs of honey (just over 4 gallons)! It was lots of work, but a simple process – Pop open the hives, remove each frame, blow off the bees and haul them off to the pole barn. Decap each frame using a special knife, drop 4 frames in the extractor, crank the handle, pull the frames and decap the opposite side and repeat the process. Chris and Taylor got stung once each (I escaped unscathed). Finally, honey is drawn out the gate at bottom of the extractor and run through a double filter screen into a 5 gallon food safe storage bucket. What we pulled will make over 30 pint jars. We spent more than an hour cleaning up the sticky mess and all headed out to dinner to celebrate.
The next day we tackled the Flow Hive because it was the easiest and to be honest, we were all exhausted. We pulled that honey in the early afternoon and, as described earlier in this post, it was fast and easy! Open the back, set up the shelf and a catch jar, then insert the long key to “break” the honeycomb. Watch the honey run into the jar! We finished that in maybe an hour and collected another gallon and a half from just 2 of the 7 frames! Done for the year at around 5 gallons total. Yea!


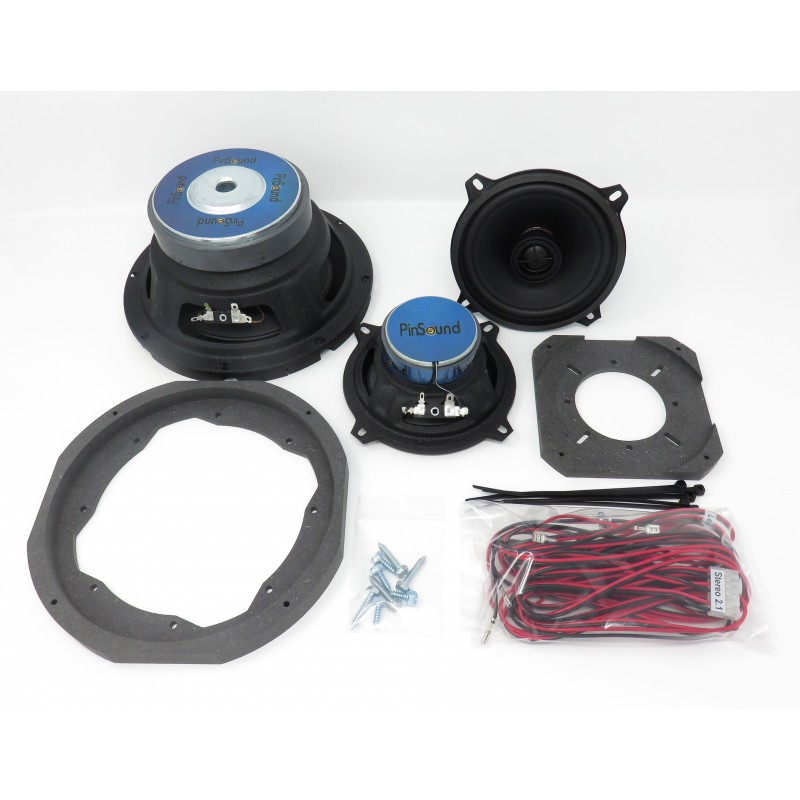
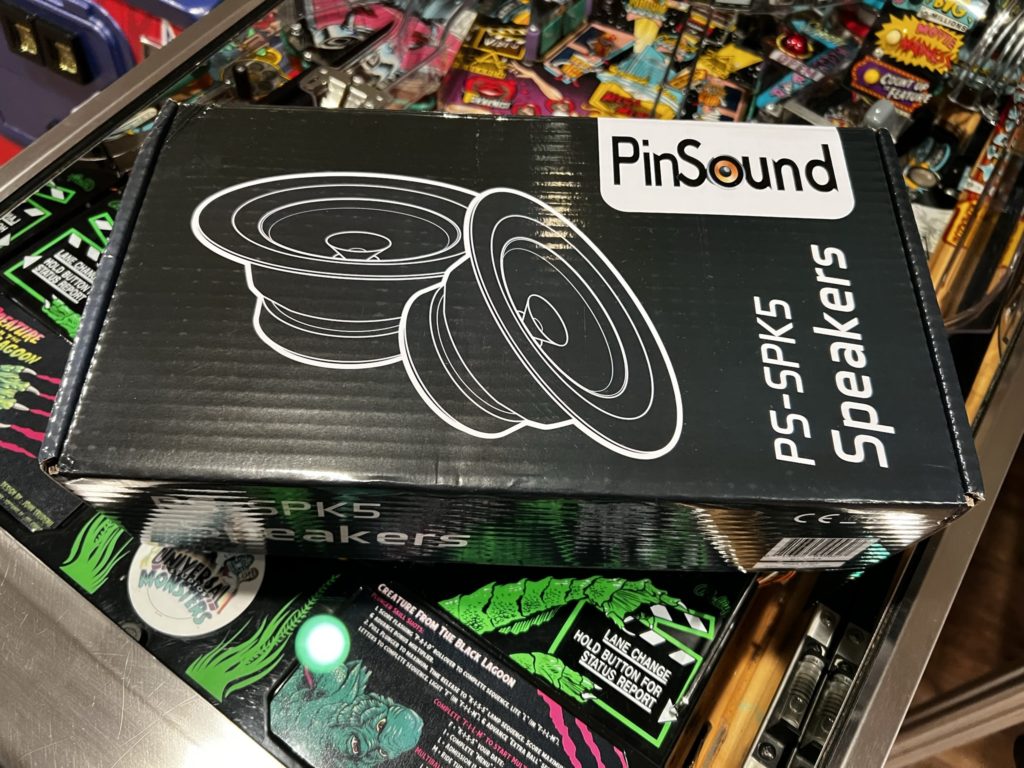
With the honey harvest behind me, I focused my attention on the box that just arrived from France. My Pinsound speakers were here! I knew from experience that this was not a real complex install so I planned it for an evening project. I don’t know why, but the majority of boxes I receive as direct shipments from China or Europe are of a thinner/cheaper cardboard. The outer shipping box of the Pinsound package was no exception. It’s almost as if the cardboard is more “paperboard” than anything! No matter, the products inside were safe and sound. I opened the outer shipping box and removed the contents. One the inside boxes were opened I spent a minute looking for the installation booklet – only to discover that the “booklet” is just one 2 sided sheet.
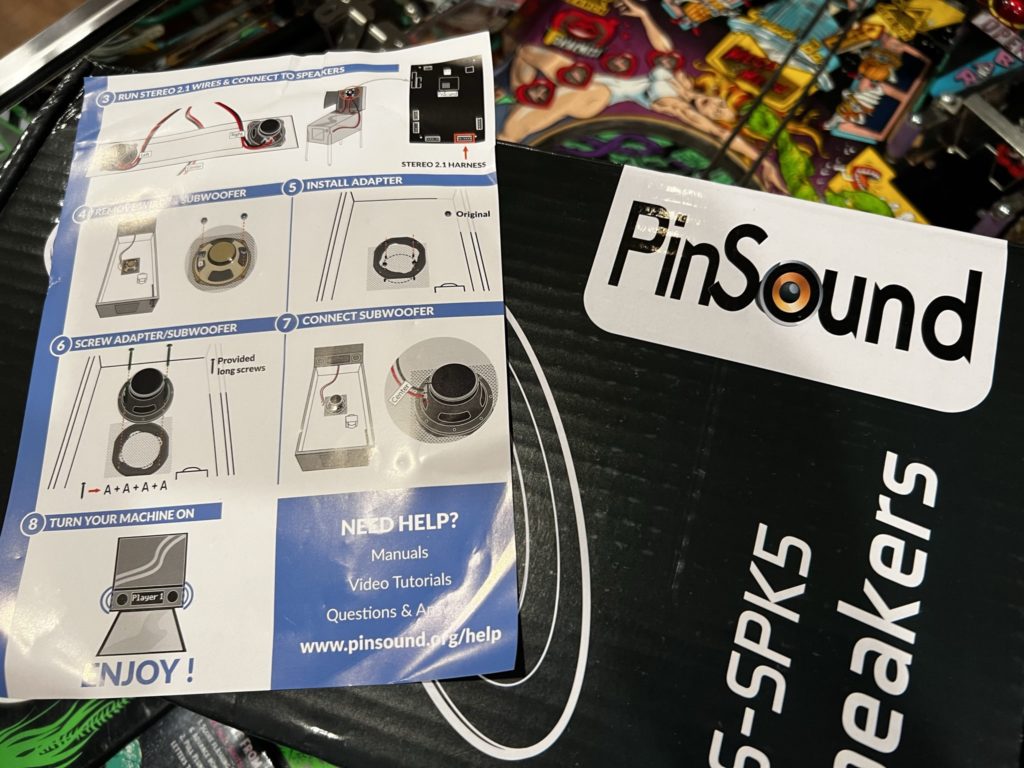
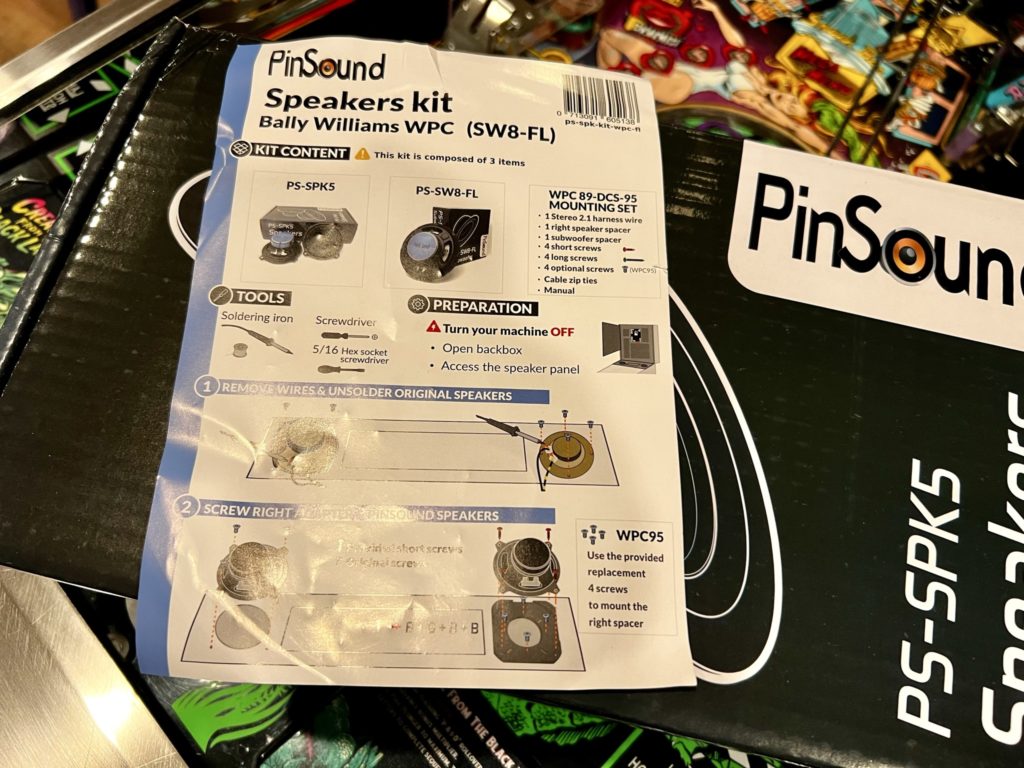
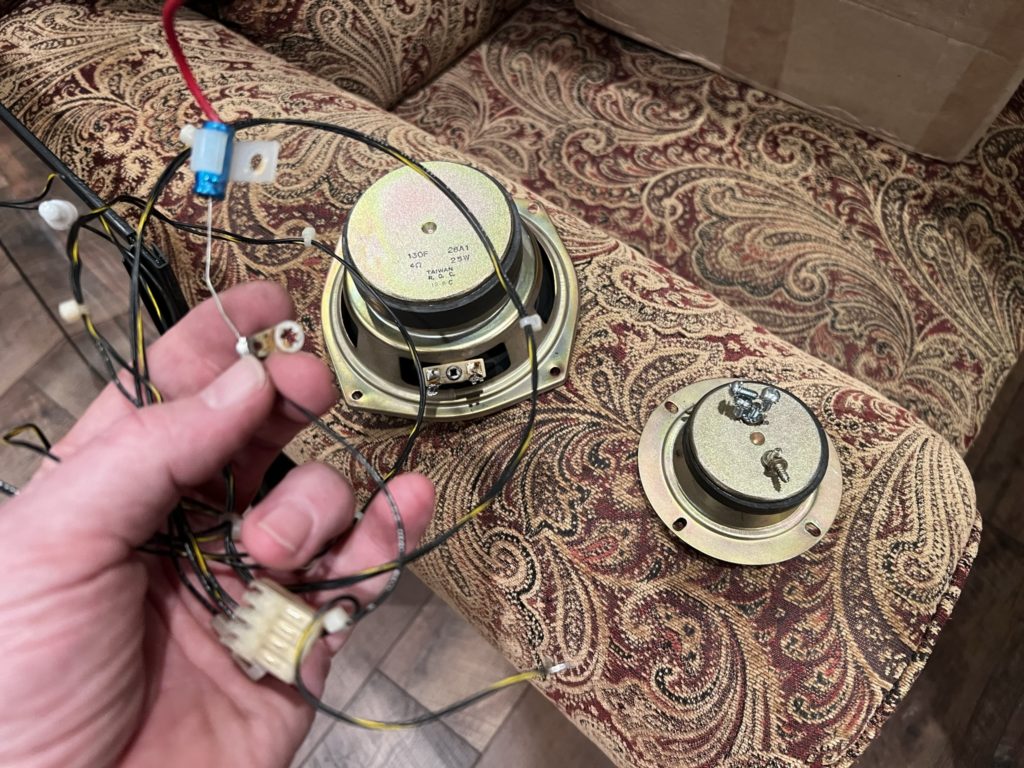
The instructions are that simple. Step one is to remove the existing speakers and wire harness. Pinsound provides you all new speakers and a new “2.1” wire harness. I unscrewed the existing speakers in the speaker panel, unplugged the molex connector connected to the Pinsound board and fished the wires out from behind the ribbon cabling in the backbox. In under 10 minutes, you’ll have the old speakers on the topside out. Take a few minutes to dust off the grills that probably have not seen the light of day in years and you are ready to start the speaker panel install
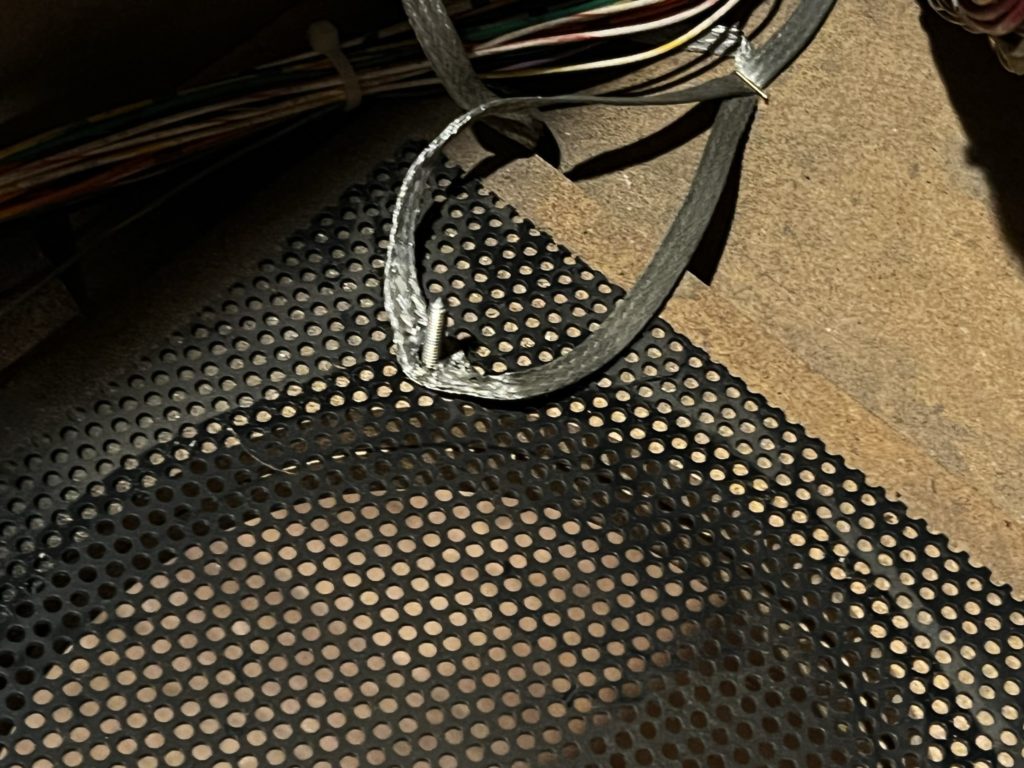
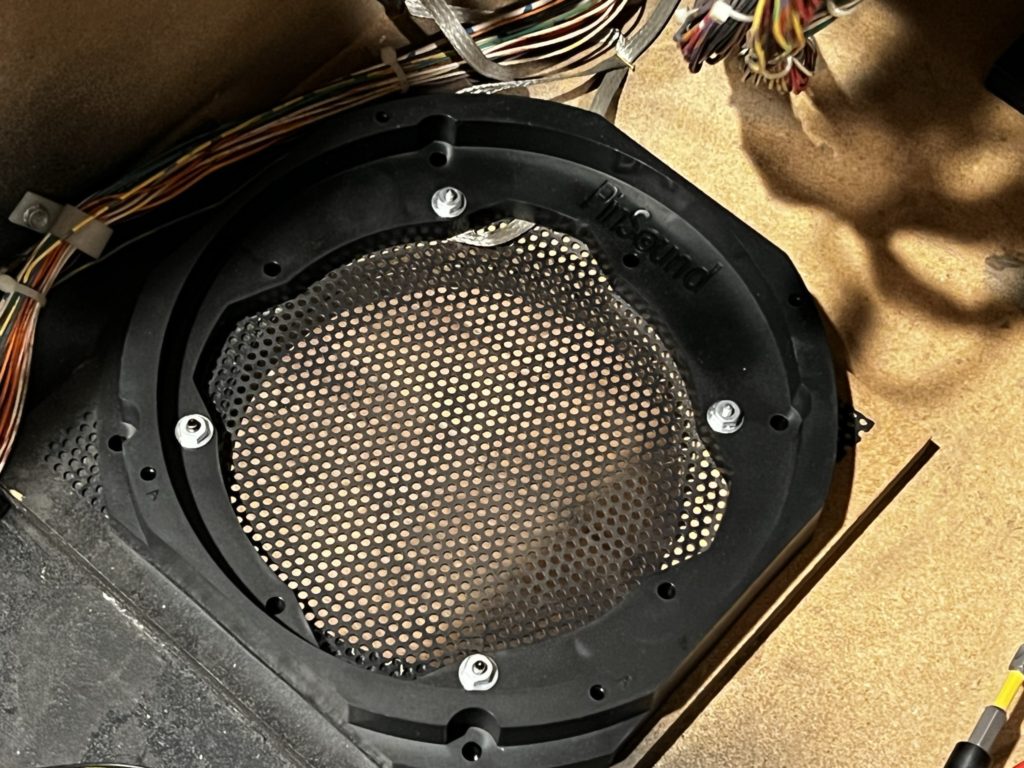
When you pull the DMD on a WPC machine you’ll notice the terribly undersized and tinny sounding right speaker. Mounting a larger (matching the left size) speaker was an issue that was solved a few years ago by several folks. All approached the solution the same way – create an adapter that screws to the reverse face of the DMD and using that adapater you can now mount the new/larger speaker. Pinsound’s solution was no different. Their adapater is black ABS plastic (other use wood or HDF) and getting it installed is pretty quick. Follow the instructions to put the new screws (provided) into the right holes so you don’t do something stupid like poke one out the front of the speaker panel. I checked the depth of the screws vs the holes vs the speaker panel BEFORE i screwed them in. In the case of this right speaker, you ARE making new holes in the back of the speaker panel (one of the few “non-reversable” moments in the install). After the adapter is in place (4 screws through the holes marked “B”), the new speaker can be mounted to it with little effort.
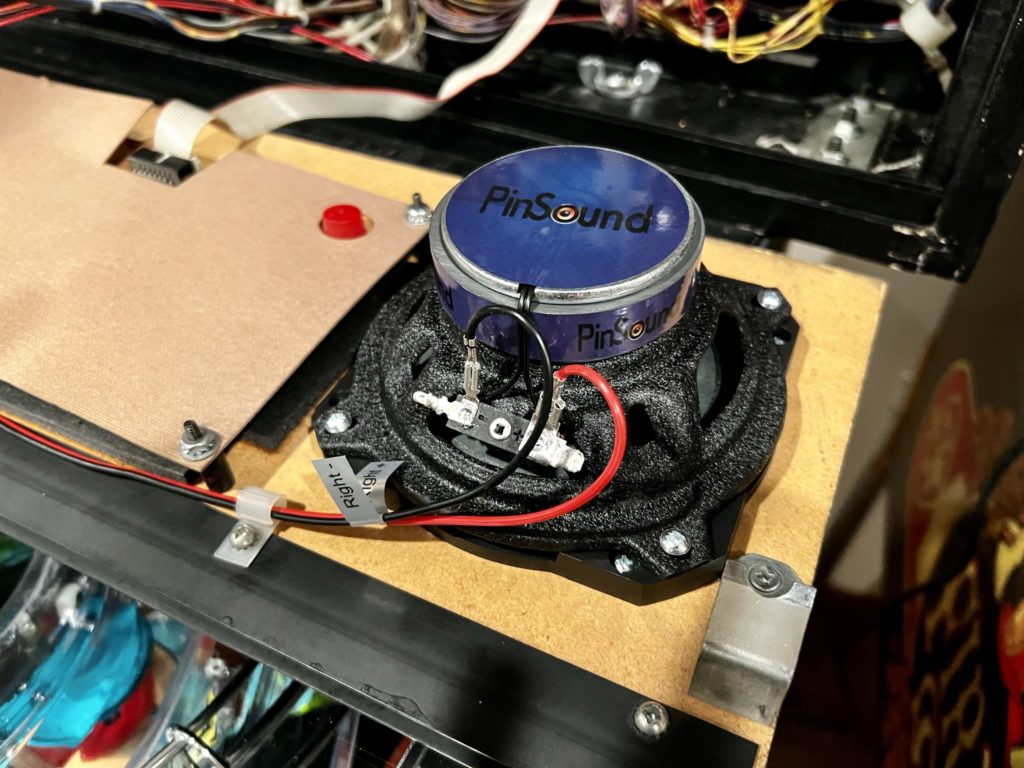
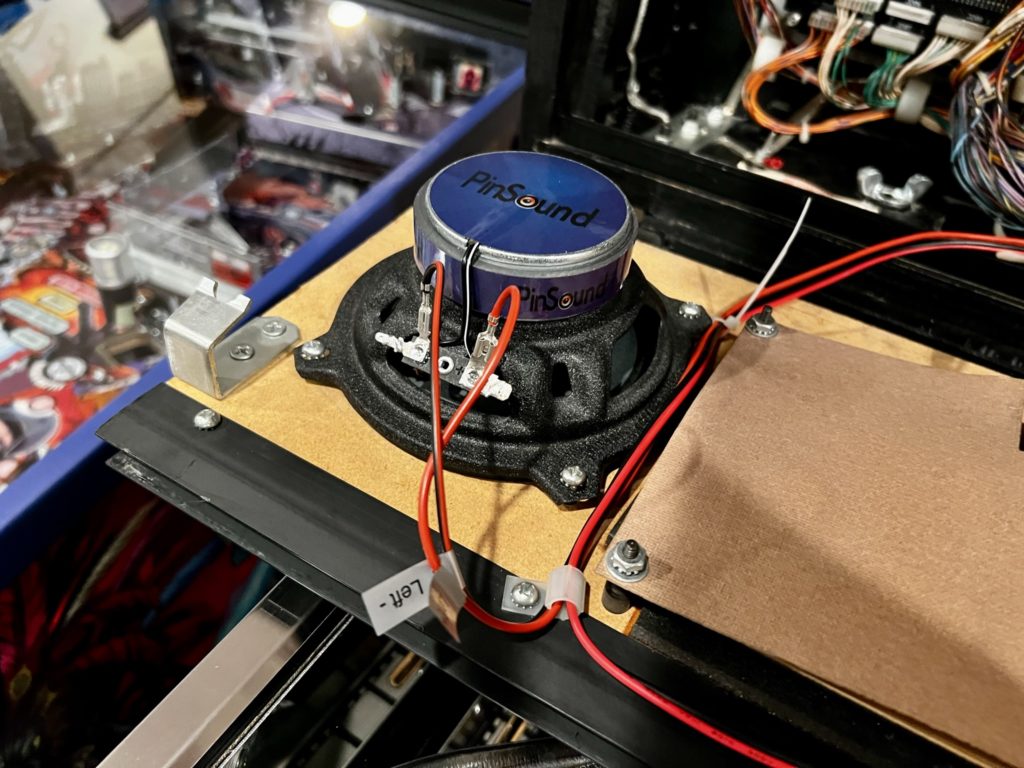
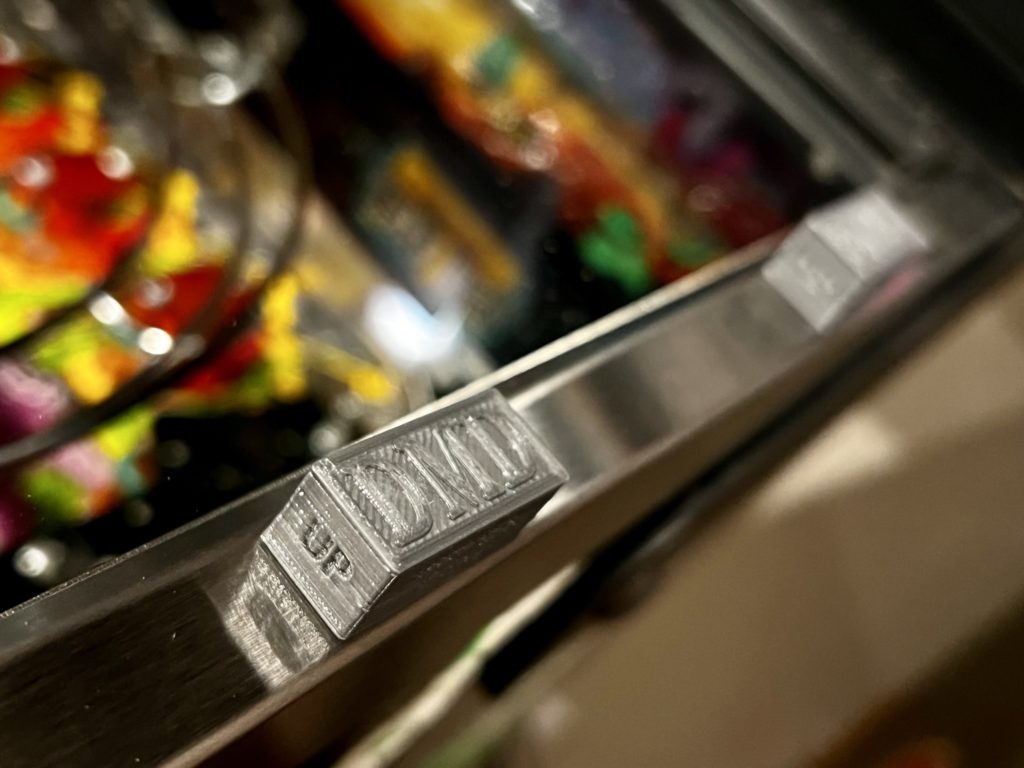
I mounted my speakers using the provided diagram so the orientation of the speaker terminals were closest to the player when the panel was pulled and laid down on the playfield rails. This is probably a great time to share the new tool I used to hold the speaker panel in place for all this work – the DMD slide buster magnets from Mike’s 3D Things on Pinside (see image). They are small but mighty and a “must have” for this kind of work (or anytime you pull the speaker panel to access the backbox). They lightly magnetize to the side rails and give you a scratch protective and non-slip surface to lay your DMD panel on while working in the backbox. Simple but very effective.
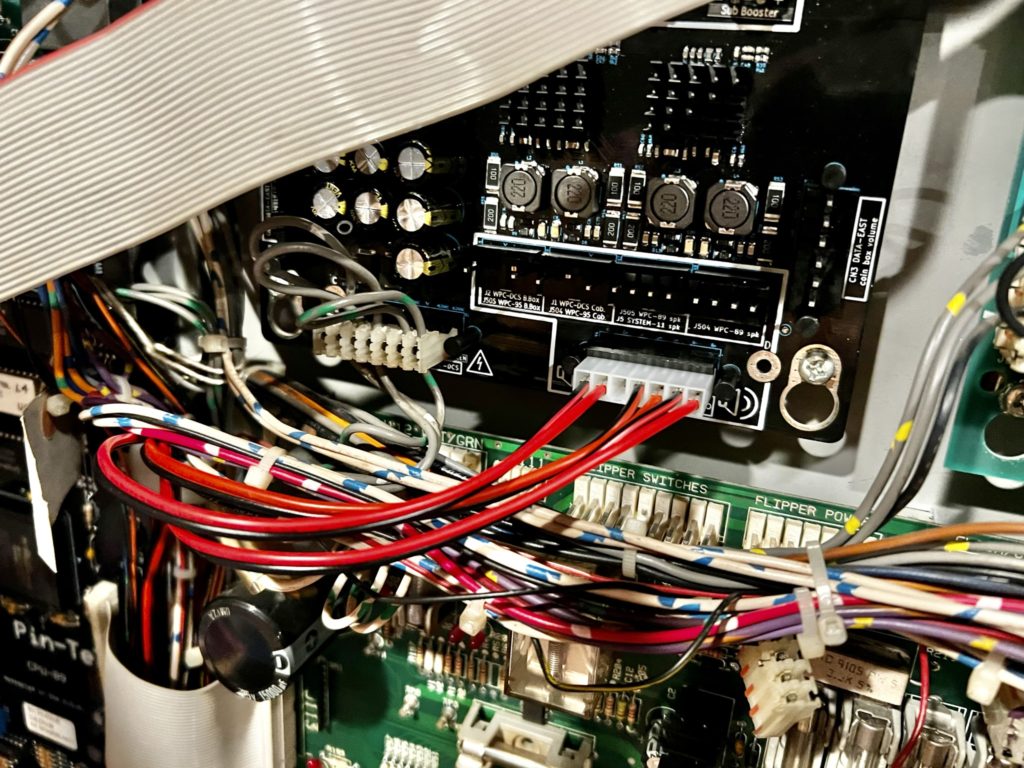
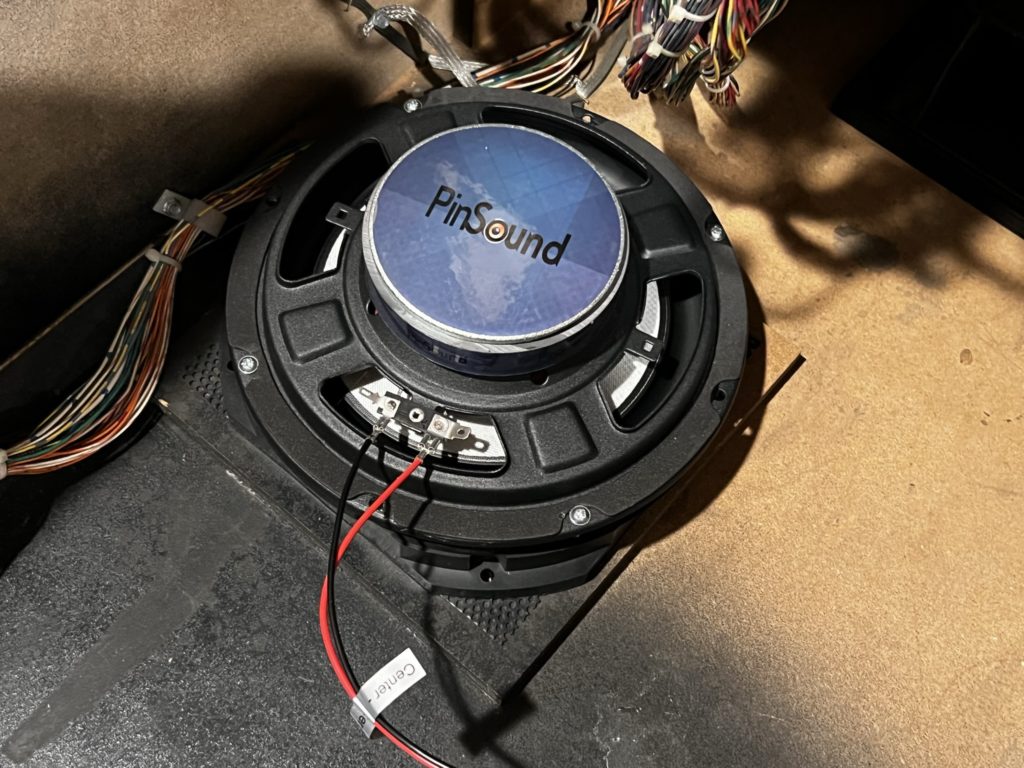
With the speaker terminals mounted facing the player, it was a simple task to plug the wire harness onto the correct speaker terminals. The terminals and the wire connectors are sized to ONLY fit the correct position on the speaker (positive and negative accordingly). Once the topside was wired to the speakers, I tucked/hooked the wires into the very same retention clips used on the original harness and plugged the 2.1 molex connector into the sound board in the clearly marked (this time correct!) location
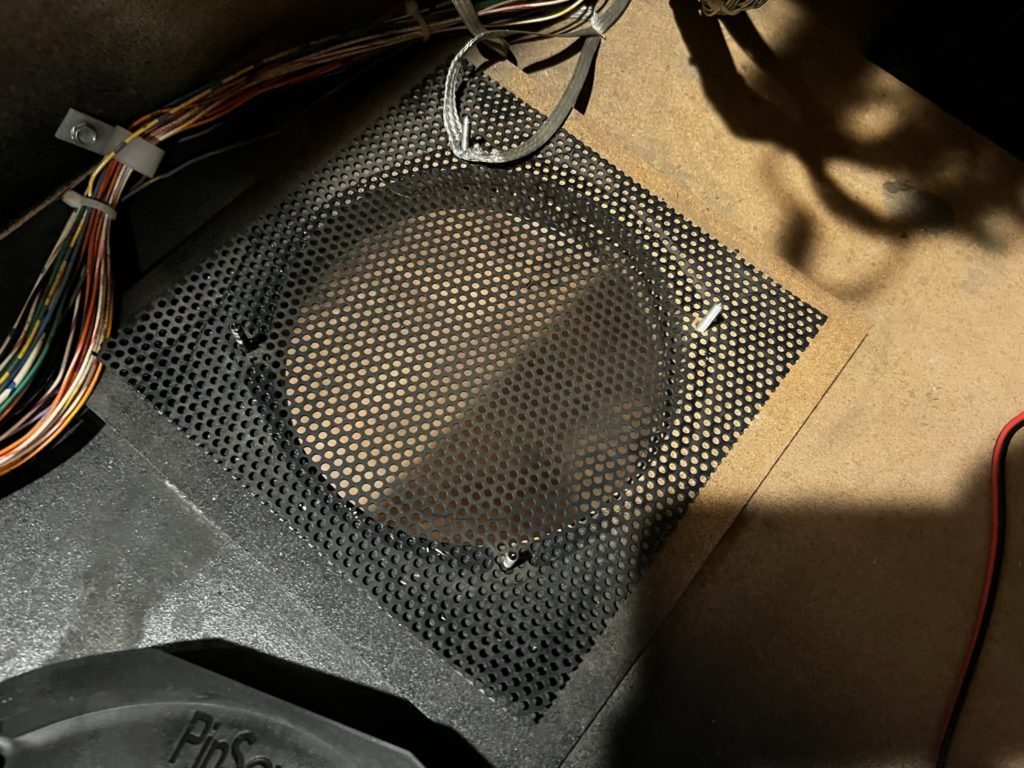
Next it was time to install the cabinet speaker. The size compared to the original was surprising. It looked nearly twice the size of the original speaker. It is was so big that I immediately questioned how it would fit. Worry not reader – it fits just fine. Even though the cabinet speaker is mounted off center and close the left edge of the cabinet bottom, it still tucks in there perfectly. To install, you unsolder the 2 speaker terminal connection (or cut them close as they will not be use again).
Next, you’ll loosen and remove the 4 nuts holding the old speaker in place. Once loose, just lift the speaker up and out of the cabinet. Leave the ground braid wire and the speaker grill in place. Pinsound has provided a speaker adapter (similar to the one up top for the right side speaker/DMD panel) and you mount that part next. You’ll use the original screw studs (still sticking up from the bottom of the cabinet) to hold the new adapter tight to the cabinet bottom. Once the adapter is securely mounted, use the Pinsound provided long screws to affix the new Pinsound speaker to the adapter through the 4 holes marked “A”. Snug them down good but do not overtighten as you are setting a screw in plastic. Finish the job up by routing the subwoofer (the 0.1 part of the 2.1 cable harness) through the existing wire loops on the edges of the cabinet bottom, and connect the +/- wires to the cabinet speaker. Don’t forget to tuck in the old cabinet speaker wire with some electrical tape or a zip tie as it will not be needed again unless you decide to un-install the Pinsound speaker set. At this point the install is complete and you can move on to adjusting the sound to your preference
How’s it sound? Fantastic! There is waaaaaaaay more bass from that cabinet speaker. Given the flexibility allowed by the Pinsound board to boost it, you can really dial in all the bass you would ever want. I will not be adding an external sub to this game – no need for it. Voices (call otus) are significantly clearer. Each dial on the Pinsound board has an extreme range of sound impact. Stay somewhere in the middle of the settings to start and I would not vary much before 10 and after 2 o’clock. The 10/11 o’clock settings will dial back that sound band and the 1/2 o’clock settings will dial it up. It’s all up to you and what sounds best to you. I’ll make some very basic recommendations. Don’t boost anything to the extent that it introduces distortion. If you are wondering if you have done that, just listen. If it sounds good, you are probably not introducing distortion of any significance. Be especially careful of the “Mids” dial as that can make the sound too thin when dialed back too much and can really muddy up the high end when dialed UP too much. Each game will likely be a bit different as the source material was handled/mixed different depending on the technology and/or the sound designer from that era.
The Pinsound system is a great way to upgrade an older Williams/Bally machine. The unique benefit that Pinsound offers vs other sound upgrades is the ability to load alternative sound packages. On top of that the Pinsound team provides a very easy to swap board and a high quality set of impedance matched speakers that allow those sound packages to shine. The system is 99% reversible (save for a few hidden holes created by screws) and is completely invisible once installed. Just power up your game to hear the tremendous benefits
