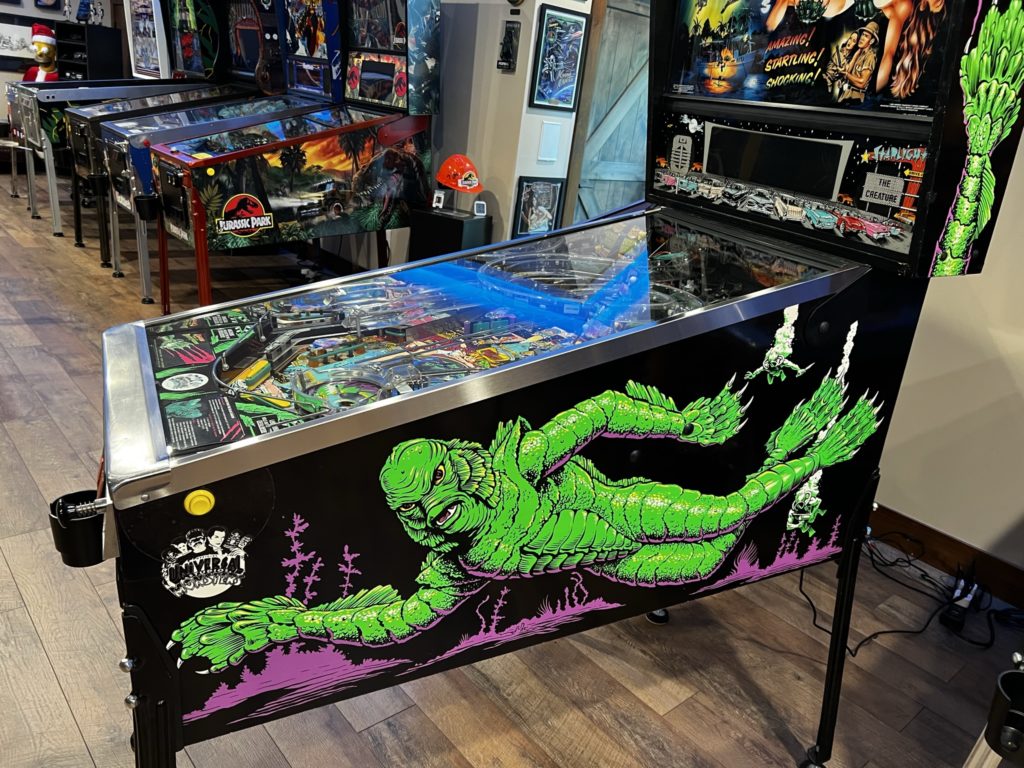
All credit for this idea belongs to thpletcher over on Pinside. I’ve had a Simpsons Pinball Party for a few years now and love it. I purchased it as part of a bulk buy from a friend of a friend a few years back. It was one of 5 games I brought home that night (OK that morning as we arrived home around 2 or 3am)
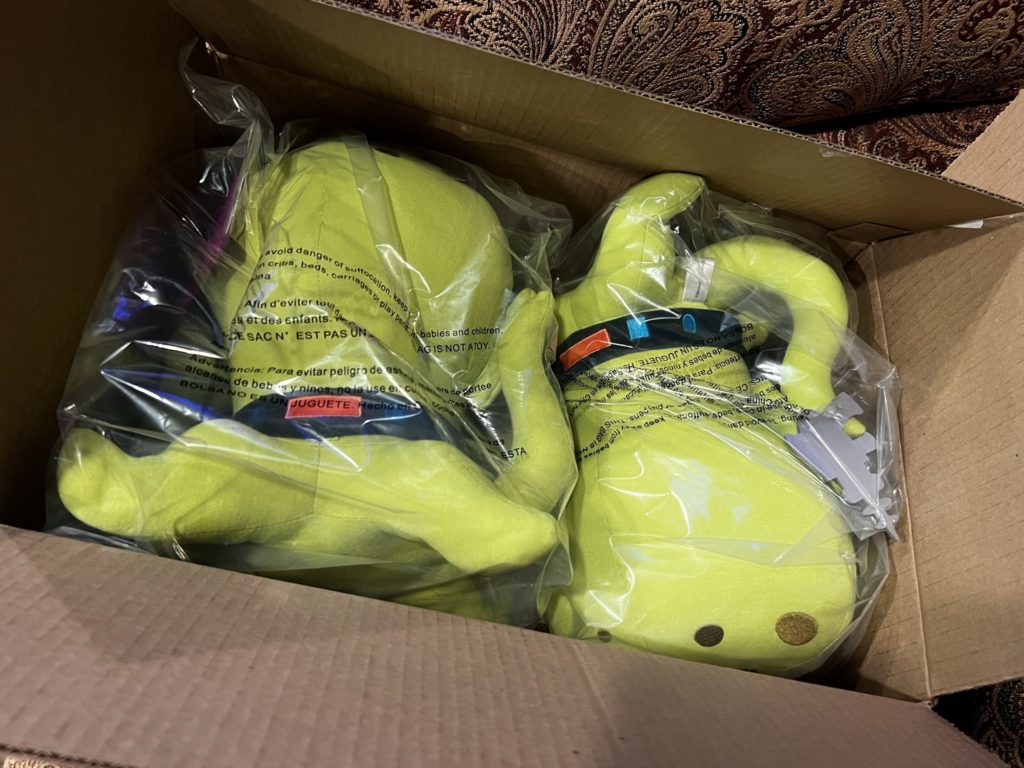
About a week ago, I was reading through the TSSP club thread on Pinside and I saw thpletcher’s post that he had purchased the Kang and Kodos 13″ plush from Kidrobot and used them as a topper.
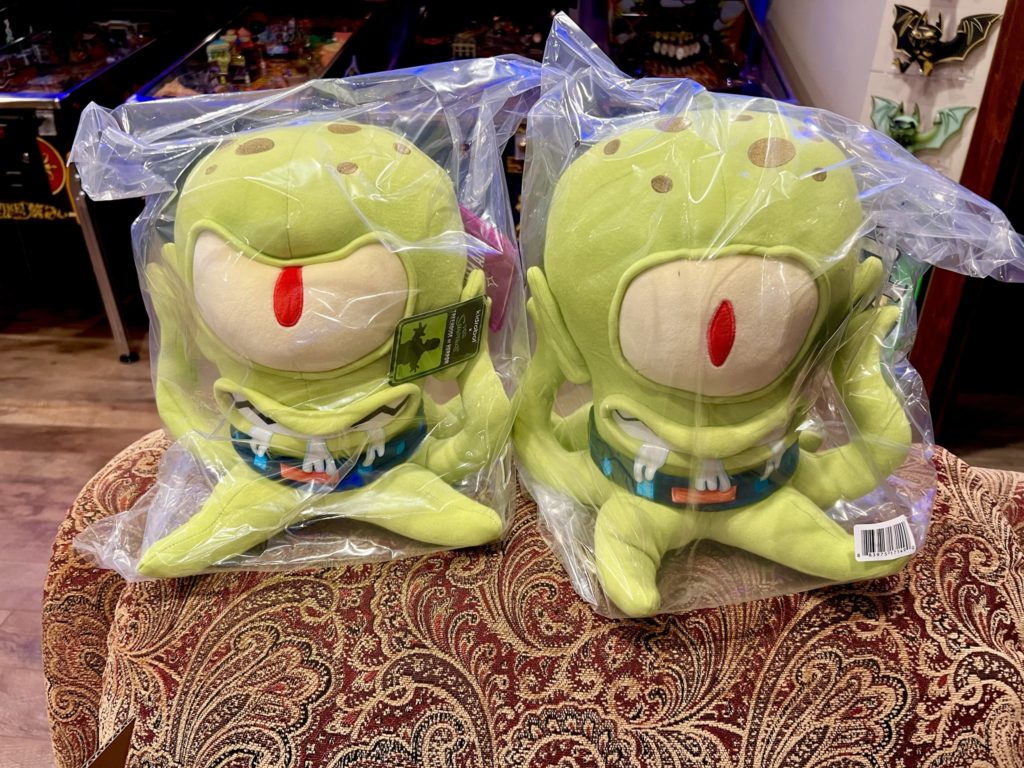
Odd … because I had “almost” purchased the very same plush “just because” about a month ago – they looked cool but I just couldn’t get past the “plush” part and worried they would be droopy or misshapen. Besides, I really wanted a vinyl version. So I didn’t buy them. Fast forward a few weeks and I saw that Pinside post and changed my mind on the spot. The post provided no details except where to buy them and that the poster had added some lighting to illuminate them.
Before I jumped in, I read up and refreshed myself on the background of these 2 character of the Simpson’s universe. What I found is that they are way cooler than I ever anticipated. First, most people know that the Kang and Kodos duo are aliens in the series. They almost exclusively show up during the annual Halloween “Treehouse of Horrors” special episodes. They are not friendly. It turns out though that they do “love humans” – to continue the joke “they just can’t eat a whole one by themselves”. (ba dum tsh)
Turns out the Simpsons writers were heavily influenced by the original Star Trek. The Kang and Kodos’s names come from two 1960’s Star Trek characters – one alien and one human. Kang was a Klingon captain portrayed by actor Michael Ansara in the 11th episode of season 3 called “Day of the Dove“. Kang would then reappear in Deep Space Nine’s “Blood Oath” and Voyager’s “Flashback”, though for me – there is only one Star Trek and that’s the original Shatner based series. Kodos the Executioner was a human bad guy from the 12th episode of the season titled “The Conscience of the King“.
It’s an unwritten writers rule that Kang and Kodos must appear in every Halloween episode. Again, according to Wikipedia, “the writers say the duo will often be forgotten and are added at the last second, leading to brief appearances.”
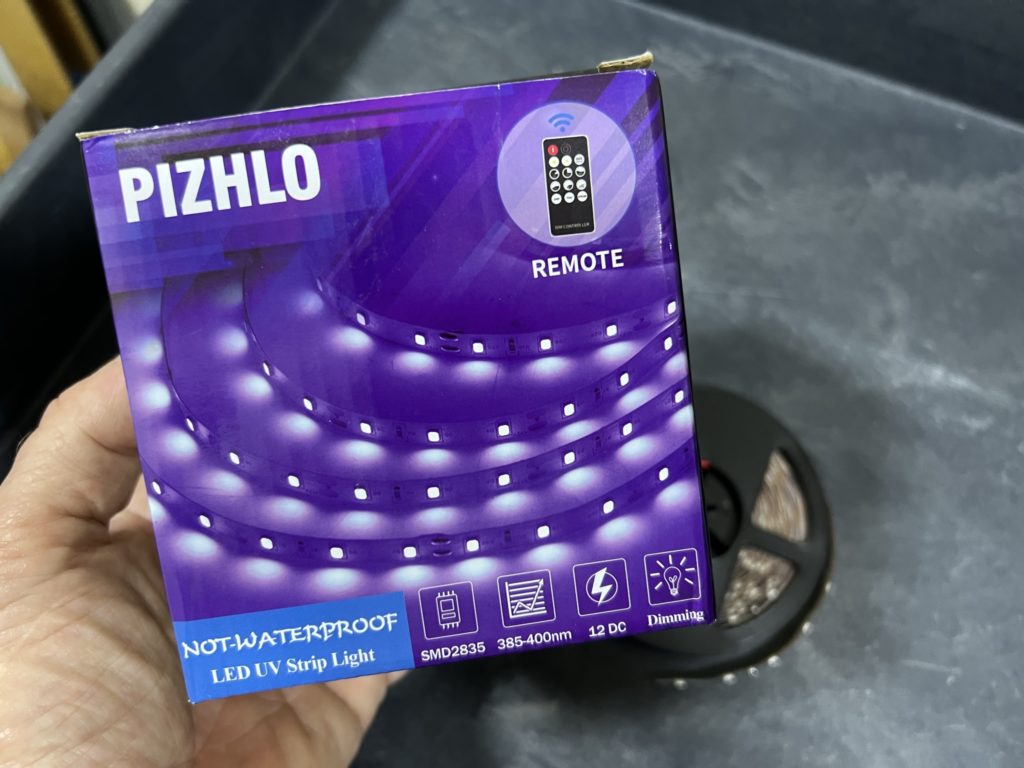
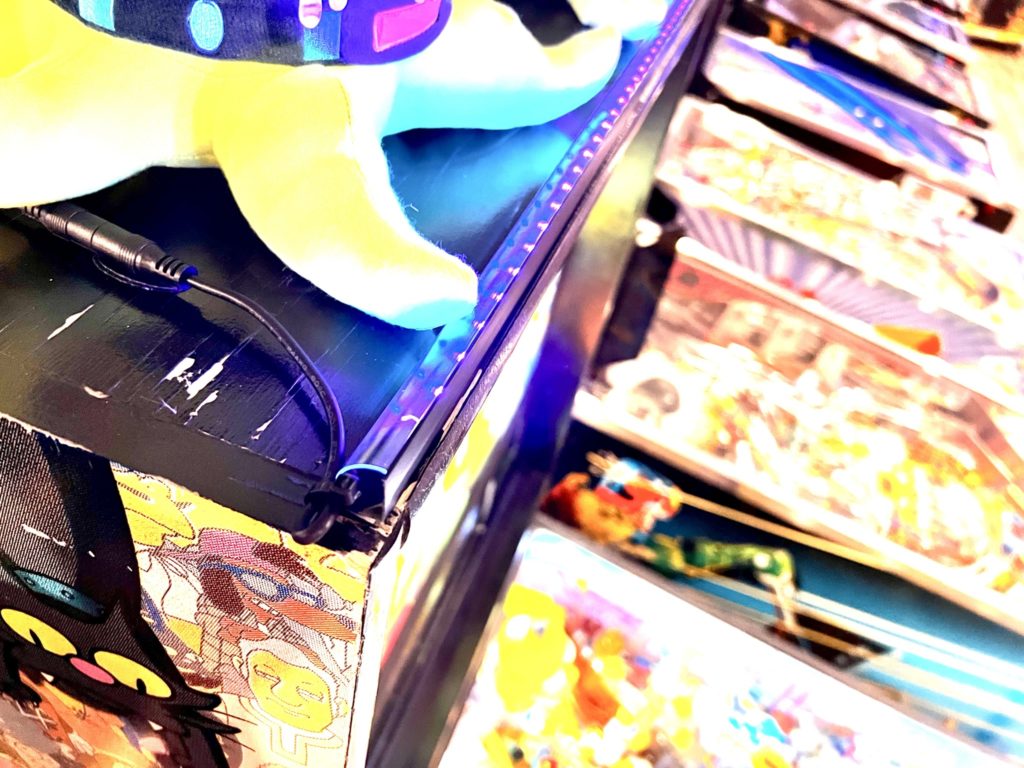
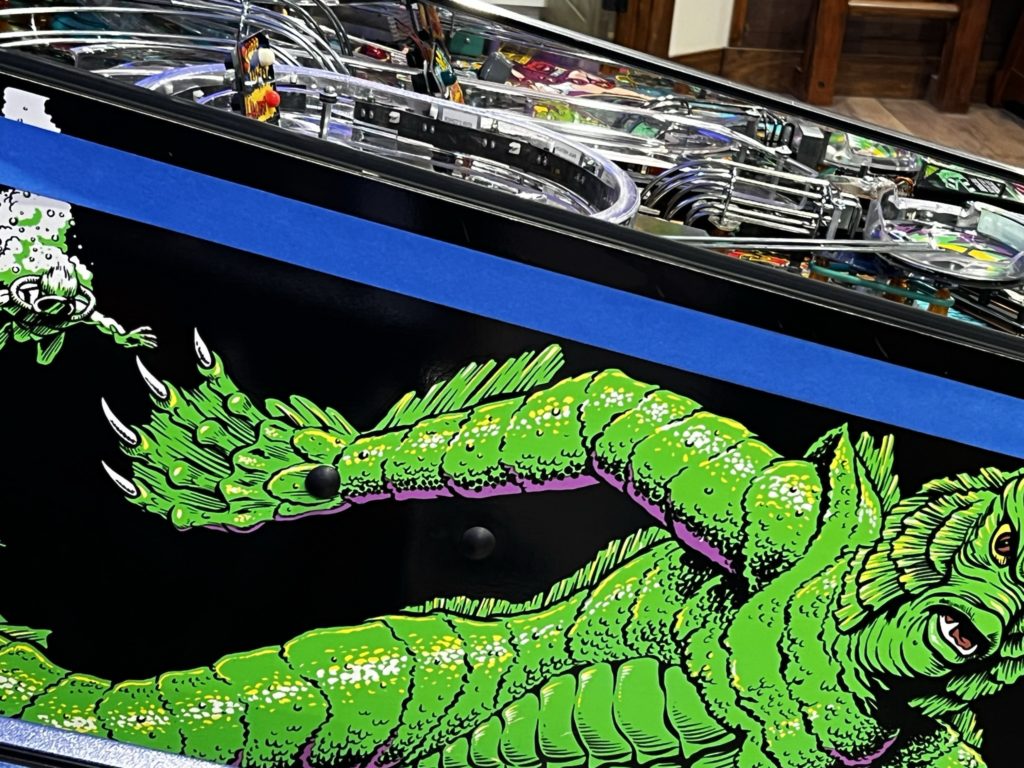
With the cultural significance solidified and my comfort level with a “plush topper” increased, I ordered the pair from Kidrobot. In the meantime, I started planning how to provide some light up there. Early on I got the idea to use ultraviolet light. I searched for a few minutes for a nice bright LED style light bar but could not find the one I would need at around 24″ to 27″ (max width is 27 1/2″ up there)
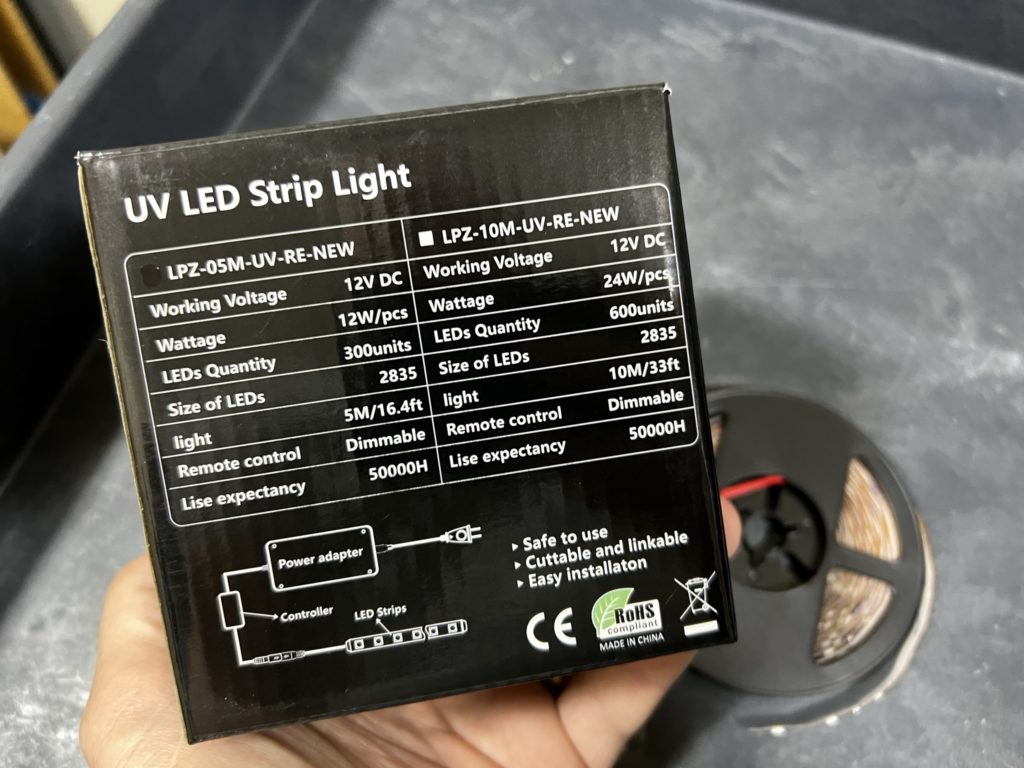
I finally settled on the simplest solution – a UV LED Light strip. I bough a nice aluminum channel to stick it to and waited (impatiently) for all the parts to arrive. The UV LED arrived first. Great. I could get that bit installed and plop the plush up there when they arrived. The LED strip install went smoothly:
Cut the plastic diffusor to length with sharp scissors (27″)
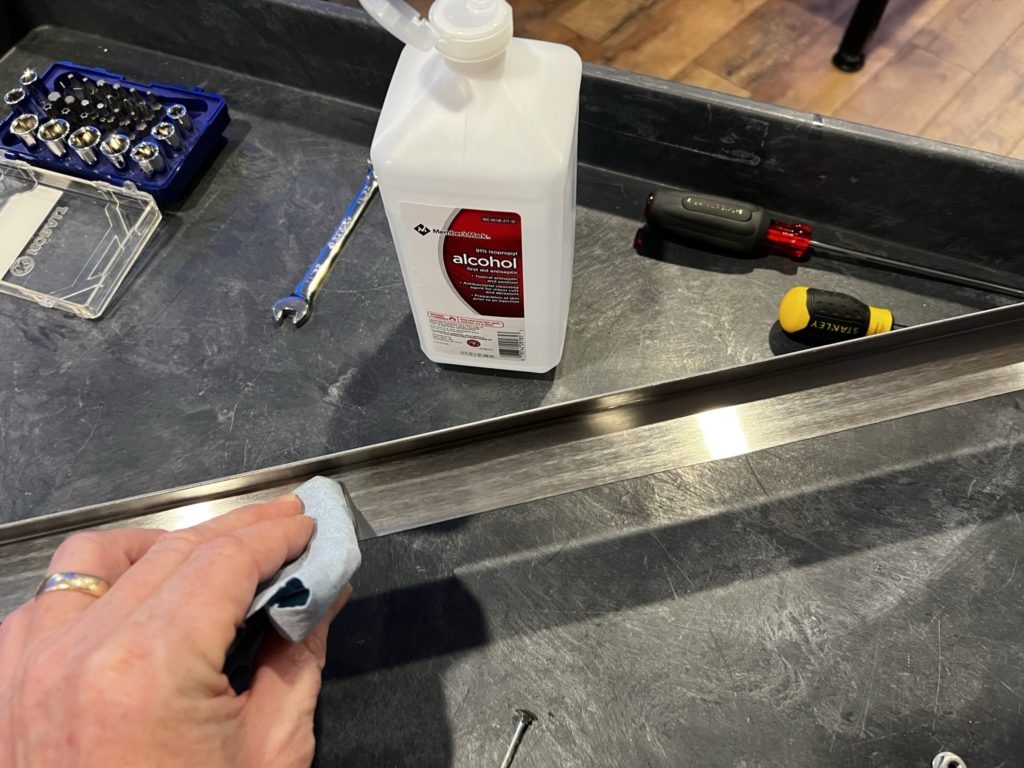
Wipe down inside of aluminum channel with alcohol
Measure LED strip to best cut point – cut with scissors (around 26″ in this case)
Peel LED strip backing and adhere to inside (45 degree) flat face of aluminum channel
Wipe down underside of aluminum channel with alcohol
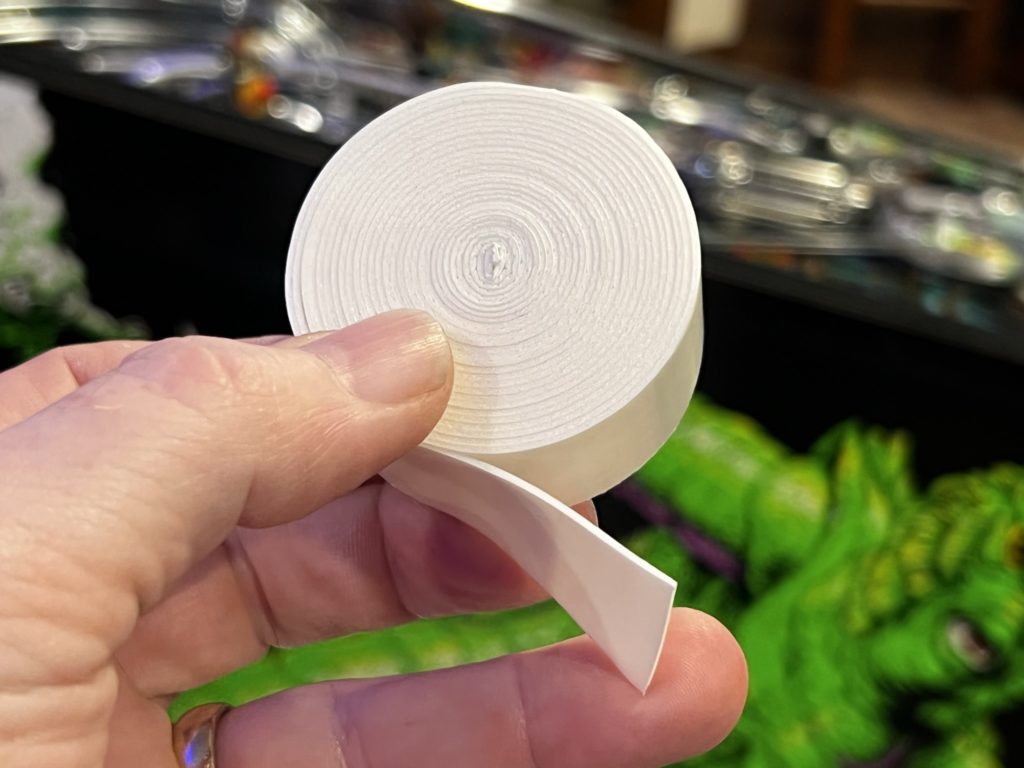
Add a piece of 3M VHB RP-16 tape to underside of aluminum channel
Fold the LED power supply cable back on itself and zip tie it into a short loop (see image)
Do the above step so the power supply cable does not hang over AND so it does not begin to delaminated the LED strip from the aluminum channel (takes the “spring” out of it)
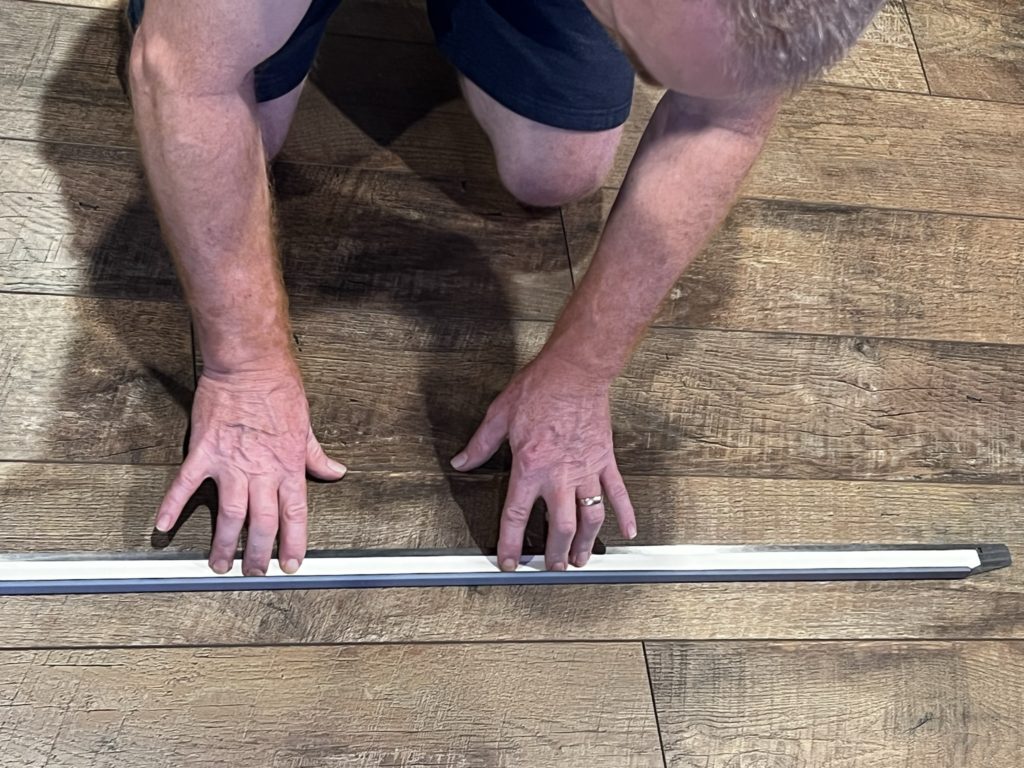
Mount the aluminum channel with integrated LED strip right even with front edge of cabinet
Add the controller unit to the power supply cable end of the LED strip
I used some sticky velcro to hold the controller/LED supply cable junction to the cabinet top
Plug in the power supply to 110volt outlet (mine is controlled by Alexa to come on with the game)
The remote that comes with the unit (like most remotes) would be confusing to an Electrical Engineer, with a degree in Physics and a Doctorate in Computer Science. Thankfully, I only have a 2 year degree in Fine Arts but it was still a struggle. The Brightness buttons also control the speed at which anything takes place and the “Jump” and “Fade” buttons are reversed.
The “100” button on the tiny remote will get you back to “just the lights thank you” and that last hint is worth reading this far! I tell you all that because you can set a pretty cool “fading effect” using the “Jump” setting and then use the Bright/Dim buttons to control the fade to your liking – see video of the whole thing in action
Overall a simple and relatively inexpensive topper for your TSSP. I was worried about the “plush” part but to be honest they look amazing. I was worried the UV LED might not be bright enough – actually, it’s just perfect. I was also concerned about them being too large – they are close but they look fine, especially if placed against a wall OR in a row of games with toppers already installed.
Simpsons Tree House of Horrors XV (aired in 2004). Kang and Kodos are cooking the Simpsons
Bart: Am I the only one in horrible pain?
Homer: You’re the only one who won’t shut up about it.
Ultraman Starlight
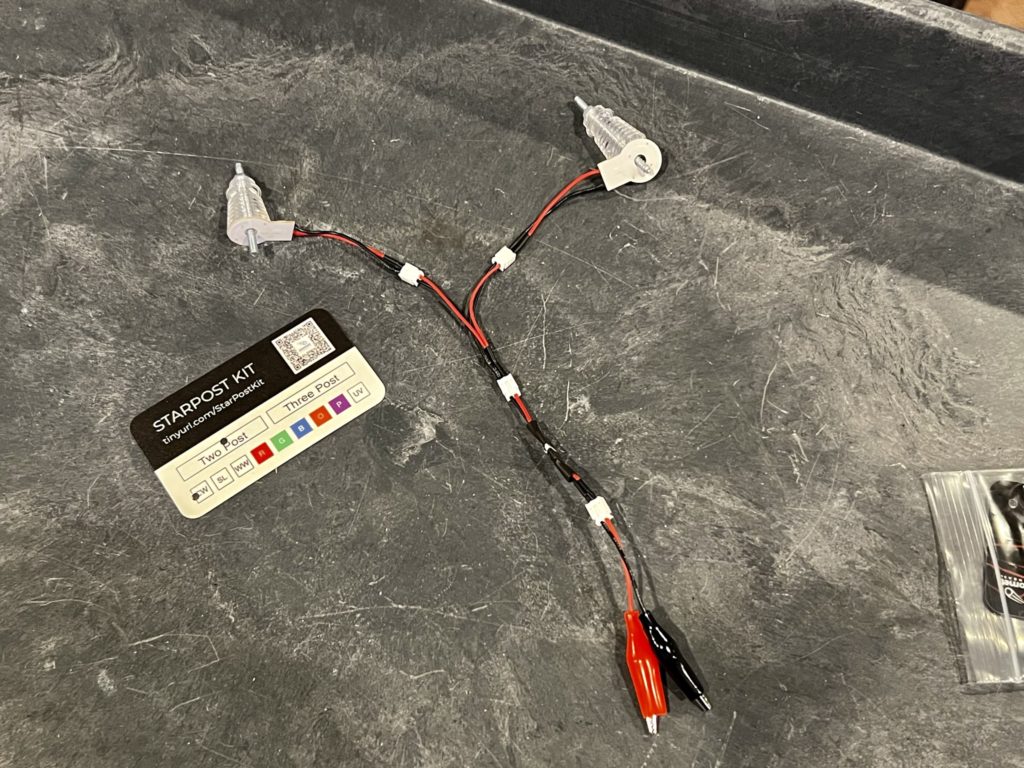
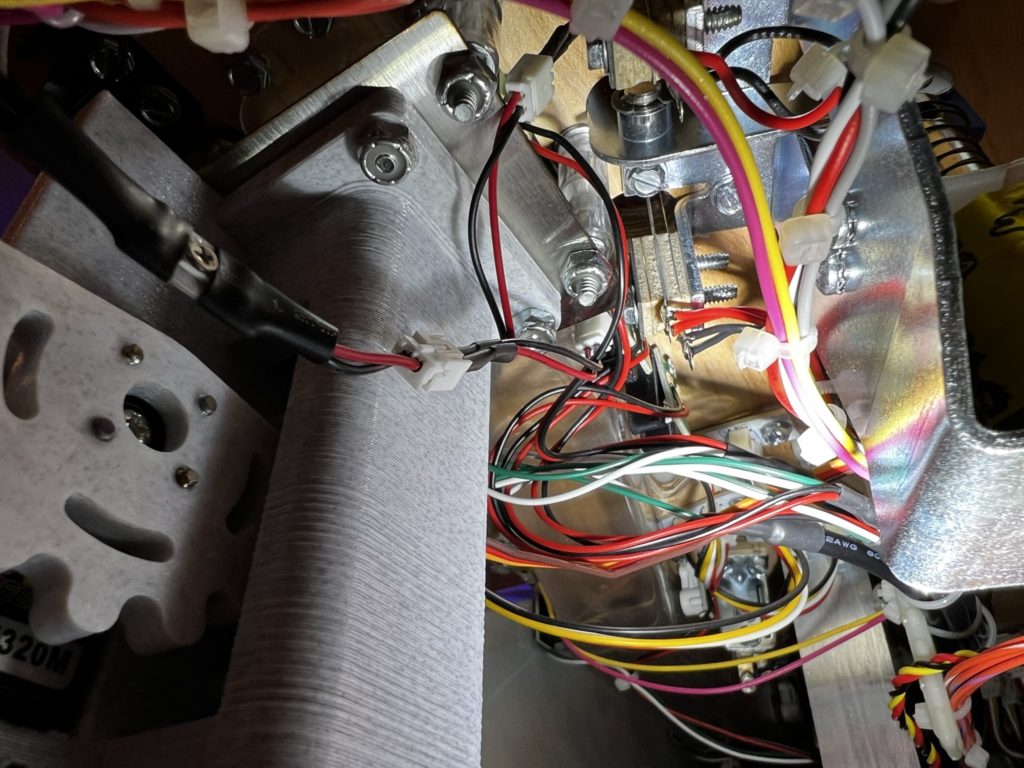
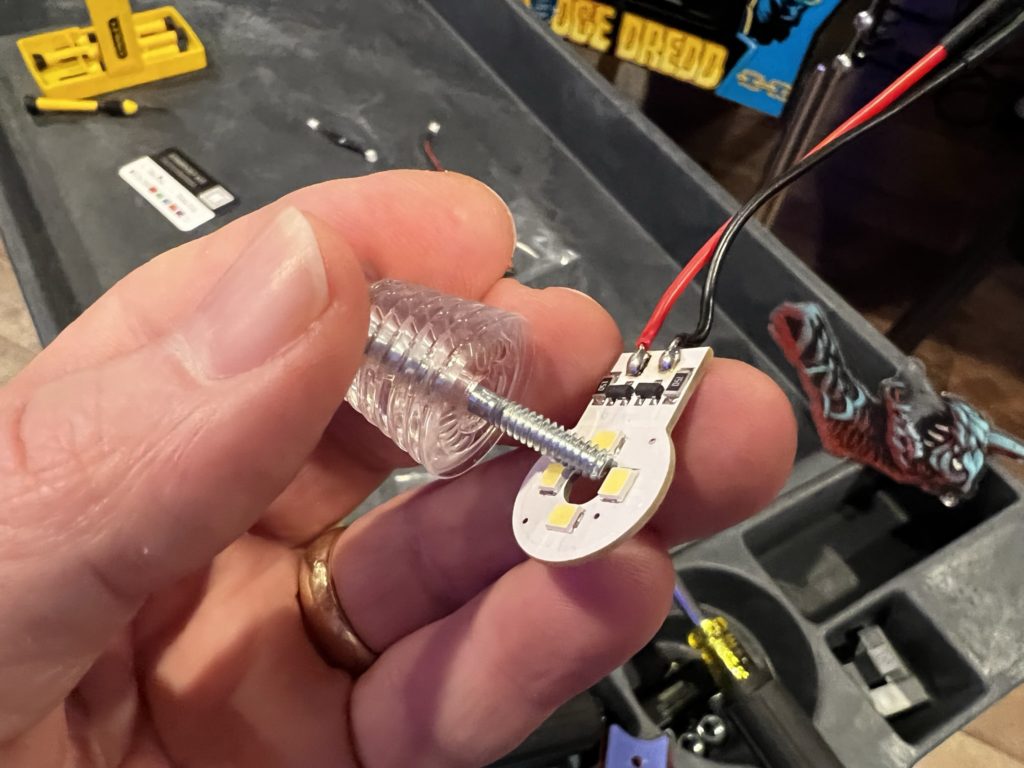
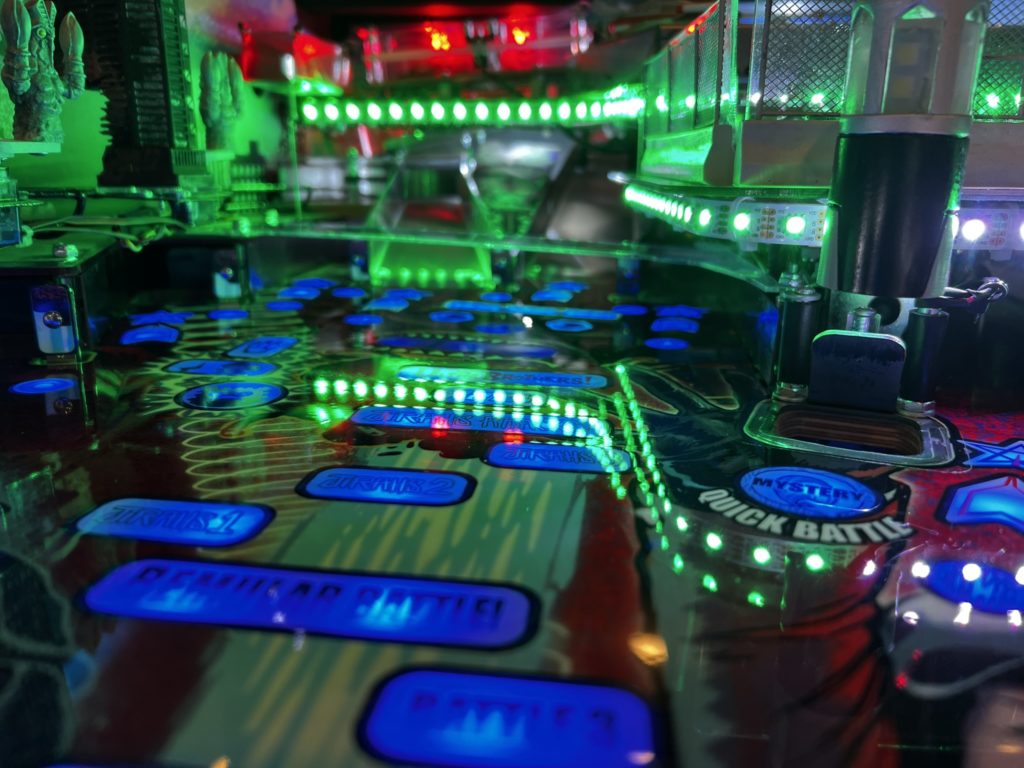
There were moments when playing Ultraman that the lower center of the playfield seemed dark to me. I wondered if adding spots would help. Problem is I don’t like all the exposed wiring, the strap ties that you have to add (and cut later to access/replace rubbers etc) and the fact that they are visible above the playfield. I forgot about the issue until I was on the Comet website ordering some LEDs and saw their “Star Post Light Kits“. These are the round shaped 4 LED wafers that fit UNDER the star posts of almost any game. I thought, why not try these. They are typically installed under the posts in your slings but can be used almost anywhere there is a star post. You can get them in a 2 post or 3 post kit – depending on whether you want to do all 3 posts in your slingshot area or just 2.
Kit image taken from the Comet Pinball website
I ordered 2 sets of the 2 post kits. The kits come with everything you need to hook them up.
LED light wafer
Power harness that connects each wafer to a common power supply
Dimmer to dial in the brightness
Power supply alligator clips
The wiring order starting at the power supply side goes like this:
Connect power supply to existing GI lamp
Connect dimmer to the power supply cable
Connect the splitter/power harness to the dimmer
Connect each end of the splitter to each LED wafer (2 or 3)
Effectively you are powering each wafer from a single power supply cable and one dimmer
Cards come with the kit and scanning the QR code will take you directly to the install instructions
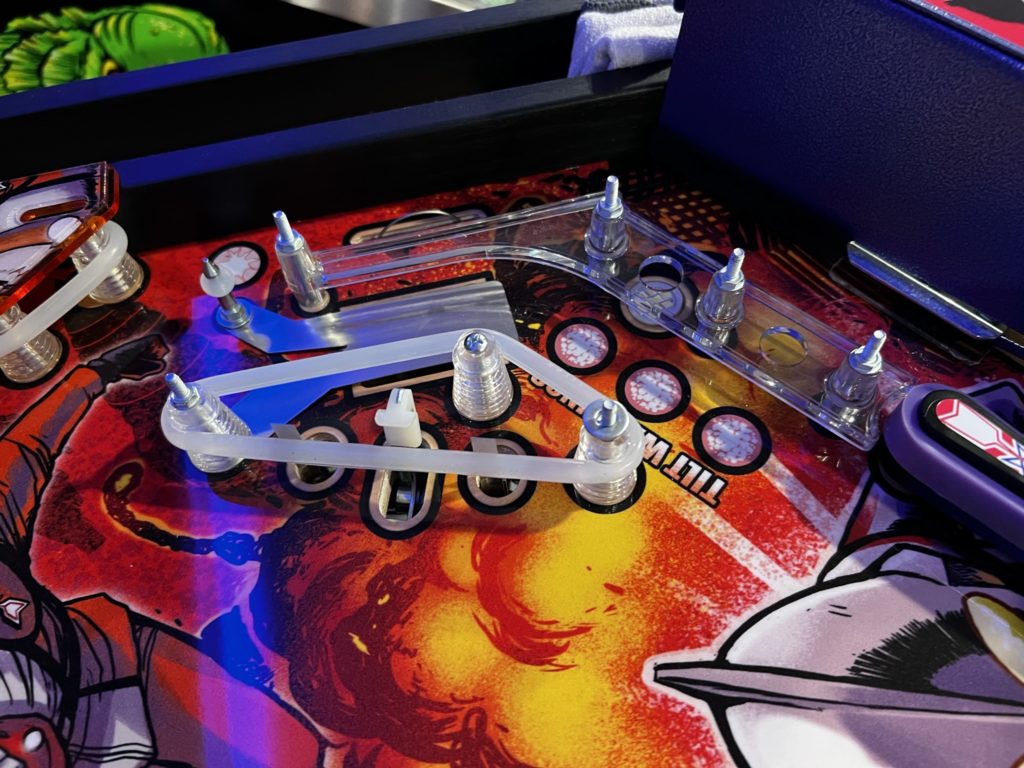
Install is fast on these and requires (for Ultraman) that you remove the sling plastics and plastic protectors on the right side of the game. On the left side, you’ll need to loosen the ramp by removing the one nut holding it to the sling area.
After all plastics have been removed – right sling
Once the plastics are removed, you simply unscrew the star post using a 1/4″ hollow nut driver, place the wafer below with the LED’s facing up and tuck the thin wires (2 per wafer) down behind your sling switches. Reinstall all of the stuff you took off, then lift the playfield to finish up the wiring.
Nut driver (1/4″) to remove 2 of the 3 posts, a standard Phillips will remove the outside one
Underneath the playfield you’ll need to find the end of the LED wafer wires and plug your splitter/power harness into each of them. Connect the dimmer to that and you’re almost done. To make the final connection and supply the power, you simply find the closest GI lamp and use the alligator clips. I placed the red clip on the bulb center and the black on the body. Polarity does not matter so where you put the red vs the black is up to you. If polarity in the electrical sense is a new term to you, just do what I did and it will work fine.
Alligator clip connections to the existing GI bulb
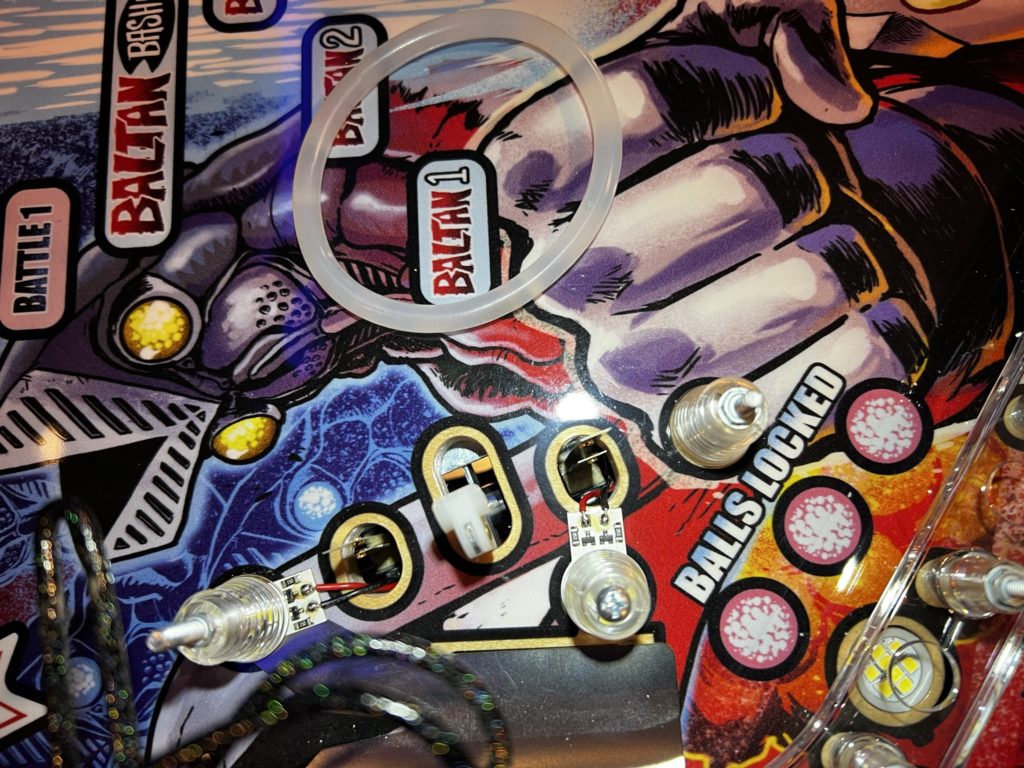
Lucky me, I got to install these TWICE. I actually placed the 2 wafers on the inside 2 posts (toward center of game) on my first install and after turning on the game, discovered I had made a pretty big tactical error. The lower posts on each sling (again closest to the playfield center and closest to the player) are VERY visible and when lit from underneath, BLINDING! To be fair, I am using cool white under a crystal clear post – it’s going to be brighter than any other combo.
Look left and you’ll see the dimmer, follow to the right and see the “Y” cable that feeds each light
I quickly removed that lower/center LED wafer and swapped it to the outside most star post (not visible as it is buried under the plastics). It was the right call. I could now dial up the brightness (almost to max) with no issue of being blinded during gameplay.
Such an elegant and simple solution – fits like a glove under each post
The incremental light is just what I wanted and the character (and appearance) of the game is not changed. The star post lights are tied into the large LED lamp that sits just low and behind each sling so the game code behavior that is coded to that lamp, is the same behavior that you get with the newly installed star post light wafers.
Second attempt at install, I moved the star post light wafer to the outside post
You can see in the images that follow that the lowest star post on the slings has no light. That’s the one where I originally had one of the 2 LED wafers installed on each side but proved to be too bright and shined directly into your eyes during game play. Moving the 2nd LED wafer to the outermost star post on each sling was a perfect solution. I could then dial them both up to almost max brightness, enjoy all that light output but no glare. I used the Cool White LED option in order to match the GI and post colors (clear) that was installed in Ultraman. For aesthetics, Comet recommends that you color match where possible. In other words, if you have red posts, use the red LED color option when ordering. If you are trying to add significant lighting to the dark center of a playfield, I would recommend using one of the 3 white options they offer (cool, sunlight or warm).
Left slingshot image – final installRight slingshot image – final install
Overall I extremely pleased with these lights and will be adding them to a few more games soon. Creature is the first on the list and I’m sure there will be more. The lights are effective, easy to install and inexpensive by any measure of “pinball mods” – try a set and enjoy better game lighting right where it’s often needed most.
Top image is final install, bottom half of image is first attempt that had too much glare
Clayton Q & The Creature
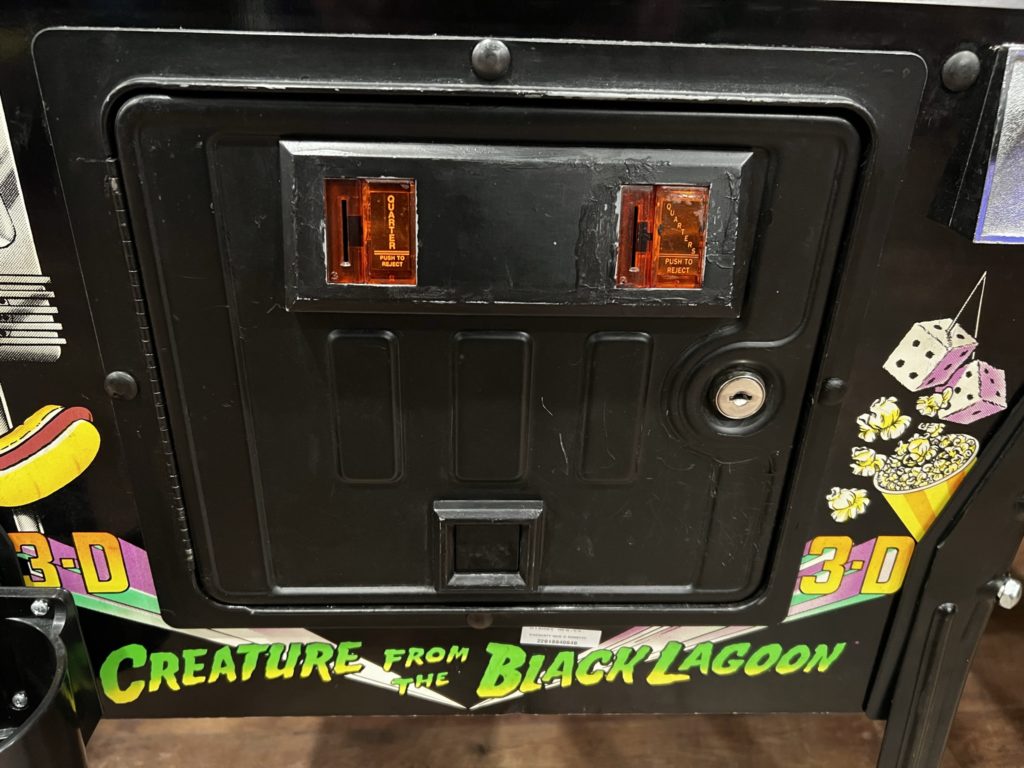
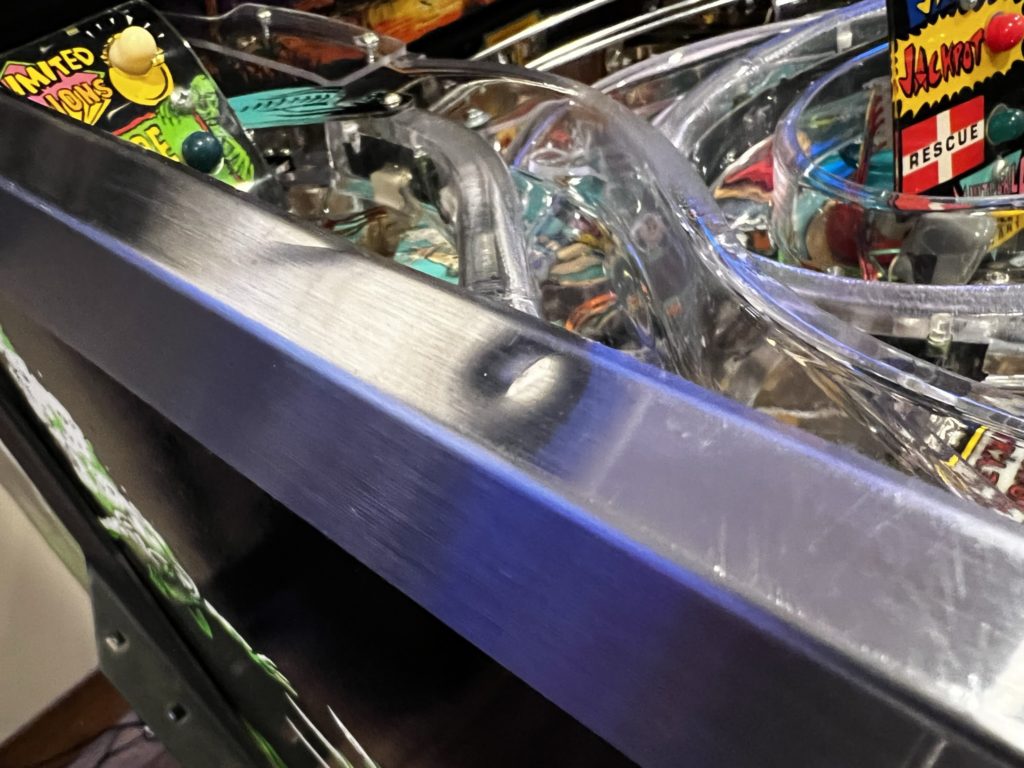
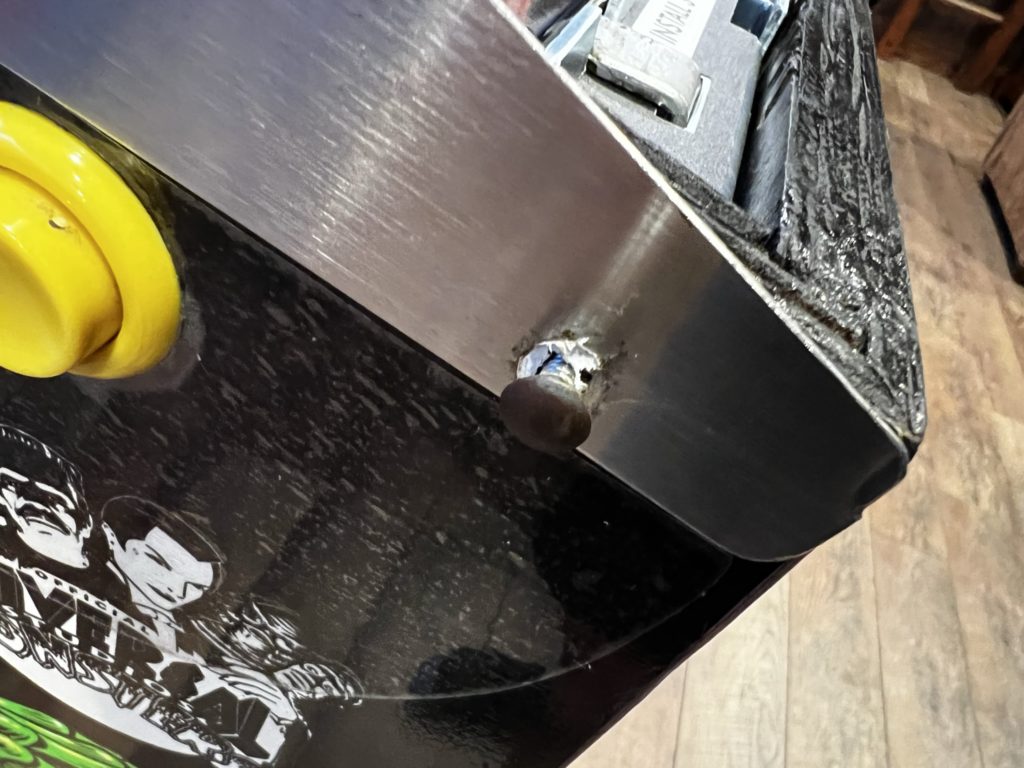
If you’ve read my post earlier on the Creature I recently acquired, you’re aware that although it was nice, there were a few bumps and dings in the nearly 30 year old game. One of those issues showed itself in the typical dents you find in the side rails. Most of the time these dents align with the exact spot where the head folds down to contact them. If the operator or owner is not careful when lowering the head, it’s easy to dent the rails. In this case, the dents were one side only and much higher up the rail than you would typically see. The damage looked like somebody had dropped something on the left rail to cause the 2 dents that were very visible (and ugly) to the naked eye. When I bought the game, I decided I would do a “mini-restore” on it so I knew in advance that the rails needed to go.
Up to this point, I had already done quite a bit of work on the game. Including a new LED edge lit Creature, lit pops and a few other things. The 3 things that bothered me most were all cosmetic. The lock down bar receiver, the coin door and the dented side rails. I ordered a new lock down receiver from Pinball Life and it came (as usual) in a flash. I removed the old receiver, taped off the area around the cabinet edge and shot some fresh black paint to cover up the various splinters and crud that had built up there over the years.
After a few minutes to allow the paint to dry and with the playfield tilted up and out of the way, I replaced the old receiver. It’s just a few bolts and 4 or 5 wood screws to replace. The biggest challenge here was that one of the holes (the hole farthest to the right from the players position) that the bolt goes through was not drilled in a spot far enough to the right side of the machine to allow it to be properly mounted. I used a large drill bit to “yoke out” the hole more toward the right side of the cabinet. I added approximately 1/4″ of more “play” to move the entire receiver farther to the right for final mounting. To be fair, the receiver mounted in the original position, but when I attempted to add the lock down bar, it was pushed to far left and would not drop down onto/over the right rail – it was “off” by around 1/4″. I did not take a ton of pics during the install but the process (less making that right side hole larger) was very straightforward
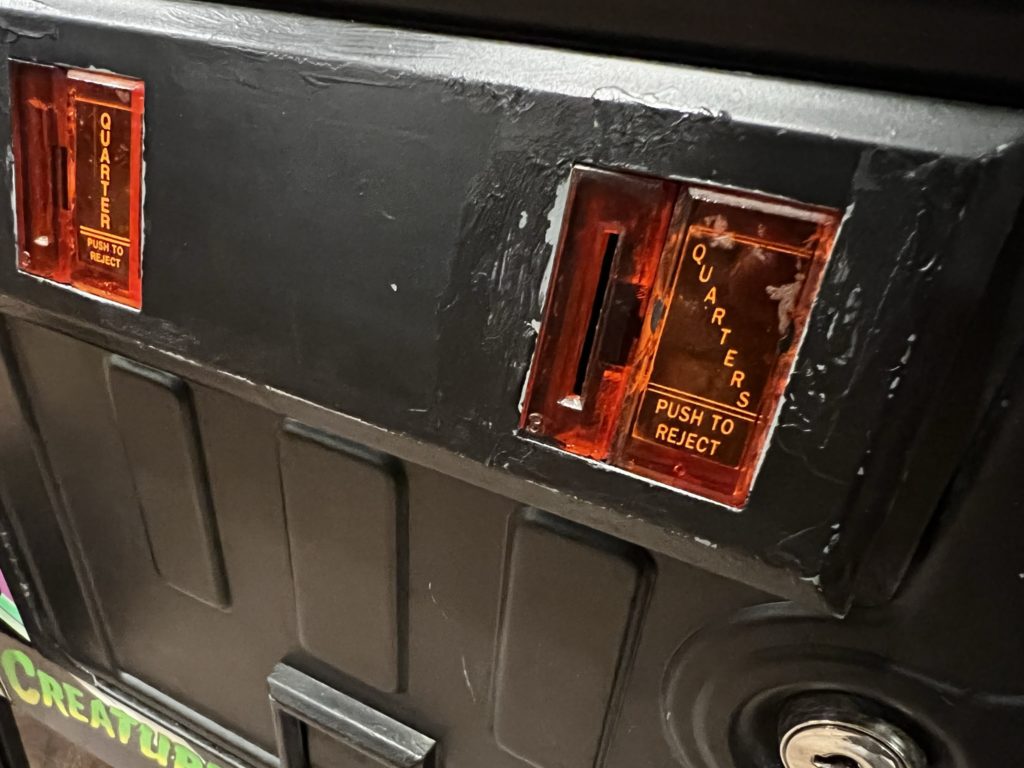
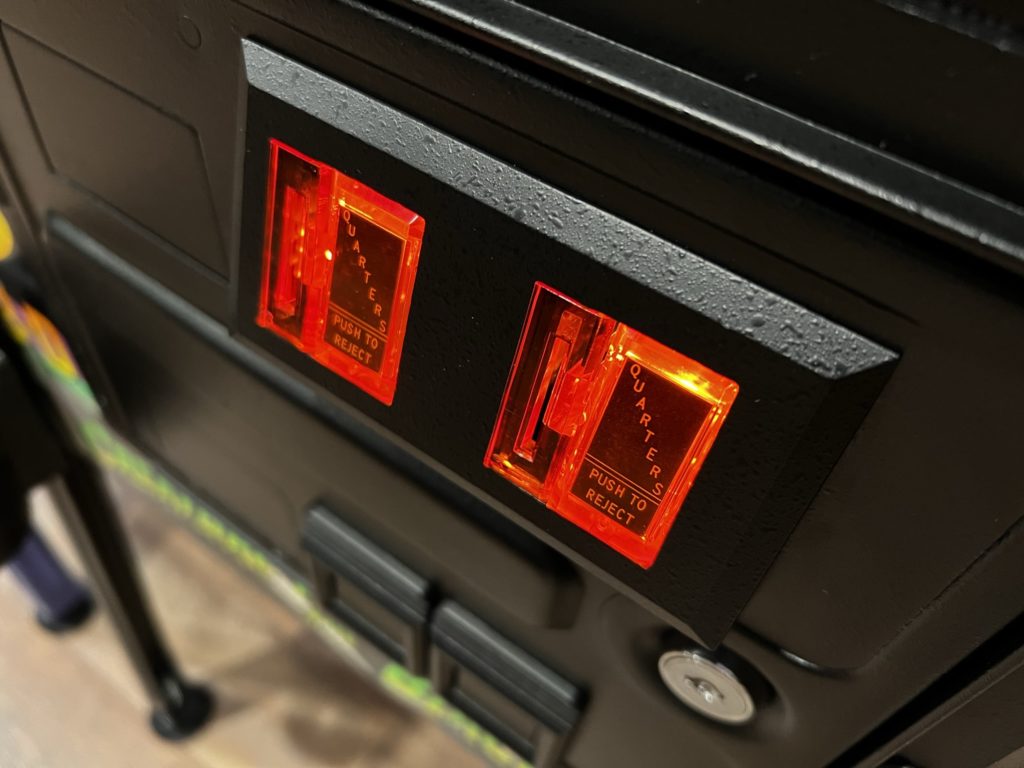
The coin door came a few days later and I was back in the loft to complete the install. As is the norm, these seemingly simple projects can get a little more complex than anticipated! The existing door was scratched at some point and someone attempted to paint it – it looked like they might have painted it with a stick because no paintbrush could leave it looking that bad. The coin slots were a mess as well being all dinged up and the straight edges/right angle corners now reduced to wavy and rounded. Just ugly. No matter – I had a new coin door. I was 4 bolts and 1 molex connector away from a new face on the Creature! Or so I thought.
The bolts came out quickly. The molex connector was even faster. I spent 30 seconds cleaning the cabinet decal that was hidden behind the old coin door metal surround and then just a minute or 2 bolting the new door back onto the game. Then the door wouldn’t shut. Ugh. The interlock switch can be mounted in several positions and the flap on the new door that pushes the button in can as well. It took a minute to get all that shifted, and I had to remount the interlock switch on the game a bit deeper to the left of the cabinet. 15 minutes later all was right and the new door was in place. It looked amazing!
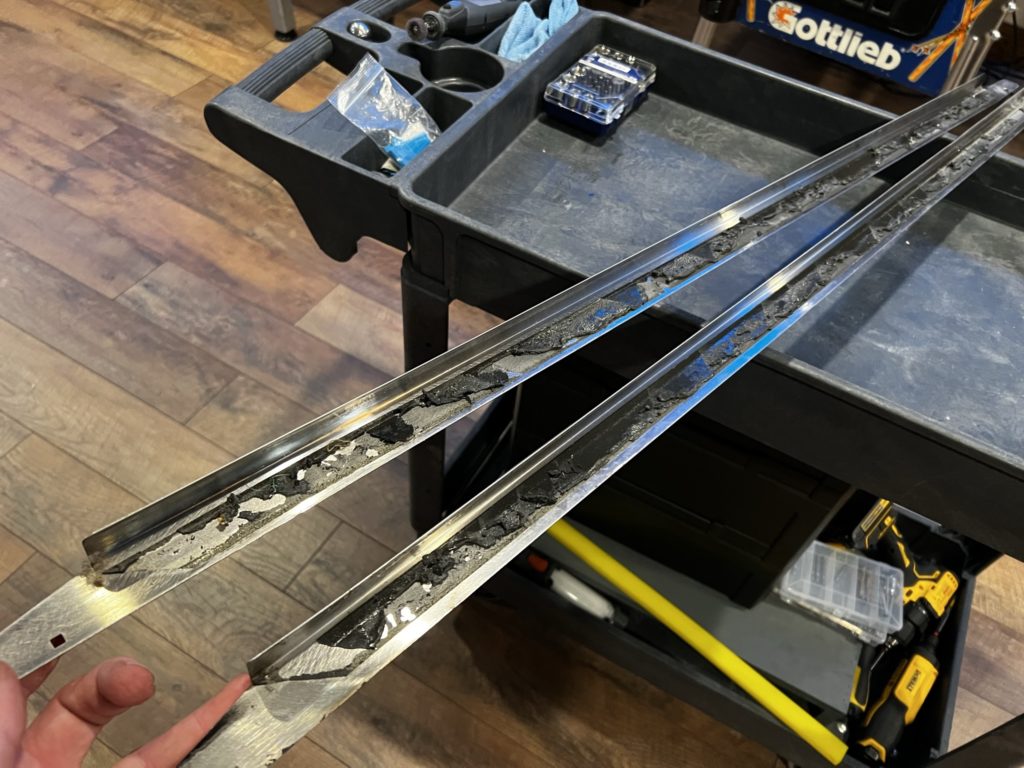
So what remained of the cosmetically deficient items that needed attention? Just those pesky rails. I had ordered them when I ordered the coin door so they were already in hand. Now I just had to install them. Trouble is … I’ve never done it before. I like pictures and the written word (blog anyone) so it took a bit to find someone that had taken the time to document the process. I finally found a really good tutorial and studied it closely so I had an idea of what I was getting into.
I then decided I would shoot some pics/video during the install in order to fill in some of the gaps that the existing tutorial left open. For one, the images in the tutorial show the putty knife square to the rail when trying to separate the rail and foam tape from the cabinet. I would not do that. It was VERY hard to push through that foam tape with the entire width of the putty knife. Instead, go under the rail at a 45 degree angle. You are leading with one corner of the putty knife and it takes less pressure and moves faster. Also note that in the tutorial, there was a stove bolt and nut on each rail near the front (coin door) of the game – same as mine. There was also a spiral nail driven into each opposite end (near the head and hidden behind the hinge) – mine did not have that nail. It had a hole available to add a nail, but nothing inserted
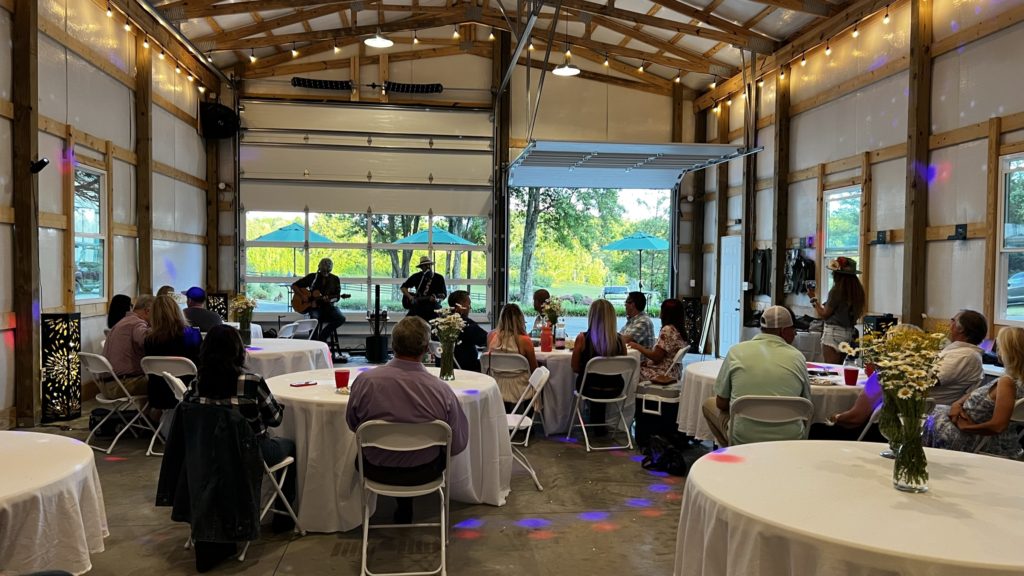
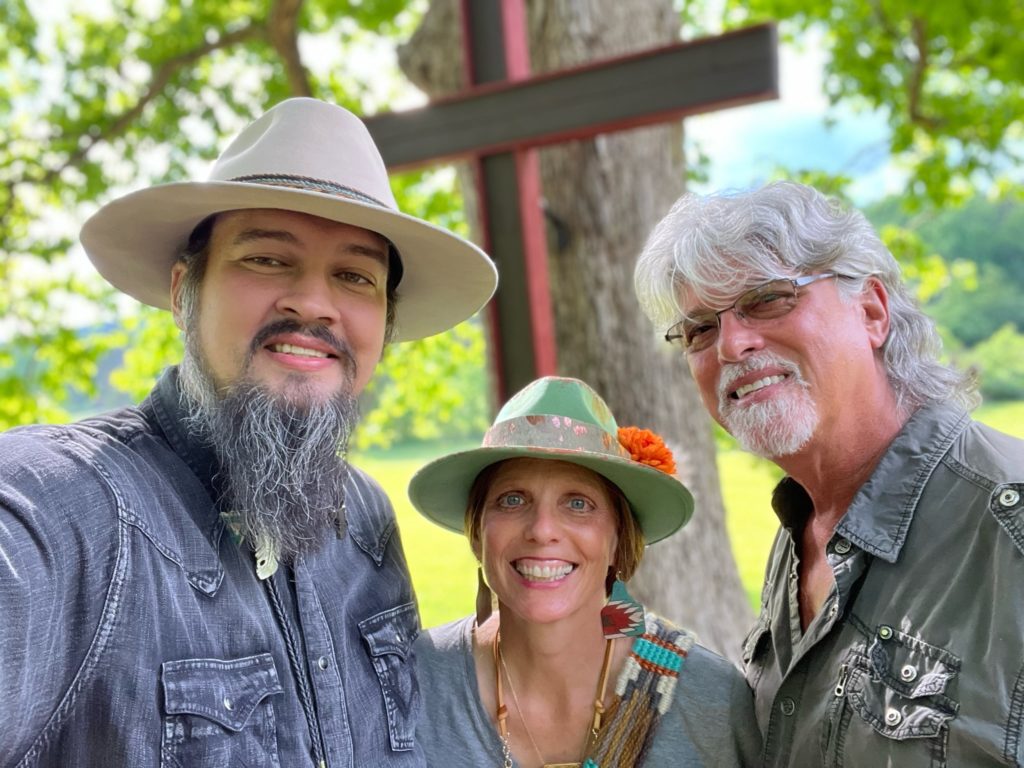
With the new coin door installed and a brand spanking new lock down receiver, I simply could not ignore the dented rail any longer. Our weekends here at the Red Heaven Ranch are always jam packed with activity, or ranch work (or both) and this Saturday was no different. Today we were prepping for an evening concert event. Clayton Q and Randy Russell were playing a private acoustic set for about 25 people. There would be a lot of work to do beforehand and some of that would fall to me. If I was to get these rails installed, I better start soon and finish early!
Clayton just before showtime
I put the mowers back in the pole barn, burned some boxes and was walking back in when it looked like we might get some rain off in the distance. The rain never materialized but a beautiful rainbow did and I ran over by the mini’s dry lot to snap a picture. It stayed for over an hour and eventually began to double. I took several photos before it was time to get back at preparing for the concert
I finished all my chores and we were now ready for the 6:30 evening show. Time to get after those rails. I popped back over to the Loft and gathered all the tools and materials I would need to get my new rails installed.
The steps are simple, the work is tedious but it’s not hard: 1) Remove the single stove head bolt near the lock down bar 2) You “may” need to lift the playfield to get at the nut on the interior of the cabinet – I did not 3) Remove all 3 nuts on each side of the cabinet head that hold the hinge to the base of the head 4) Pull the 3 matching stove bolts out from the bottom (or watch as they fall out now that they are missing the nut) 5) Carefully rotate the hinge so it’s hanging down (don’t allow it to scratch your cab as it rotates)
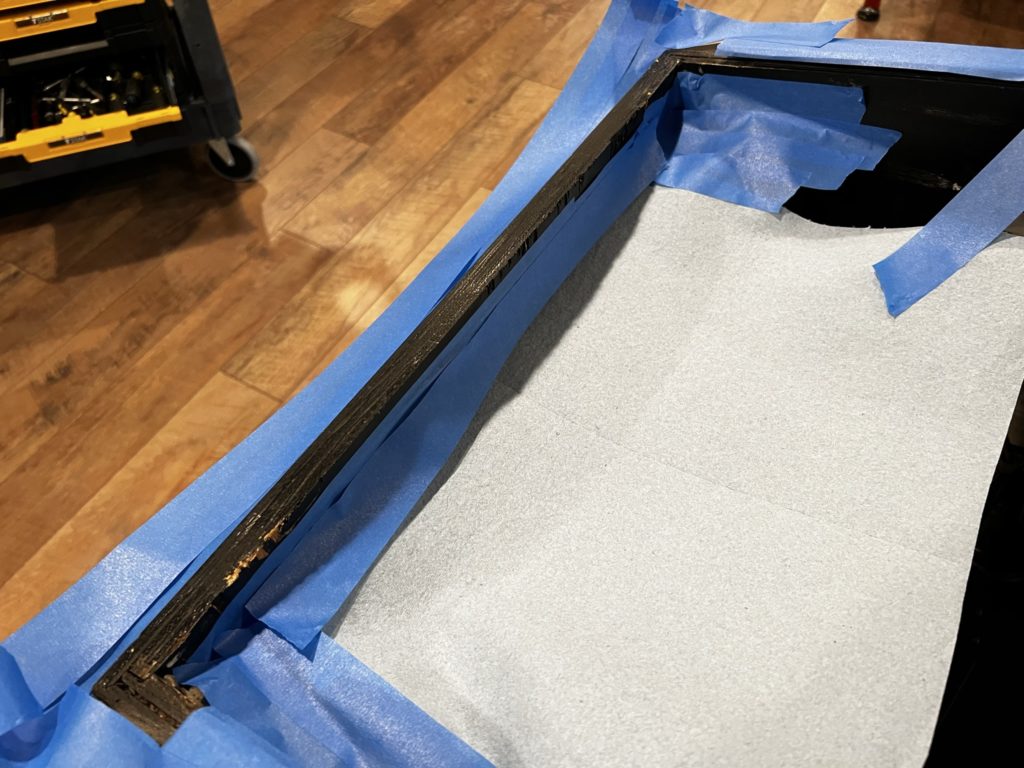
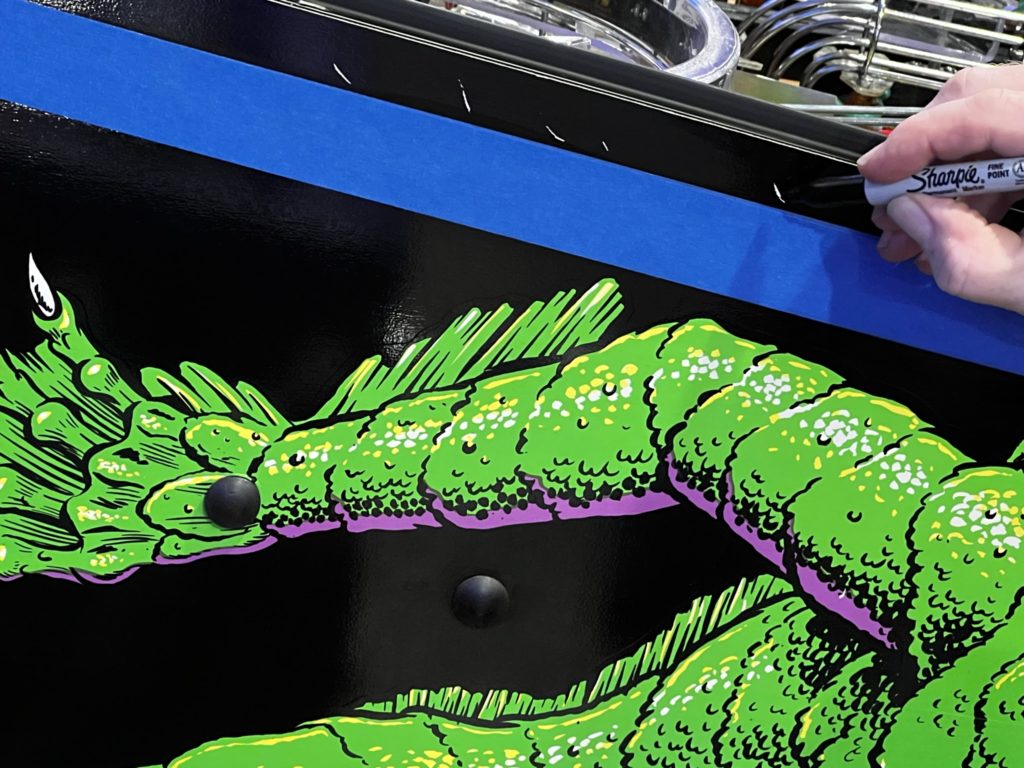
6) Lay a double row (one on top of the first) of wide painters tape just below the edge of the old rail 7) Use your putty knife to carefully slide it (and an angle, not perpendicular) under the edge of the rail until it bottoms out 8) Work your way from the coin door end to the head end until the old rail is loose 9) Pull the old rail off the cabinet
10) Spend the next 30 minutes with Goo Gone and a plastic razor blade removing the old foam tape residue 11) Wipe down with alcohol when all residue has been removed 12) Optional: Grab a sharpie or color matched paint to fill in any scratches you made while removing the rails (not critical because the rail covers that damage) 13) Remove the old 2 layers of painters tape from the cabinet side and discard
14) Prepare new rail by wiping inside down with alcohol (promotes tape adhesion) 15) Add proper length of new foam tape (you did buy the tape, right?) 16) Stay about 1/2″ away from the edge that points to the floor when installed 17) Leave room at the opposite edge (1/8″) so foam tape doesn’t bunch up near the top 18) Leave the backing on the tape so you can do a test fit of the rail 19) Line up the stove bolt hole near the lock down bar (critical step)
20) Once aligned, carefully place a fresh piece of painters tape 1/2 of it on the new rail and 1/2 on the cabinet 21) Use this new painters tape as a functioning hinge to rotate the new rail off the cabinet but still attached at the tape hinge (see video that follows) 22) Remove the backing from the foam tape on the new rail 23) Rotate the new rail back onto the cabinet and apply pressure to adhere to cabinet 24) I took the time to Dremel polish each stove bolt before adding them back – you could skip that but mine were rusty 25) Next you’ll reinstall the 3 stove bolts on each side of the (inside) of the head – remember to replace the steel plate that the nuts butt up against
When finished, the outcome was better than I expected. The install took a bit longer but there were no surprises and no inadvertent damage to the game either. The rails from Pinball Life fit perfectly and the associated foam tape used for install (sold separately but you’ll want it) was just the right thickness. Overall impact is small in the grand scheme of things but taken in concert with the new coin door, the machine now has a fresh and clean look.
The Clayton Q concert was an absolute hit and I heard so many comments about how everyone had a really nice time. Clayton and Randy are incredibly talented artists, humble men and incredible entertainers. Clayton played his newest platinum single “Save Myself” and followed that with a few more of his new original songs. Randy played his acoustic like it was an electric and with incredible speed and finesse. Watch for Clayton’s original song titles like “Red” in the future as these are destined to be hits. A killer cover of Chris Stapleton’s “Tennessee Whiskey” was a highlight (they owned the song!) and the duo closed out the night with an extended version of “Sweet Home Alabama” with almost every guest singing along word for word! A good day for Creature and a wonderful night of entertainment for all.
Enjoy a few of Clayton’s video below. Be sure to check out the certified platinum “Save Myself”
Titan Transparency
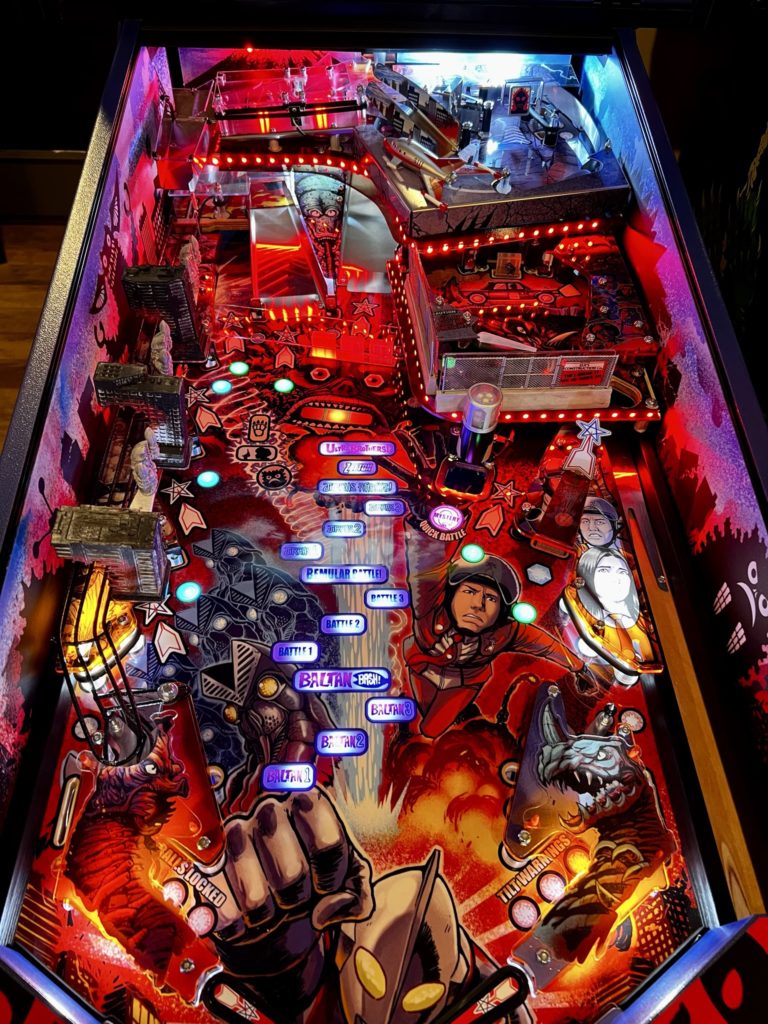
Check out the previous post to see my thoughts on the new Ultraman here at the loft. Now that it’s been here a week, I feel even more strongly about how good of a game it is. To have this kind of shot variety requires that the game have some advanced engineering – and it does. Every time I get under or into the game to check something out I’m more and more impressed at what the Spooky team has accomplished.
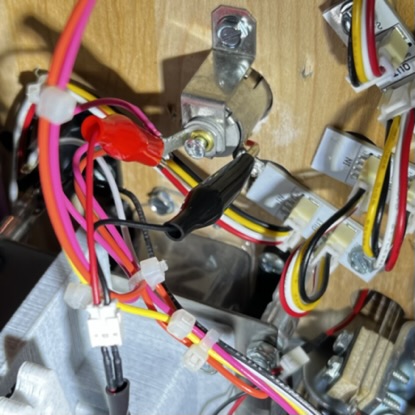
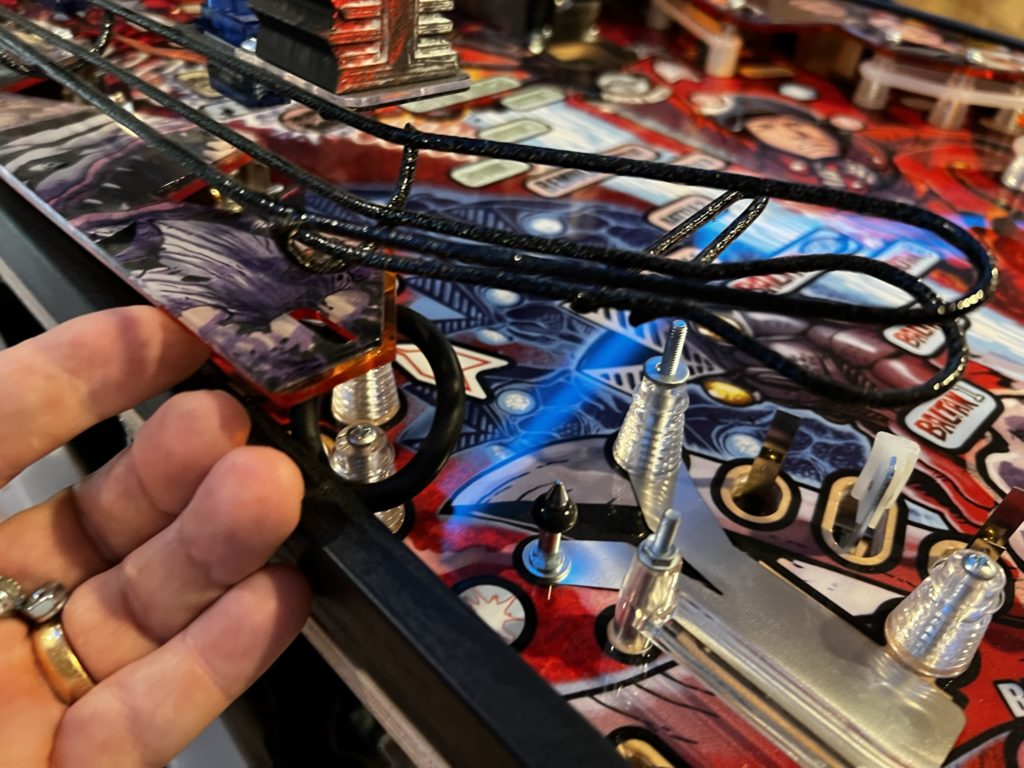
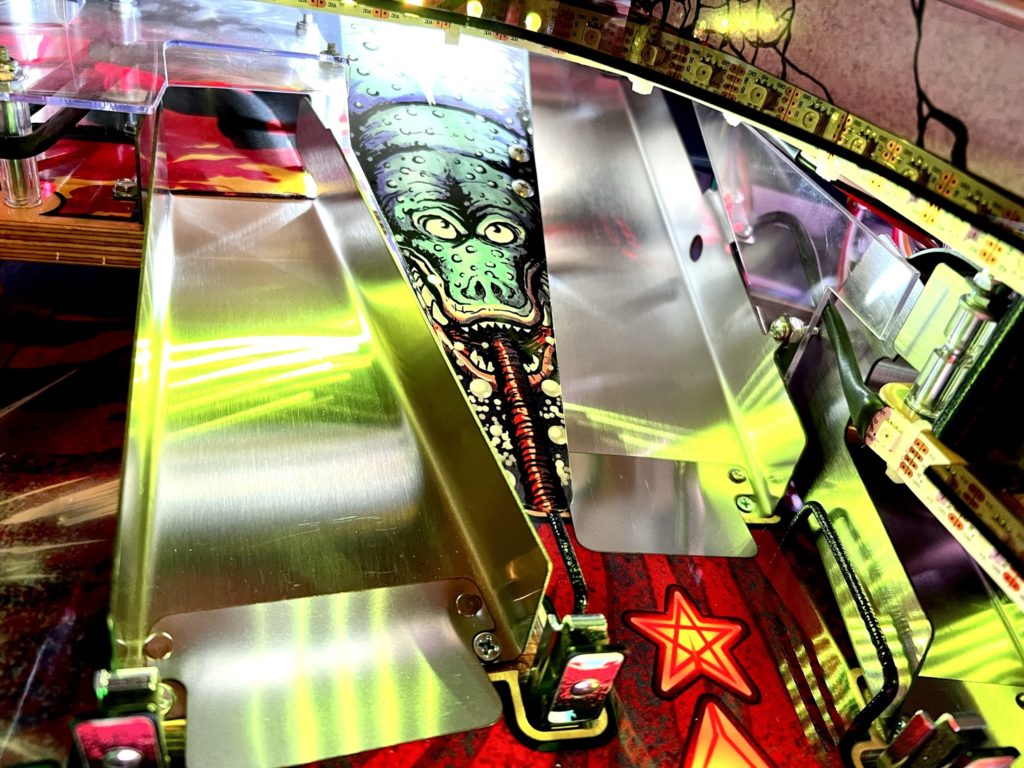
Today I added some transparent rubber from Titan and thought I post a short commentary. The game comes standard with black rubber and to be honest, that looks just fine on this game. I thought about other colors like purple or red, but at the end chose transparent to allow a little more light onto the playfield as this is a darker game
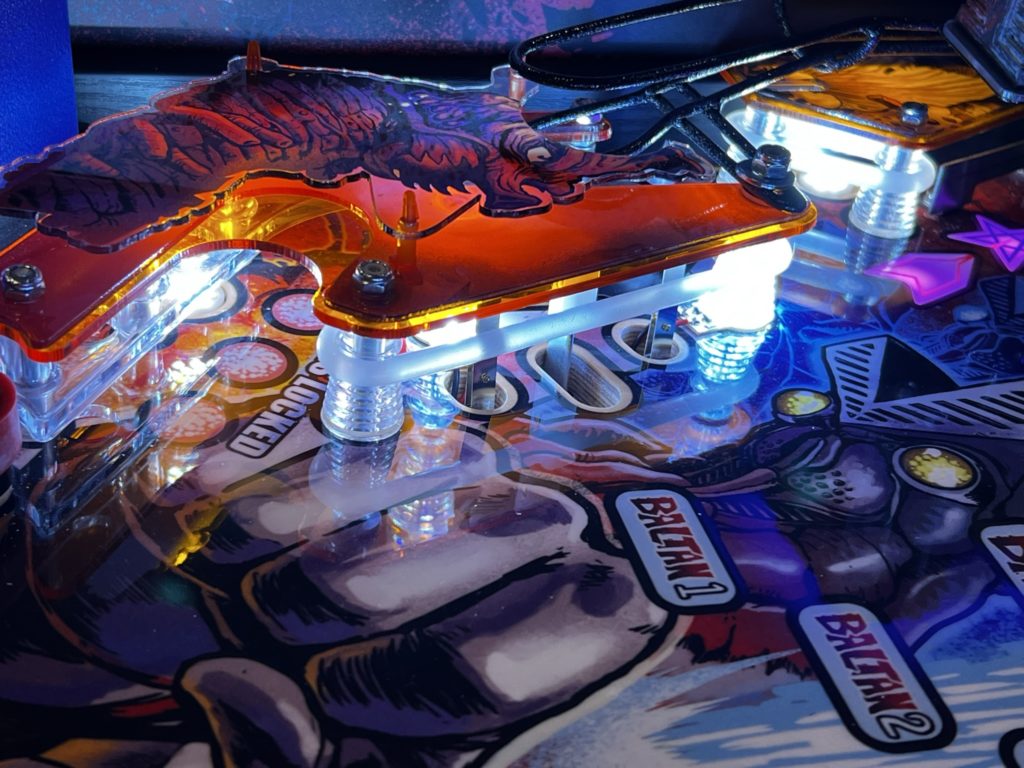
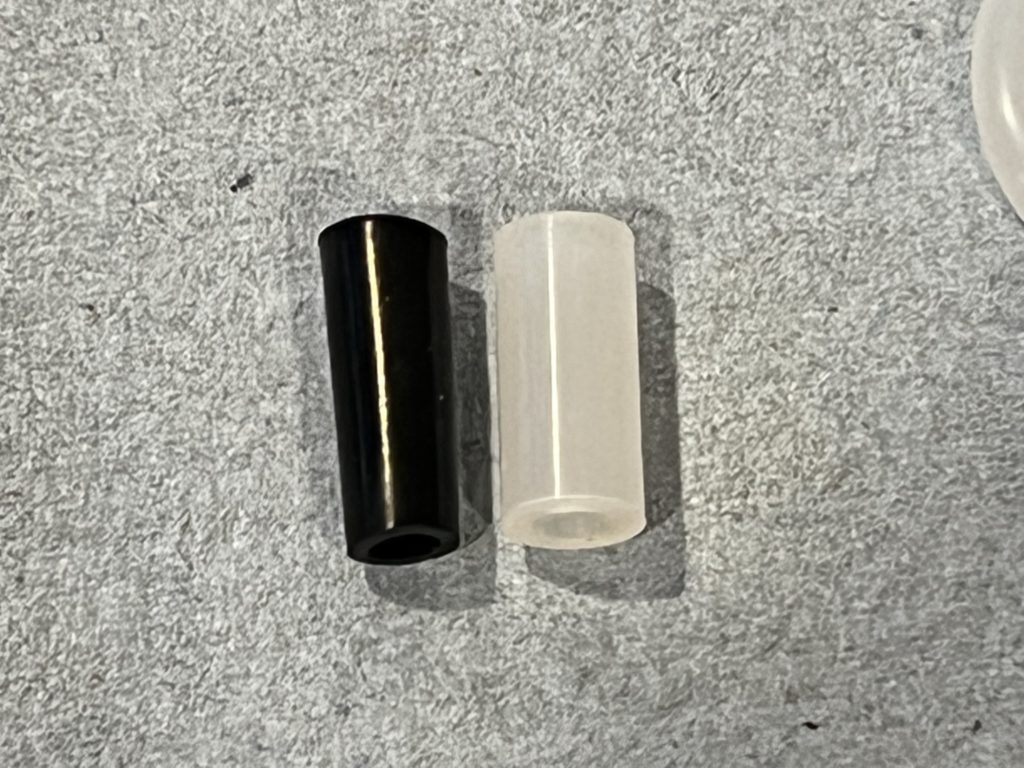
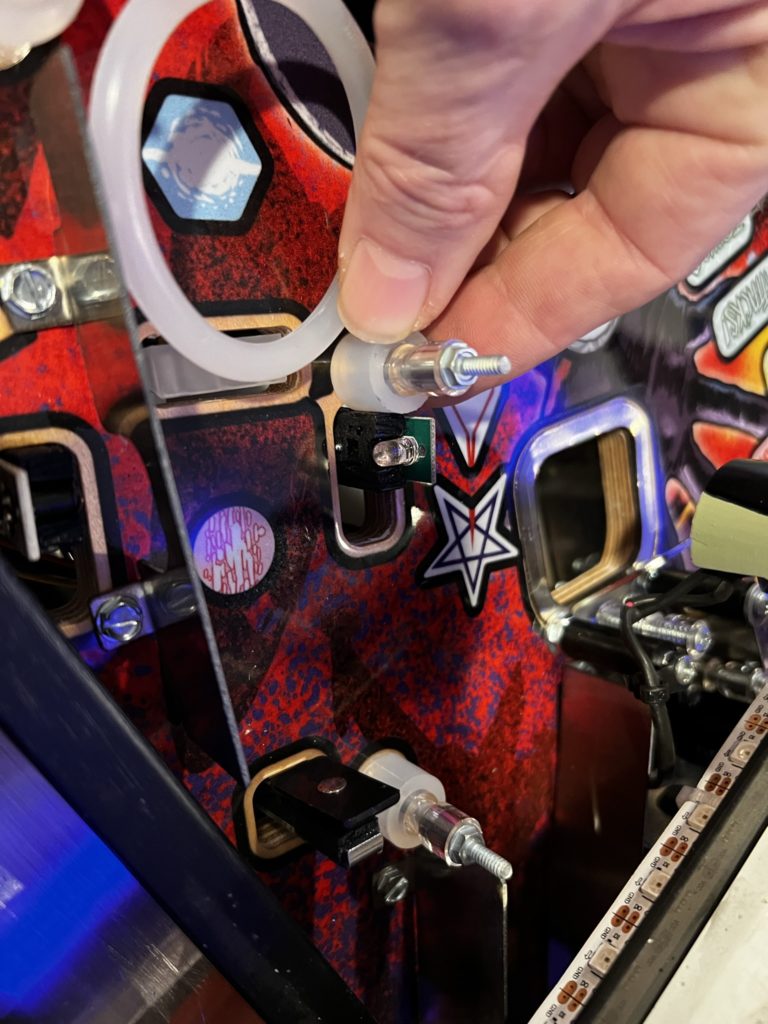
I started up in the “Headquarters” area and right away discovered that the “kit” someone had built for Ultraman at Titan was not correct. They chose standard size post sleeves and Ultraman comes with the thinner and tapered ones. It’s a big deal. Up in the Headquarters area the ball paths are tight and you’ll need that extra millimeter of space created when the correct (thinner) post sleeves are in place. I chose to wait and order the correct ones and do that part later
Thin tapered left, standard post sleeve right (standard is incorrect for this game)
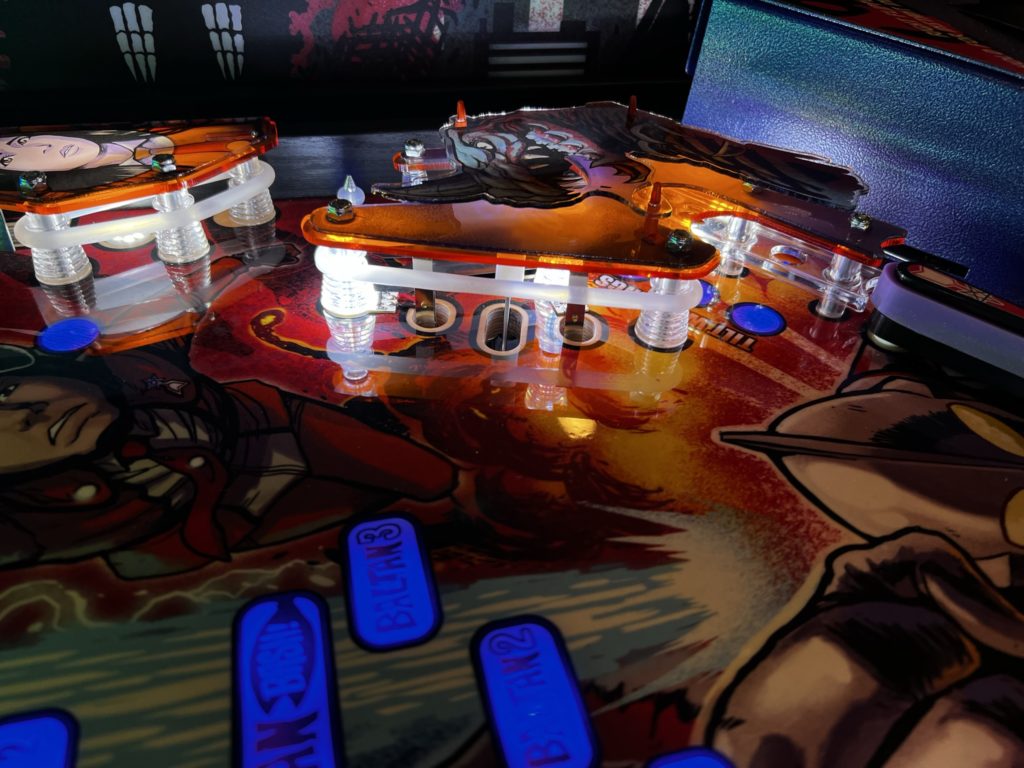
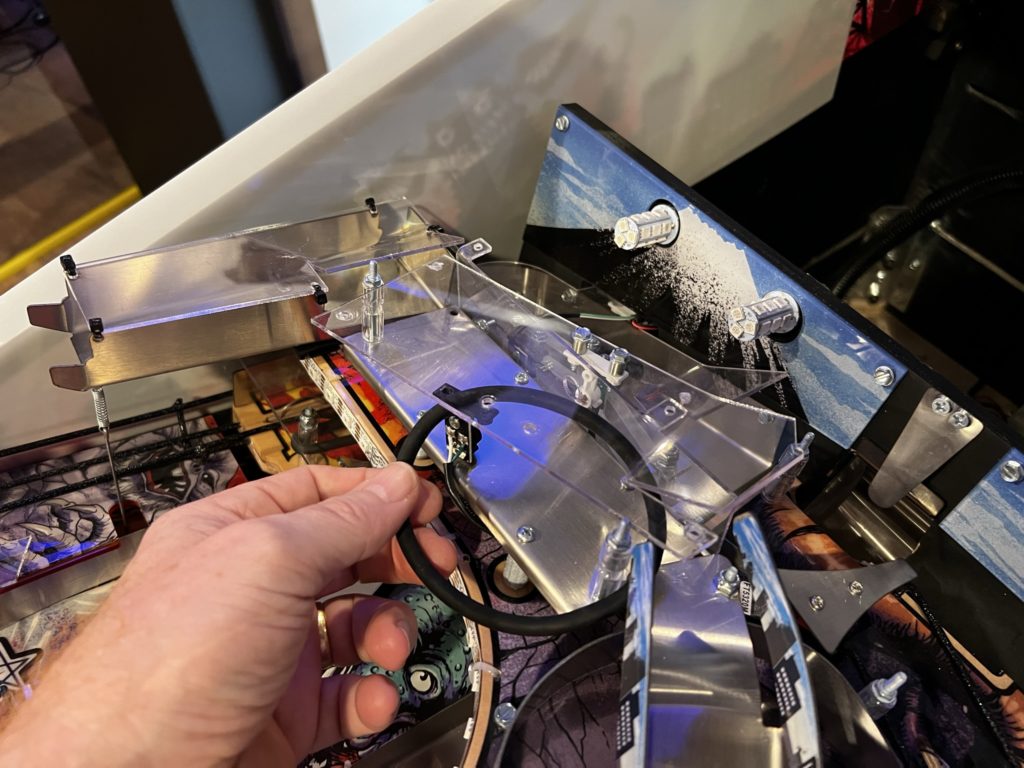
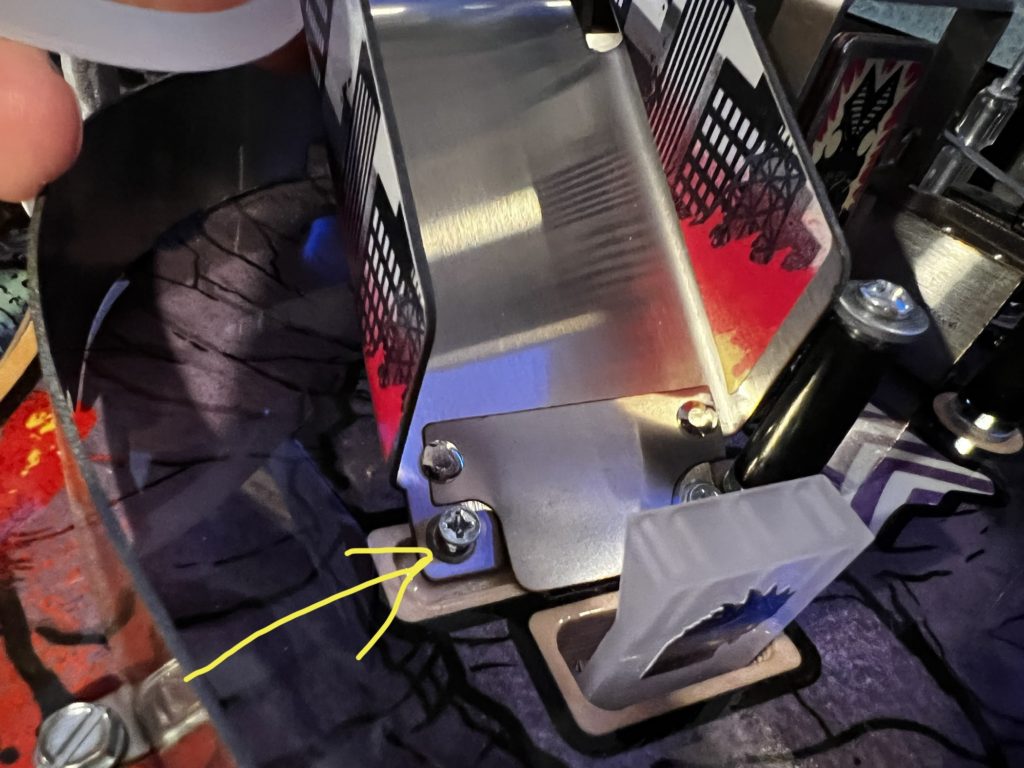
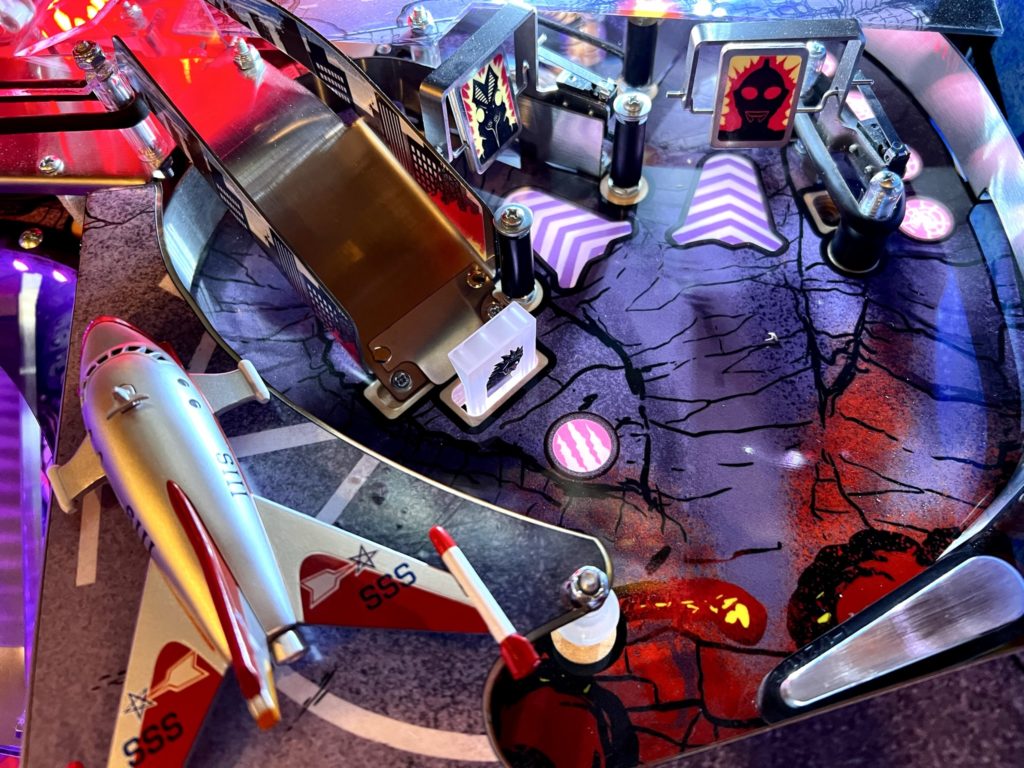
While I was up there, I pulled the cover off the “bridge” at the top of the playfield to replace the single large rubber under the cover. You’ll need to remove the player facing opto as part of getting that cover off. You will also need to loosen the small metal ramp that connects to it as it is so tightly set against the bridge, you can’t squeeze the rubber in. Simply loosen the tiny ramp screws that hold the ramp base to the playfield and remove the single post nut in the rear right and that will be enough to move it out of the way. Take the opto screws out AFTER you have the post nuts off the clear bridge cap. This will give you some wiggle room to carefully hold onto the spacers that sit below the cover and between the opto. They are non magnetic so your magnet tool won’t work. I used some need nose pliers
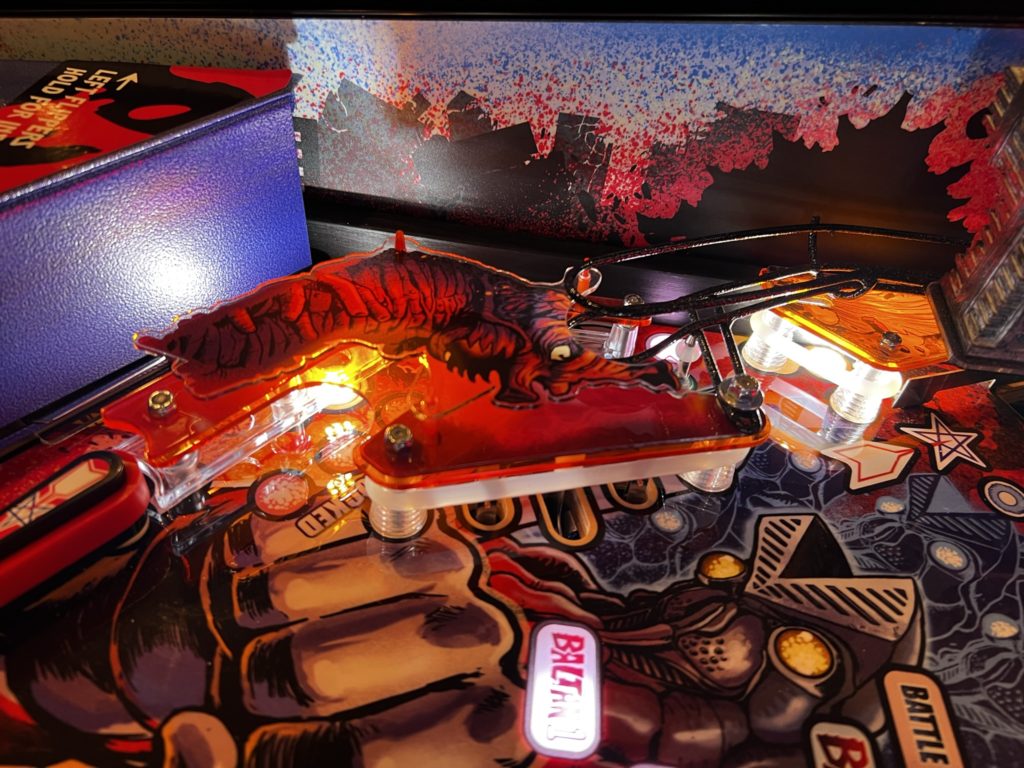
While I was up there I pulled the metal cover off the headquarters and used my dremel to round the corner of that smoked piece of plastic. The pointed corner is VERY close to the edge of the playfield and can catch and damage the side art. The day prior I took the metal cover to my shop and ground that back as well
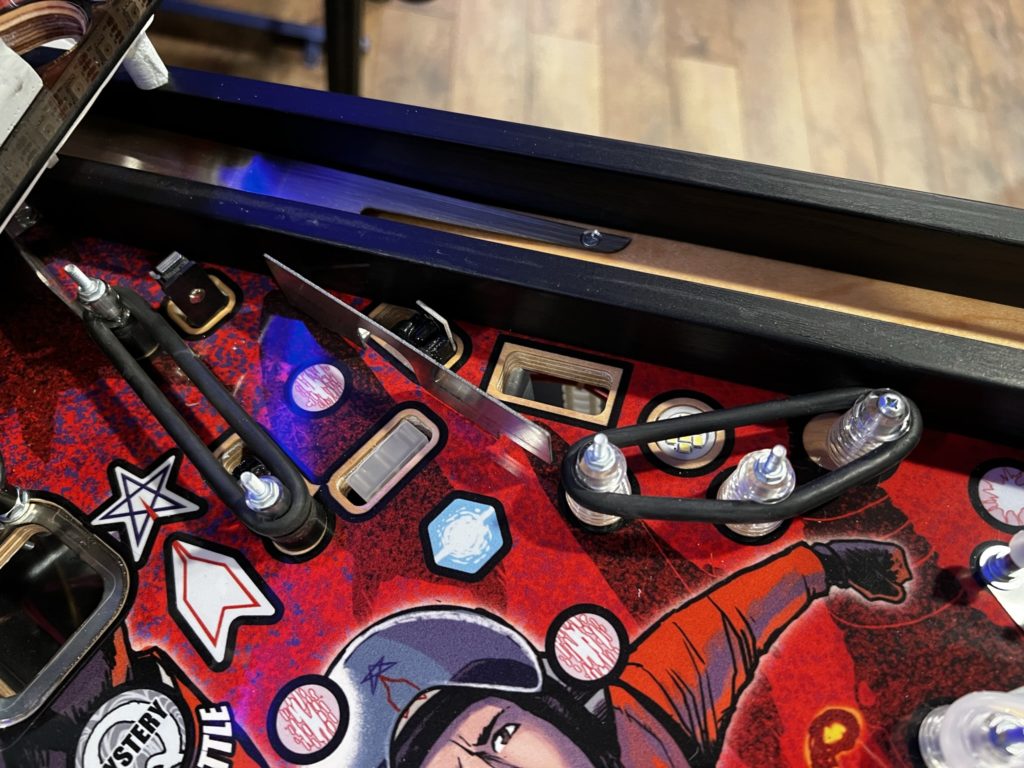
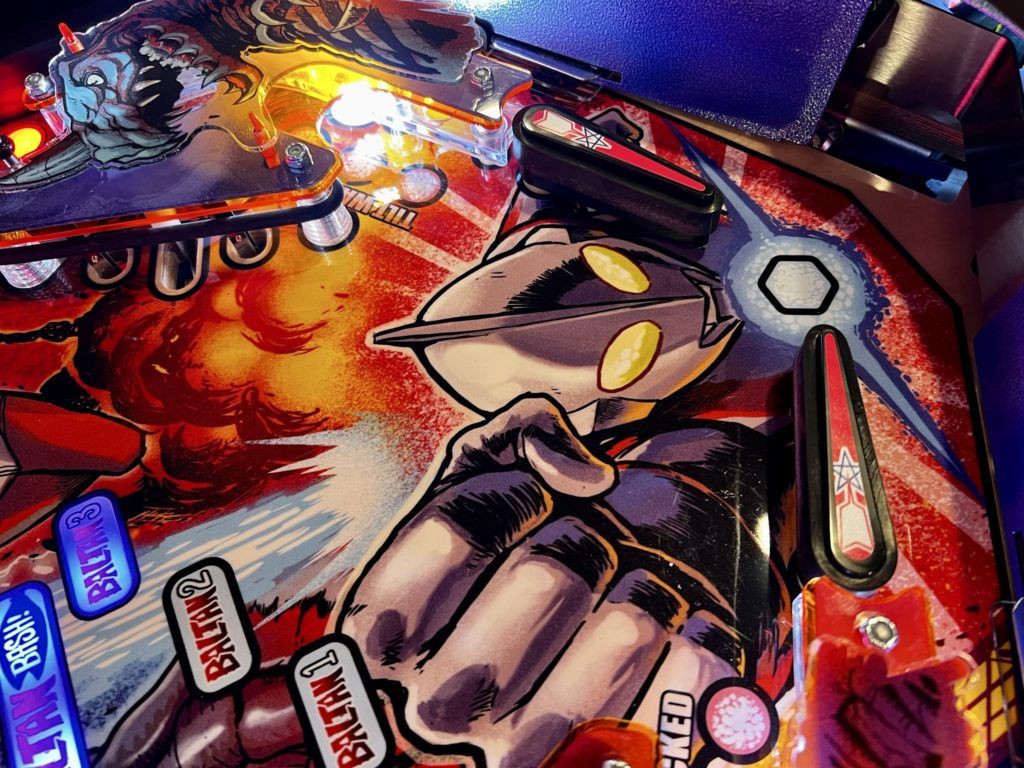
Next I moved to the right sling area. On this game you’ll need to remove the top (3D) plastics by using your fingernail to push in the single tab on each of the orange standoffs, then the plastic piece pops right off. Next remove the 6 nylock nuts with your nut driver. At this point, it’s pretty straightforward to remove the old rubber and replace it with the new. Make sure your switches are BEHIND the rubber after putting on the new one
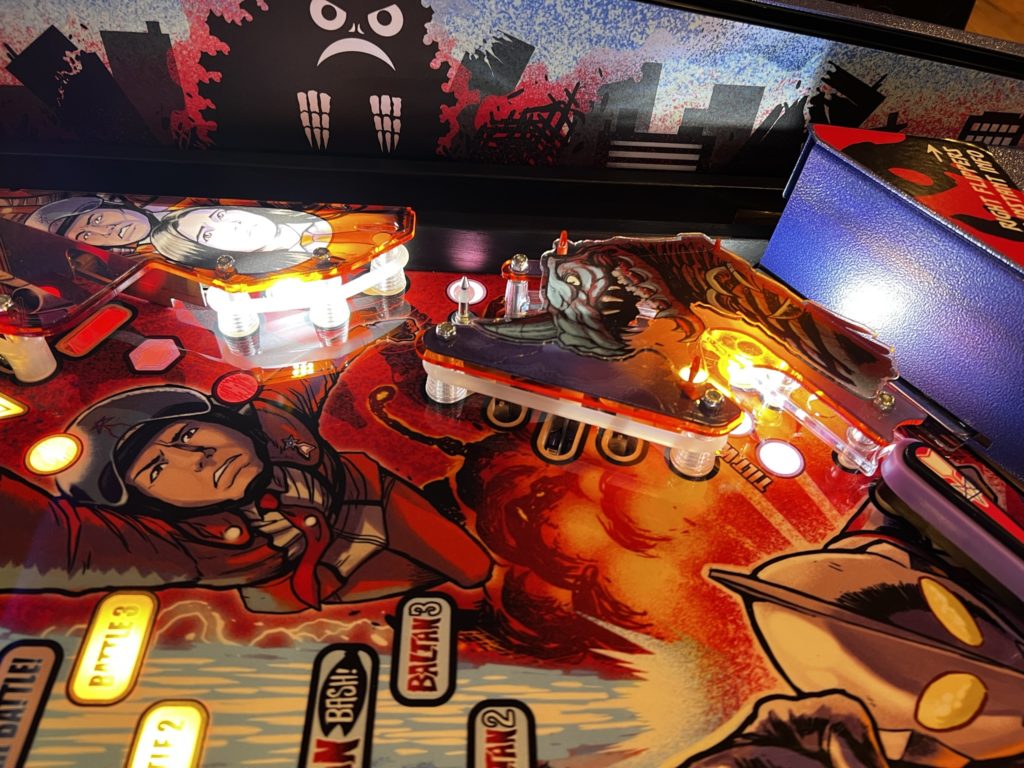
Next I tackled the ball lock area to the right of the scoop. There are 5 nylock nuts and the entire plastic assembly comes off, including the orange plastic protector installed underneath. The only unusual part in this area is the install of the 1/2″ Data East/Stern post sleeves. These are short post sleeves used in various places on this game and are typically placed on a post and go UNDER the rubber ring that sits above them. There are 2 of them in this area – right at the edge of the right orbit.
I then moved on to the left sling area. All of the steps used in the right sling apply, but this spot is a tad more challenging. You have to deal with one ramp post due to the habitrail connection. Also, there is a rubber ring right under the habitrail that needs to be accessed. You don’t need to remove anything more than 2 nylock nuts from the plastic below the habitrail. Once the habitrail is loose from the sling, it will easily lift 1-2 inches and also move left and right to give you room to access those 2 nuts. Remove the nuts and the plastics can be lifted enough to easily access that rubber ring for replacement. Replace the sling rubber, then put it all back together and admire your work!
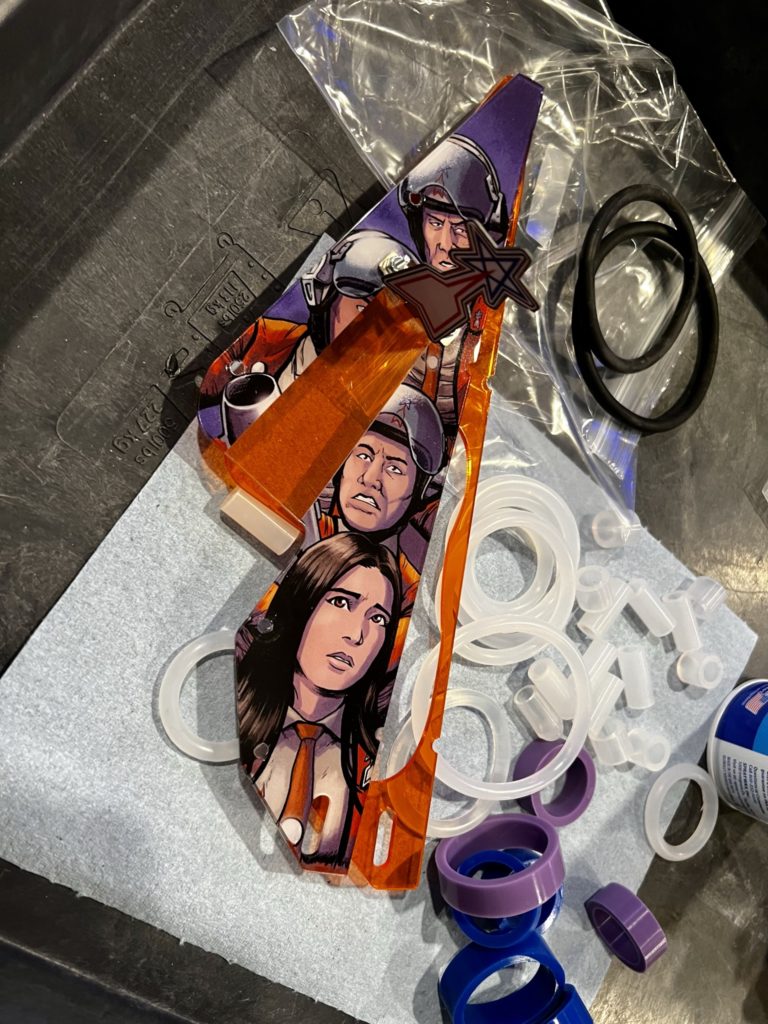
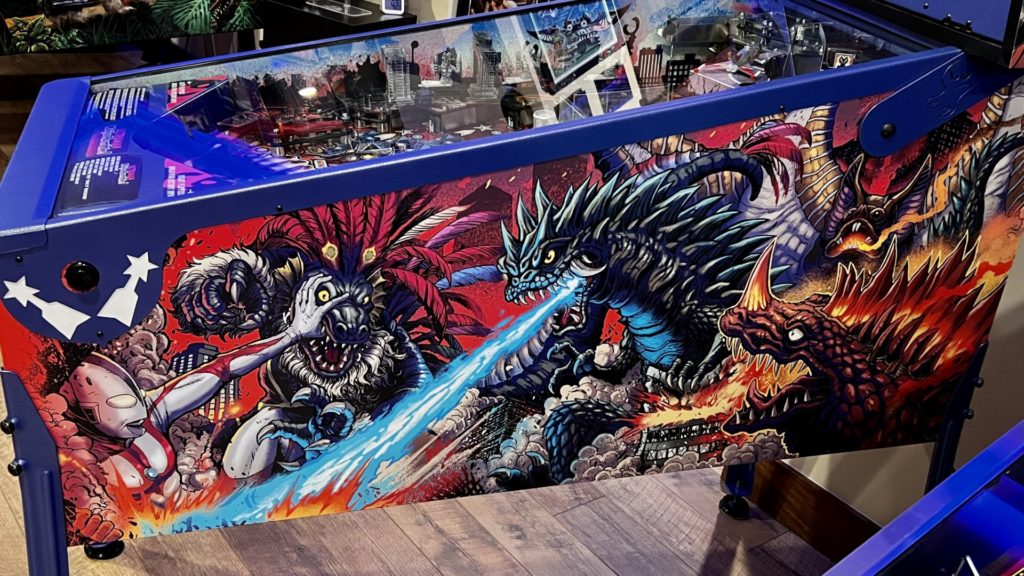
The last thing I tackled was to change out the flipper rubber. I ordered both purple and blue to try them out. Titan stocks the mini flipper rubber for those upper playfields and I ordered those as well. It’s hard to beat “black”. It just works. In the end I ruled out blue entirely and went into my parts cabinet to grab some Titan reds. I liked the red. I liked the purple. I liked both of them so they both stayed. The red matches the colors and the Kaiju on the left and the purple does the same for the right. That’s my plan and I’m sticking to it! While the game was open, I put a fresh coat of wax on it and took a few minutes to straighten the apron decal that had been installed crooked at the factory. I put away the tools, cleaned up the glass and dove back into the game – Shuwatch!
A few more pics follow
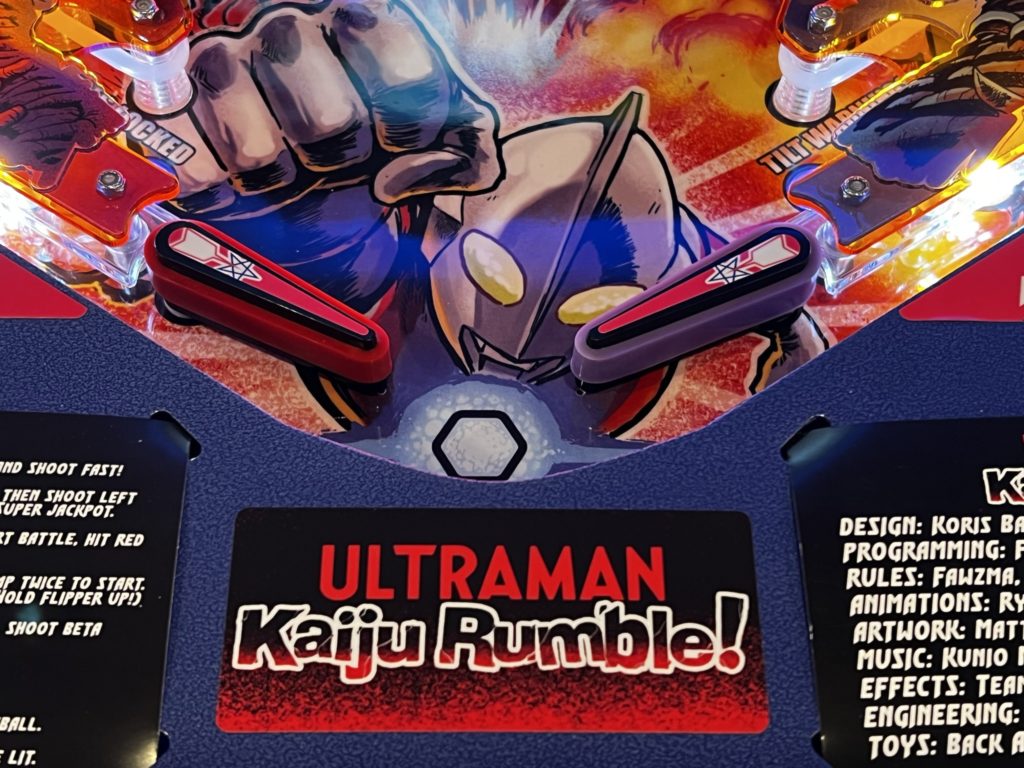
Ultraman ’66
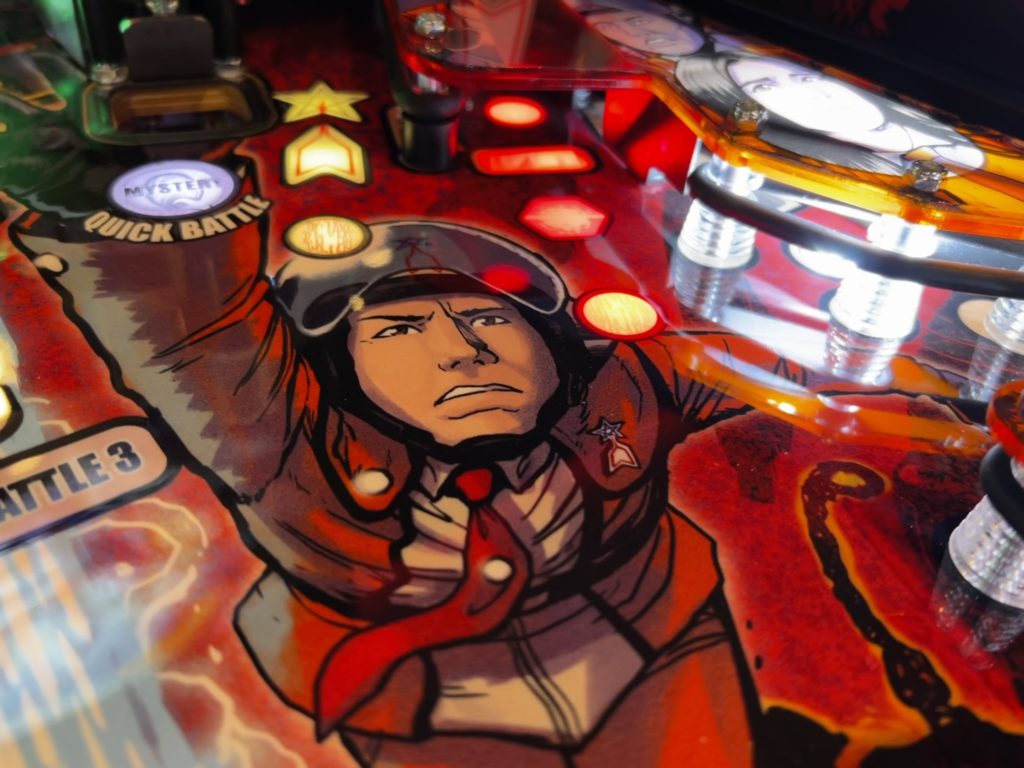
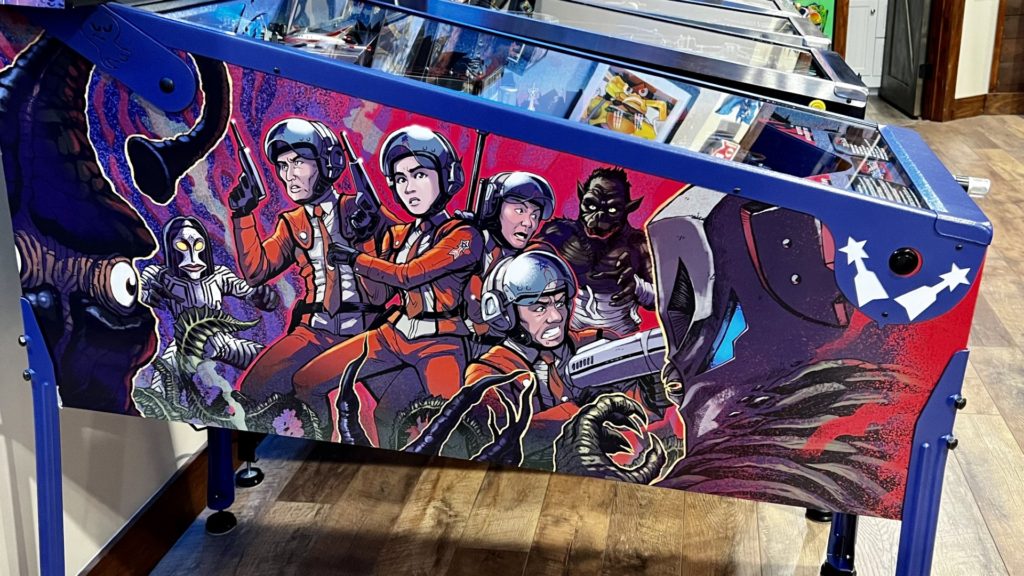
Wow does this story start a while ago! 1966 to be exact. While the Batman craze was in full swing here, Japan was going wild about something else – Ultraman. The Ultraman franchise began with a few trial episodes under the title “Ultra Q” then quickly shifted to the Ultraman franchise of today. According to Wikipedia the Ultraman brand generated $7.4 billion in merchandising revenue from 1966 to 1987, equivalent to more than $18 billion adjusted for inflation. The Wiki entry goes on to say “Ultraman was the world’s third top-selling licensed character in the 1980s, largely due to his popularity in Asia. References to Ultraman are abundant in Japanese pop culture, much like references to Superman in U.S. culture.” Bottom line is that Ultraman is likely one of the biggest superhero franchises in history that you’ve never heard of. I was intrigued when in mid 2021 Spooky announced the game (alongside Halloween), but like many others was unaware of the scale and magnitude of Ultraman worldwide. Reader, you know by now that my “unaware” was about to change. Time to go deep.
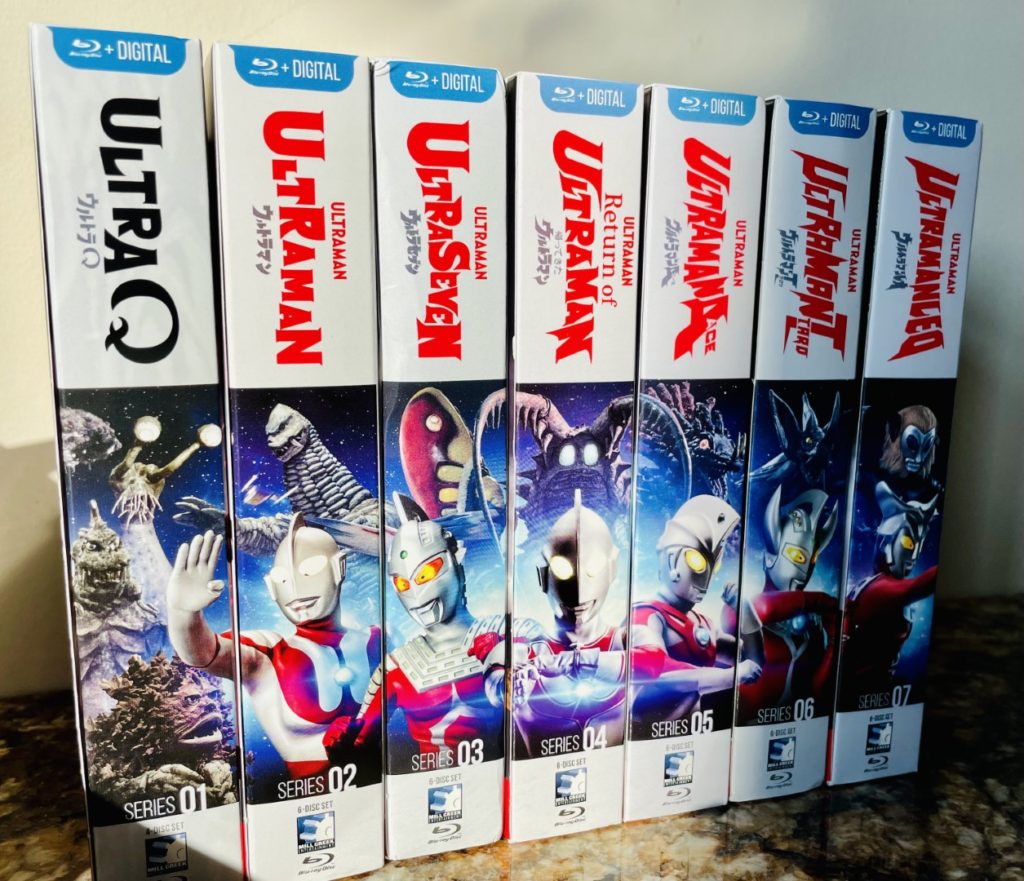
I started my recent Ultraman journey where most of the kids did when it came out in the late 60’s. I watched the shows. I purchased a total of 7 Ultraman boxed sets in bluray. They can be found on Amazon and they are on the affordable side. The “first series” ran from 1966 to 1967, but the franchise continues to this day with fresh movie releases every few years. I watched all of the episodes from the first year and a few from the later series as well. It’s an interesting show in many ways. For someone in their 50’s, those ways almost never line up with “great entertainment”. It is, however “interesting” entertainment. The creative thought that went into the Kaiju (monsters) and the beautiful costume/rubber suit designs is marvelous. The “over-the-top” acting by the stars of the show and the beautiful land/cityscapes of pre-70’s Japan are something to both chuckle at and appreciate (and sometimes in the same scene). Yes, once in a while I do find myself lost in the story of a good old fashioned monster movie, but the Kaiju battles between Ultraman and the bad guys (monsters) are meant to satisfy a 7 year old and to enjoy them, you’ll need to put your adult brain in a box for a few minutes. Appreciate them for what they are and don’t expect the camp and abundant adult humor that BM66 brings.
The game is designed and built by Spooky Pinball out of Benton Wisconsin and if you don’t know the Spooky Pinball story, it’s worth discovering for yourself. The newspaper headline might read “Family starts a small business manufacturing and selling the most complex entertainment device on earth and WINS!”
Game Animations: David Fawzma, David Van Es, And Matt Frank Game Code: David Fawzma Licensing: Charlie Emery Artwork: Matt Frank Rules: Bug Emery and David Fawzma Engineering: Spooky Luke Wiring/Nasty Nuts and Bolts: AJ Custom Music: Matt “Count D” Montgomery Sculpts: Matt Reister
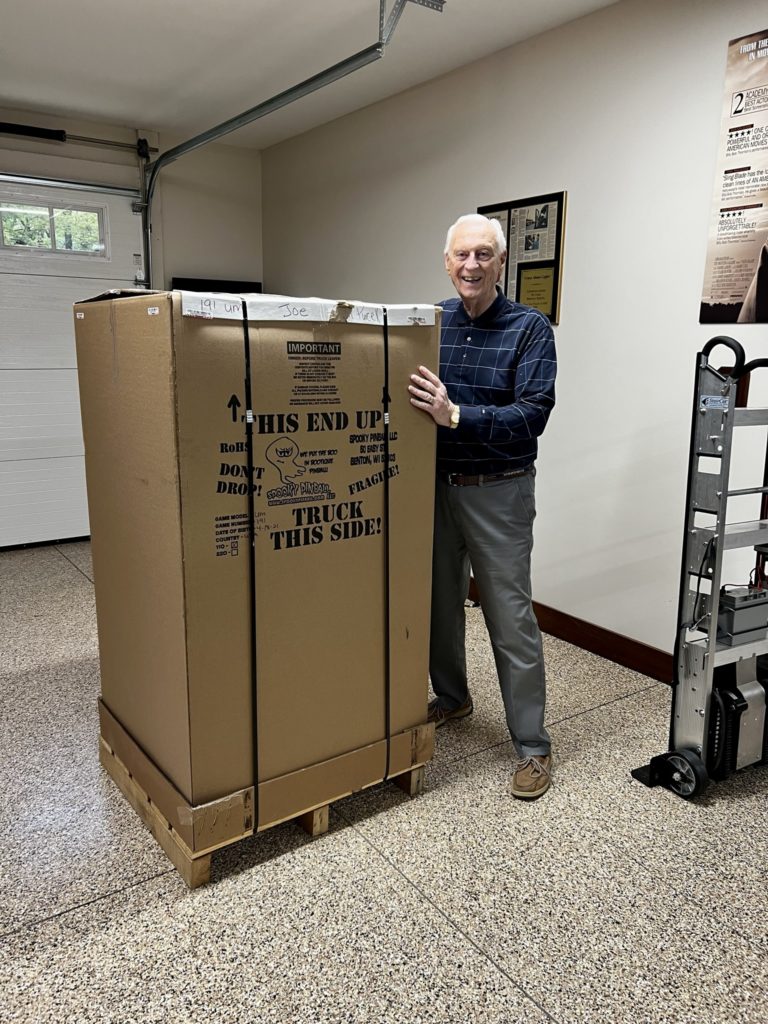
The wait for my Ultraman was long but not painfully so. Spooky does a good job communicating the general timeline and setting expectations so if impatience gets the best of you, it’s your fault not theirs. The wait gave me time to sell a few other games in preparation (Roller Games, Volcano and Space Mission). I was the very first order into Joe at Pinball Star when the game went live for sale. I almost had no choice but to order the game as the “live for sale” date was my birthday. The way Spooky handles orders does not align exactly with how “fast” you placed your order, so I was a bit down the line in production. The Ultraman edition was limited to 500 units total alongside the (released at the same time) Halloween title with the same game design but differing artwork. I received my notice of game assignment (#191 Collectors Edition, hold the butter thank you) on July 24th 2021 and picked up my game at the Dayton freight terminal in Knoxville April 30th 2022. Total time elapsed around 250 days. Not bad for a boutique Pinball company in the middle of a pandemic and short of parts.
As I waited for my game to be built, I became more and more concerned about what I would receive. The skinny on Pinside from folks that had early games delivered was not good. The negative feedback was broad. First the code. It was almost non-existent. Not the first time I had seen this. I was one of the lucky few to get a BM66 SLE and it came with bare bones code on delivery too. No worries, as code can be added. There was also a pretty wide range of quality issues. Parts not fully screwed down, mechs not working, ball hang-ups in multiple locations, topper problems and more. Many of these issues proved to be minor and Spooky either sorted them for the owners or the owners fixed it themselves. The most nagging of all the feedback was the gameplay. There was talk of it being clunky or without flow. Some went so far as to say it just wasn’t that enjoyable. To be fair, when the code is not fully developed, the gameplay will suffer. I worried most about this type feedback but I also remembered how other games suffered this same negativity, only to emerge later as highly regarded (think Walking Dead, Game of Thrones, Gaurdians of the Galaxy and more). I made the decision to be patient, wait for my game to be delivered and make up my own mind about game play. I’m so glad I did.
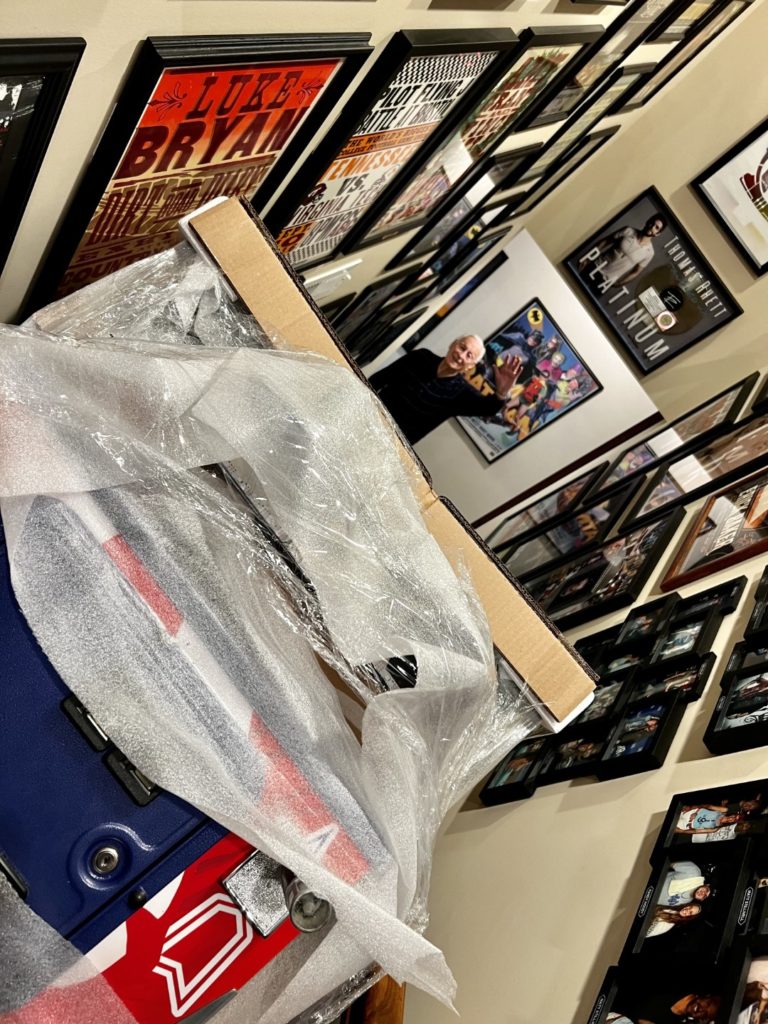
When Joe from Pinball Star gave me the Pro number for the game delivery, I tracked it right away. I was surprised to see it had already been picked up in Benton WI and was on it’s way! It also showed a delivery in just 2 days. I called the moment it arrived at the terminal and asked to come pick it up. The team at Dayton was super helpful and in 15 minutes I had signed for it and loaded it onto the back of the pickup. There was NO chance of rain that day but (in typical game day pickup fashion) of course, on the way home I experienced 10-12 drops on my windshield. The remainder of the trip proved dry and once home, my daughter helped me tip the game off the truck in the garage. Later that evening we had some very dear friends over (Sonny and Carolyn) and he was kind enough to lend me a hand in hauling the game into the Loft and setting it up. Sonny is 87 years young and always ready to learn something new! We used my Escalara to walk it up the steps followed by my homemade pinball setup tool (rocker, RV jack and drill) to get it up in the air and install the legs.
The setup went quickly as I’ve done this a few times 🙂 Once up and plugged in, I asked Sonny to do the honors of powering on the machine. He reached under and rolled the rocker switch and the game came slowly to life. These new machines take a minute … like grab a sandwich minute. Eventually the game fully booted and it was magnificent. Just beautiful. Even in attract mode, the light show was awesome. I hit play. Nothing happened. Well, I take that back. A ball appeared in the shooter lane but the machine was completely silent. No music, no callouts. Time for some troubleshooting. My first stop was behind the backglass but I found only a small circuit board that couldn’t possibly be the sound board. Time to pull the playfield. The PF is very tight in my machine so I used my side blade protectors to ensure I did not scratch the beautiful art blades that came installed from Spooky. Once the playfield was lifted it was easy to find the sound source. Spooky was using a well known Lepai amp to drive the speakers. These are inexpensive but effective class D Chinese amps that pack a lot of output power into a romance novel sized package. I checked all the wiring into and out of the amp – all good. The control knobs were relatively close to the edge of the cabinet so I had to use a small mirror to read them and see what levels they had been set at. I got to the power switch and found the issue. The amp was switched off. With a flick of the finger the largest issue with the game out of the box was fixed. Now to play some pinball!
Gameplay. If you’re reading this while the game is still in production, then this is what you came for. If you’ve found this content sometime after that, then I’m hoping it’s confirmation of what you may already know. If you are considering buying an Ultraman on the used market, read on for at least one persons thoughts on the gameplay. Note that as I write this the code is still young/incomplete and the gameplay is likely to both change and improve over time.
Let’s start with the bullet point summary:
It’s different, and I mean that in the most complimentary way
It’s a nice combo of both easy and hard things to accomplish
It’s beautiful – in every single way
The light show is excellent and fits the theme well
The theme integration to gameplay is very good
The left ramp rattles a good bit but rarely rejects, so it “looks” clunky but does not play that way
The center ramp will reject with a weaker shot and that fact only makes the clean shot feel even more satisfying
The center ramp can be made with both the right and left flippers
The right side single drop target/ball lock is a great mech, but needs more supporting code
The variety of skill shots is something refreshing and a nice selection of risk/reward
The ability to restart multiball with scoop shot is very “Ballyish” and a welcome bit of code (think Snack Bar in CFTBL)
The lifters are unlike anything else in pinball and during normal gameplay force a change in your style (not a negative IMO)
The lifters during multiball are a significant challenge as you don’t have the moving ball on the habitrail/ramp as a visual reference
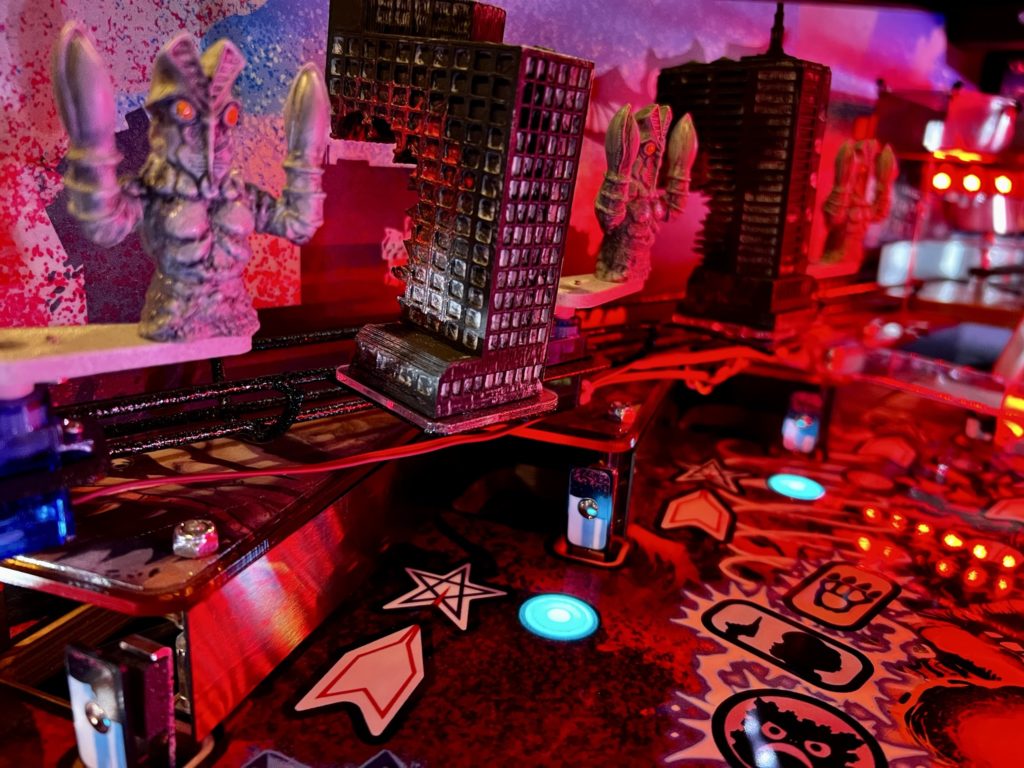
The upper playfields are the best I have ever seen and the topmost (Headquarters) is just killer fun
The outlanes are VERY forgiving and allow you to focus on the center drain and ball control
The shot variety is excellent and balanced from both the right and left flippers
The drop targets create nice gameplay variety and future code may enhance further
The sound quality is there in spades (bass is killer) but needs some leveling and more callouts
There is plenty of “flow” potential in the game, your skill will determine flow and combos
The toy sculpts are excellent and close to the best I’ve seen in any game
On top of all that the CE “comes with” many extras:
Laser cut side rails, powder coated and with colored inserts
Motorized custom topper with RGB lighting
Pre-installed orange plastic protectors
Customer blue powder coating INCLUDING backbox and coindoor
Custom shooter rod
RGB speaker lights
Shaker motor and knocker
Art blades pre-installed
A signature plaque from Bin Furuya is a very nice touch for all us Kaiju geeks.
Bin was the actor in the Ultraman suit (uncredited) for the 1966 debut of Ultraman
From here, I’ll just give you some stream-of-consiousness commentary of how it feels to play Ultraman. This is not going to be an extensive “review”. After all, I’ve played less than 50 games to date. Like I said earlier, it’s different. So what does “different” mean?? That’s really the $64,000 question. What are the differences and what are we comparing it to? In my mind standard pinball starts with the “fan layout”. A fan layout has ramps that return the ball to an inlane/flipper. What makes Ultraman play different is that those returns to the flippers via ramp or habitrail are missing. They don’t exist. The entire experience of watching a ball roll down that ramp, drop into the inlane and then mentally prepare for the shot are missing. Well EXCEPT for that very last part and BTW, you don’t get a ton of time or line of sight. The “mentally prepare for the shot” time exists for sure, but it is shortened both in time and visbility. Time is cut because the location of the lifter and is just inches from the flipper and visibility is reduced because unlike a ramp/habitrail drop, you only get to “see” the ball for maybe 3 inches of travel total. There – I said it. The largest difference in gameplay for Ultraman is the impact that the lifters have on gameplay. For the most part, I like it. I appreciate the challenge. YMMV
The other difference I’ve experienced is related to the above. The ball can spend a bit of time in the subway system and can move in a surpising number of paths. It’s by design. That can translate to a good portion of the time that the ball is simply not visible or in those moments, not available for gameplay. Given that the game is also at times frenetic and blindingly fast. The “break” presented by subway travel is not a negative. I use this time to plan the next shot and take note of where I am in the game. I’m still surprised by how many places the ball can exit the first upper playfield. All of this can translate at times to a feeling of “losing the ball” or at a minimum wondering where it went. Some of this is the newness of the game and over time, I’ll get to know all of the various ball paths. Even so, the variety of shots and ball paths lead me to add this as part of the overall definition of “different” – again though, I’ll add “in a good way”.
In closing, I would say that the quality and variety of the engineering is something I would also credit as additive to gameplay. This is not a simple, single level game. It’s one of the most complex multi-level games manufactured by anyone, let alone a company with new designers at the healm. I think if you took away some of the (unwarranted) complaints of the lifter mechs and view the remainder of the game as a whole, you’d be impressed at what a young Spooky team has accomplished.
The game has two complete and intensely fun to play upper playfields, both with a drop target and one with dual spinners and a connected a teeter totter ramp! All of this innovation and creativity packed into one game that manages to deliver a satisfying theme integration based a foreign licensed property that most Americans have never heard of. A risky endeavor to be “different”, but with a hugely successful outcome. Congratulations Spooky team, well done.
Shuwatch!
Change wishlist:
UI screen needs some changes: visibility of score and ball count is terrible to my aging eyes
The call-outs need to increase in variety and tighten up from a choreography perspective
Minor QC issues on my game when unboxed:
The center sticker on the apron is installed crooked (no just a little either)
The right lifter was occasionally sticking “up” (found a loose cable catching the gear and zip tied it out of the way)