Ultraman Starlight
There were moments when playing Ultraman that the lower center of the playfield seemed dark to me. I wondered if adding spots would help. Problem is I don’t like all the exposed wiring, the strap ties that you have to add (and cut later to access/replace rubbers etc) and the fact that they are visible above the playfield. I forgot about the issue until I was on the Comet website ordering some LEDs and saw their “Star Post Light Kits“. These are the round shaped 4 LED wafers that fit UNDER the star posts of almost any game. I thought, why not try these. They are typically installed under the posts in your slings but can be used almost anywhere there is a star post. You can get them in a 2 post or 3 post kit – depending on whether you want to do all 3 posts in your slingshot area or just 2.

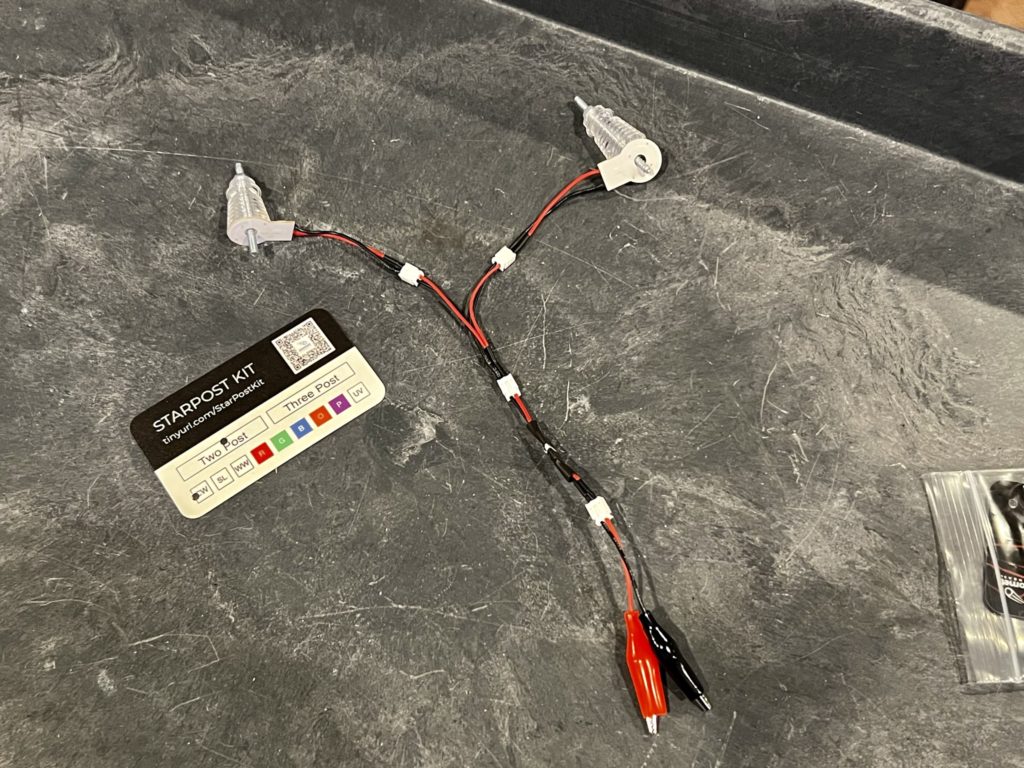
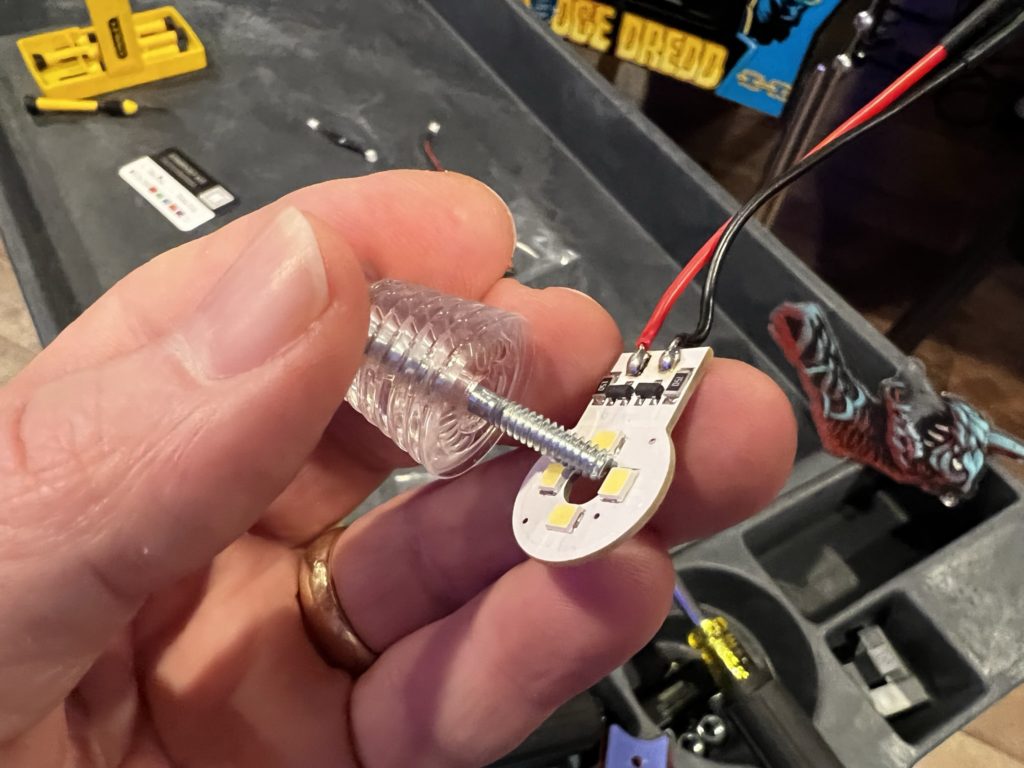
I ordered 2 sets of the 2 post kits. The kits come with everything you need to hook them up.
- LED light wafer
- Power harness that connects each wafer to a common power supply
- Dimmer to dial in the brightness
- Power supply alligator clips
The wiring order starting at the power supply side goes like this:
- Connect power supply to existing GI lamp
- Connect dimmer to the power supply cable
- Connect the splitter/power harness to the dimmer
- Connect each end of the splitter to each LED wafer (2 or 3)
- Effectively you are powering each wafer from a single power supply cable and one dimmer

Install is fast on these and requires (for Ultraman) that you remove the sling plastics and plastic protectors on the right side of the game. On the left side, you’ll need to loosen the ramp by removing the one nut holding it to the sling area.
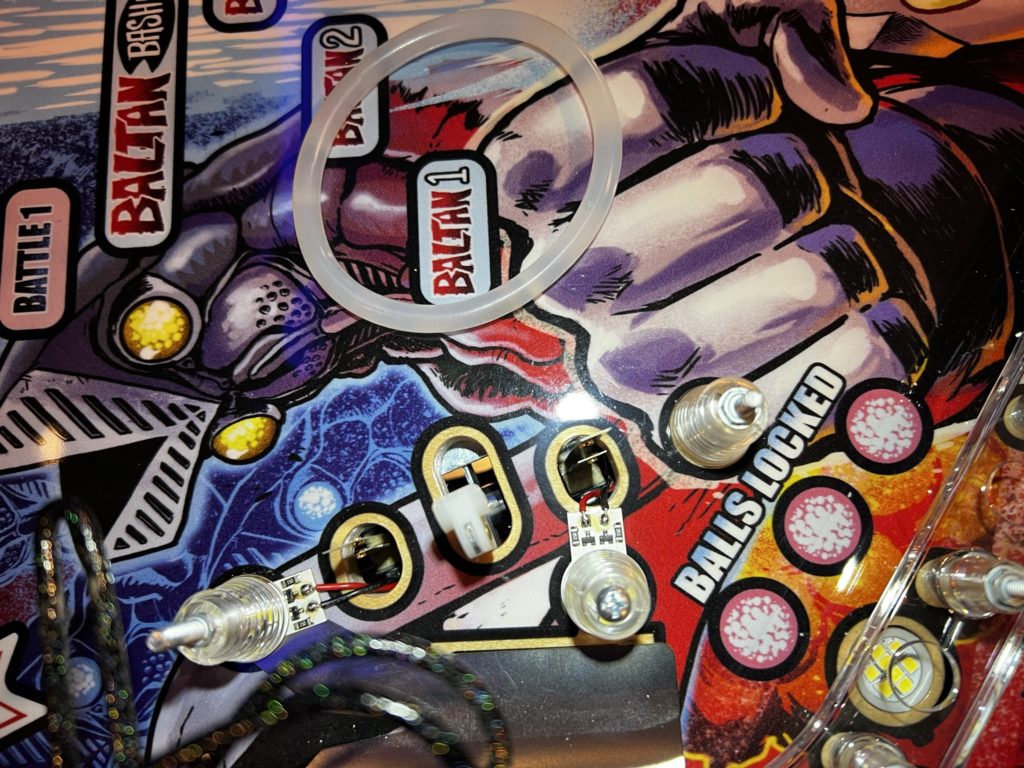
Once the plastics are removed, you simply unscrew the star post using a 1/4″ hollow nut driver, place the wafer below with the LED’s facing up and tuck the thin wires (2 per wafer) down behind your sling switches. Reinstall all of the stuff you took off, then lift the playfield to finish up the wiring.

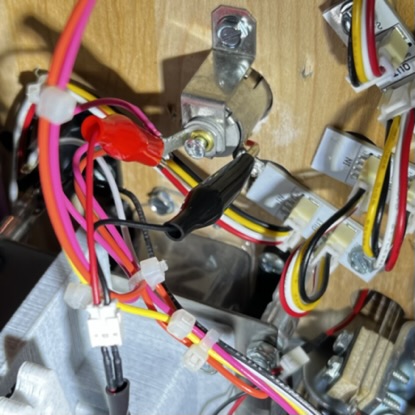
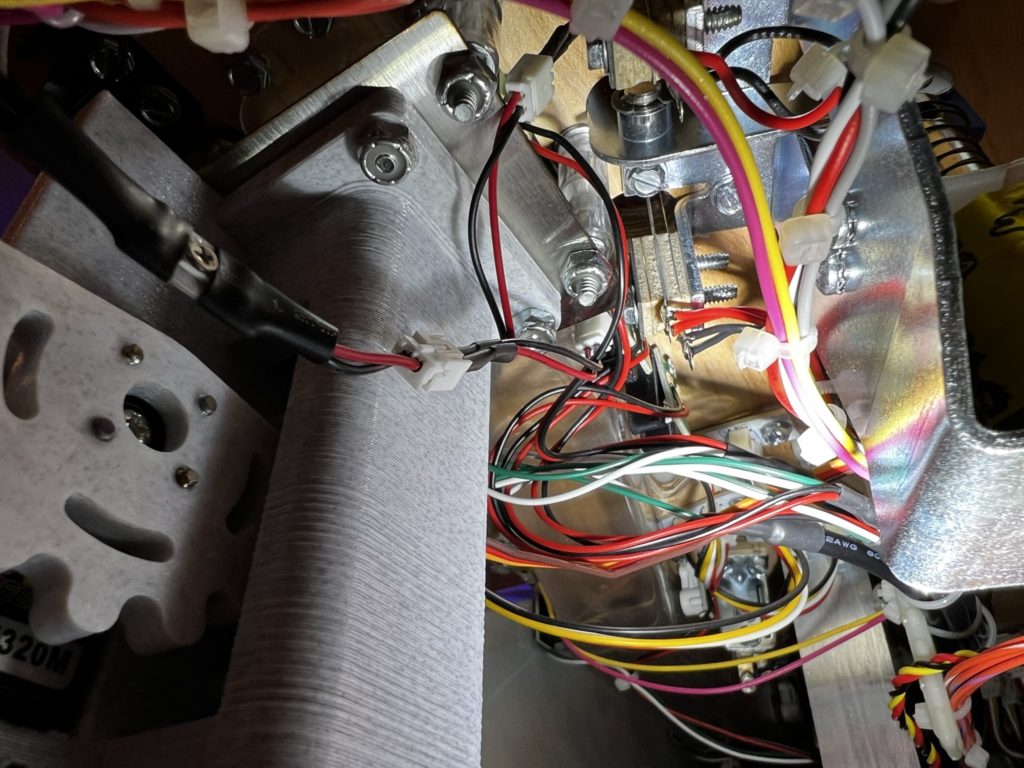
Underneath the playfield you’ll need to find the end of the LED wafer wires and plug your splitter/power harness into each of them. Connect the dimmer to that and you’re almost done. To make the final connection and supply the power, you simply find the closest GI lamp and use the alligator clips. I placed the red clip on the bulb center and the black on the body. Polarity does not matter so where you put the red vs the black is up to you. If polarity in the electrical sense is a new term to you, just do what I did and it will work fine.
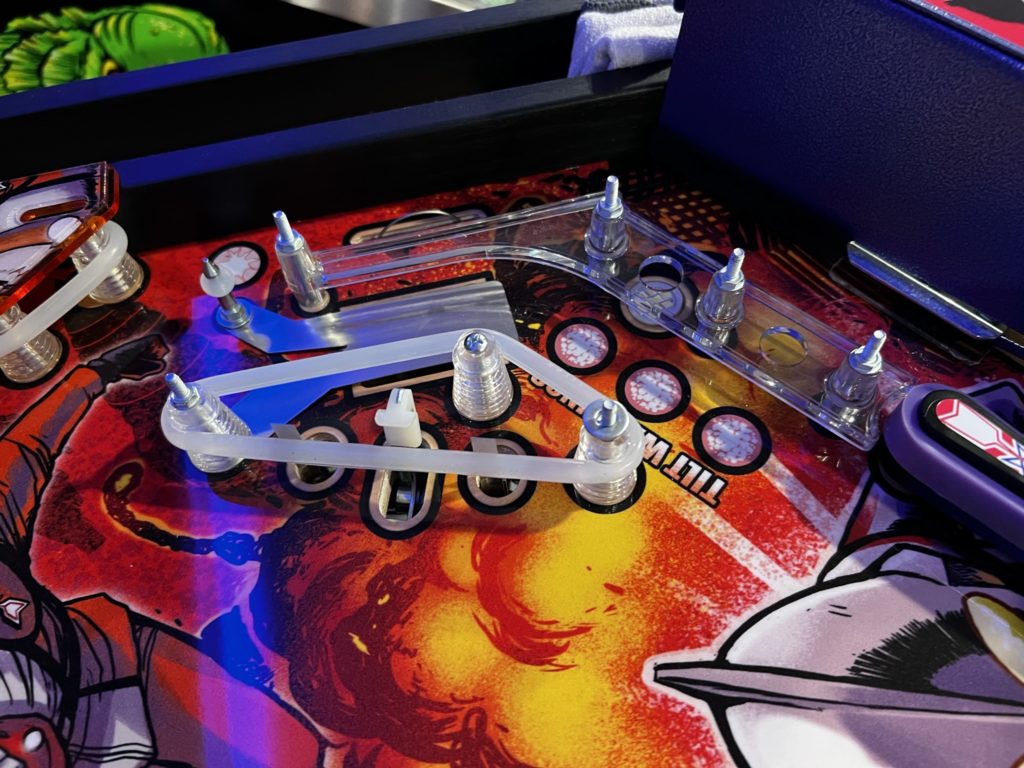
Lucky me, I got to install these TWICE. I actually placed the 2 wafers on the inside 2 posts (toward center of game) on my first install and after turning on the game, discovered I had made a pretty big tactical error. The lower posts on each sling (again closest to the playfield center and closest to the player) are VERY visible and when lit from underneath, BLINDING! To be fair, I am using cool white under a crystal clear post – it’s going to be brighter than any other combo.
I quickly removed that lower/center LED wafer and swapped it to the outside most star post (not visible as it is buried under the plastics). It was the right call. I could now dial up the brightness (almost to max) with no issue of being blinded during gameplay.
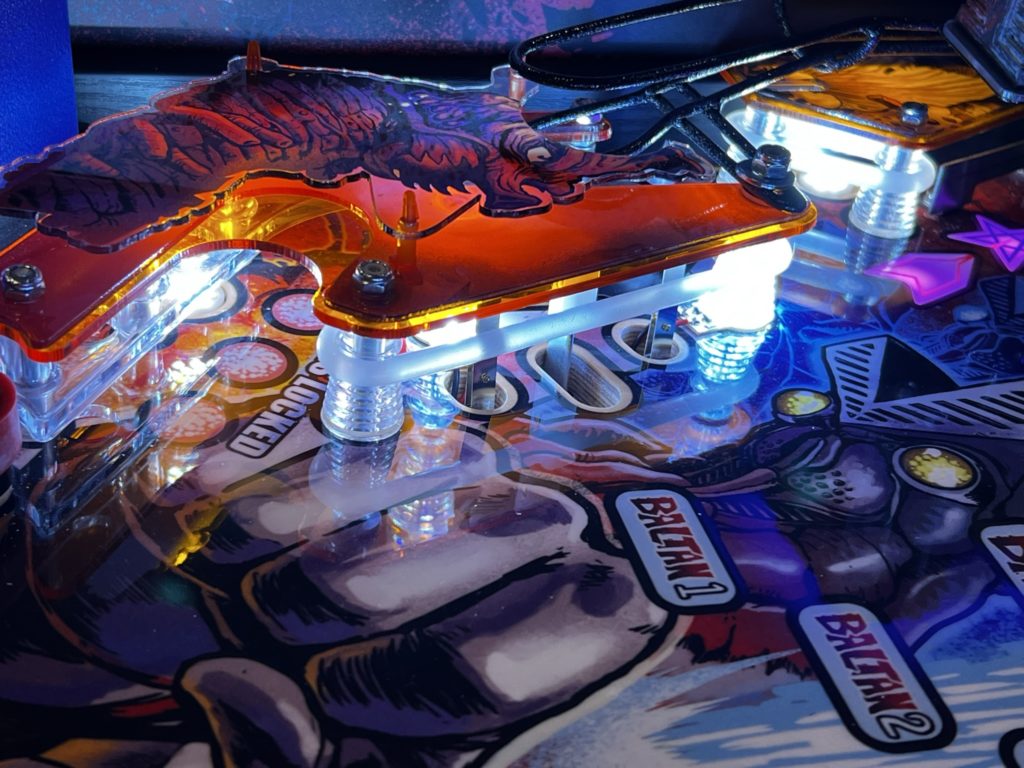
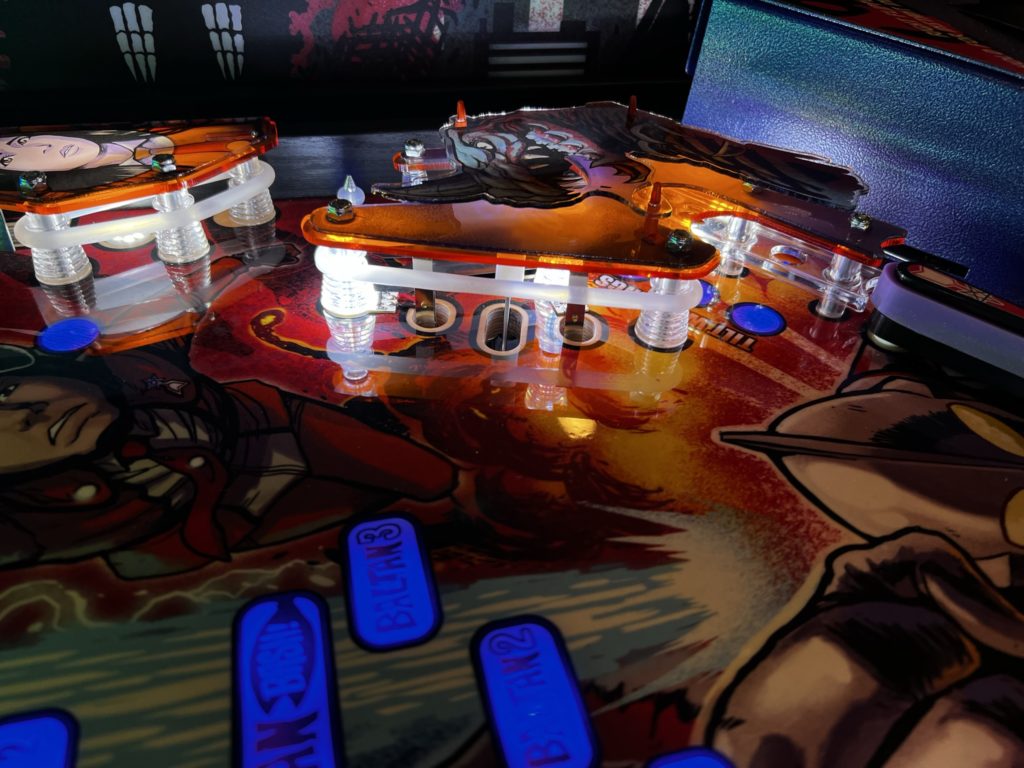
The incremental light is just what I wanted and the character (and appearance) of the game is not changed. The star post lights are tied into the large LED lamp that sits just low and behind each sling so the game code behavior that is coded to that lamp, is the same behavior that you get with the newly installed star post light wafers.
You can see in the images that follow that the lowest star post on the slings has no light. That’s the one where I originally had one of the 2 LED wafers installed on each side but proved to be too bright and shined directly into your eyes during game play. Moving the 2nd LED wafer to the outermost star post on each sling was a perfect solution. I could then dial them both up to almost max brightness, enjoy all that light output but no glare. I used the Cool White LED option in order to match the GI and post colors (clear) that was installed in Ultraman. For aesthetics, Comet recommends that you color match where possible. In other words, if you have red posts, use the red LED color option when ordering. If you are trying to add significant lighting to the dark center of a playfield, I would recommend using one of the 3 white options they offer (cool, sunlight or warm).
Overall I extremely pleased with these lights and will be adding them to a few more games soon. Creature is the first on the list and I’m sure there will be more. The lights are effective, easy to install and inexpensive by any measure of “pinball mods” – try a set and enjoy better game lighting right where it’s often needed most.

