Buck Fans
Quick post here for you “new to the home market” BBH owners. As you know from my review of the new BBH Home Reloaded Mini – I love the game. It’s great and I actually am enjoying it more as time passes. It’s been a great addition to my game room!

You’ll also know I complained about how loud the cooling fans were – holy cow loud, not just “kinda loud”.
So I went on a mission to search out some suitable replacements. The replacement fans not only had to be quieter BUT they needed to move as much (or nearly as much) air and be very reliable too. Finally they needed to match the electrical specs as well. Much internet searching led me to 2 options and I would suggest that if you choose to do this (I did not because that, of course, would void my warranty) you are on you own. That’s the disclaimer here – don’t try this at home on YOUR BBHMR!
So let me share with you EXACTLY what I didn’t do …
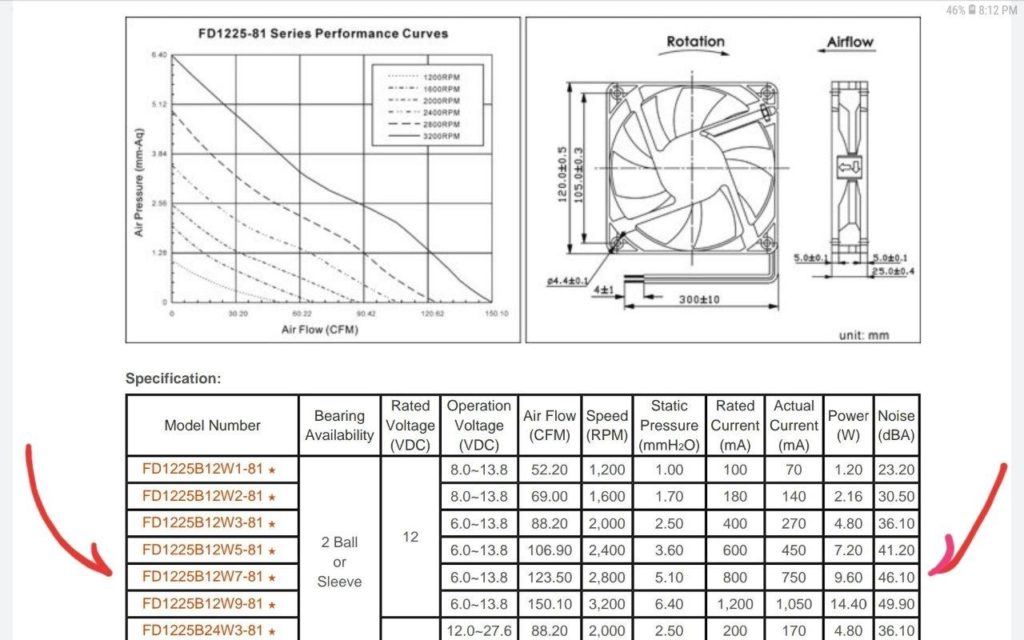
I’ll start with the specs on the fans that are installed per factory spec. The 81 series Cooltron is not the easiest to find specs on but I finally found a sheet. It’s the FD1225B12W7 model shown in the image and highlighted with my hand drawn arrows. This is both a high static pressure (5.1) and high CFM at 123.5. I’m not sure the cabinet creates significant static pressure, as it has 2 huge grilled air intakes right below it, so this fan probably moves even more CFM than stated. It has a 2 pin molex connector so that means no speed control from the PC, it just runs at it max RPM when on.

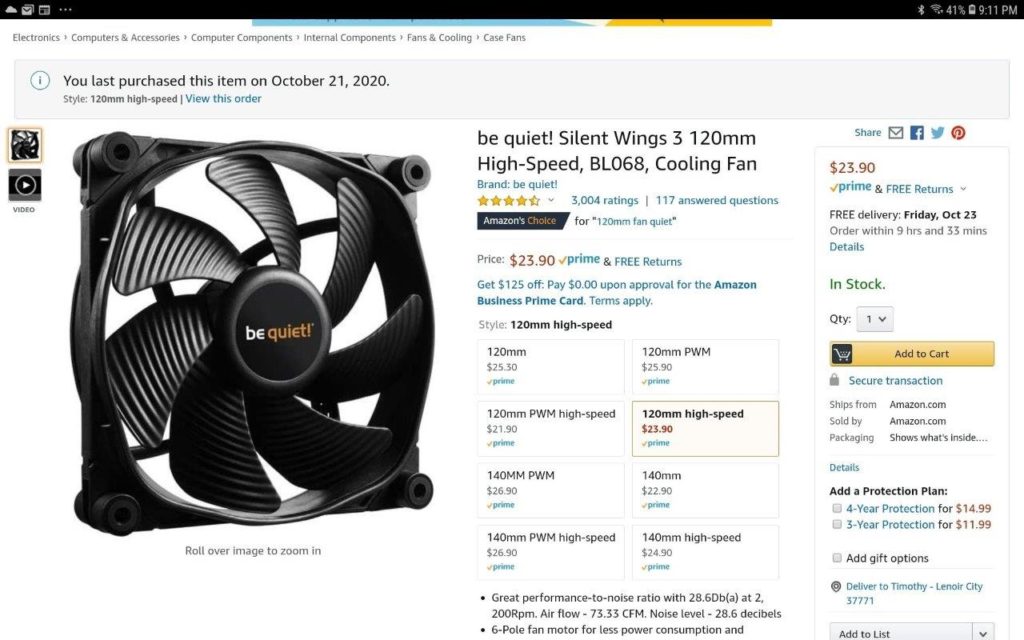
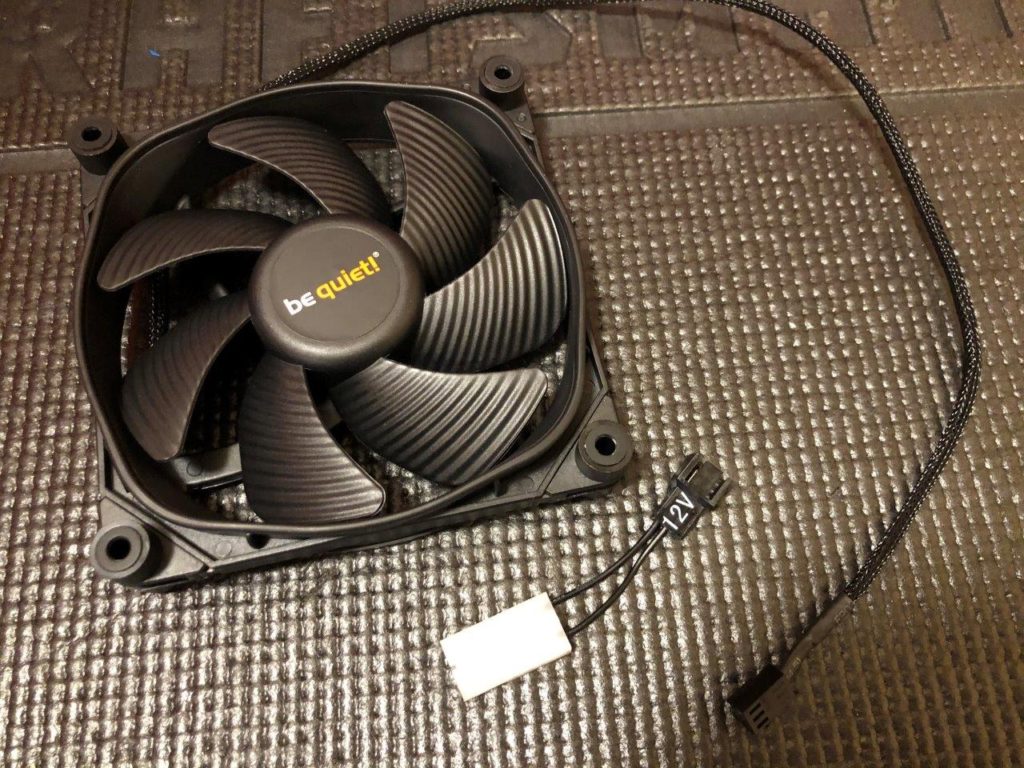
Based on what I discovered, I ordered a “Be Quiet Wings 3” to test out as the upper fan replacement
There are several “Be Quiet” models in the 120mm size, the quietest one rated at just 16db, but the CFM on that one is only around 50, too low IMO for this cabinet. So the one I purchased was the high speed version 120mm
Pretty high CFM at 73CFM, also low vibration mounts, 12 volts like original.
28db noise at full rpm vs the stock fan of 46db. I cut the supply wire and add a simple 2 pin molex connector by cannibalizing the connector from the factory Cooltron fan. You’ll need a special tool to remove the pins without damage.
The fan arrived quickly but before I could begin I needed to get the factory installed fan out of the cabinet for inspection and to help plan the connection/wiring for the new one
To gain access to the upper fan, you simply unscrew the screws that hold that plate on. Then use a 3/8″ box end wrench to grab the nyloc nuts on the inside of the fan, while using your drill to remove the bolts – there are just 4 obviously.
You can peek your head inside the cab and look upward to see the top mounted fan and it’s 2 wire molex connection. The wire is VERY long so no worries about the new one reaching.

The molex connector sits to the right of the fan as you stand behind the BBH cabinet and is unplugged by simply pulling it apart

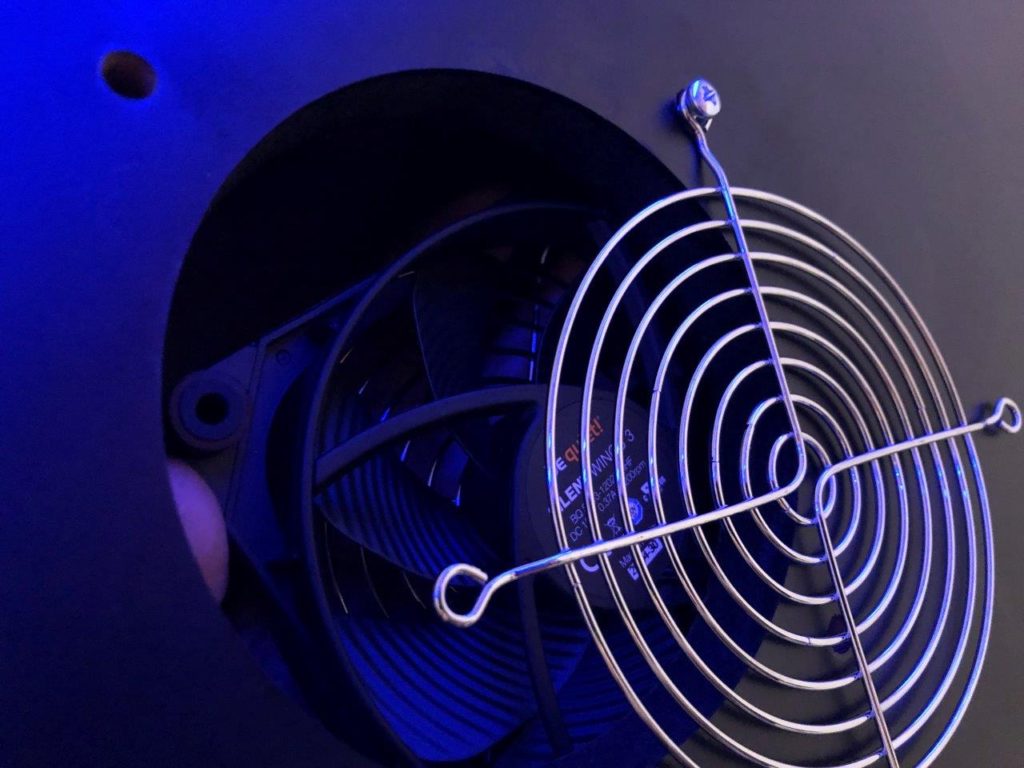
The molex connector was quickly removed as was the upper fan. Be aware that there are NO washers on the fan bolts at all – no need because there are 2 fan screens that act as both washers and to center the screens on the fan. Note the on the upper fan, the screens are separated to be both inside and outside the cabinet. On the lower fan, the screens are both INSIDE the cabinet.
With the upper cabinet fan removed, it was time to see how to get the new “Be Quiet” fan wired up for install.
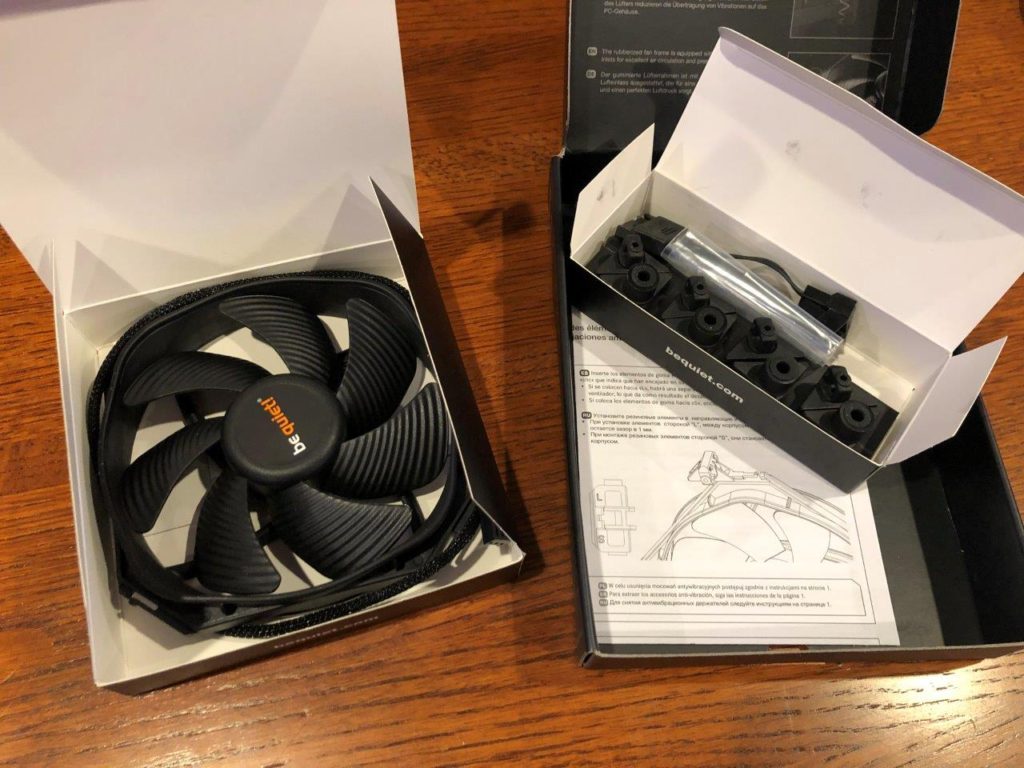
The Be Quiet fan comes with a nice pigtail adapter that we will use to wire it to the BBH cabinet wiring. I used the 2 wire section of the pigtal and discarded the rest.

I simply cut the 12v section off, plugged it into the existing connector on the Be Quiet fan and stripped/prepared the bare wires on the other end.
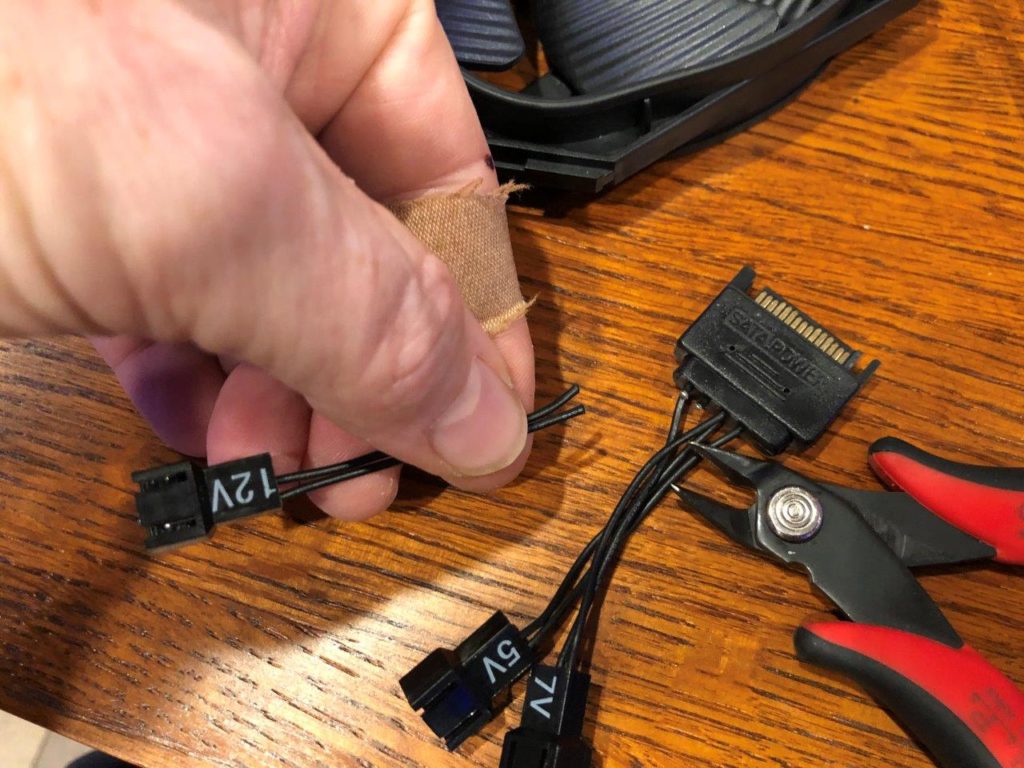
I needed to use the existing molex 2 wire housing from the factory fan, so I removed it from the original using my molex tool. That “male molex” connector was then added to the new Be Quiet fan using new Trifurcon .156 pins for a nice factory install. This also leaves the factory fan intact and able to be re-installed should I want to later.

The final assembly has the new molex connector, attached to the cut off portion of the Be Quiet supplied pigtail and then that part is simply plugged into the fans factory connector
Now it was time to reassemble the upper fan back into the cabinet. Pay attention to the fan screens, they have a bend in the 4 arms that is purposeful and pulls the screen away from the blades
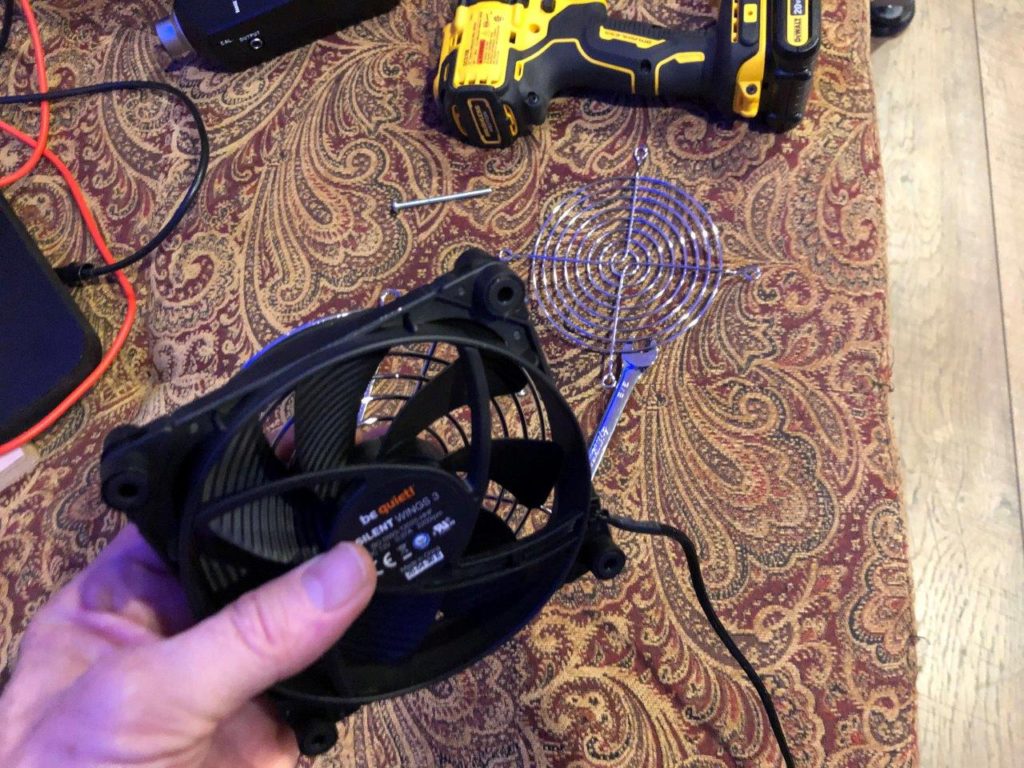
To install the easy way, just get one bolt “right” – Bolt, outside screen , through the cabinet, through the fan housing, then finally through the inside screen – add the nut finger tight. Now repeat for all the remaining bolts. Careful if using a drill to tighten so you don’t overtighten and crack the fan. Lastly, connect the molex connector
I measured the DB levels again after installing the new fan and although lower (about 3db) it was still too loud for me. Why? I spent a few minutes poking around and measuring some more. Here is why:
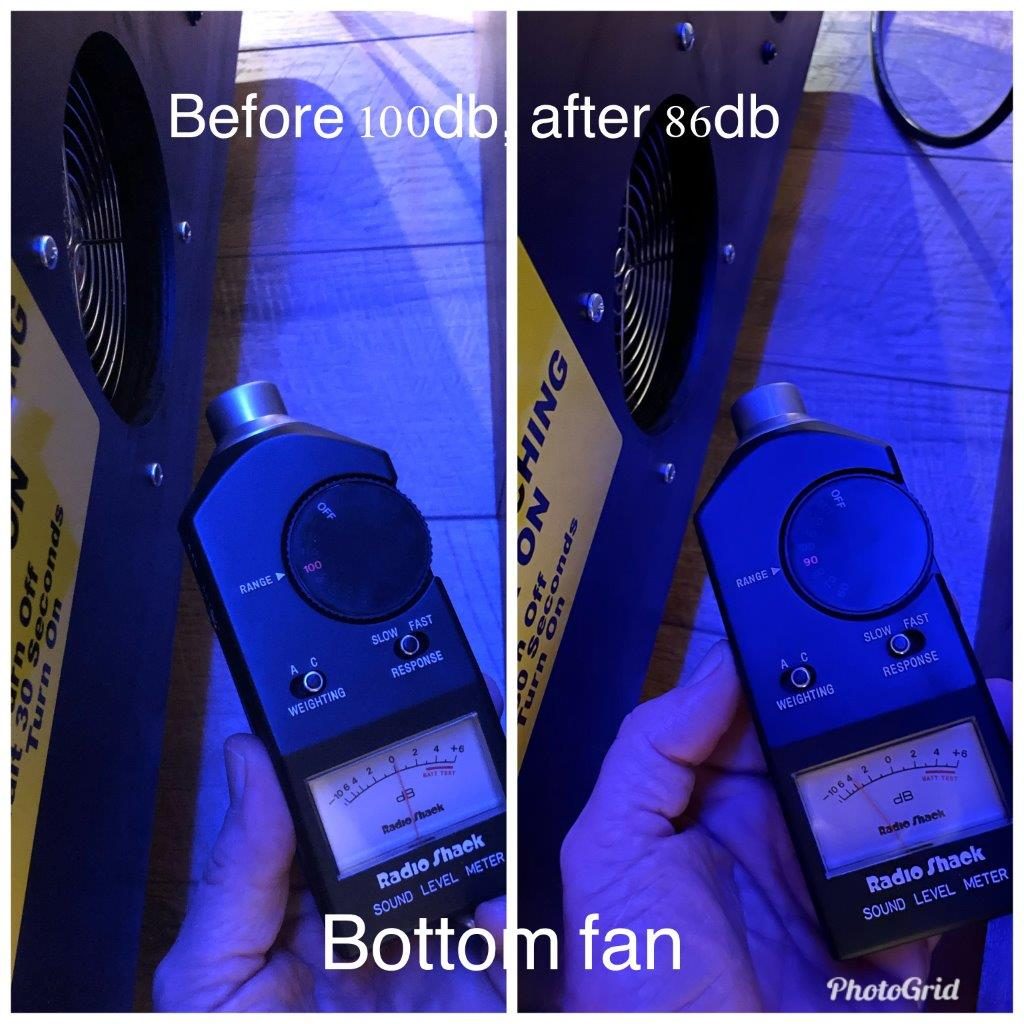
- Lower fan is 100db all by itself
- There are several fans on the back of the monitor INSIDE the cabinet and there is really nothing you can (should) do about them. They produce extra noise that most certainly is transfered to the outside of the cabinet through vent openings but … it is what it is
- There is at least one fan on the computer INSIDE the cabinet – same as above. No way would I mess with the computer fan inside the cabinet for likely almost no gain
So now what? Well I decided to “do what I could do” and no more. The lower cabinet fan was the very same as the upper and it could be replaced so that is what did (I didn’t really ’cause that voids warranty).
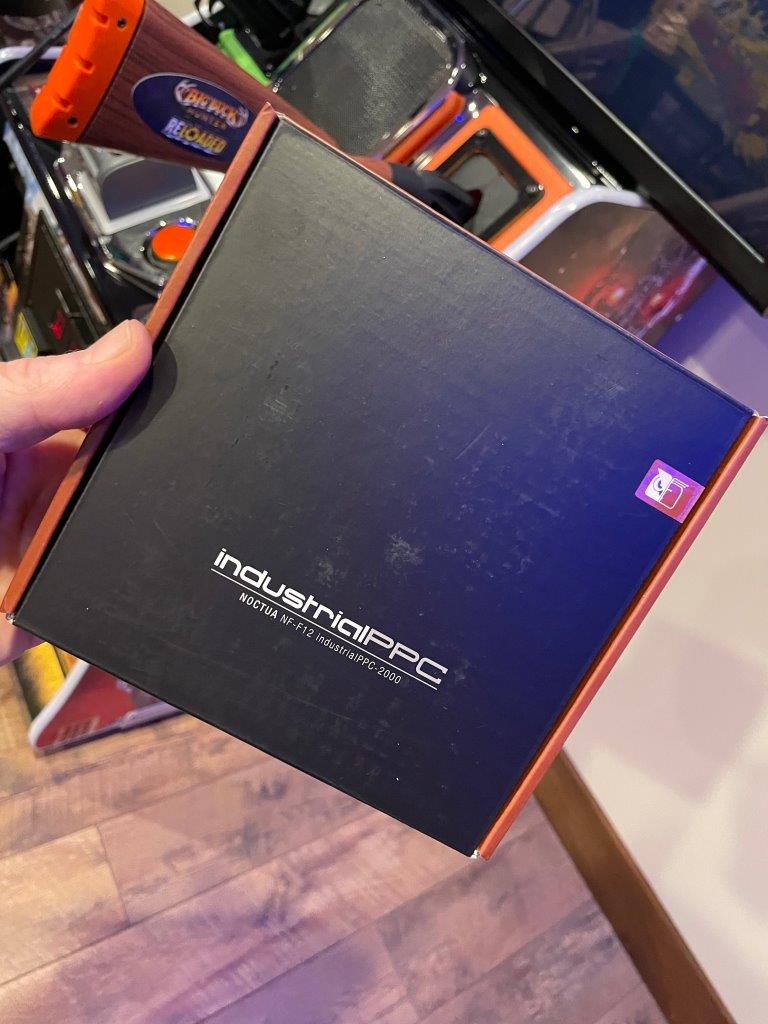
The fan I settled on was a Noctua NF-F12 that can be purchased on Amazon. I bought this model because is has a bit higher CFM that the Be Quiet fan but I thought it important to have the lower fan move as much air as possible as it was close to the computer where much heat is generated.
Removal of the lower factory fan and install was nearly the same as the upper. On the Noctua, you’ll need to just cut off the connector from the actual fan. The yellow wire will not be used. Black is ground, red is 12 volts and this matched the molex wiring of the cabinet. Reminder that when putting the lower fan back in, BOTH screens are installed INSIDE the cabinet – ask me why I’m telling you that TWICE.

So how does this all end? Was it worth it? Is it quieter?
It ended well, Yes and oh heck yes! Noticeably quieter and now tolerable.
Here are the old vs new measurements and images to back them up:
- 2 feet from cabinet front – OLD 68db and NEW overall is <60db
- Lower fan at 6 inches – OLD was 100db and NEW Noctua is 86db
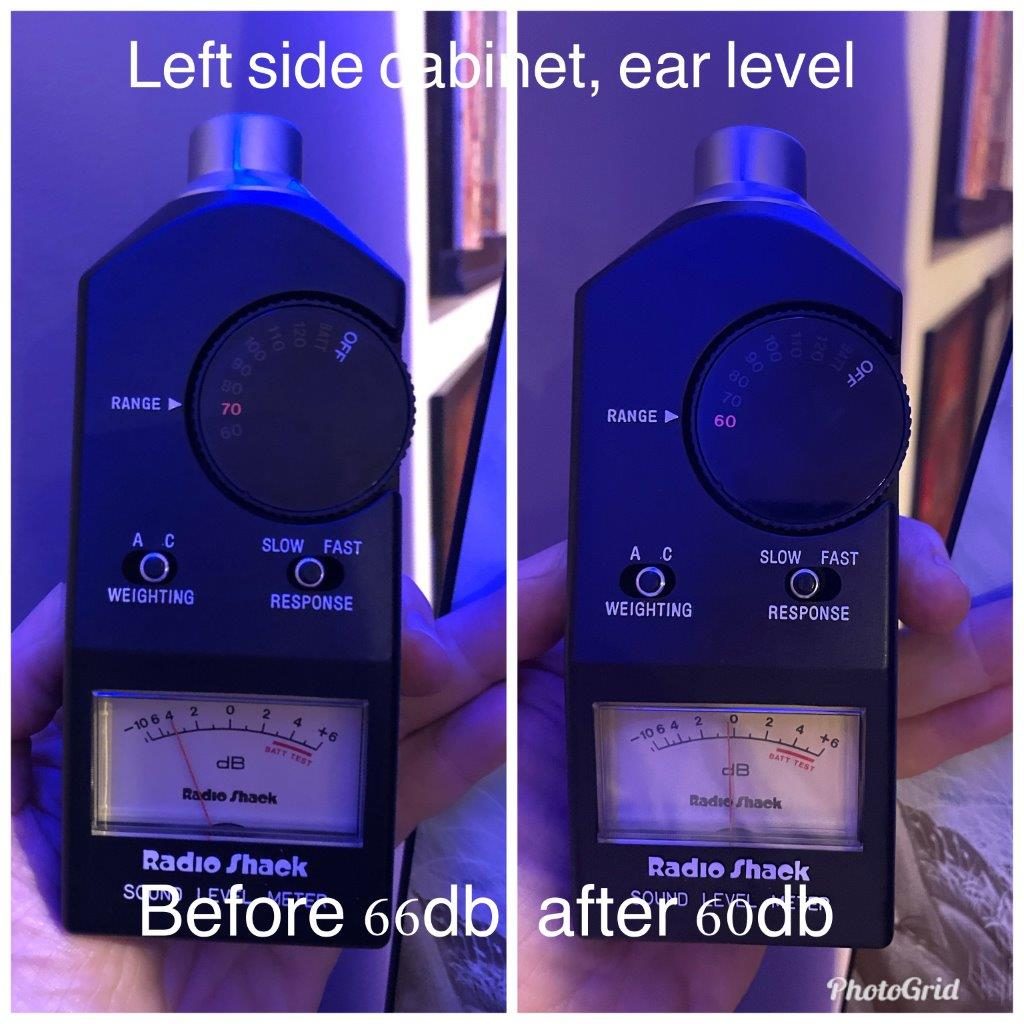
- Ear level at cab rear – OLD was 66db and NEW is 60db

Overall pleased with the result. Was not difficult nor expensive. Now to put it all back to factory condition 🙂