Nice Run!
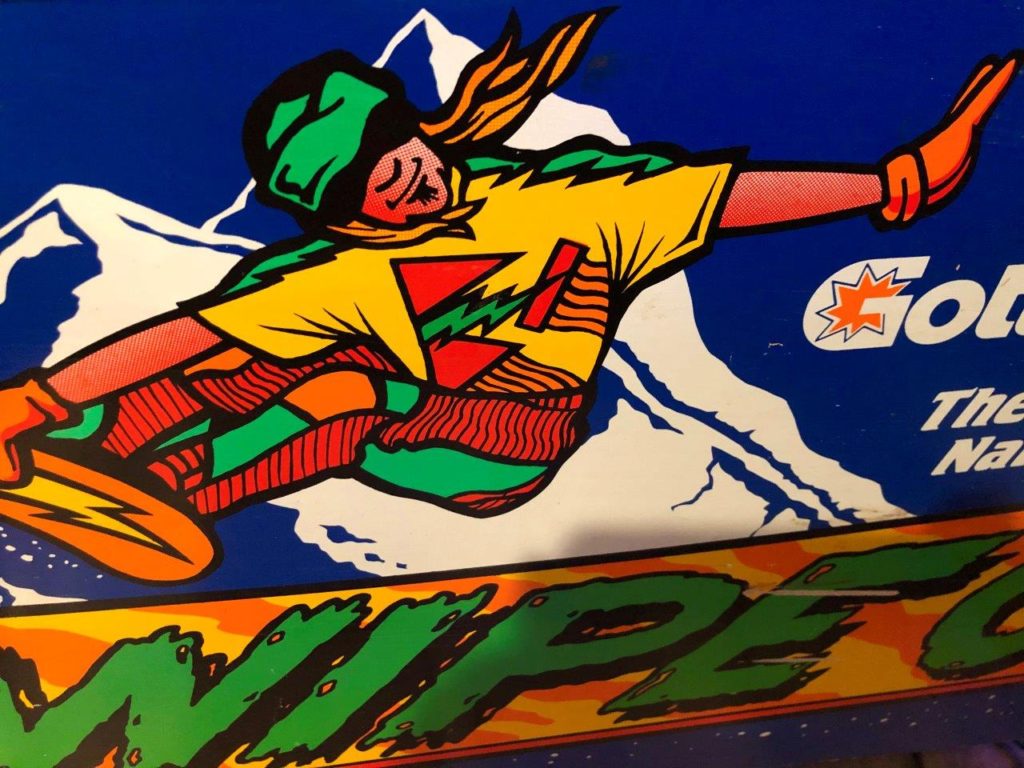
I can hardly “not” be interested in the 1993 Gottlieb system 3 Pinball game titled “Wipe Out”. Why? Simple, because just before this game was released I was living in a tiny town in upstate NY (population 337) that had its very own ski area. I moved to Turin, NY in the late 70’s and the ski area that was situated in that tiny town was called Snow Ridge. The annual average snowfall when I grew up there was over 300″ per year – do the math … that’s 25 feet of snow. For much of the time I lived there, Snow Ridge had no snow making equipment. Didn’t seem like it was needed.
By the time I was old enough to get a job there, they had already installed snow making guns on the main hill. Snow making was added to extend ski times. Even in upstate NY there are days where it might be unseasonably warm and we would begin to lose our snow-pack. The equipment allowed us to maintain the base during those times. It also helped to extend an already long (we usually kept skiing until the first week of April) season by a few more days.
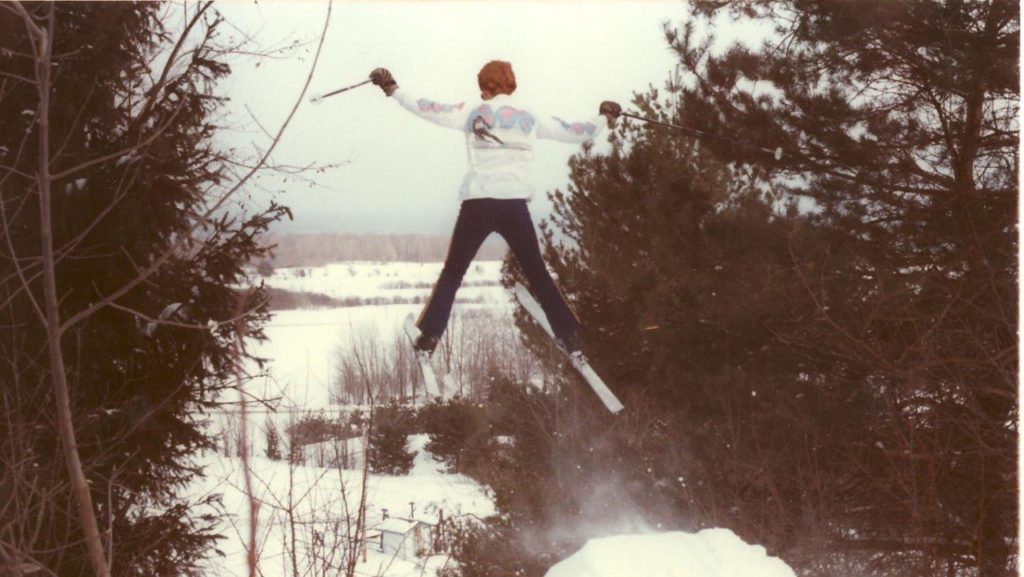
I did not take ski lessons until I was around 17. Once I learned the basics it was off to the races – literally. I skiied over 100 days per year, raced on 2 teams and loved every minute of it. After graduating college in the early 80’s I went straight to work there running the ski rental and repair shop. My staff and I would rent skis in the morning, ski all day, then get back in time to receive all of the rental return in the evening. Once it was dark, the main slope opened for night skiing and we would repeat the procedure!
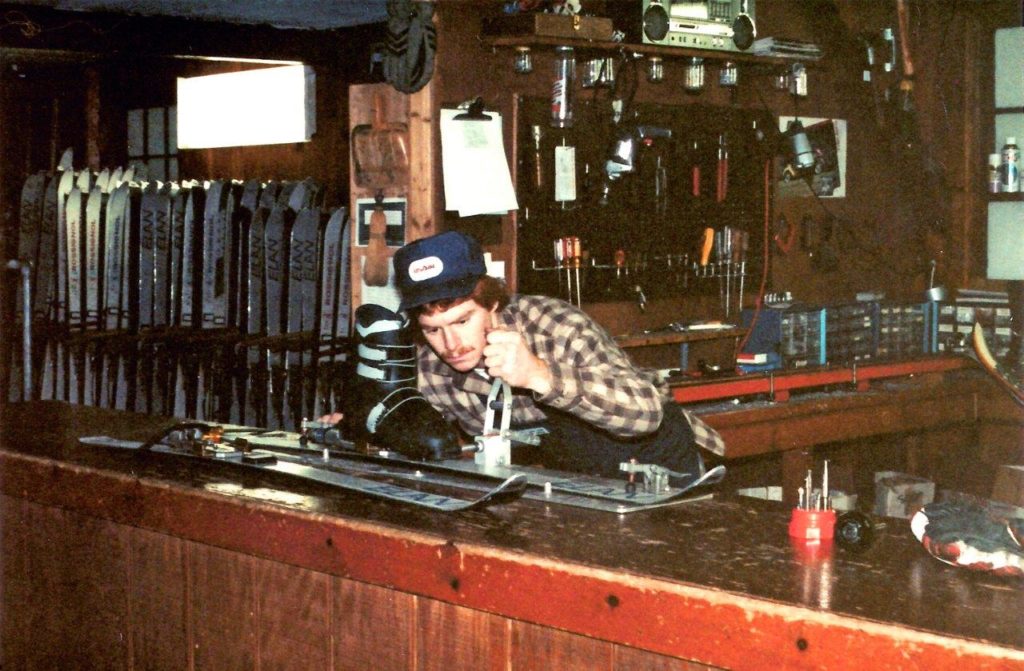
In between skiing and renting I would mount bindings, repair skis and sharpen/wax them as guests requested. In the lulls between rentals, my team and I would clean and organize the rental shop and … when the mood struck us we would horse around like young guys are prone to do. Indoor snowball fights and ski pole sword play were common events. When the day ended it was off to the bar (100 feet away from the rental shop) for an evening of laughs and good times that sometimes went all the way until the next morning.
In short, I loved that life and I loved to ski. Skiing is thrilling, fast, adrenaline pumping – scare the pants off you fun! So … do I still ski? No is the short answer. I have enormously fond memories of it but I quit skiing a long time ago. I realized the pay for working at a ski area was never going to support a family. I clearly remember standing in the parking lot on “closing day” with the spring snow melting all around me and holding the last check stub from the company – it was less than $10,000 dollars in total for the entire year – ugh. Time to find a “real job”. I left the skiing world in 1984 and have not skied a day since.

(note the ski instructors highly discouraged this!)
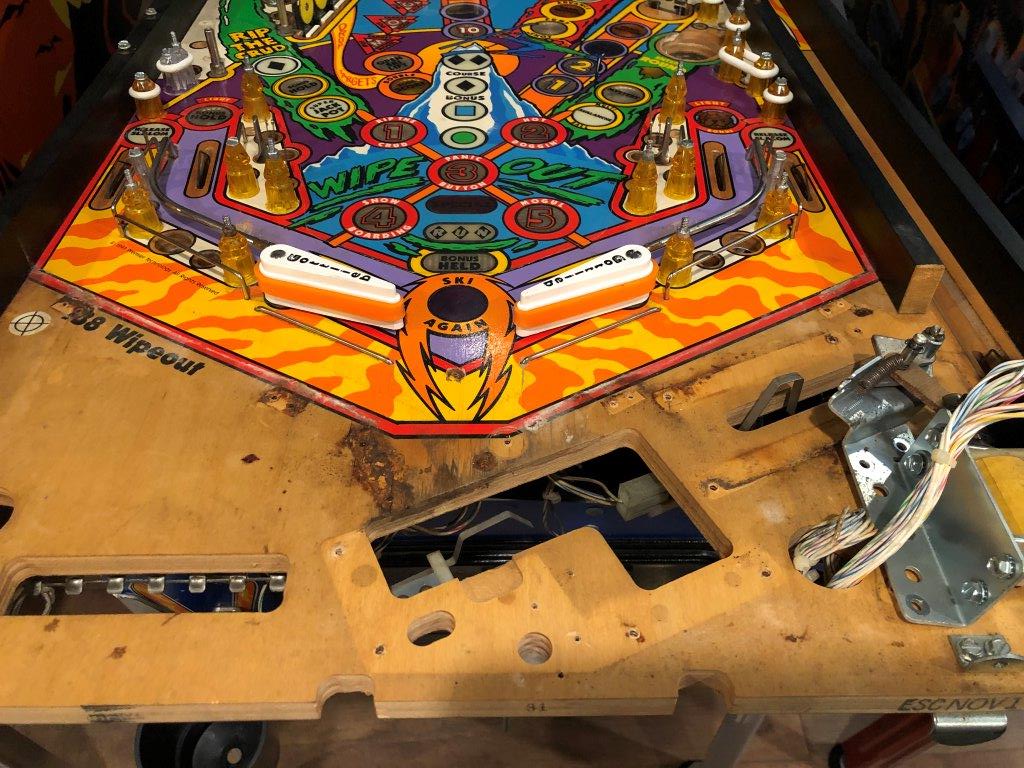
So here we are, 35 years later and I notice that my go to guy for inexpensive machines has a Gottlieb Wipe Out listed for sale. I make the 45 minute trip out to see it and find that it’s in “OK” shape. I see a tiny bit of wear on the playfield at the ball drops. There is a sizable chunk missing from the ski lift ramp (the lower portion of it). The flippers are in need a a rebuild. The glass needs to be replaced. Inserts should have LEDs added as they are all incandescent and many are out. The slalom course is not moving left and right as much as it should. The cabinet has a few dings and finally … it’s dirty. Not disgusting, just generally dirty. All in all – my kind of game!
We talk price, settled on a number and I leave with it knowing that it will be months before I can get to shopping it properly. We were in the middle of building our new house and I had at least 6 games ahead of this one. I decided to put it in my pole barn until I could get to it later. I failed to share with my wife that I was “picking up another game” ( … as if they are laying alongside the road and they cost nothing and I am saving them). As luck would have it she was busy in the farmhouse and Chris was available to help me unload. We got it off my pickup, moved to the back of the pole barn on a pallet and covered in a tarp alongside Big Strike and Gold Wings. The poor thing sat there for 3 months until the Pinball Loft was completed and it finally had a permanent home. Tami saw it for the first time all setup in the Loft and said “where’d that come from?” – I answered honestly “I’ve had it for months!”

Fast forward a few months and we are approaching Thanksgiving. I’ll be home this year and will want to spend some of my downtime getting this machine up to snuff. To be ready to “work” when I have the time requires that I have all the supplies and parts I need on hand ahead of time. So it was time to do just that BUT … just getting ready to shop a machine can be a challenge. This is especially true for titles that get little attention or are rare. The answers to very simple questions are not easy to find. For instance, you want to order new rubber for the game. Simple, right? Just go to IPDB web page and download the manual to get all the specific sizes, then head on over to the Titan website and put your order in. Except for Gottlieb machines, you can’t just download the manual. These can only be purchased from Steve at Pinball Resource or from another licensed seller.
What about the lighting? That’s pretty straightforward when you are re-doing a game like Theater of Magic. Lot’s of folks own the game and many have replaced the lighting with LED. Some have even documented what colors they used and where. Not so much with a title like Wipe Out. Documentation is sparse. I got lucky on the rubber because someone had uploaded a kit to the Titan website. It was not correct in that they ordered Bally/Williams flipper rubber and the Gottlieb correct rubber is significantly different – so I edited that part and moved on. I also wanted to customize the rubber color and there were few images on Pinside where others had done it so I ordered 2 complete sets of colors – I could then mix/match as I saw fit – Orange and Purple.
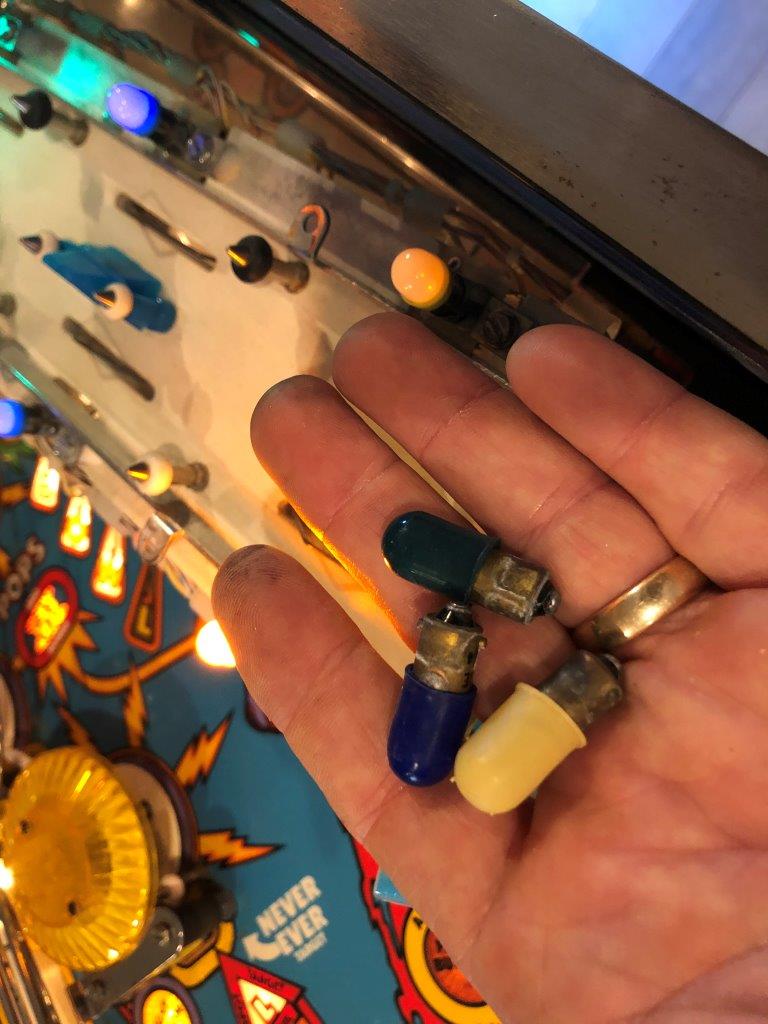
The lighting presented another challenge in that no one had shared the specific light kit they used when swapping in the LEDs. The closest I could get was a question I asked on Pinside months ago in the Gottlieb System 3 Club thread about a game that looked “well done”. That gentleman shared that he had used Comet 2 SMD “white” LEDs for the whole game. That honestly did not help much because … 1) I would have ordered Comet anyway as it’s my go to for LEDs and 2) It was obvious they were white, but “what white” were they?
(these were switched to LED, see video below)
Comet sells: Warm white, Sunlight white and Natural white. Natural is the Stern look, Warm is the incandescent look and Sunlight is a nice compromise if you do not need the incandescent feel but dont want “hospital bright white”. I popped a few in the game and determined that I was going to use Sunlight in the GI and would hold on my decision between that and warm white for the inserts. I would not be color matching inserts in this game. Once that decision was made, I could head on over to Comet and place my order for a couple of 100 packs of LEDs as buying in bulk cuts a dime off each bulb. In a few minutes the LEDs were ordered in preparation for the coming time off
Now onto the flippers. Flipper rebuild kits have a wide variety of parts associated with the entire flipper assembly. Because there are a lot of parts, they are expensive as a “kit”. I always try to assess exactly what is wrong with the flippers ahead of time in order to buy “just what I need”. You would be surprised at how much this can save you. For Wipe Out I ended up needing MORE that a standard kit would ever contain.
So the assessment that I did was helpful because I could be assured that when the parts arrived, I was ready to go. The flipper bats and shoes were in bad shape. The bats were cracked and there was no saving them. The shoes looked original and although they might be OK, I wanted to ensure nothing would stall my shop job so I ordered a set. I always order sleeves for the flipper shafts – they are cheap and important to keeping the flipper perfectly vertical throughout it’s entire rotation. I also ordered coil stops and sleeves as when worn, these can cause all kinds of issues: slow response, sticking and sluggishness. I ordered a new set of shafts and links because a worn set causes weak and sloppy flipper responses. Pawls, EOS switches, mounts, coils, screws and springs were not ordered as they appeared functional.
Before I started I laid out a plan of attack. This would not be a full on restore like my Bride of Pinbot.
The plan here was to do a deep shop job that would fix all mechanics and make the game beautiful to look at – not perfect.
I would do the following:
- Strip down the entire topside of the playfield
- Polish all metal/chrome using a bench polisher and media tumbler
- Polish the playfield using my high speed drill, pads and Meguiars polishes
- Repaint the worn ball drops and cover with mylar
- Clean all drop and stationary targets
- Fix the slalom run to move left and right
- Fix an issue with ball hangs at ski lift
- Vaccuum and wash the cabinet interior
- Wash exterior of cabinet
- LED the entire GI, back box and inserts
- Replace the playfield glass
- Rebuild the flippers and bats
- Replace all coil sleeves and tighten stops
- Replace all topside rubber
- Wash the playfield plastics
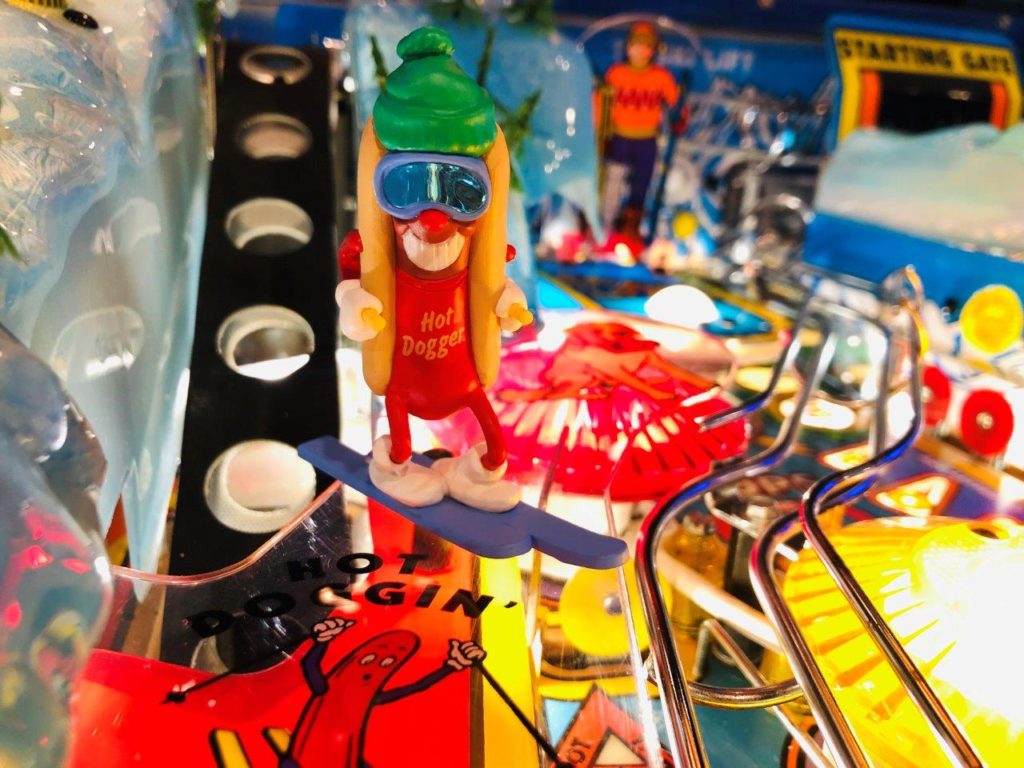
- Add the Hallmark hot dog mod
- Add new balls and play!
Of all places I could have started the shop job, I chose the ski slalom. I thought it would be fairly straightforward to replaced the incandescent “colored condom covered” bulbs with LEDs. This involves removing the standard Gottlieb finger rivets and them pulling the blue “snow” plastics from each side. The process went without a hitch other than a pesky bulb on the upper right that was not making great contact. I used a pencil eraser to clean up the contacts in the socket and it worked again. Gottlieb finger rivets are a wonder and a challenge if you don’t know how to remove them. To loosen them you gently but firmly pull up on just the center pin/post. You may need to apply pressure on the surrounding sleeve as you remove the post. Once the center pin is removed the rivet sleeve will remain but now the 2 parts that were joined can now be separated will little effort. If the parts still seem tightly bonded, you may need to grab the edge of the sleeve with a pair of needle nose pliers to remove or loosen the sleeve. Either way it’s always a good idea to keep a few spare rivets on hand as they are cheap and they do break (not often). I finished up the slalom LED job and put away my tools for that day.
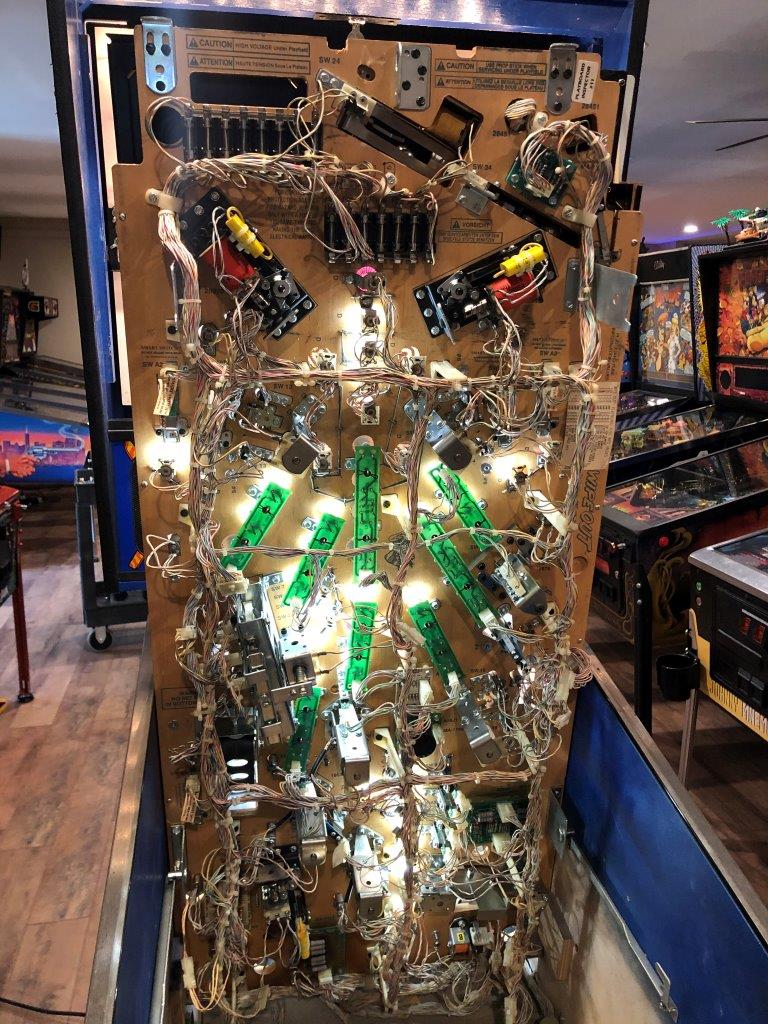
Time passed. Lots of it. Like months. Then COVID-19 hit and more time passed because I was literally working 7 days a week for 2 months before I could catch my breath. We were doing whatever it took to keep the company running as an “essential service”. It was a huge challenge but we rose to meet it and kept our company running and serving our guests during the entire period. When the pace slowed a bit, I had a Sat/Sun off and started the “real restoration” process! I started early Saturday morning with my wife still sleeping. I stripped the entire top of the playfield and carefully noted where each piece went and with what hardware. Wipe (like lots of Gottliebs) has a TON of hex posts. Some are huge and some short with a bit of variety in between. Best to record each height and where so you don’t get it wrong later and have to remove parts you already installed.
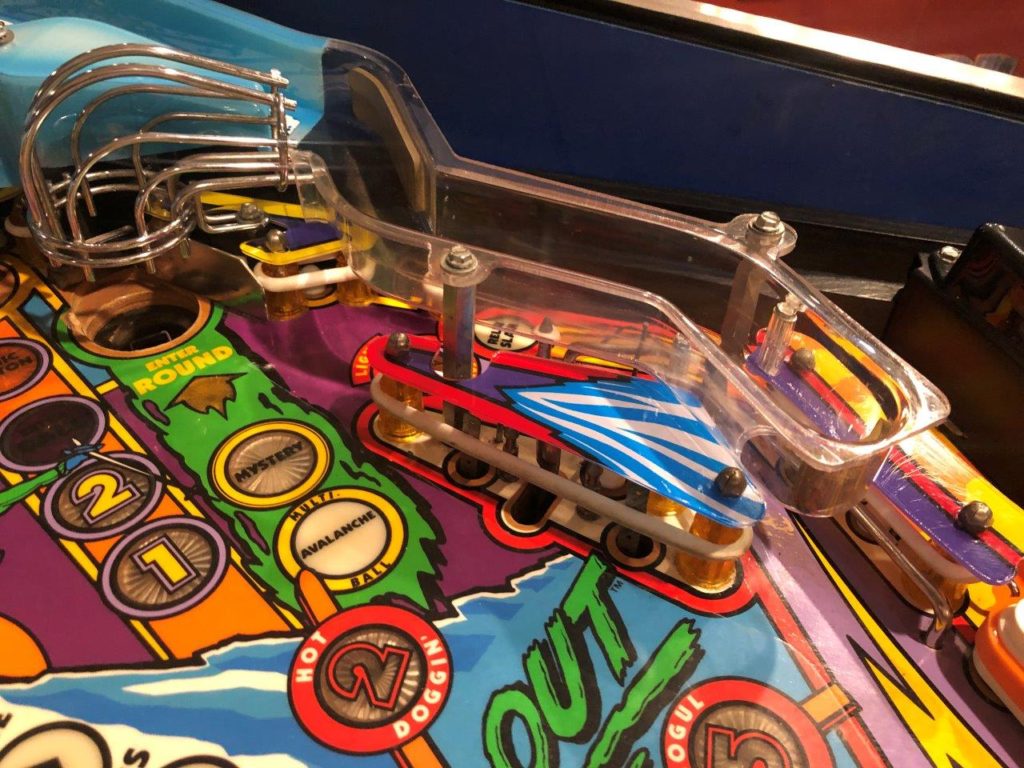
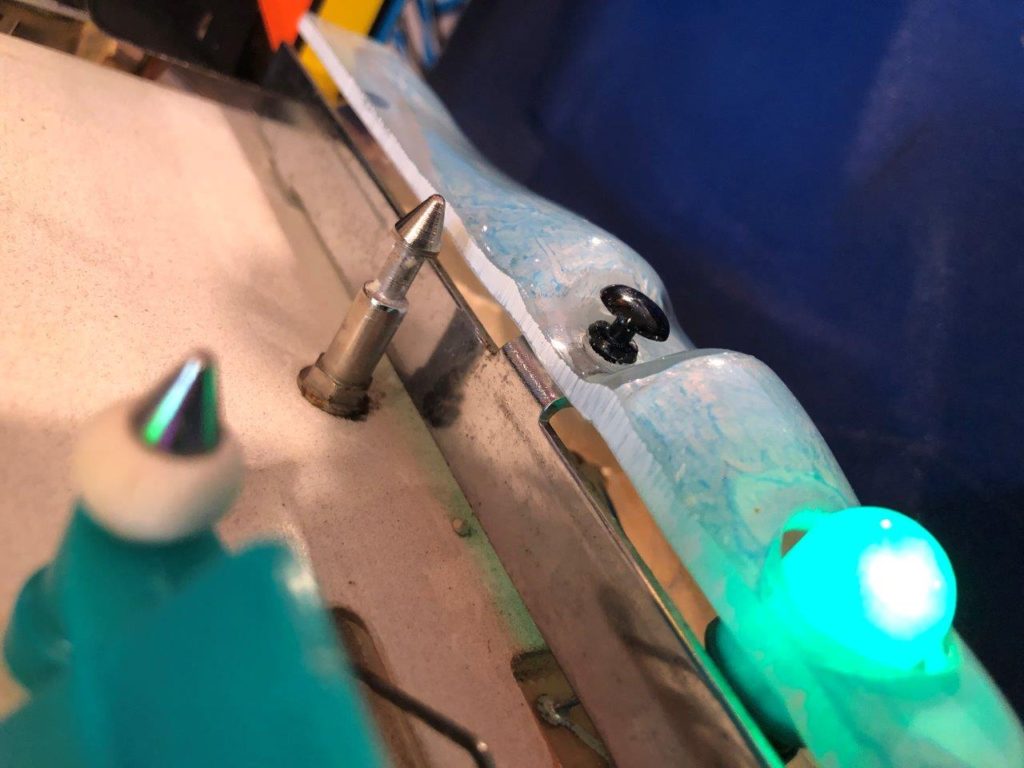
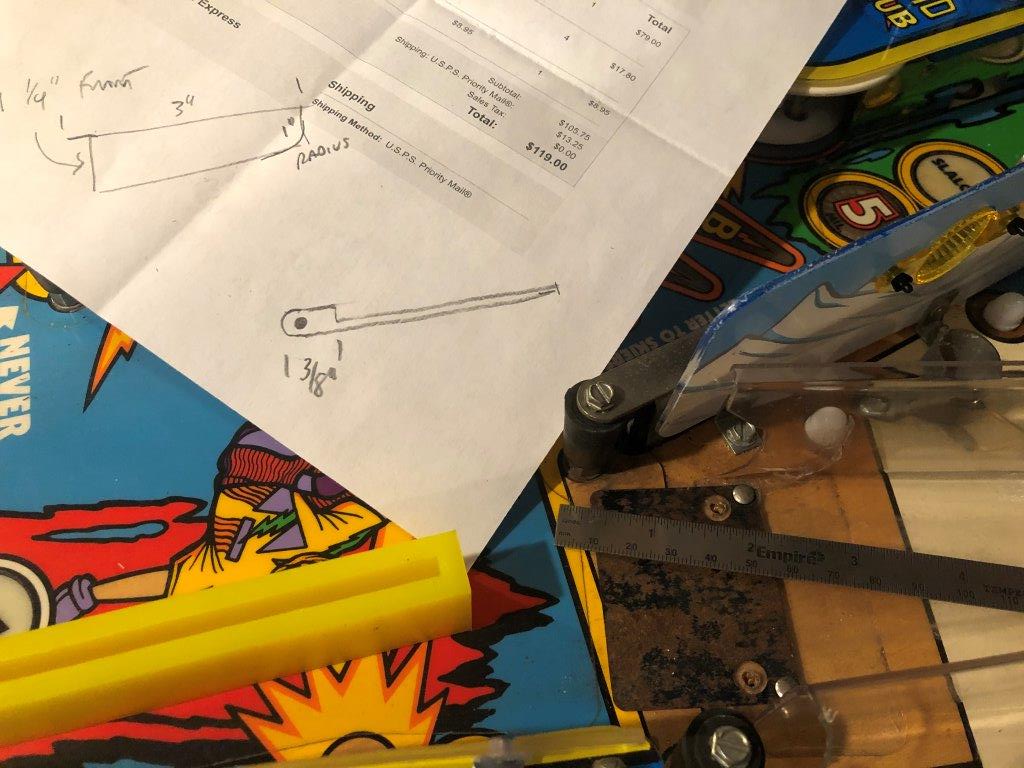
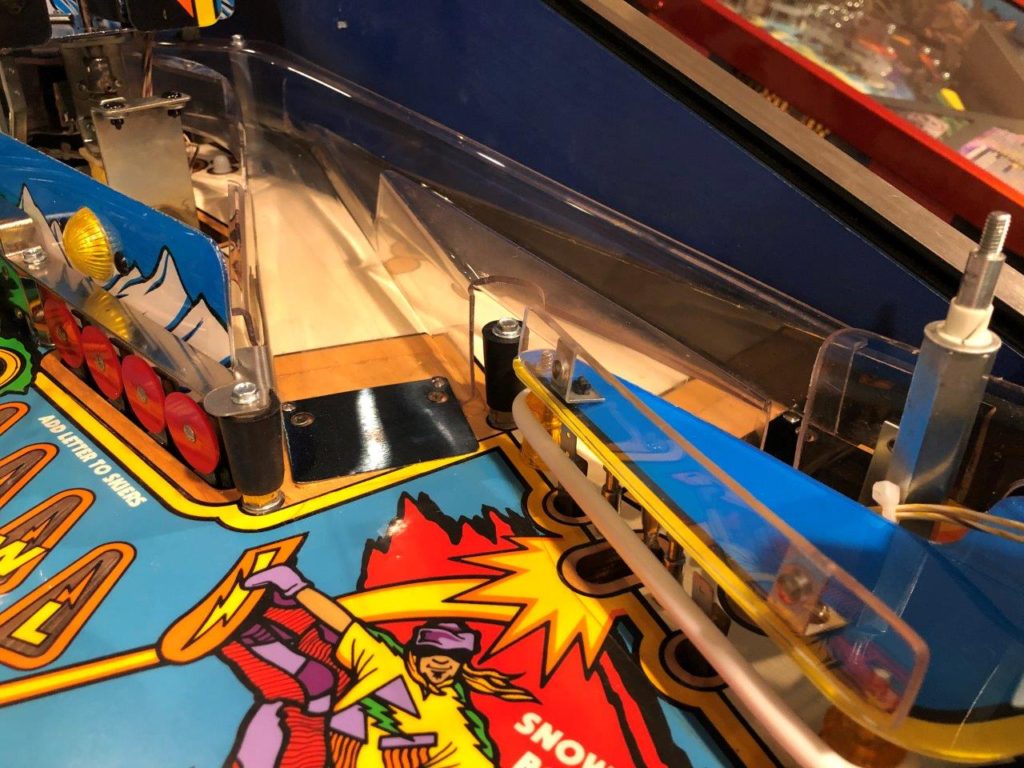
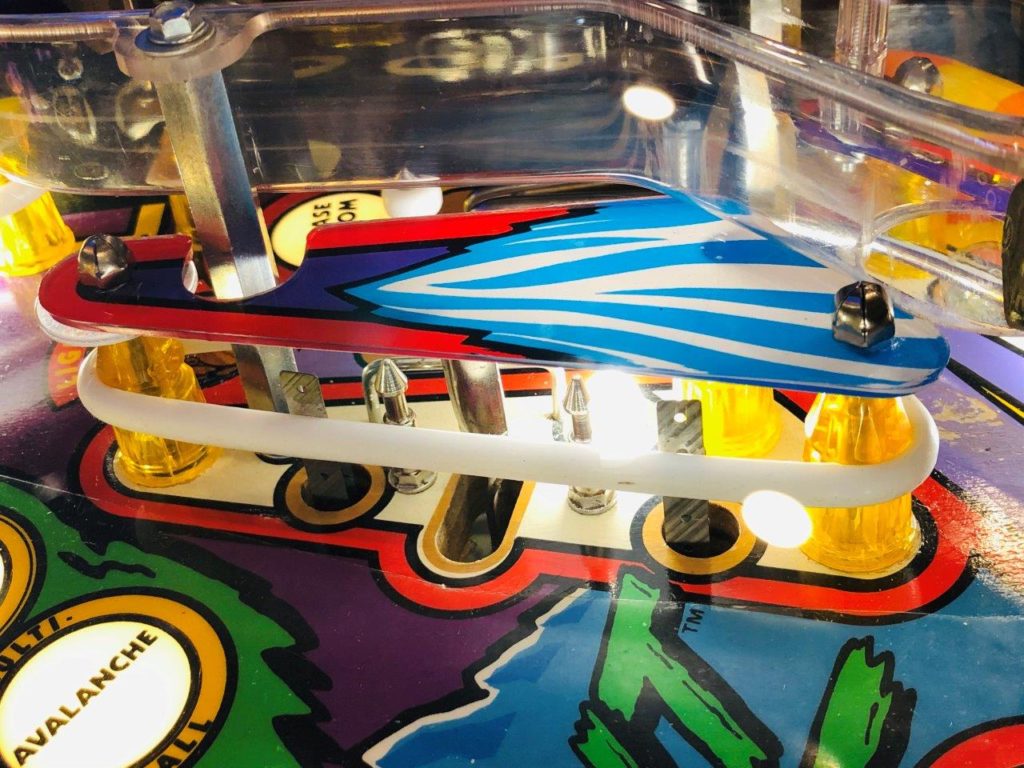
Going into the full blown restore, I knew there were going to be a few things that MUST be corrected. First and foremost was the right ramp. It was cracked. More than that it had a huge chunk missing from the left side – almost large enough for the ball to go through! My plan was to create a poor man’s “Cliffy” (stainless steel ramp protector) from scrap stainless that I had purchased a year ago from a local metal company. I dropped by one day and they let me peruse the scrap bins and I left with $20 worth of scrap and enough stainless to build hundreds of Cliffys! Well, now it was time to put these scraps to good use.
Once I got the ramp out of the game it was clear that a simple Cliffy fix would look good and cover the damage but without further engineering it might actually promote more damage to the ramp. After all, the end of the stainless protector would touch the ramp (farther up of course) and if hit by the ball put pressure on a new (currently un-cracked) portion of the ramp. So I adjusted my plans to include a playfield post with a full height rubber on it. That post would sit directly behind the new stainless ramp protector and be the singular thing that would take the brunt of all ball strikes. Simply put, the ball would hit the protector and with the new post/rubber tucked in tightly behind it, NO forces would be applied to the ramp plastic at all.
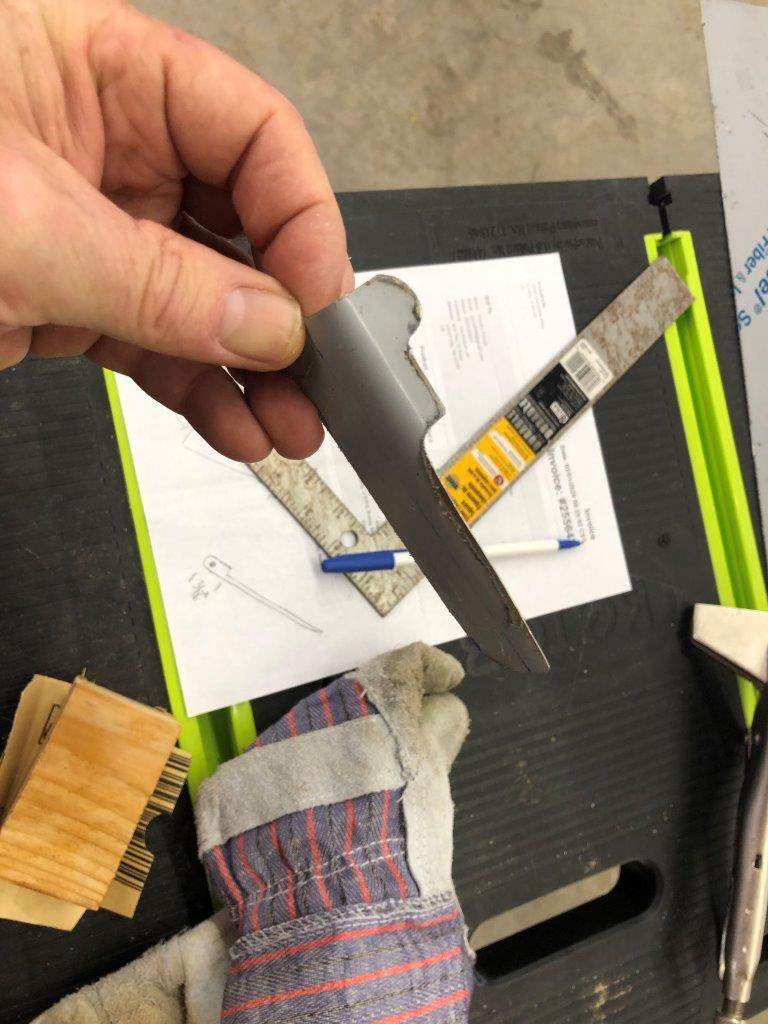
I grabbed some printer paper, make a rough template and headed to the pole barn to hand bend/cut my stainless protector. Bending it first (as many bends as you can) is always best because you are levering a larger portion of the materials. After bending I used my jigsaw to cut the larger pattern, then a hacksaw for the fine cuts.
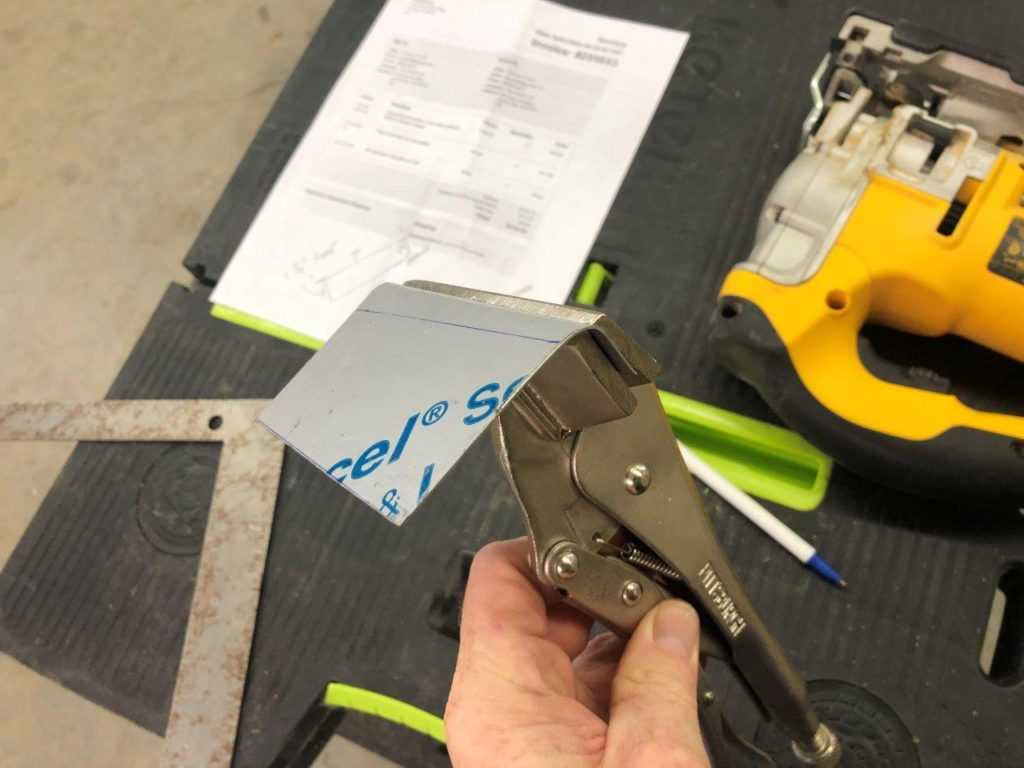
A few minutes on my grinder took care of the rough edges (key here is to go slow and gentle with the grinding wheel). When finished I ran it back to the Loft for a test fit. It was perfect! Now I was able to determine exactly where the support post needed to go behind it in order to drill through the playfield for installation.
I built a tab onto the front of the protector so it would have permanent support on the left ramp post – other than that connection, there is no other spot where it bolts to the game. When I installed it, I pushed it tight to the newly installed post behind it and then tightened the post screw on the left ramp post to lock it in – done!
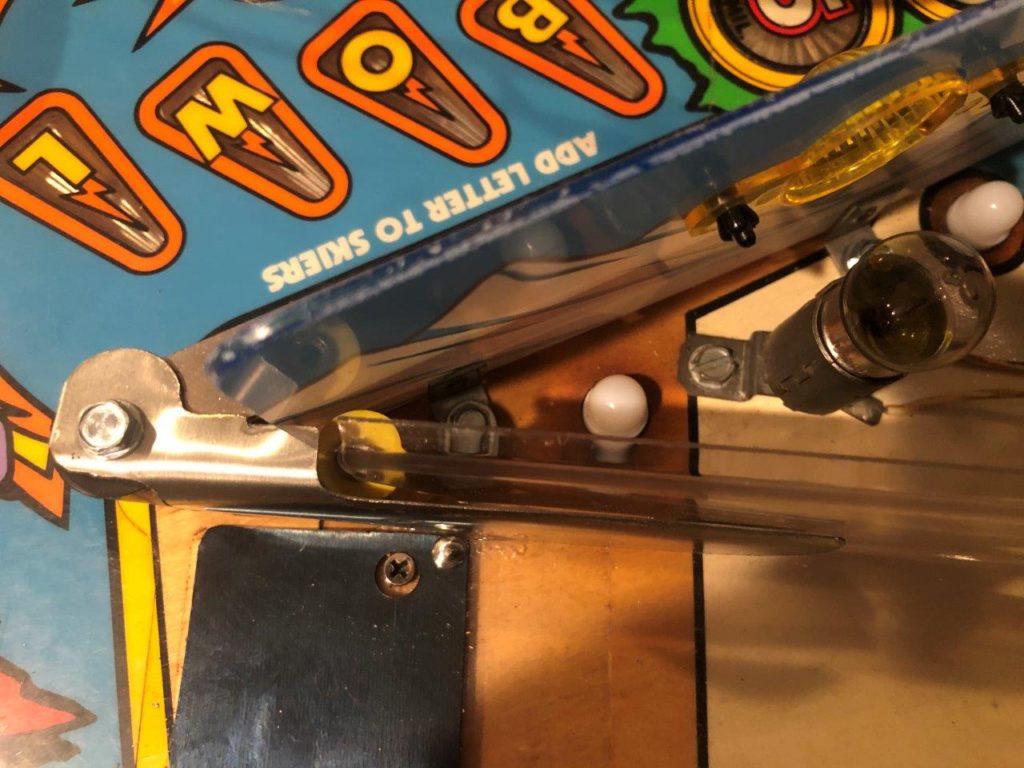
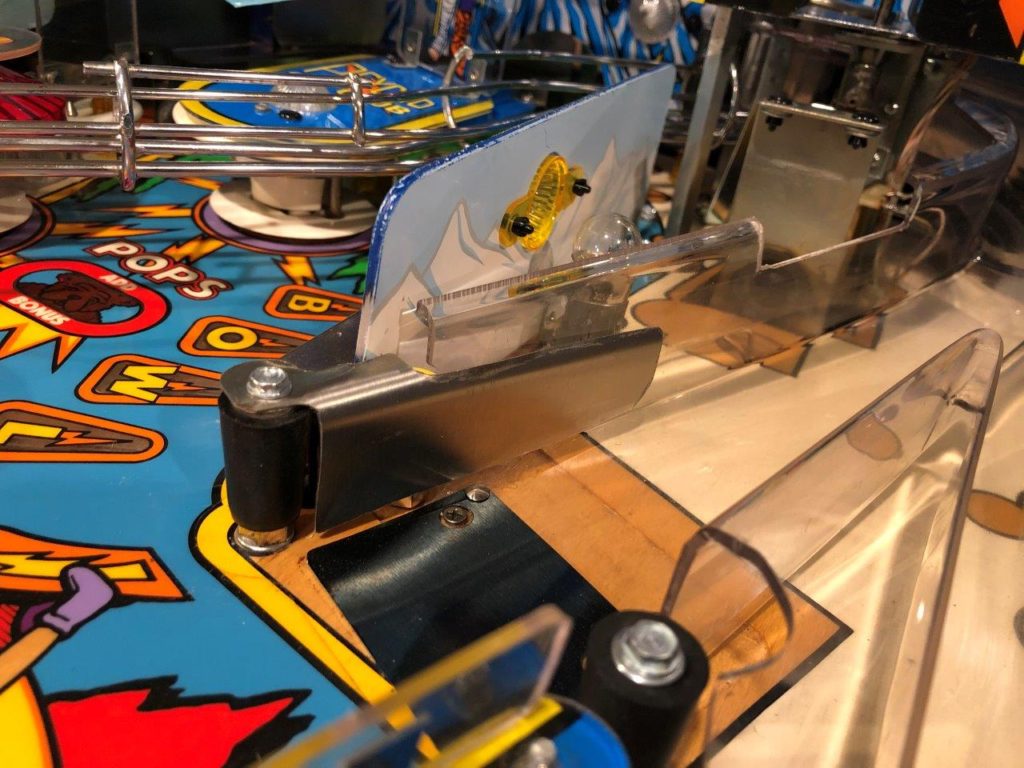
(original black tapered posts left here as they provide superior ramp protection)
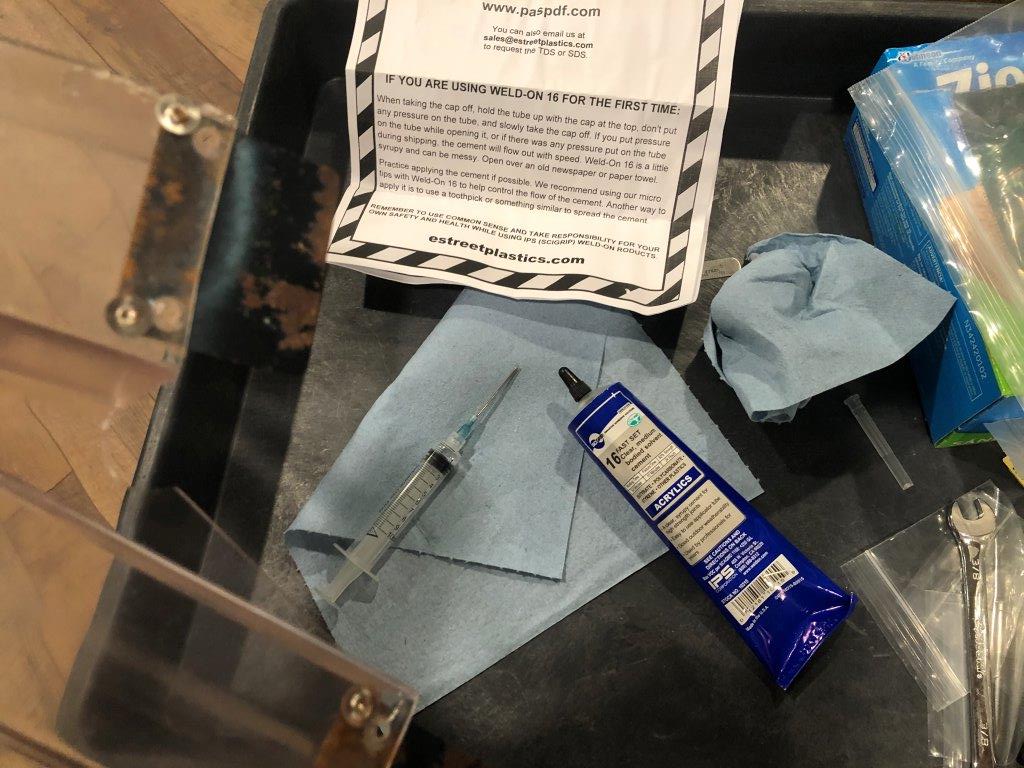
Now that the engineering was worked out I had to repair the physical cracks that existed in the ramp structure. There was only one but it was a problem. It was cracked right at the rivet hole. As you know, it’s usually not possible to move the rivet location so now was as good a time as any to test a new ramp glue that someone (@wantdataeast) had suggested on Pinside. It’s called “Weld-On” or “Sci-Grip #16” and it is made by IPS out of Compton CA. The Pinside thread I found this on can be discovered HERE. Applying the Weld-on adhesive was easy. I used a syringe to control the amount and flexed the cracked to make sure the glue was “between” the edges of the break, then aligned the pieces for 3 minutes and let it sit for an hour. The repair (as you can read online) is actually stronger than the surrounding material. I was able to re-rivet the ramp without cracking the repair or any other spot. When I tried to get the “old crack” to re-open by flexing the ramp, it simply would not. LOVE this stuff. If you read the entire Pinside thread you’ll see it’s even a strong enough repair to fix a ramp tab that has broken off. I’ve never seen any adhesive that could do that – but this can.
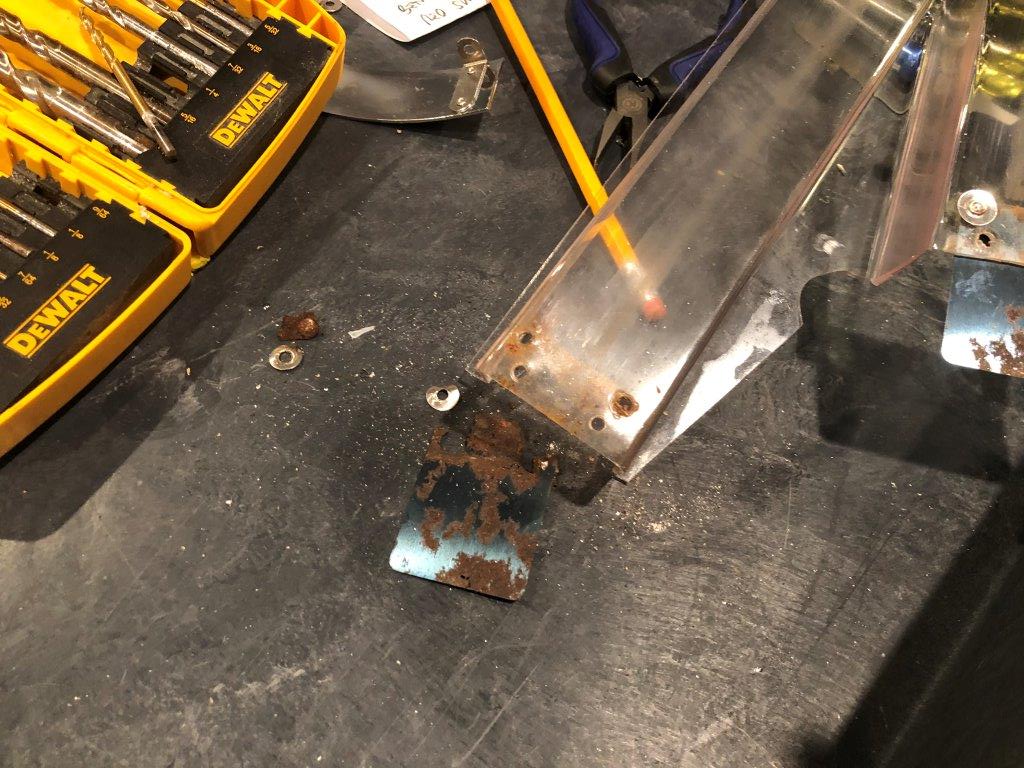
With the weak side of the ramp fixed, it was time to address the ramp flaps … or should I say, what was left of them. The wide flap on the playfield side was so rusty it was almost solid brown. The shooter lane ramp flap was a flap in name only as it had rusted through in 2 places and was only held on by one rivet. Did I mention you can’t buy them anymore? So I grabbed my supply of flap material (Pinrestore.com) and traced the outline of the flaps on the virgin steel. I used the tin-snips to rough cut the flaps and then VERY gentle application of the grinding wheel to smooth the edges.
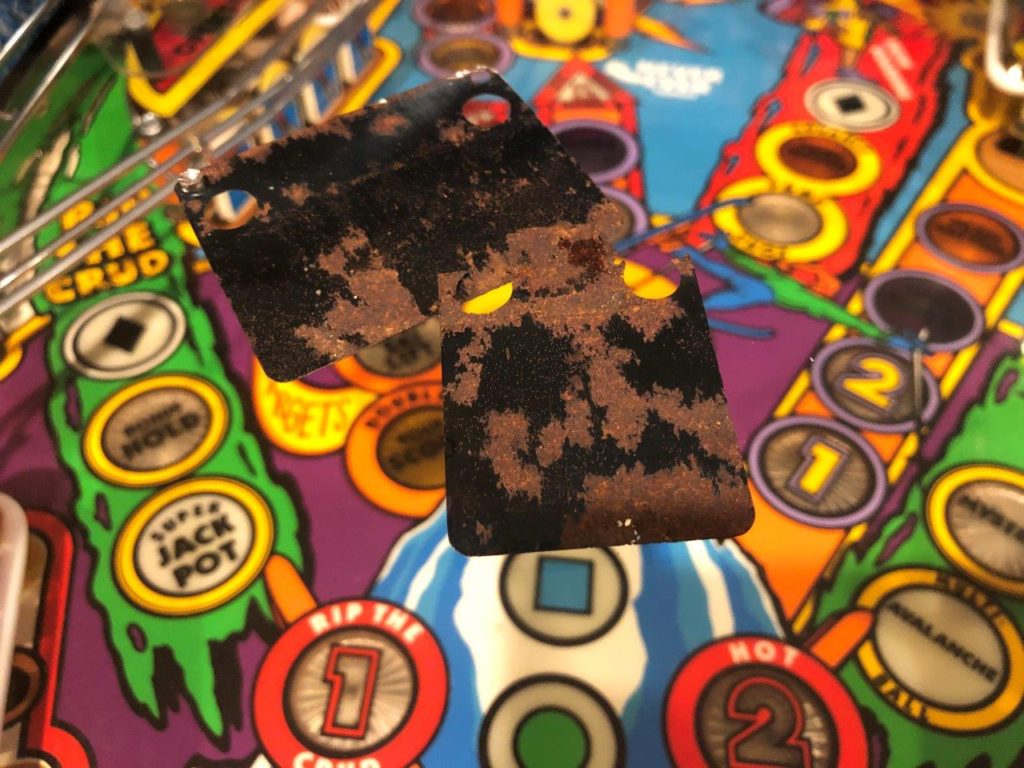
Then I was stuck. How do you put the neat/clean and perfectly round holes in this material? Each ramp flap needs 4 holes (2 for the ramp screws and 2 for the rivets to attach it to the plastic ramp). The rivet holes are also very close to the edge of the material. I am not afraid to tackle anything but this looked like a challenge.
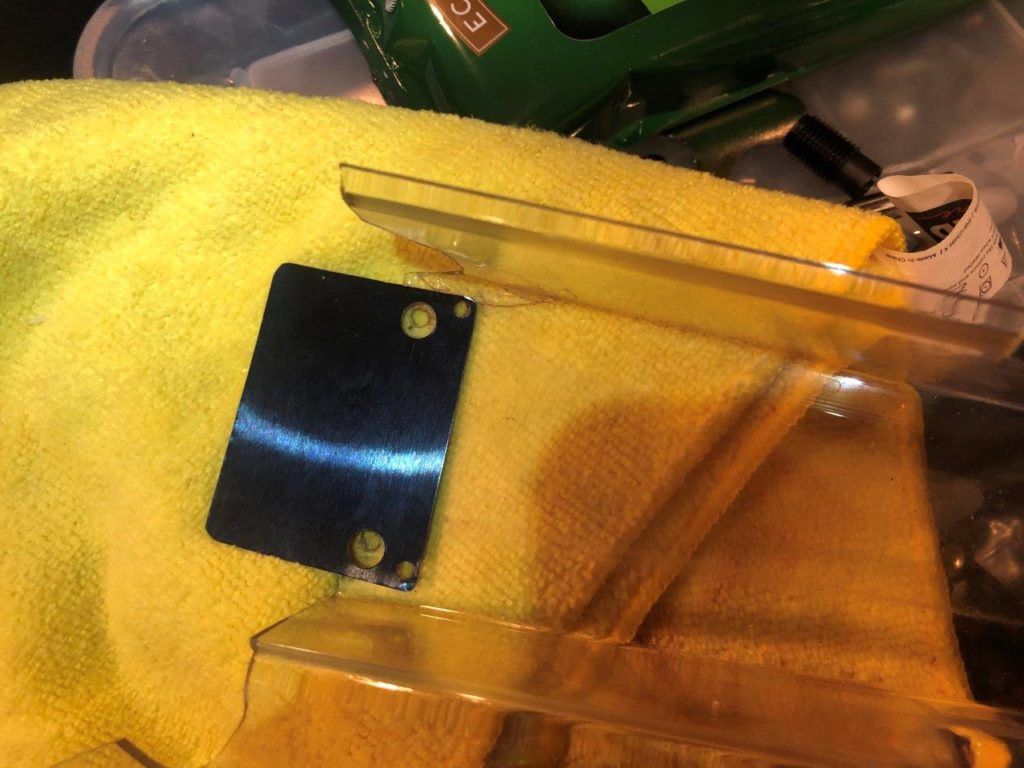
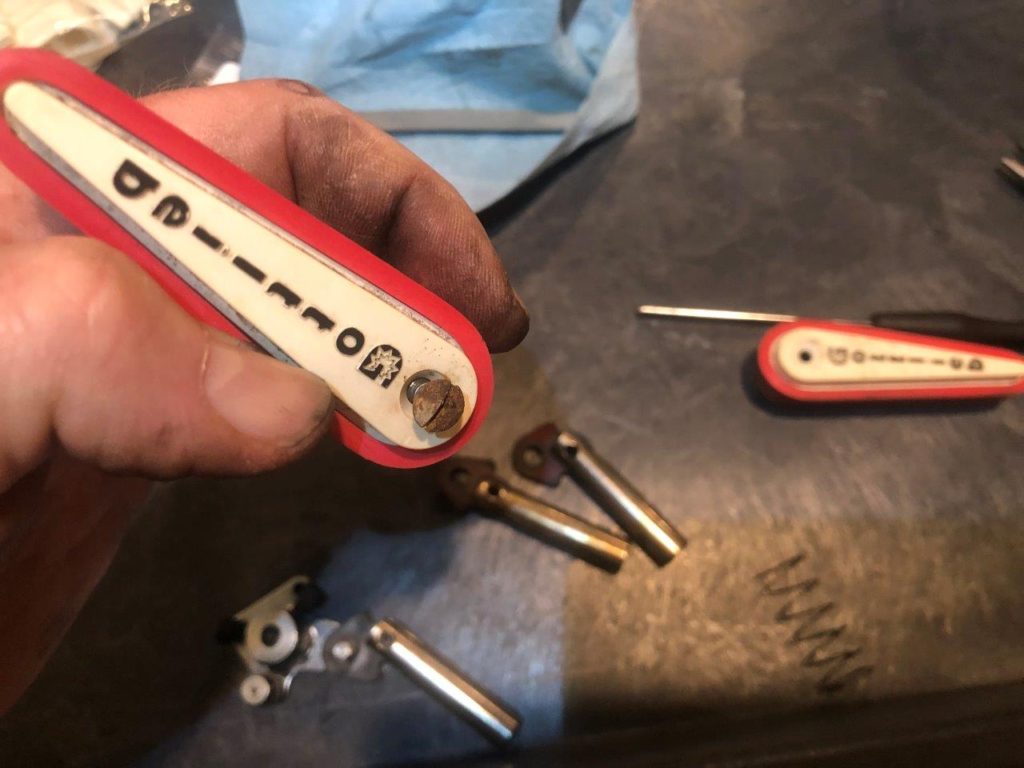
I grabbed my cordless drill, a block of wood and a scrap of flap material and went outside to “practice”. Holy cow! After almost losing my fingers, I gave up and came back inside. No way could these be drilled. I went online to see how others were doing it and found the perfect tool. I went to Ebay and quickly ordered one but it was coming from California and I needed my flaps done now! Oh well, in a few days I could knock it out.
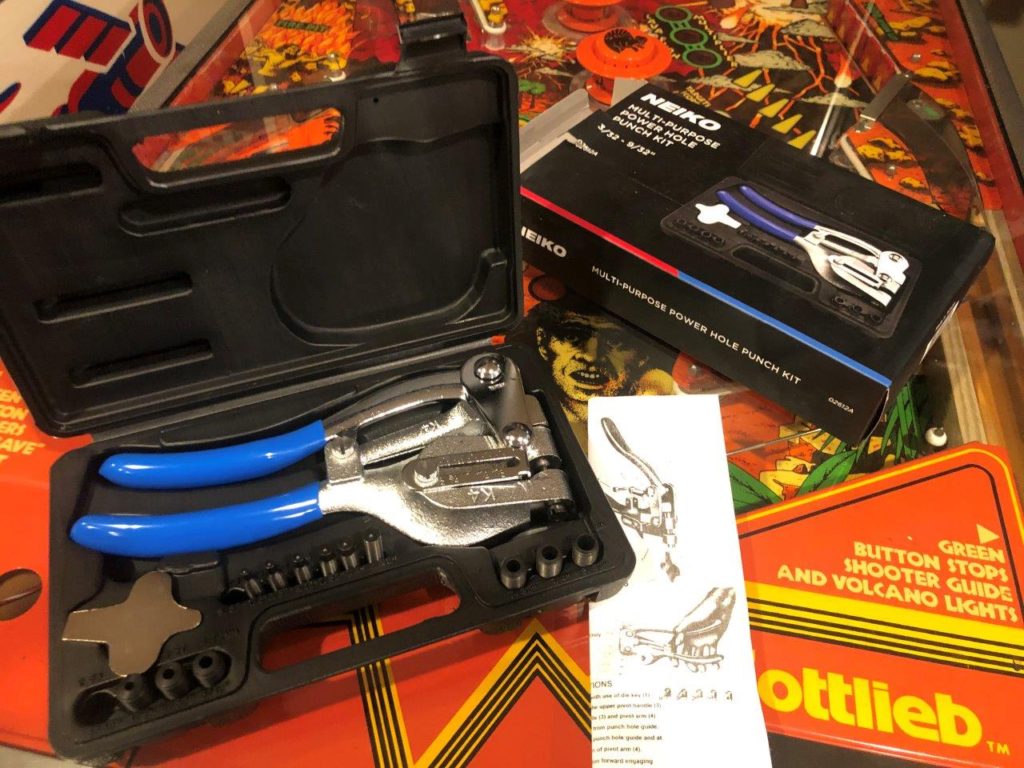
The next day I got to thinking about the tool I had ordered on Ebay and wondered why it looked so familiar. I raced upstairs to my pinball tool room and pulled open the big bottom drawer. Sitting there (still unopened and in the original box) was the exact tool I had just ordered from Ebay – crap, the tool I so desperately needed was right in the house all along. Then I remembered that I had ordered it over a year ago and had completely forgot about it. I popped open the box, quickly read the directions and 20 minutes later had completed 2 perfect ramp flaps! The punch/press tool is amazing and is made exactly for this purpose – and now I have 2 of them!
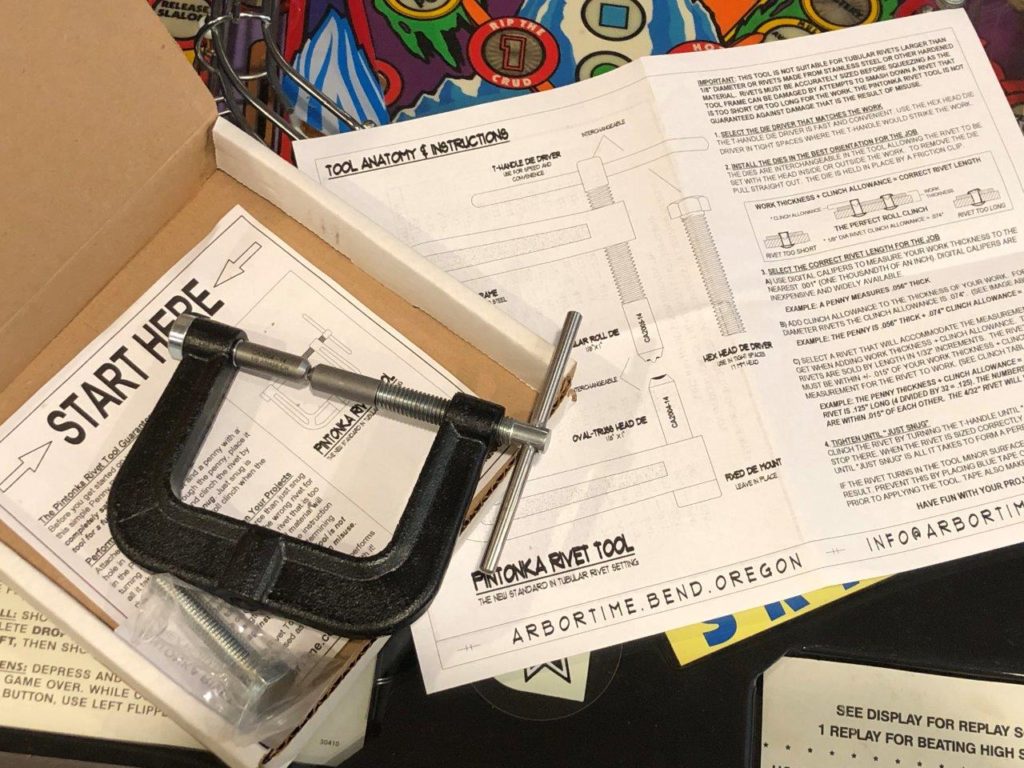
Before I close out this section, I really need to call out the Pintonka tool. I bought my tool a few years ago and have now used it on 3 or 4 games. The last game was Jokerz and I (stupidly) used the wrong length rivet (too long) which required me to put undue pressure on the rivet press. Unfortunately I bent it. It still worked just fine but the bent clamp bothered me – so I emailed Rob at Pintonka. He replied with an apology and asked for my address. Just a few days later a brand new clamp frame showed up in the mail! I tried to pay but Rob said it was “on him”. Wow. Great riveting tool and great service too. Order one of these from Rob – you’ll be glad you did.

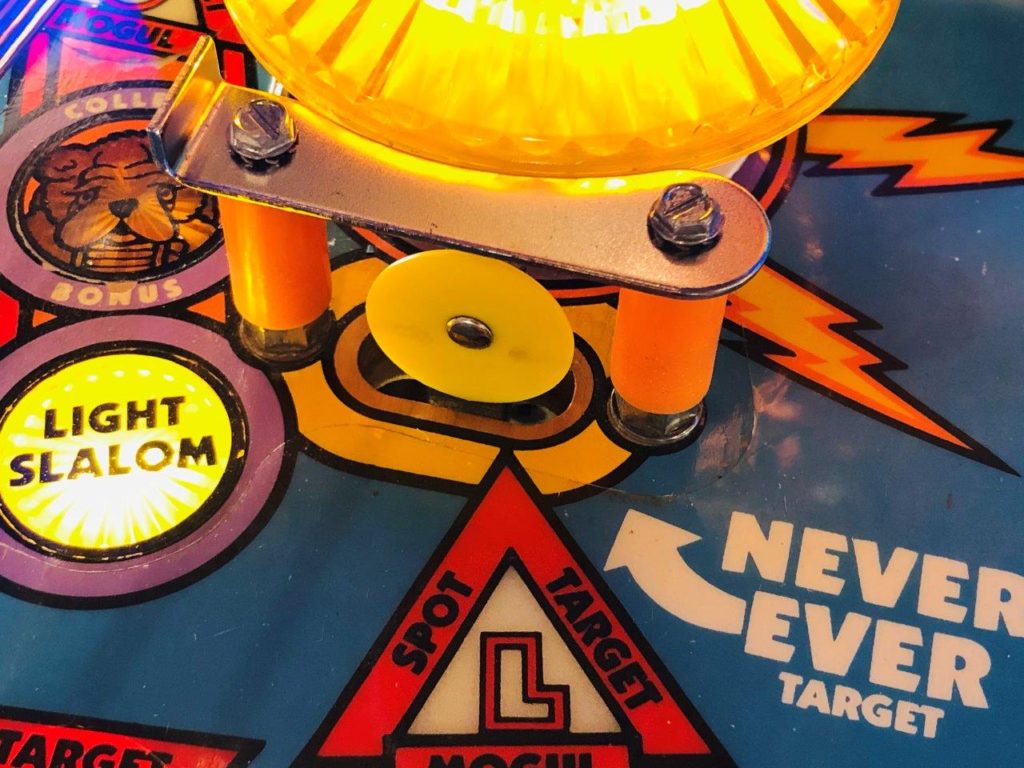
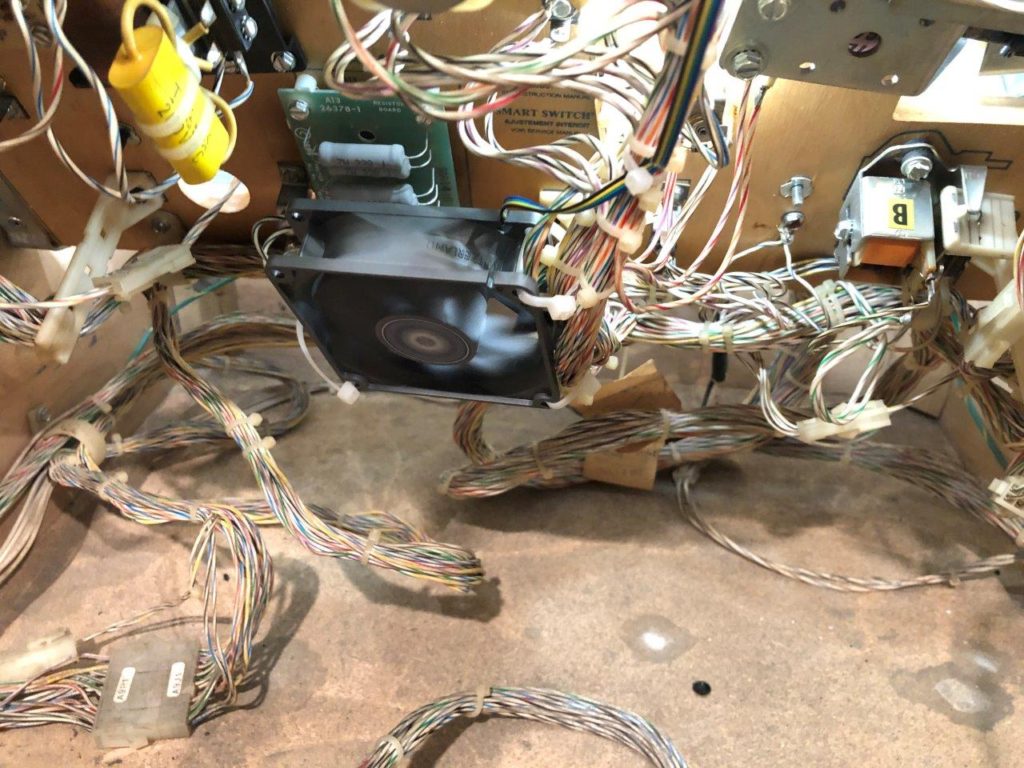
The pop bumper lights were not working correctly and it was on my list was to get those fixed ASAP. It took about 60 seconds to see why. There is a resistor board (Part #MA-1417) near the top of the playfield that reduces the voltage coming to the pop lamps from 20 VDC to 6 VDC for normal operation. When they are activated, the resistor board allows a brief spike in voltage (20 volts) and the pops “brighten up” upon ball impact. Cool idea. Almost like a controlled lamp and GI combo. Unfortunately the implementation is technically weak.
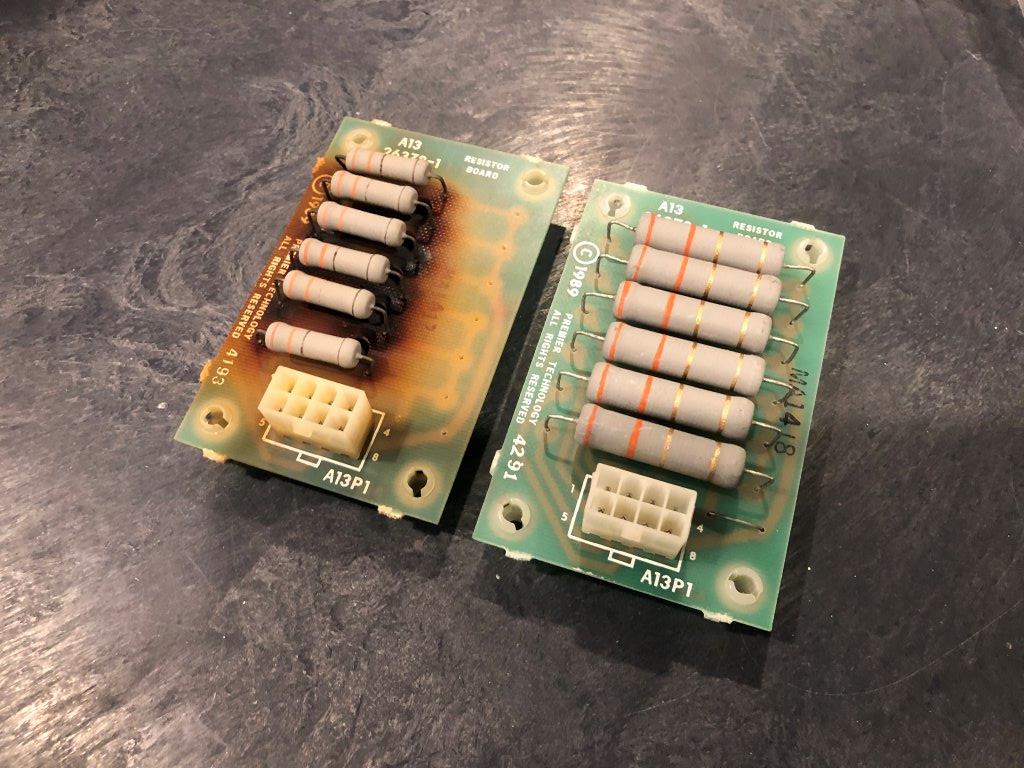
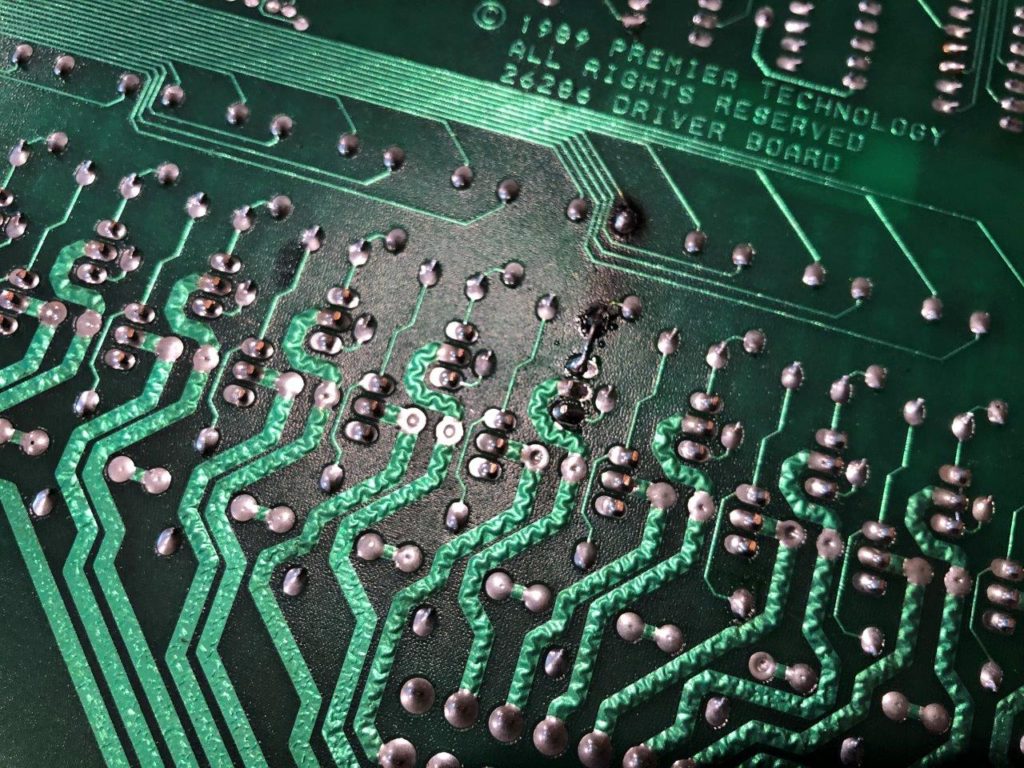
That resistor board is full of resistors that are reducing 20 VDC on a steady state basis as most of the gameplay is with the pops running a normal GI voltage of 6 VDC. That means one thing – it gets hot. Hot enough to melt the circuit board and brown the playfield above it! In fact this is exactly what my board looked like.
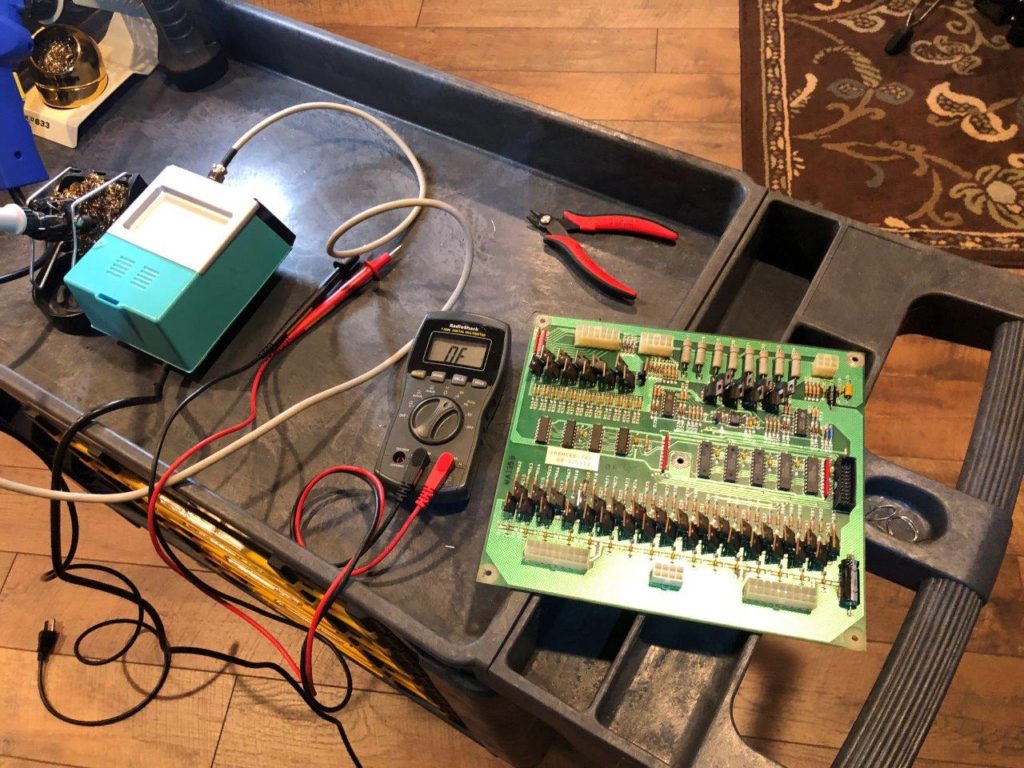
First I reflowed all the solder joints and added a few wire bridges where the board had gotten so hot the traces had melted away. That got my pop lights working again but I worried about long term dependability. So I replaced the existing resistors (5 watts) with larger 10 watt versions and, if anything they got even hotter. I measured the temp during operation and they quickly hit 175 degrees Fahrenheit.
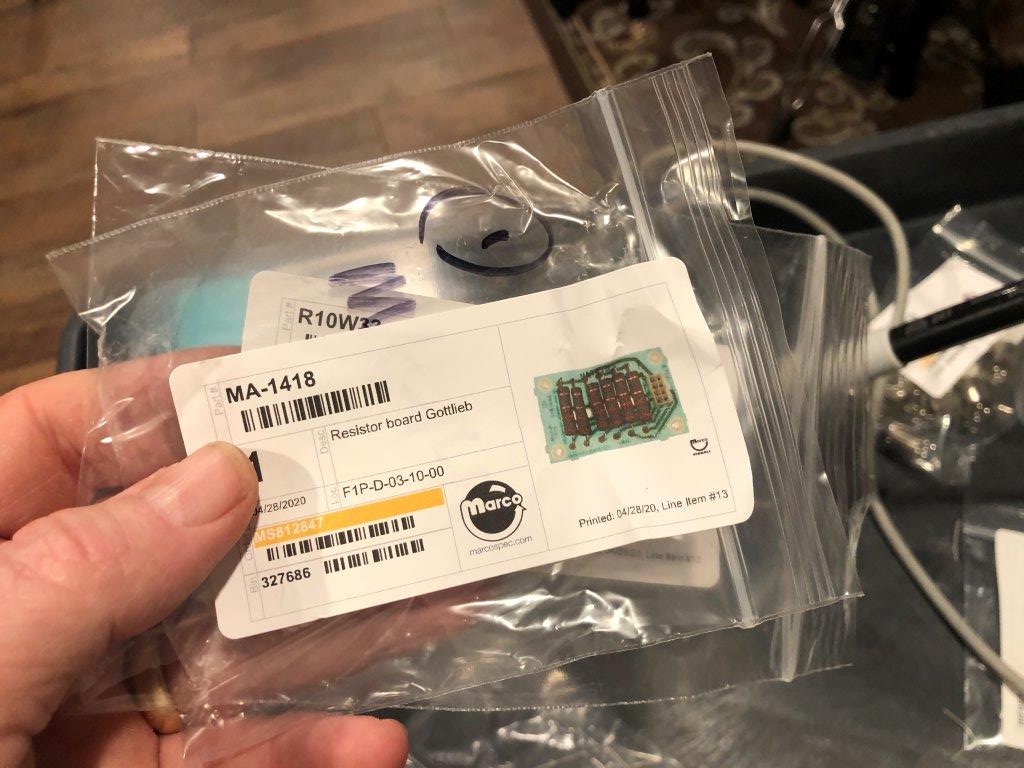
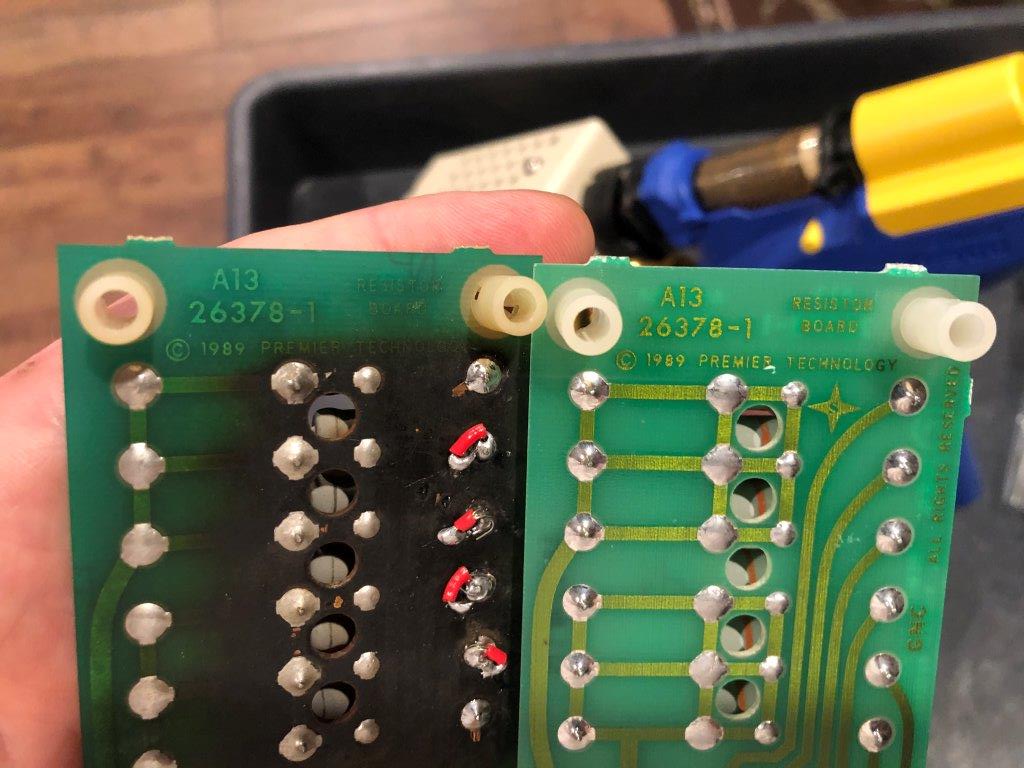
This issue with using the larger resistors is that once installed on the board, they just don’t have enough space around them for cooling like the smaller ones did. To remedy this I ordered a brand new OEM Gottlieb board from Marco (Part #MA-1418). Gottlieb used this board template in a lot of games and simply swapped out resistor specs as needed.
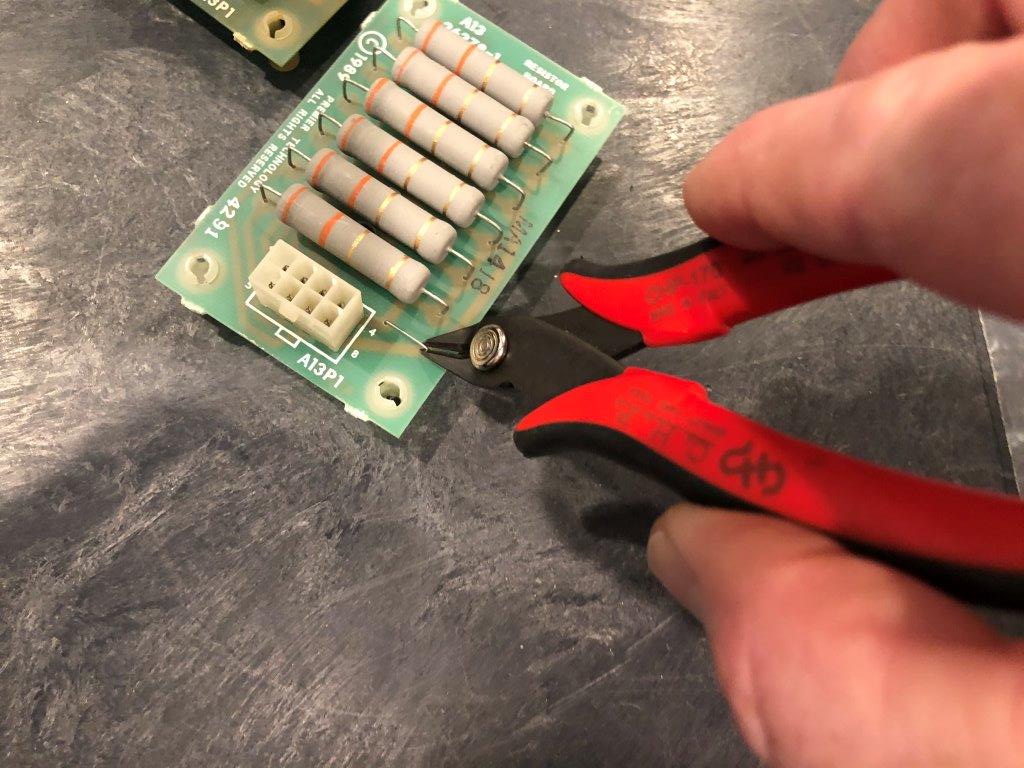
This board is essentially the same as the MA-1417 board BUT it needed to have the jumper that was soldered into it “clipped” before using it (see image) once I did that it was ready to host the new (smaller sized) 10 watt resistors I ordered from Mouser. This time I took no chances and mounted a 12 volt computer fan that blows directly on the new board. The computer fan is running off a AC/DC 12 volt converter that is plugged into the service outlet. When the game is on, the fan comes on.So far so good with no overheating issues and the pops lighting is working like a charm!
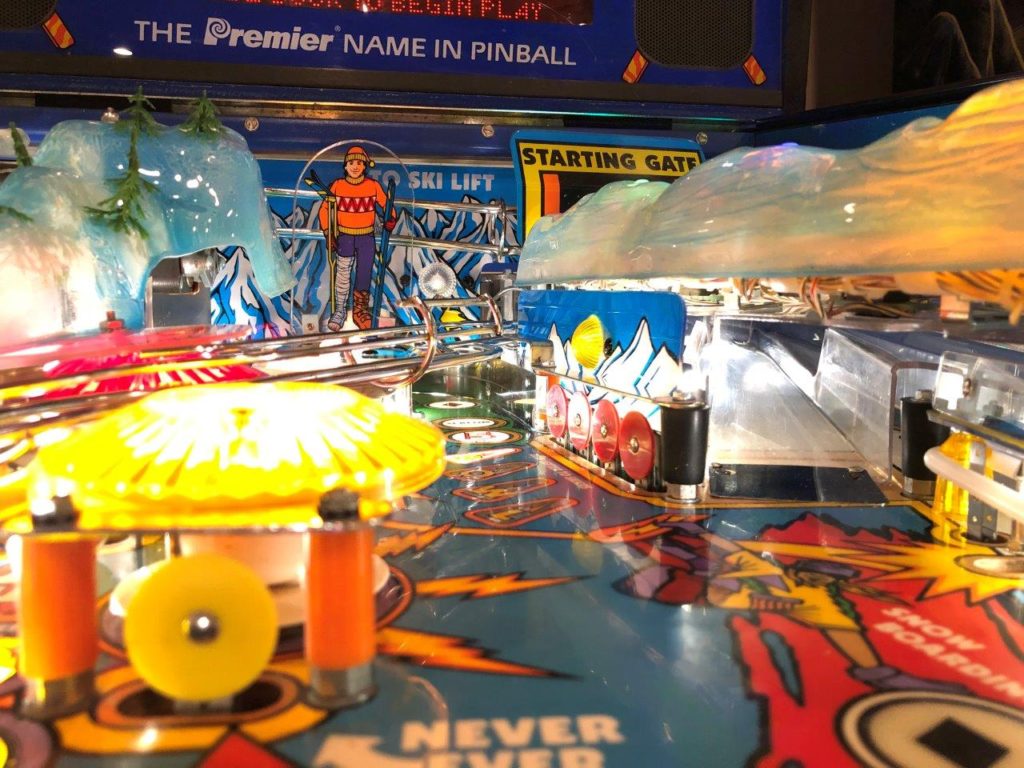
Next on the list was the slalom toy. I HAD to get this working. It’s really the star of the show. What other game allows you to “ski” using a pinball. The problem with my slalom mechanism was that it only “skied” one way. I checked the voltage on each coil (left and right) and there was voltage available.
That meant the game wasn’t energizing the coils for some reason – usually because of a blown transistor. Sure enough after reading the schematic, Q8 was the transistor that controlled slalom movement and a quick inspection of the circuit board revealed that the transistor was blown and had taken the R69 resistor with it. The traces on the R69 resistor were blown out so I soldered a short jumper in place on the back side of the board. An hour later I had the board back in the game for testing and I’m happy to say my slalom moved BOTH ways now!
Just before I started stripping the top of the playfield for the restore, I completed a lamp check. It was obvious that a bunch of GI bulbs were burnt out but in checking the flashers I found that almost all were out. I made a note as to where and began to strip the machine. I replaced the burnt out flashers (Gottlieb used a #67 flash bulb at 13.5 volts instead of a #89 at 13.0 volts) and the light show got tons better right away. I had the top of the playfield stripped for a couple of days when I remembered that the flasher in the middle right of the PF was not flashing during my prior testing. Interesting – because there was not a lamp socket for it to flash from! Then I remembered a molex socketed wire harness that I found laying in the cabinet when I was vacuuming the machine. Betting they were related I looked under the playfield for a matching molex connector and sure enough – it was right there. Long ago, someone had removed the lamp holder, then unplugged the wire harness to the lamp. I’m guessing because that flash lamp holder is right in the way of normal servicing of the slalom run. Anyway, I ordered a new lamp socket and soldered the harness back on there and boom – back in business again.
Finally. It was time to polish the playfield and then put it all back together. I used my normal selection of Meguiars car polishing compounds and a high speed drill to bring the mylar back from it “hard to see through” state to something a bit more presentable. Then I reassembled the entire topside of the playfield in reverse order of my notes. It went well and I had only minor hiccups during the re-build. One of those was getting the slalom hill situated just the right distance from the starting gate. Too close and the slalom cant move back and forth – it hits the gate because the top portion doesn’t just move left and right, it move in an arc based on the fact that the hinge in a single point at the opposite (bottom) end. This means that even if you have clearance at the actual ball exit at the gate, it might not be enough during gameplay. In order to create enough clearance I had to notch the right ramp that runs under the gate mech to create about 1/8″ more room to move the gate rearward. No worries, the part of the ramp that needed a little dremeling was just a tab from the mold when it was created. Got that fixed and the gate mounted and (importantly) played like a charm!
Gameplay and Conclusion
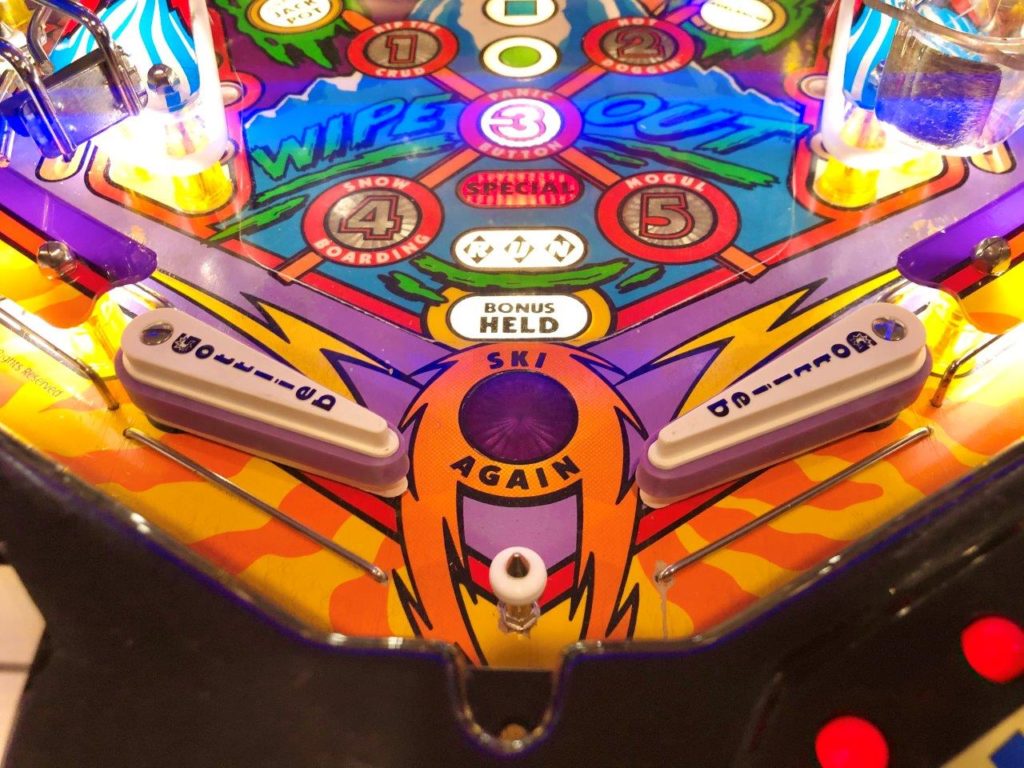
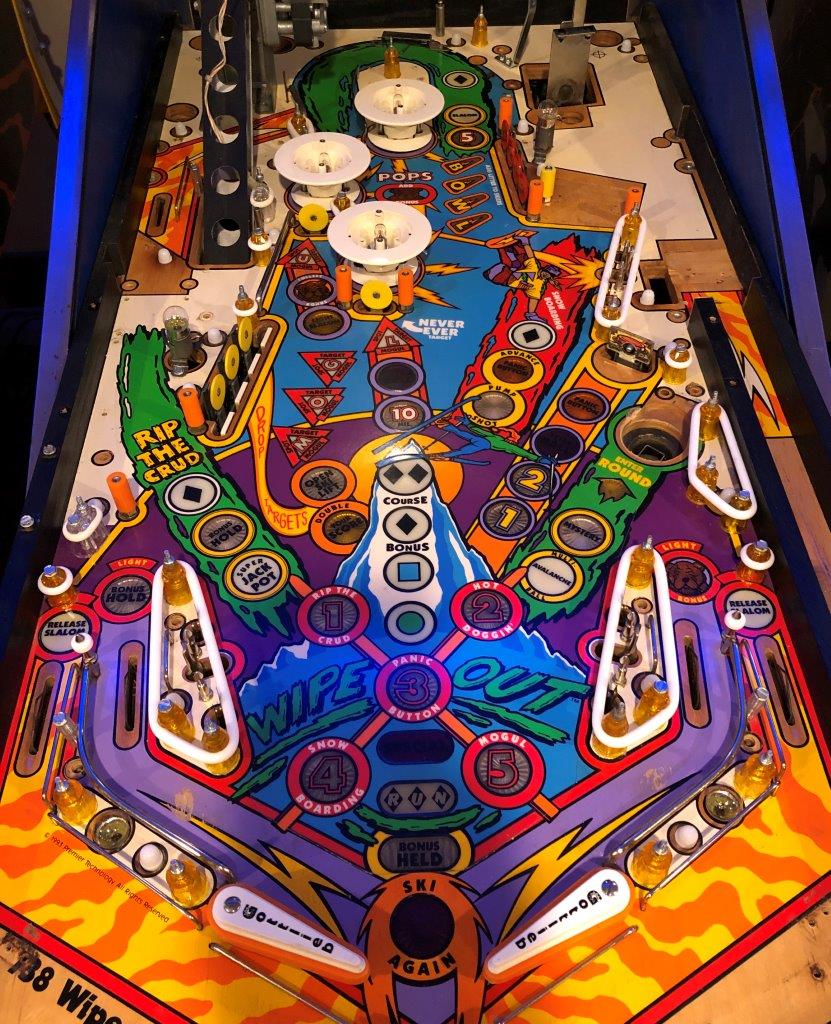
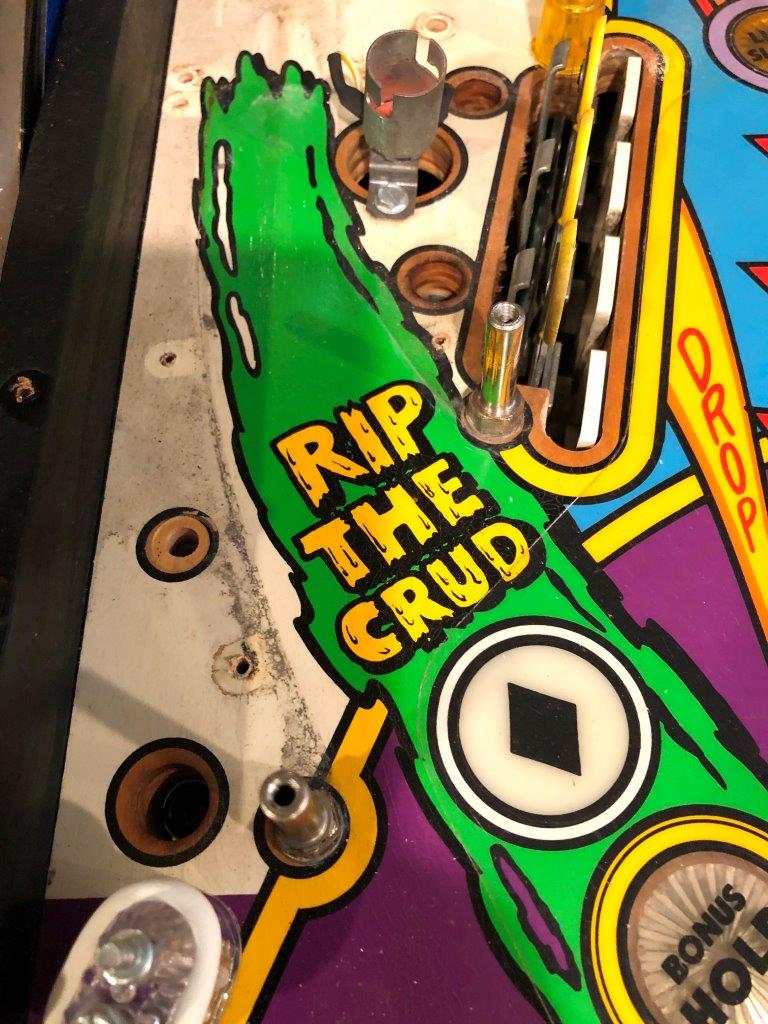
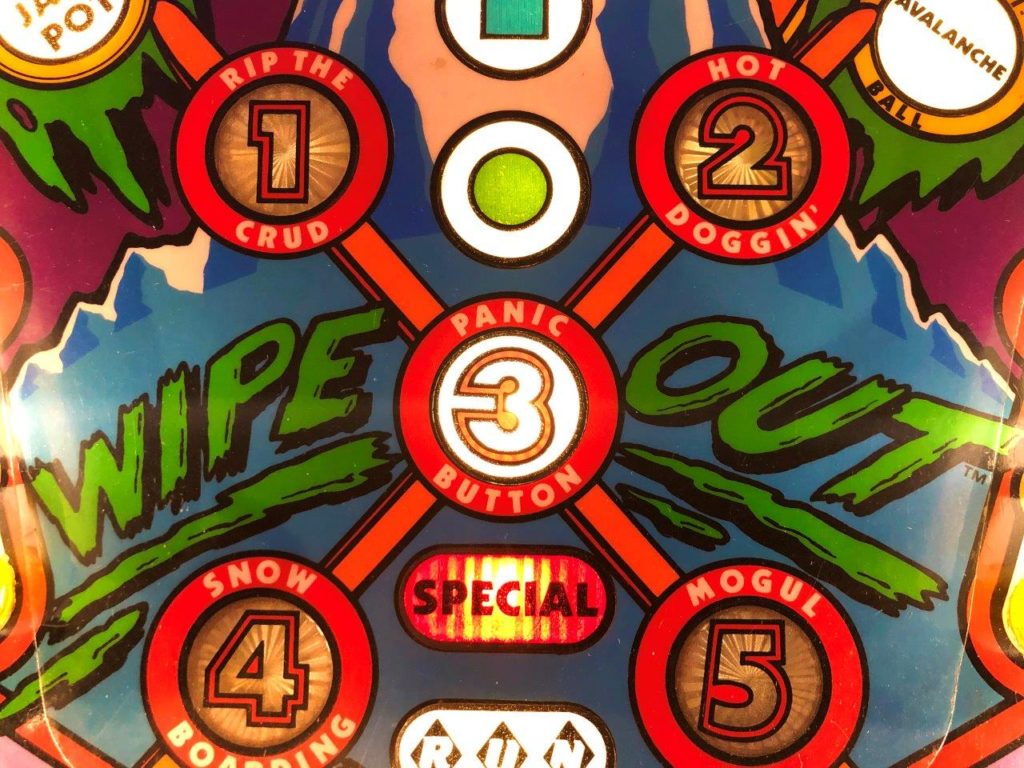
Now that it’s done, here are a few takeaways from the project. There were NOT a lot of units made of this title. Although not highly sought after, it’s still not easy to find because there were only 2,150 produced. The playfield is chocked full and it has 2 very cool mechs that occupy the left and the right side. On the left, there is without argument one of the coolest ball lifts ever put into a pinball machine – the ski lift. A simple rubber belt with “ball sized” holes punched into it do a great job of simulating a chair lift. On the right hand side the slalom run is the largest and most successful implementation of a moving playfield that has ever been done (the other is the tilting/moving playfield in the Indiana Jones machine. The “Rip the Crude” shot is challenging in an otherwise “easier” to shoot game. The game is colorful, the call-outs are just about perfect for the ski theme of the early 90’s – even if they have not aged so well (“Look at the moguls on that ski-bunny!”)
The game was surprisingly easy to shop out. Keep track of those hex posts and you’ll do just fine. If buying this title, be mindful of the right ramp (that large one that goes under the slalom ramp). It’s un-obatnium and if it’s busted up you’ll need to be skilled enough to repair it. Same for the rubber ski lift belt. They CAN be handmade but are very difficult to find NOS. Also watch for the ball drop areas at the inlanes – every game that I’ve ever seen has paint wear in these spots. If you can match the purple, it’s easy to fix and then cover with a mylar patch to protect it. Run the machine menu test for the slalom to see if it moves properly right and left. If it doesn’t you can check the the transistors in the backbox to see if blown. If you can do board work, it’s an easy fix. Finally, check the resistor board that sits under the playfield near the very top. Most are burned badly from overheating and lead to the pop bumper lighting not working properly.
Game play is pure and simple fun. If you’re a skier that was active in the 80’s and 90’s – that’s just a bonus! The game is fairly easy for any accomplished player. The right ramp is as wide as an LA freeway and the shot to the ski lift is the same. The VUK on the right is a bit more challenging to hit and as mentioned before the “Rip the Crud” return wireform is a nice challenge.
Most players will complain about the “Hot Doggin'” round (mode) due to the fact that (like many other Gottlieb’s) when accomplished will double your current score. The complaint is surrounding how unbalanced the scoring can be because of it. I get it but don’t care. I love the challenge and the opportunity to double my score! If I’m playing against another player, it’s a nice wildcard. The game is not likely to make it into any tournament play but again, I don’t play competitively.
One of my favorite parts of the game is the increasing value of the right ramp – it moves from 1MM to 20MM after a non-stop series of consecutive shots. It’s exciting to watch the score grow as you hit that ramp over and over. You would think that you could hit it “all day long” but as the score builds, so does your anticipation and inevitably it leads to over-confidence and a miss.
It’s right about then that the Austrian accent guys taunts me by saying in his condescending whiny voice “Maybe I should call your mother, have her help you ski.”
I will typically respond by actually yelling back at him another call-out from the game “See that ski pole – I’ll shove it up your “beeeeep”.