Queen’s Yacht
Somebody posted a picture on Pinside of the coolest looking topper for a Stern Pirates of the Caribbean that I had ever seen! The problem was that they were a very infrequent poster and I couldn’t for the life of me, find the source of the parts they used to build it. I sent them a PM but got no response. So I began to search on my own. What the heck does Queen Victoria’s Royal Yacht have anything to do with Stern’s Pirates of the Caribbean? Arr … read on me hearties and discover for yerselves!
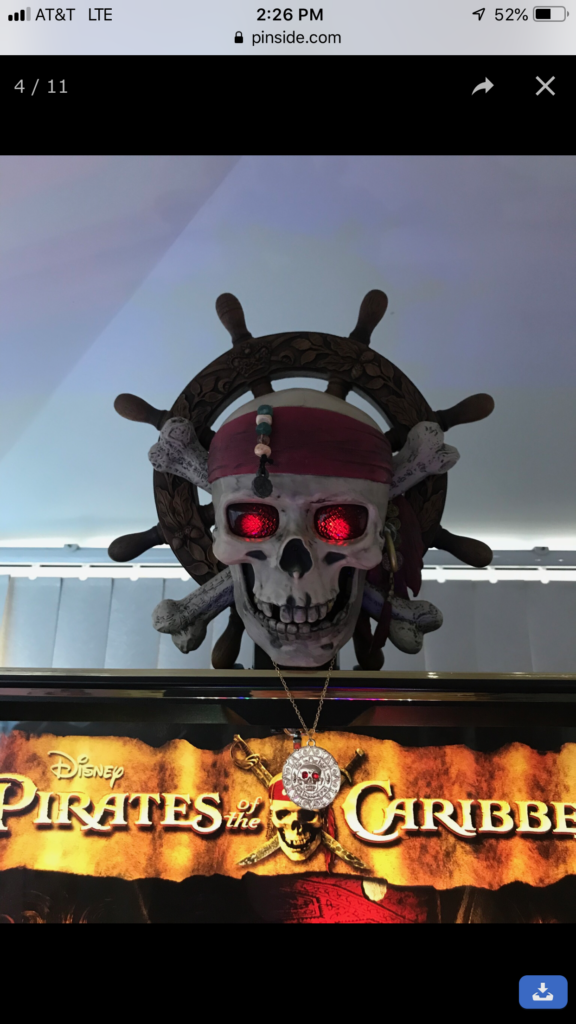
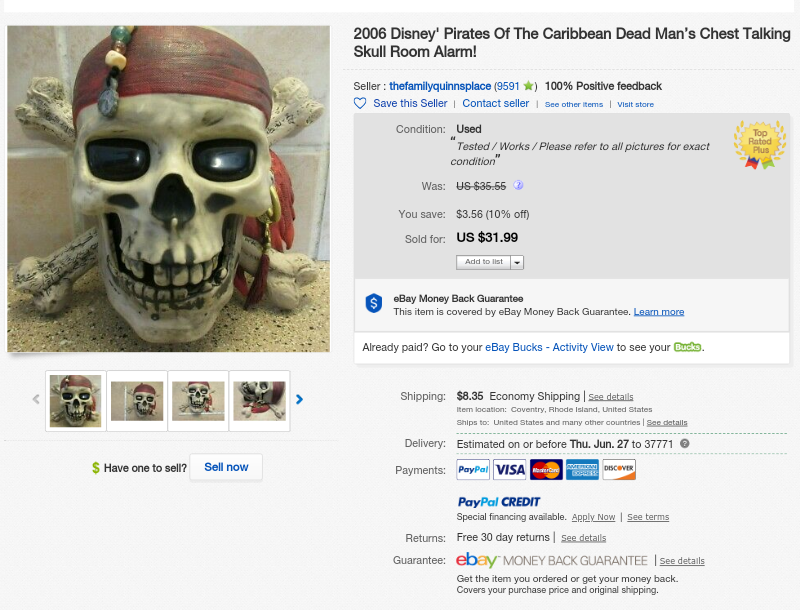
I spent countless hours (yes, hours) crawling through Amazon and Ebay pages hoping to find what it would take to build my own version of this cool topper for my recently acquired POTC pinball. It appeared to be built from a wooden (Pirate style) ships wheel AND a skull and crossbones that looked to be of POTC Disneyesque origins. Well, the skull and crossbones was found rather quickly on Ebay. Turns out it WAS from Disney and it was a licensed POTC wall hanger for kids to use in their rooms. It had a built in motion sensor, speech and eyes that lit up. The jaw also moved when it “talked”. It appears they made at least 2 versions of this “toy”. The one I bought that has bones crossed behind the skull and another version with swords crossed behind it. Assuming both are the same scale, then either would work. The whole thing runs on 3 AA batteries, and is constructed of hard plastic. I paid $32 on Ebay and it arrived in perfect working order a few days later. I took a few minutes the day it arrived to use some E6000 adhesive to glue the bottom plastic plate in place (it was hinged in its original design) as a future “mounting base” when fixing it to the top of the pinball machine. This saved time later on as you’ll soon see.
The ships wheel wasn’t so easy. I simply could find no information on the wheel. After quickly finding the skull on EBay I figured I’d quickly be building my new custom topper BUT after exhaustively searching Google and Bing enginesI came up empty. I did image searches and a hundred variations of “Ships wheel”, “Pirates ship wheel”, “Wood ship wheel”, “Boat wheel”, you name it but … nothing. In all the years I’ve searched for things on the internet, I’ve never been completly stumped – this time I was. I went to Pinside for help and asked if anyone recognized the ships wheel behind the skull. Was it a:- Toy? – Beer sign? – Disney POTC item? – Handmade Etsy item? – Liquor advertising piece? In the original image I can see it has 8 spokes and it’s probably plastic – but I’m not sure. I can see acorns and oak leaves and I see a crown and swords. Even zooming in I could see no other clues that might help me in finding it. A fellow Pinsider suggested it might be a clock or even a thermometer so … I went back to Ebay and searched hundreds of “ships wheel clocks”. Nothing.
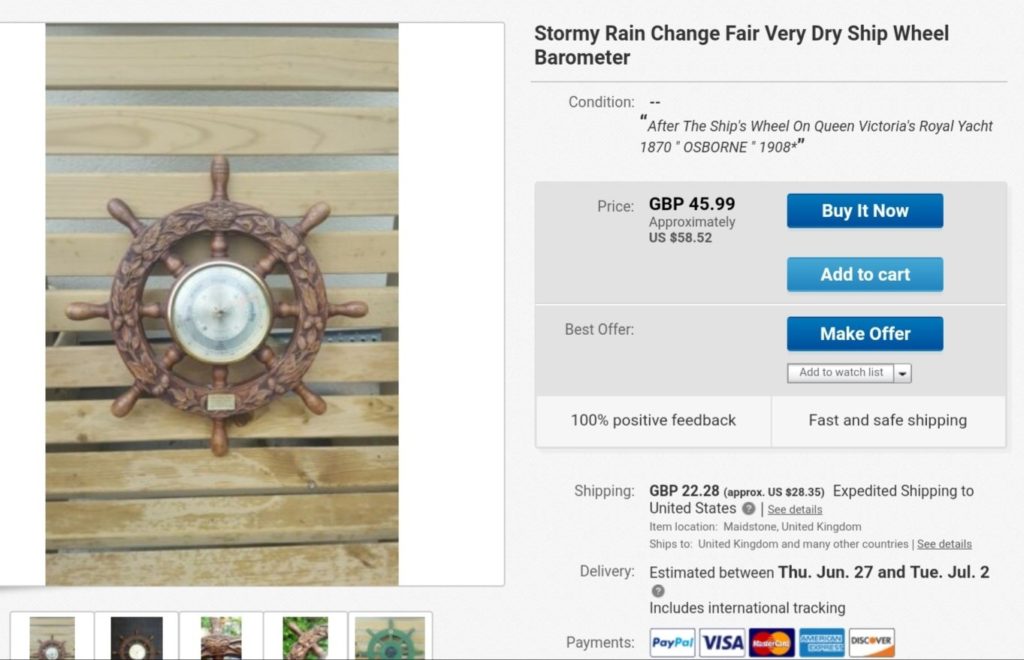
I then thought about what another guy said and tried “ships wheel thermometers”. Still nothing. I was about to give up when I tried “ships wheel barometer”, and … a couple dozen hits later – BOOM! There is/was exactly ONE identical item on Ebay, and it was in the United Kingdom. Looks like it was made in the 50s or 60s. No wonder there were no Google images of it! The maker was listed as Rototherm. I bought it immediately for just under $90 delivered from the UK.

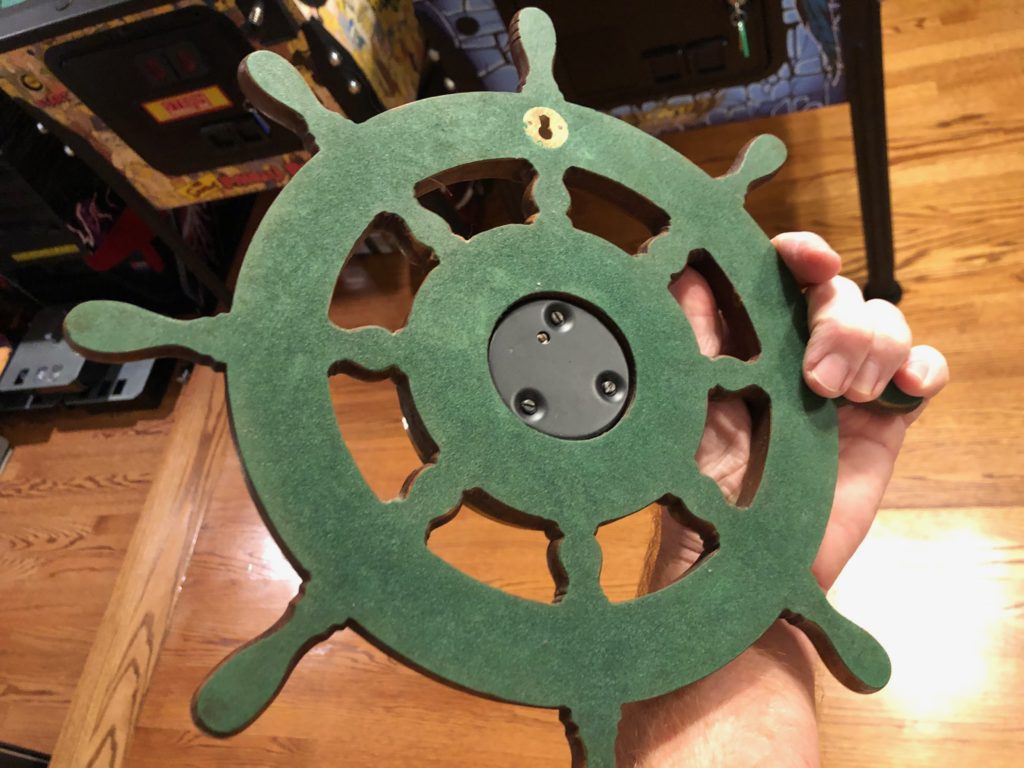
When the package arrived (quickly BTW) it looked like it had gone through a meat grinder but the wheel was in perfect condition. Sure enough, right in the middle was a still functioning barometer. Along the bottom was a brass plaque stating “After the Ships Wheel on Queen Victoria’s Royal Yacht Osborne 1870-1908”.
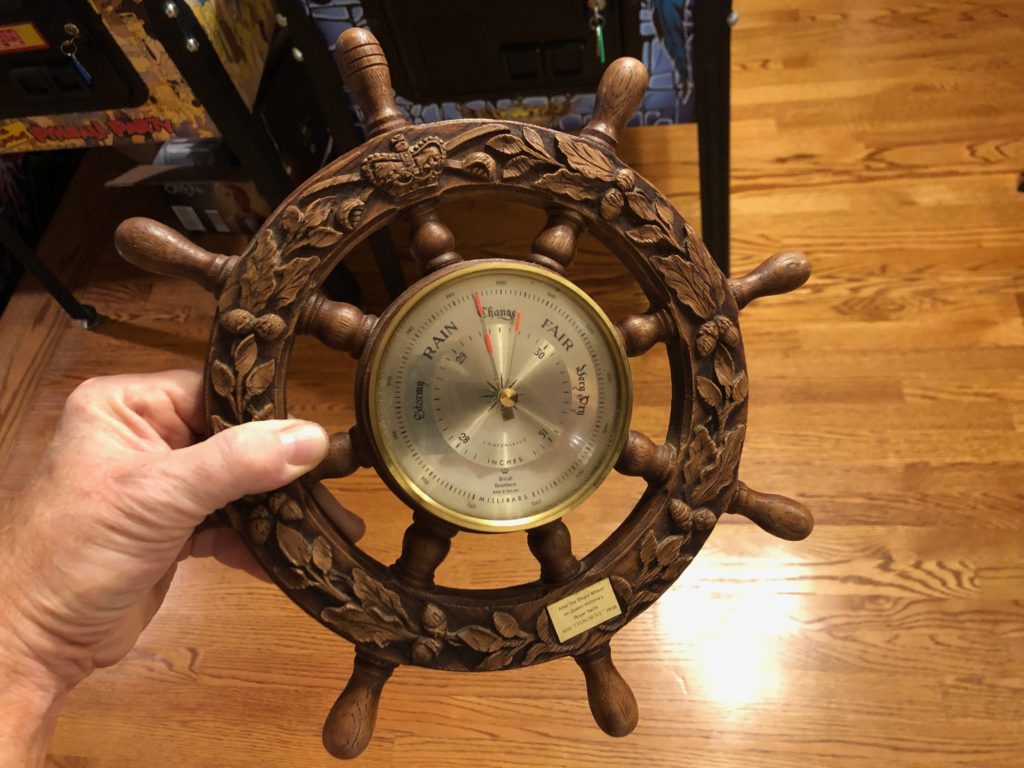
The barometer looks like wood but is made out of a material that is much more dense. It has the weight of concrete but the appearance of plastic close up. Maybe it is wood but I could not tell and I never needed to drill into it to discover its secrets. The rear of the unit is covered in green felt and has one brass keyhole at the top to hang it with. I was able to quickly pop the barometer out of the center. The only thing holding it all in there was some old hot melt glue that had browned with age and weakened to the point of failure.
I put the wheel back in the box intending to build the entire topper the following weekend. Then life happened. Or, should I say “the move” happened. We were in the middle of building a house and it was time to “get going” – so the topper was put on temporary hold for 4 months. To shorten the story, we finally got moved. The house is beautiful and the new gameroom is awesome (SEE IT HERE). Now it was “time” to finish that topper. Sunday October 13th I set aside a few hours
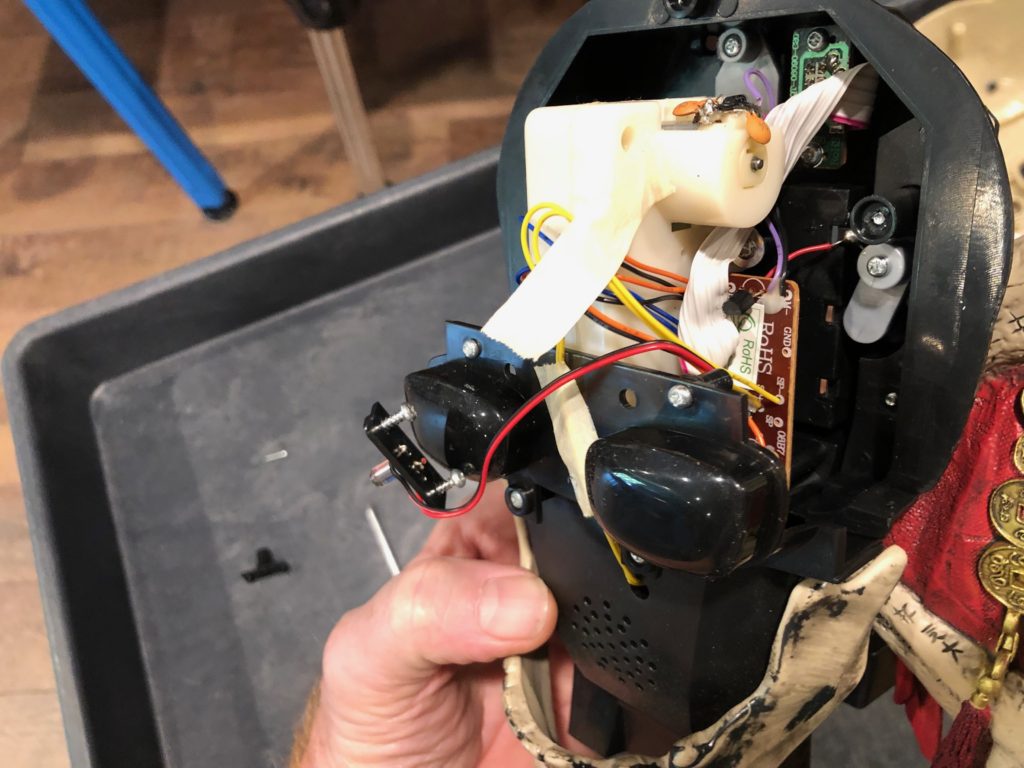
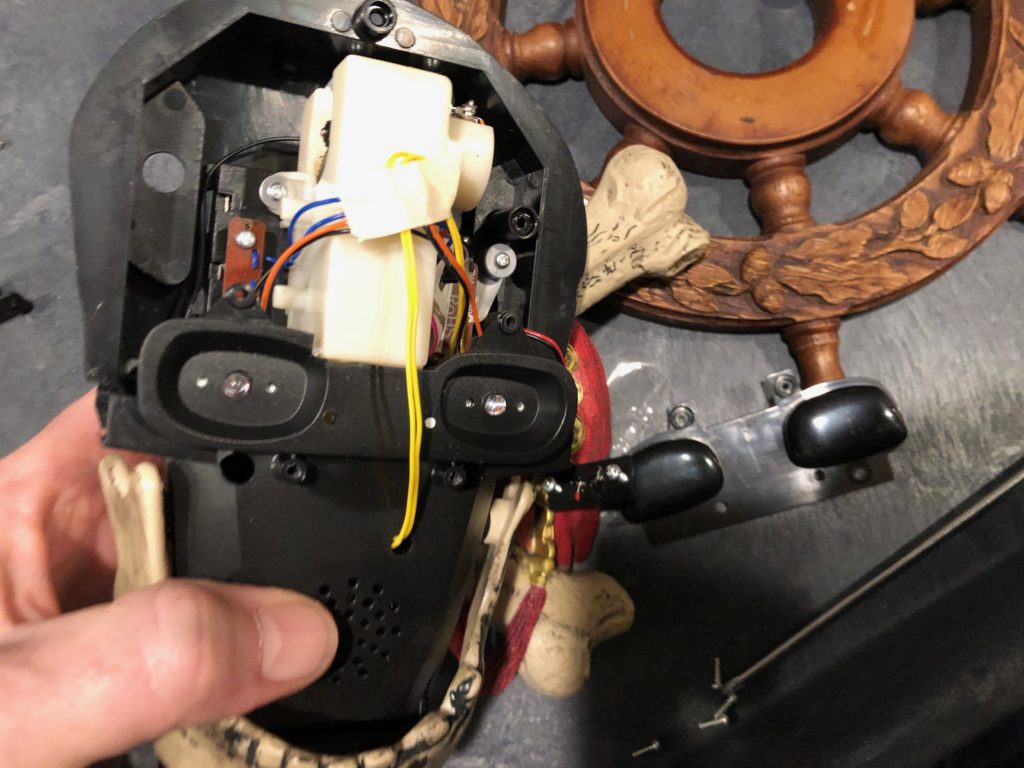
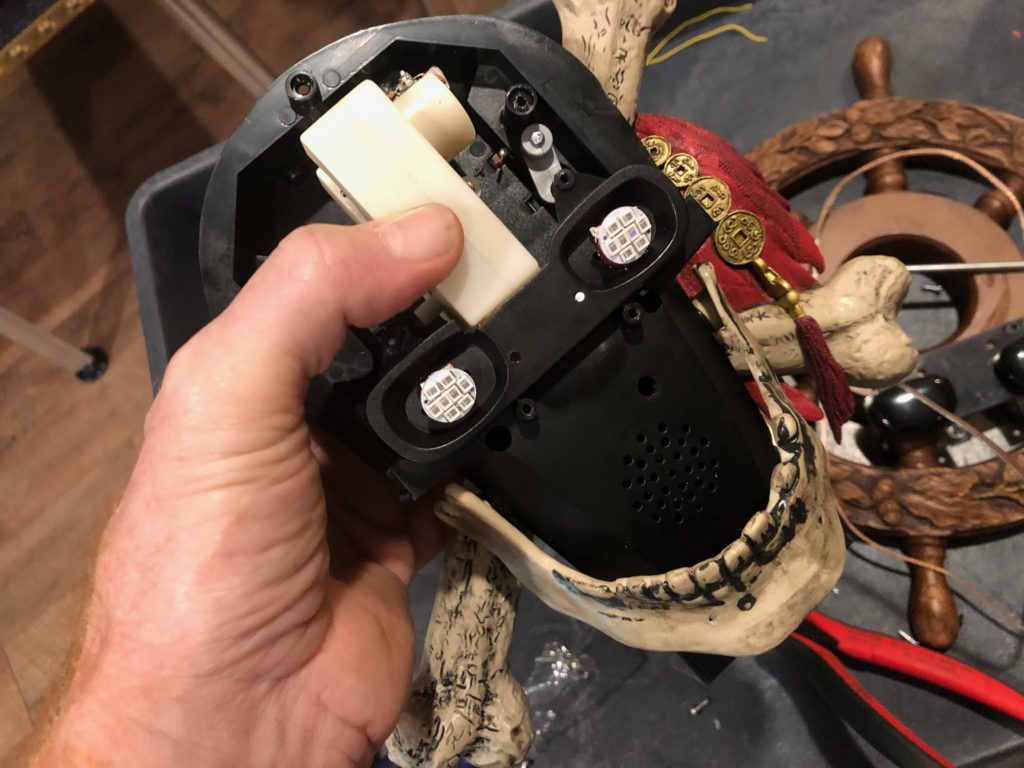
In a nutshell, I cut all the inside wiring and functionality of the original skull out and tossed it. In it’s place, I wired in 2 MUCH larger/brighter LED “eyes” and added 2 large LED effect lights that are mounted low on the skull and flash to light up each side of the “face”. I then glued the entire skull to the ships wheel and mounted that entire assembly on top of the pinball head and wired it to an existing flasher in the game. By plan, the moving jaw no longer functions What follows is a loosely documented step-by-step of how I first gutted the skull, rewired it and then mounted it to the wheel. Step one was to simply “get in there”. This involved unscrewing the backer which was held on by 6 to 8 screws. Once open, I cut the motion sensore out of the nose, then unscrewed and then removed the black smoked eyballs “visor”. Note that there are 2 pins in addtion to the screws that hold that visor on. One of the pins is glued, the other is not. I carefully but forcefully pulled and pried the visor to break the glued-in pin – it’s not structurally integral to the visor so no worries breaking it off. I then unscrewed and removed the existing (very, very tiny!) OEM eye LEDs
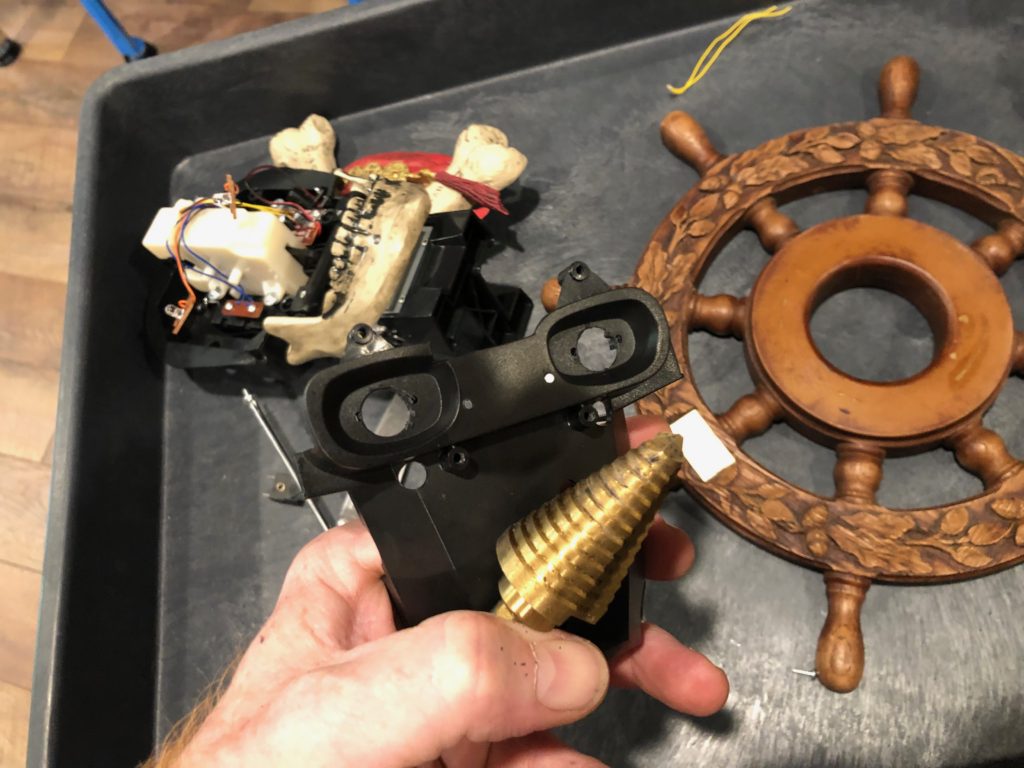
The holes left by the original LEDs in the eyes were much too small so I grabbed my step drill bit to enlarge them to hold much larger LEDs. Those larger holes were used to accommodate Comet brand 8MD Red “flexi” style LEDs and wedge sockets (13 volt style – used as flashers in modern games).
I wired and soldered the wedge style socket in series using some 24 gauge speaker wire. I mixed up some 1 minute epoxy to glue in the whole eye assembly and wiring
With the epoxy now dry, I popped in my big LEDs and stopped to admire the work so far! I needed a way to get the newly wired “eyes” power supply wire out of the skull so I drilled a tiny hole just below the battery compartment in the back. It was then that I decided to add a few more of the large LED around the base of the skull for dramatic effect. I mounted these using some LED wedge bases I had on hand that had some right angle mounts already attached. To power them, I would need another supply line so I tapped into the one I had just completed by soldering then adding heat shrink tubing to a “Y” connection on my 24 gauge wire. The additional 8SMD Orange flexi style LEDs were then mounted down low on the skull but with the LEDs bent to be facing up. Finally I would need to a way to disconnect the topper for when the game needs to be broke down for transport so I added a 2 pin Molex quick disconnect to the power supply wire
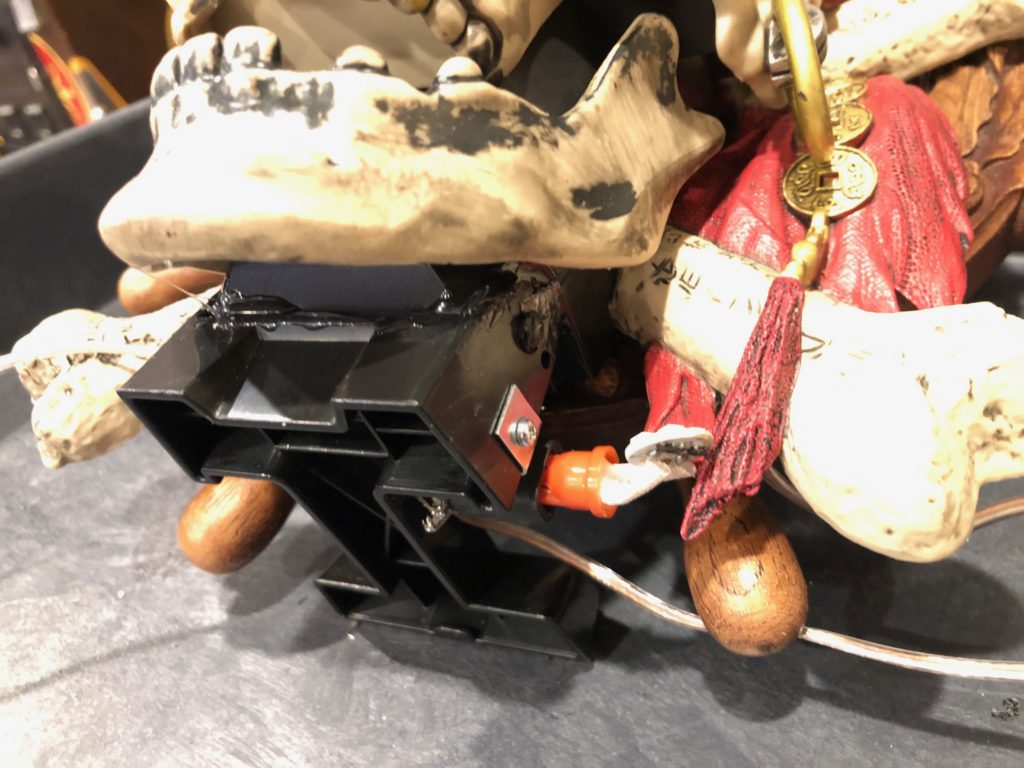
Before I put it all together and mounted the skull to the wheel, I dragged it over to the machine and tested the LEDs to make certain all wiring was good. Taking the whole thing apart AFTER I had it mounted to the wheel would have been crazy painful so I wanted to make sure it would work first – it did. With the testing behind me, I used E6000 to mount the whole skull to the ships wheel and painters tape to hold it in place until the E6000 setOnce the glue was set, I needed to decide exactly how I would mount the whole thing. The skull came with a base of sorts. You’ll remember earlier that I had already glued that part in place a few months ago. That saved a step during the process and also alllowed me to complete the entire topper in just one day.
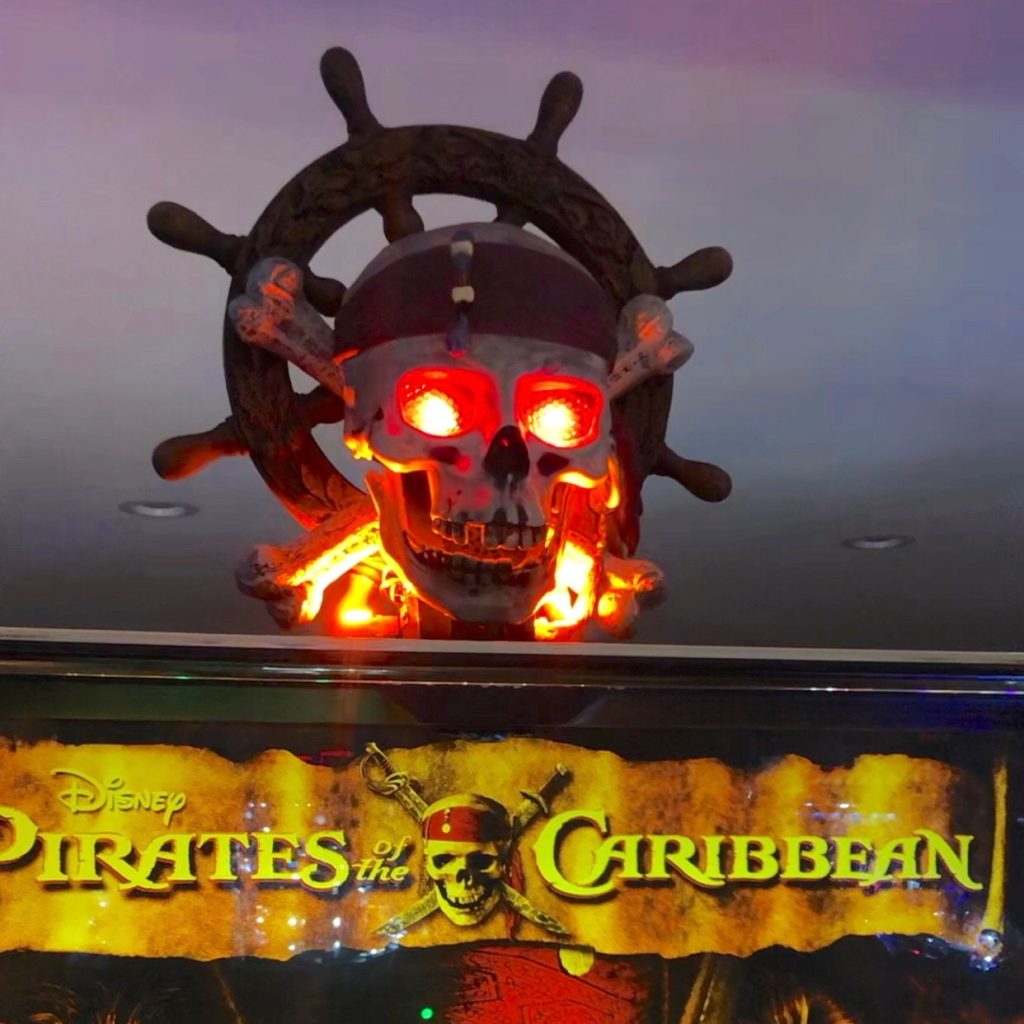
When the wheel was added, the spokes actually stabilized the entire structure and it became apparent that just ONE screw, in the back of the skull base would be sufficient to anchor the entire assembly. I pre-drilled the base of the skull and the top of the pinball machine cabinet and mounted the entire assembly – I was getting close! All that remained was to feed the wire through the back screen of the cabinet head, down the right side into the larger base cabinet and choose a flasher to marry it to.I chose the pop bumpers as they are typically fired on every ball if you plunge to the top instead of a short plunge. All in all I’m very please with how it turned out! It’s plenty bright and the addition of the 2 outside (and low mount) Orange flashers really enhance the entire look.