Practical Jokerz
The story behind the game starts with a trip to get a Gottlieb Gold Wings. Yup, Gold Wings. When I arrived to see the game in person, the Gold Wings was misbehaving a bunch. There was a power supply issue related to a bad solder joint causing mid-game resets and flippers that wouldn’t allow the ball to make the ramp. I was disappointed because I really wanted a copy of that title but the price along with it’s condition took it off my list.
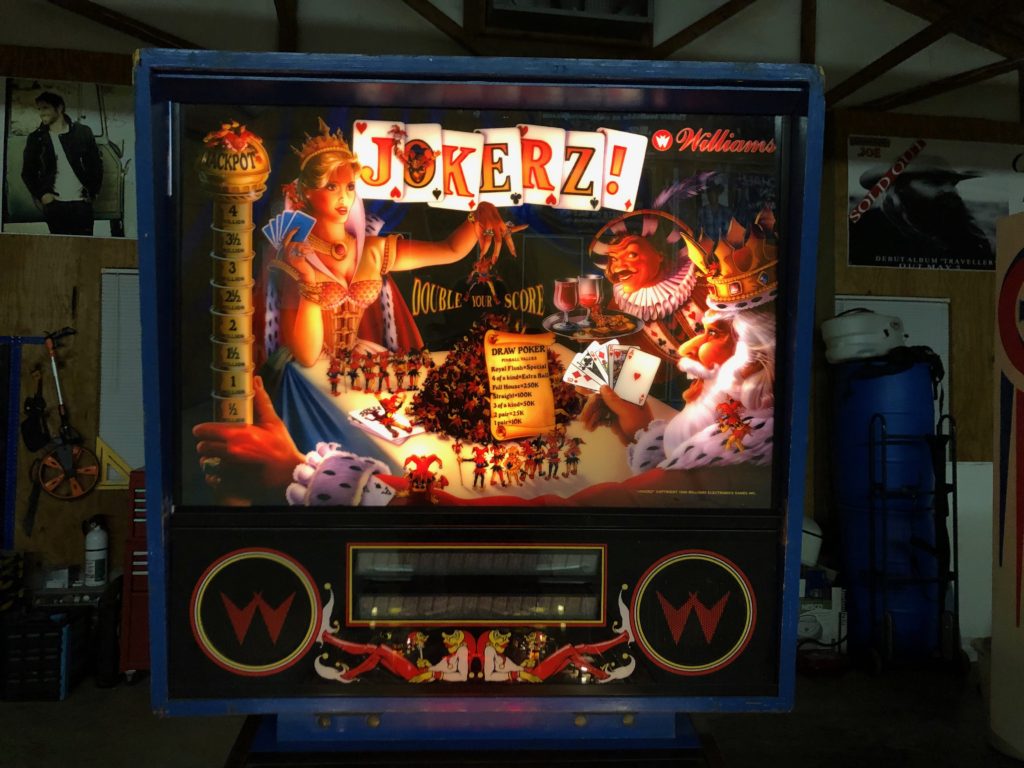
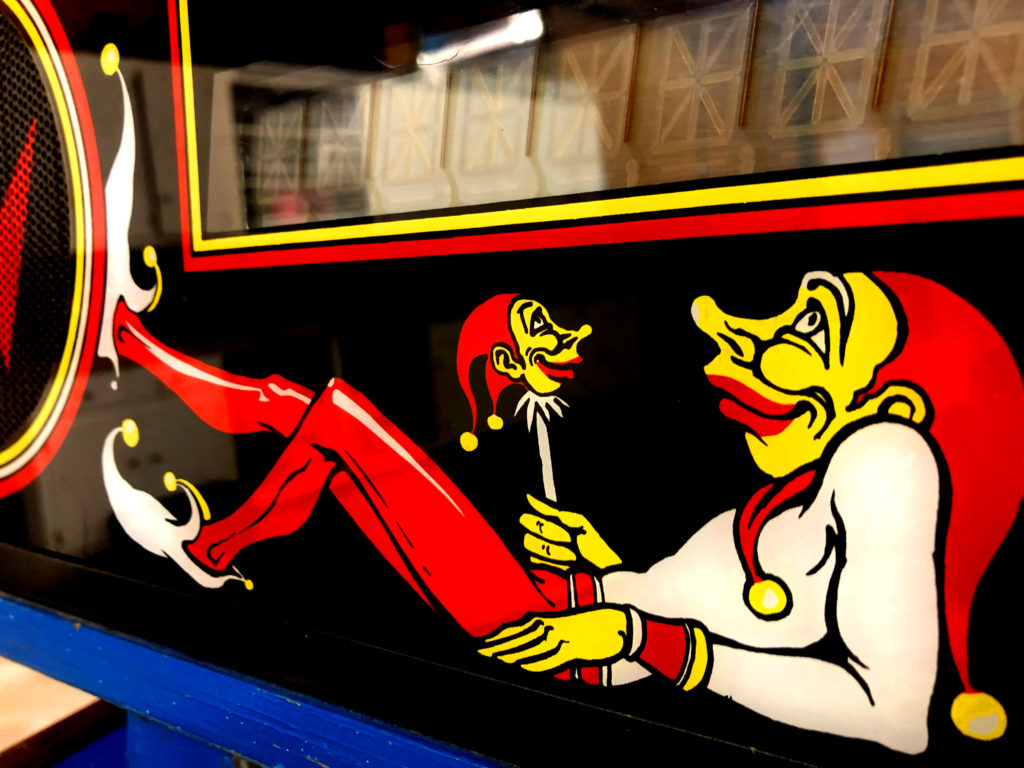
When I asked the seller if he had any other Pinballs he said that he had just picked up 2 more and they were still in his truck. A minute later we were standing outside behind his pickup in a very brisk January breeze. Brrrr. He pulled back a blanket to reveal a well worn Williams Jokerz. I knew that this was not a highly desirable system 11 but I loved the artwork and enjoyed playing it when I saw it at shows, etc. John Youssi (the artist) lives in my home state of Tennessee and I simply love his work.
The seller shared that the guy he bought it from said he could not get it to boot and that he had purchased a replacement transformer for it but had second thoughts about tackling that level of work on the game – so he sold it. I got to see just the center of the playfield and that looked “OK” at best. The cabinet on the left side had literally been carved into by either a child or someone acting as one. I was also able to see that the head had some structural issues and would need some glue and cabinet clamps to correct. I also noticed that the backglass was cracked (not tempered) and the translight was significantly faded.

I asked the seller what he wanted for the Jokerz and he shared a price that put it right at “market” – this was not a “market” condition game but I asked him to let me know when/if he got it to boot and I would think about it. I got a call a few days later that he had the Jokerz up, working and had played it. I could stop back and see it anytime. He reaffirmed the price and backed it up by sharing some of the new parts he had on order but had not installed yet. He had ordered a new upper playfield, rubber kit, lift channel, and a tempered back glass and would give me all those parts if we agreed on a deal. So I drove back to see the game and … the game was stripped! I mean like down to the bare playfield stripped. All the parts/ramps/plastics were in a box. Ugh. Not his fault at all. I had not committed to buy and he was marching along doing what he does to prep the game for sale. So … I couldn’t play it. I looked over the rest of the game good as this was my first real chance.

The “other” side of the cabinet was just as bad as the “carved side”. The Mylar was lifting in places and would need to be surgically trimmed. The translight was that in name only as most of the ink took a permanent vacation. The legs were painted blue and scratched. Many of the plastics were cracked. The playfield glass was a scratched mess (aren’t they all?) and It started in “adjust failure” mode. On closer inspection I saw significant corrosion on the top connector of the on-board battery box (nothing below it thank God).

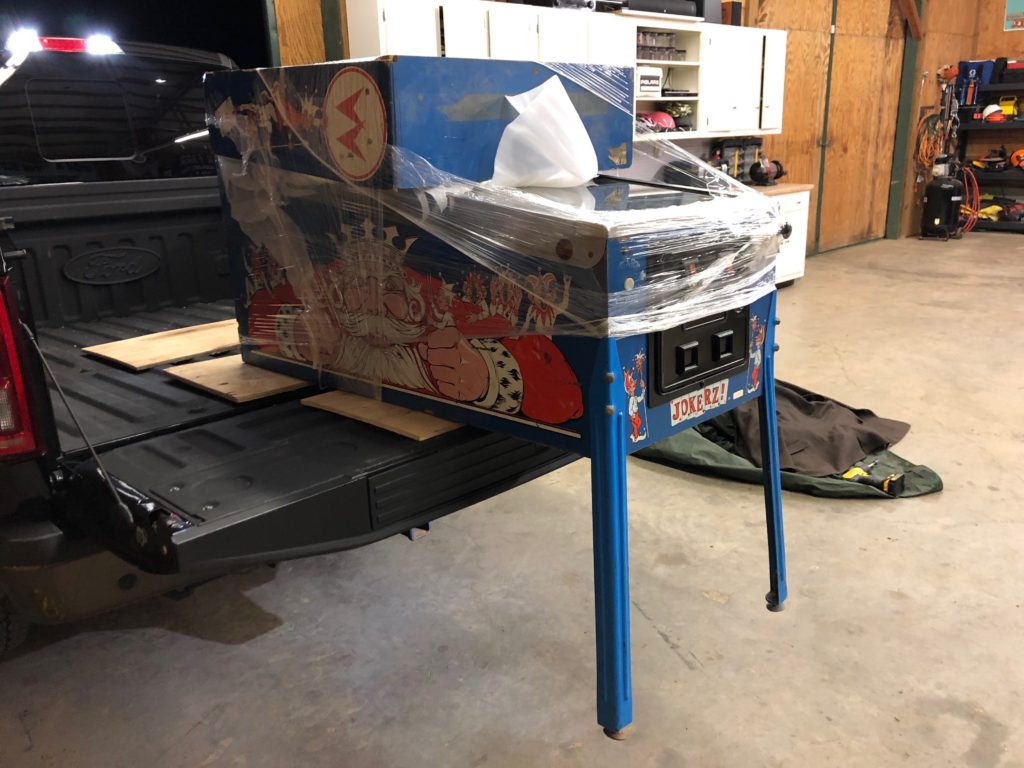
No matter, blinded by the drug called Pinball, I took his word that it actually worked and made an offer. We came together on the price and started to prep the game for transport. First order of business for me was to “check the ramps”. I never saw them in the game. Never got to check for cracks or broken mounting tabs, etc. When I pulled the first one out of the box my heart sank. It was missing large chunks from both left and right. The left ramp was worse. Now what. This was not going to work. But wait. What do I see, she’s walking back to me .. sorry, that’s a song. What I saw was ANOTHER Jokerz sitting 3 feet from me. I walked over and in 2 seconds saw that all 3 ramps were in very good condition. I asked that he swap ramps as part of the deal. He’s a great guy and agreed on the spot. We grabbed some tools and traded out all 3 ramps before I left.

Time to fold the head and get this project machine loaded, but wait. How do you fold the head and secure the speaker panel and the light panel when there is no backglass (it was cracked remember). Easy, unplug the entire speaker panel and shove some small blankets into the head to hold the light panel from flopping around in transit.

This Weathers’s a Joke.
Time to load it – boy it looks cloudy all of the sudden. I quickly check the weather report again – nope, no rain predicted for today. But by now you know my track record on hauling pins. If I buy one – it rains. Every time. I get it loaded say goodbye and hit the road. I’m halfway in the middle of nowhere. It’s dark and I have NOT put a tarp over the game. Why? Because I checked the weather and it’s not supposed to rain- that’s why. It starts to sprinkle almost to the second I pull out of the driveway. Within 5 minutes it’s light rain. In 20 minutes I am forced to stop in I-40 in heavy traffic to pull out my tarp and cover the game or risk water damage. I stopped, covered the game and moved on toward home. I made it home dry and safe but had no one to help unload the game.

It was a weekday and I usually only have someone that can help on the weekends. So I tried to unload the game alone. Don’t do that. Getting it to the edge of the tailgate, adding the front legs is a breeze. the next steps are all danger and risk. I pulled the front of the game with the legs now installed off the tailgate. It was then that I noticed the distance from the bottom of the legs to the concrete was “too far” – in other words the game would be sitting at roughly a 45 degree angle and would in all likelihood, simply slide onto the ground and break in a million Jokerz pieces. so I pushed it back on the truck. Then I had the bright idea to put a large flat top wood pallet under those front legs. I repeated the “pull it off the truck” step and sure enough, I was able to reach the pallet with the front legs and not have the game crash. I was so excited! Maybe I had discovered the new “one-man-can-unload-a-pinball-alone” technique that no one else had ever thought of. Not so much. After a minute I came to the simple conclusion – now what? I could no longer put it back on the truck and I could not take it the rest of the way off. Fortunately I heard my daughter approaching on her way to the barn. “What’cha doin'” is her common greeting. Oh – trying to kill myself, why? She knew the drill and asked if she could help. In 30 seconds we had it off the truck and safely on 4 legs.
It was late and I had time to only do one thing to the game before heading into the house. I settled on a shotgun repair of the corroded battery terminal. The top pad was completely gone due to acid and needed something to restore continuity to the through hole behind it. I grabbed a tiny screw and inserted it into the rivet hole that was now corroded away. The head of the screw now made good contact with the battery and the threads of the screw created continuity to the pin from the through hole. I turned the game on and was deflated to find the same message on the DMD – “adjust failure”. Then I remembered that you needed to factory reset these games, then power cycle, then start again. It worked. I now had a game that would hold menu settings as I worked on it in the coming weeks.
Pieces and Parts
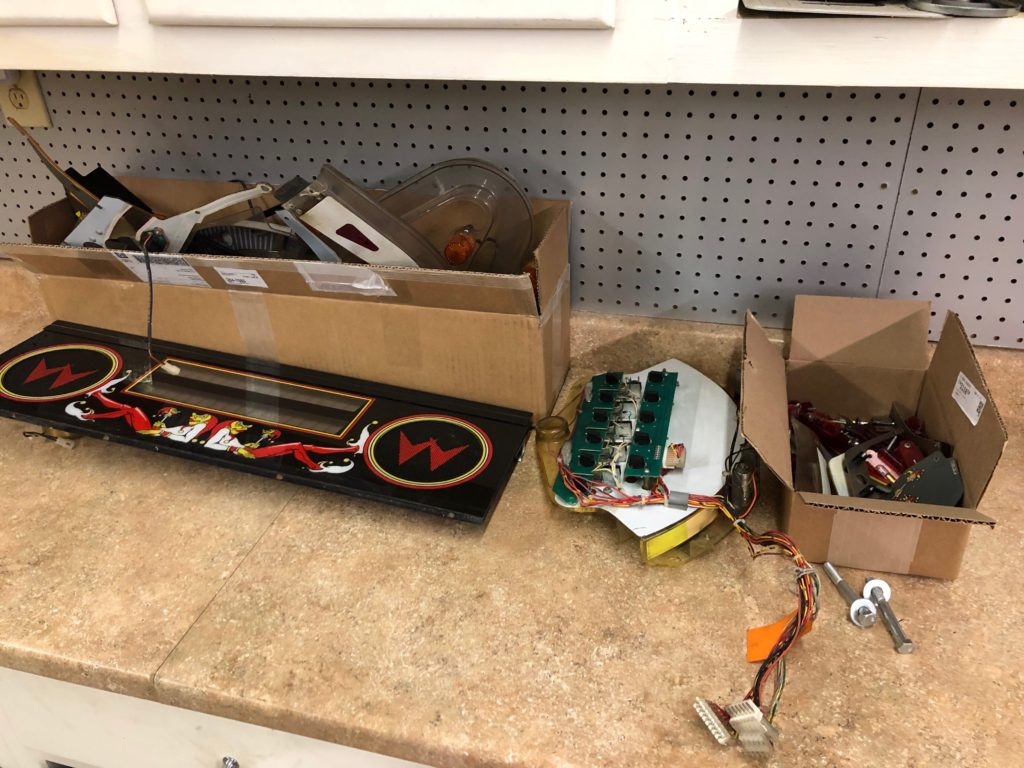
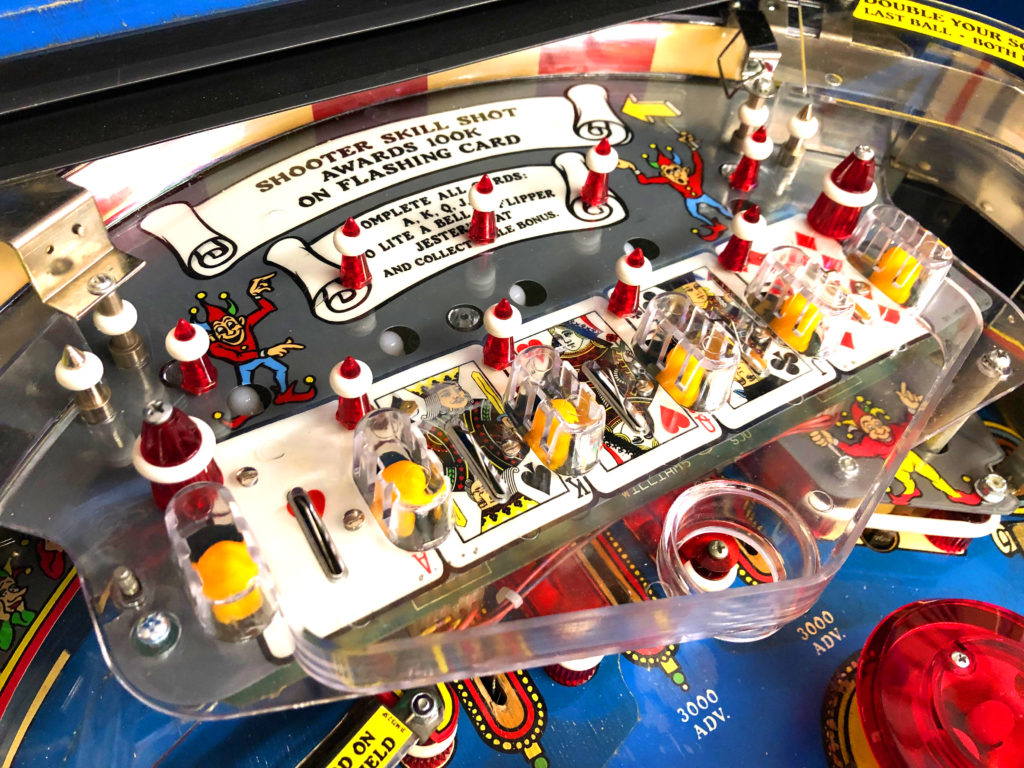
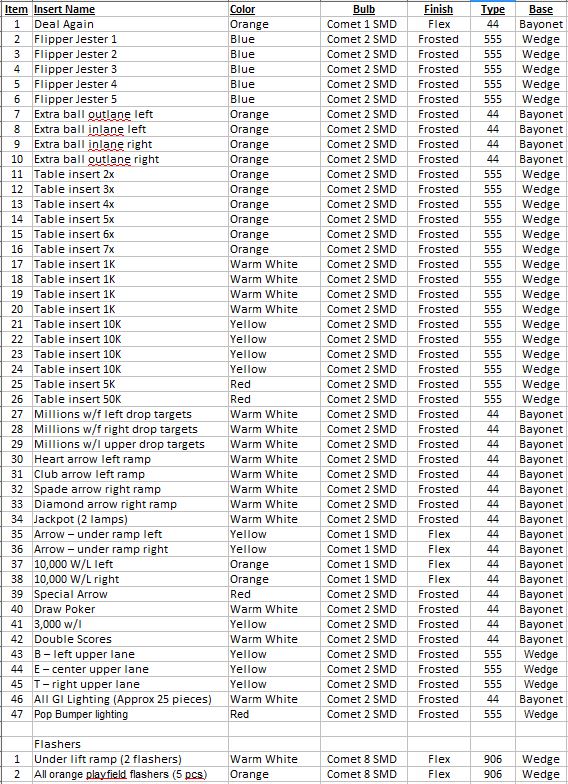
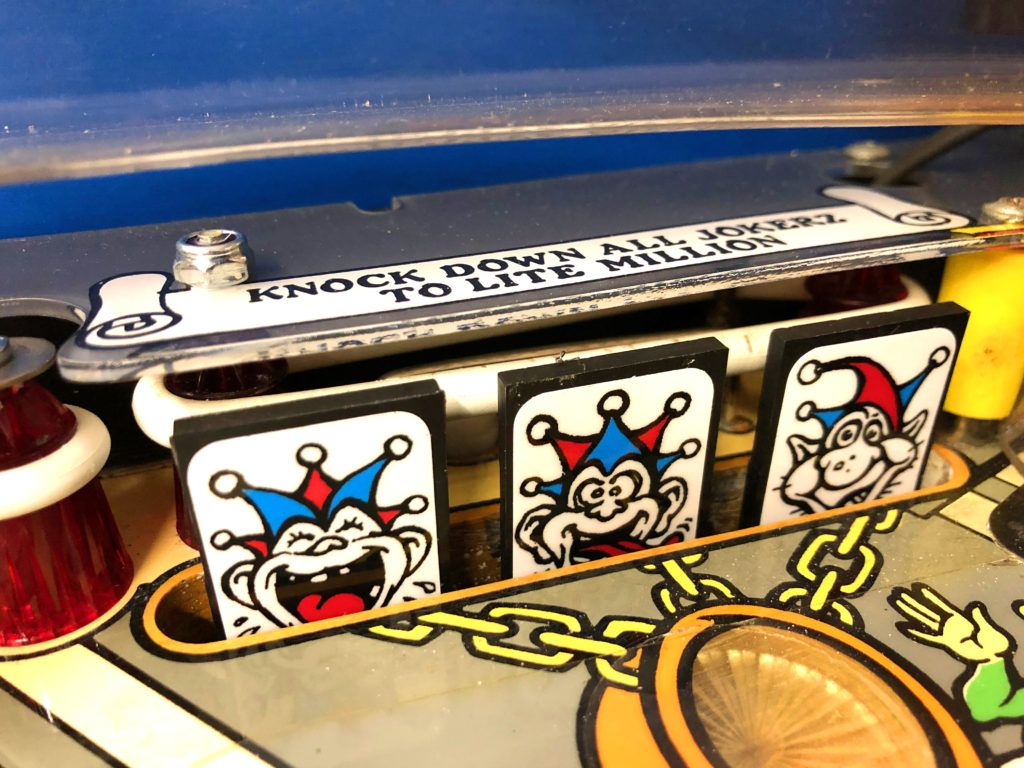
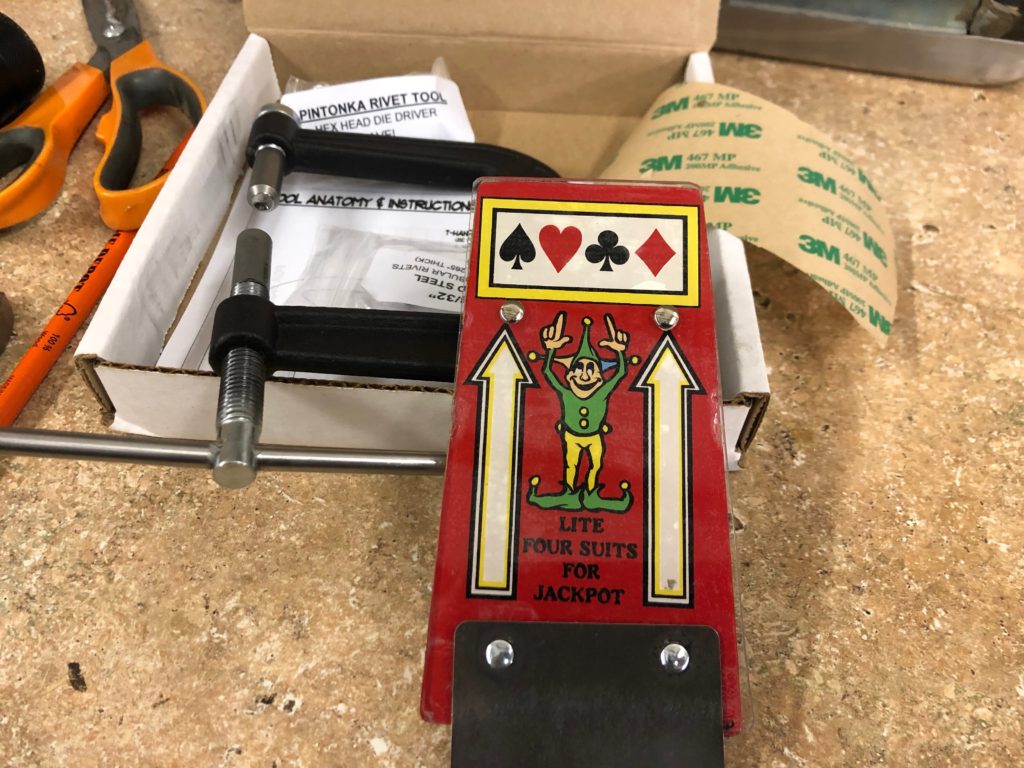
Tonight was inventory night. You can’t restore a machine without parts. In many cases you can’t even start without parts. So I needed to know what I needed. My problem though was that most of my existing parts are in a box. So the process of taking an inventory was just that much more complicated. The existing star posts were a mess. Cracked, faded and covered in 20 years of wax. They needed to go. So I took a star posts count – but wait, some of the ones I have are 1 and 1/16″ inch and other ones 1 and 3/16″. I took an internet trip to the Marco website to confirm these 2 heights exist – they do. I order 35 pieces as it looks like the game requires 34. I ordered the taller ones first only to discover that these had been added by an operator and (best as I can tell) were not the correct height. Fortunately I had stock on hand of the correct height posts. I stock lots of LED’s but do I have what I need for this game? Turns out, no. So insert by insert I review each and attempt to color match – The Red looking inserts (from the top) are actually orange when I shine my flashlight through the bottom – that throws me off a bit- There are 25 total bulbs under the playfield and I’ve attached my color matching LED plan here because there is very little info out there about this game surrounding LED’s- There is only ONE red insert (arrow right) The drops are sticky on 2 of the 3 banks so I ordered new springs all the way around (9 total) and ordered new drops and decals as well.

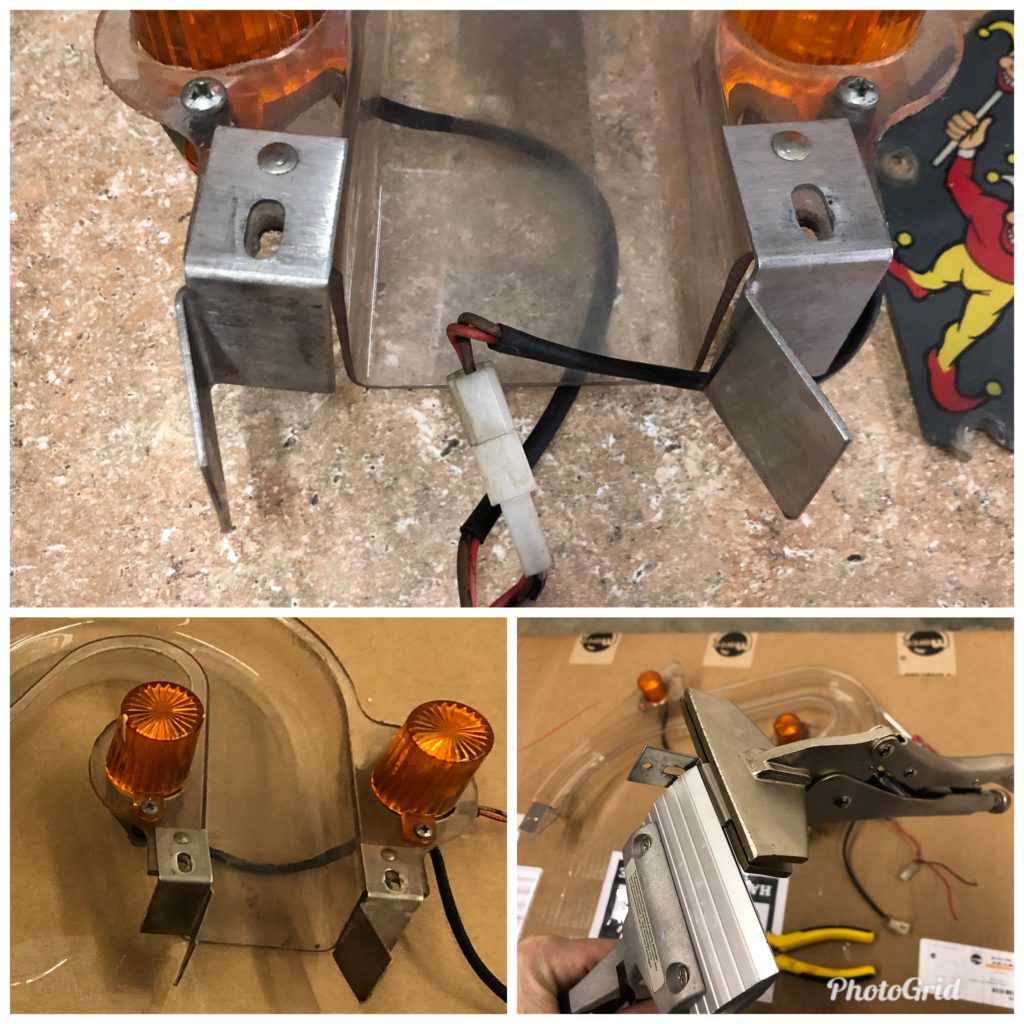
Now I turn my attention to the main ramp. This is the one that my seller swapped for me. It’s in great shape BUT the deflectors that are on the end of it (to corral the ball when it jumps up the red ramp) are incorrect. These deflectors are created in left and right pairs. They are not interchangeable. My problem? I have 2 of the right deflectors and zero of the left. Looking at the ramp straight on, the left deflector is not longer protecting the ramp and guiding the ball – it’s actually capturing the ball and shoving it right into the unprotected left edge of the ramp. And … it’s riveted on there. That means this game was on route and played that way from some time. I’m shocked that the left edge of the center ramp is not destroyed. Using my welding pliers, a sheet metal brake and a handheld torch, I created a lefty deflector by bending it 180 degrees on 2 of the angles. Works like a charm.
Icky Upper
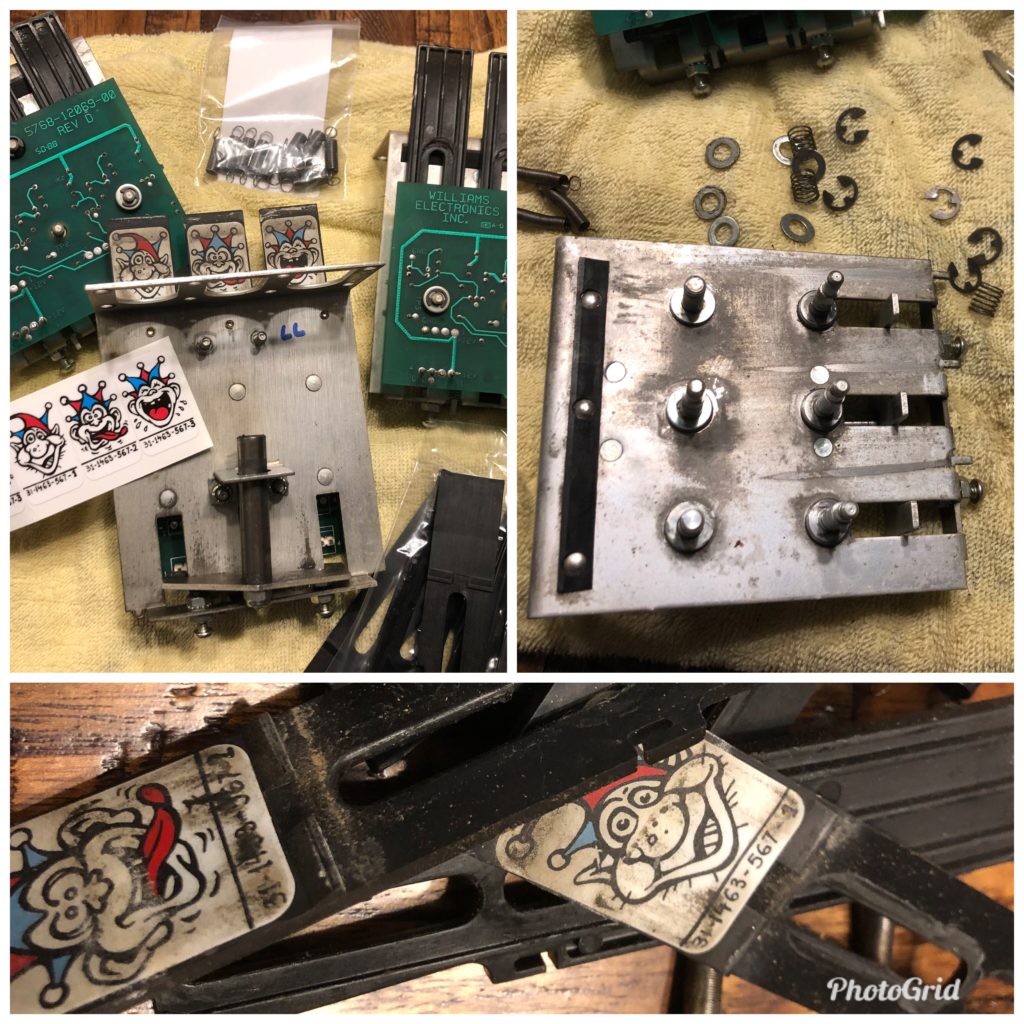
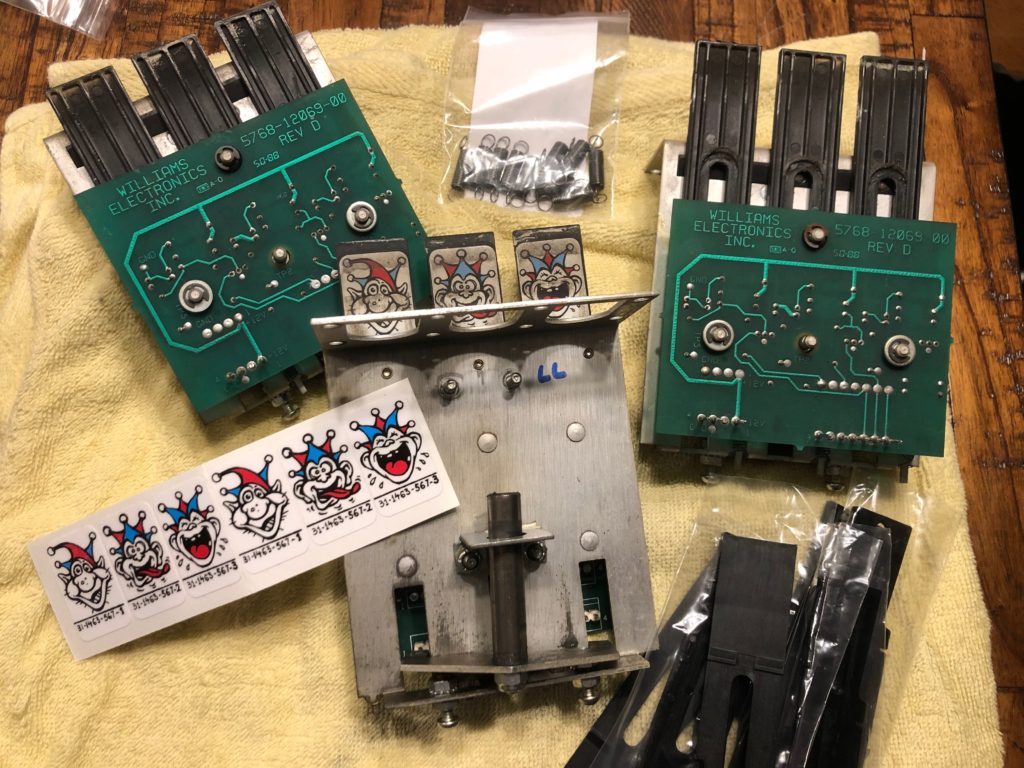
There’s a thread on Pinside about the worst hacks you’ve seen. This one doesn’t make the all time hits list but the installation of a 12 volt fan to keep an overheating transformer cool is pretty “hacky”. I removed the cobbled up fan and moved on to the most challenging part of the Jokerz transformation. It was time to swap the upper playfield. Wow. Not easy. Getting started was actually easy because the upper playfield was already pulled from the game and the new one was sitting in a box.

How hard could it be to simply drill out the rivets, swap the decals and light boards, re-rivet the switches and be done? Turns out – harder than you think. First the easy parts. I removed the 4 flashers on the back side of the upper playfield – just 4 screws. Then the light boards. The rear one has 2 nylock nuts and the front one has 3. Now I’m left with just the switch array – and THAT is riveted to the playfield.
I reviewed the thread on Pinside on how to do the swap and it recommended a 1/8″ drill bit to drill out the rivets. That size did not remove enough material to easily separate the rivets so I moved up to a 9/32″ bit. You’ll need to be a little more careful that you don’t drill out any of your switch plate but I was able to do it no problem. Now the entire wire harness is free and can be set aside. Next I unscrewed all of the various posts that are attached. Now onto the 2 decals that need to be removed. I ran a large sink full of hot soapy water and let the playfield soak for about 5 minutes in the hot water. I removed the playfield and cut off the 2 tall plastic screw standoffs on the rear so they did not interfere with pulling the large decal off the bottom.
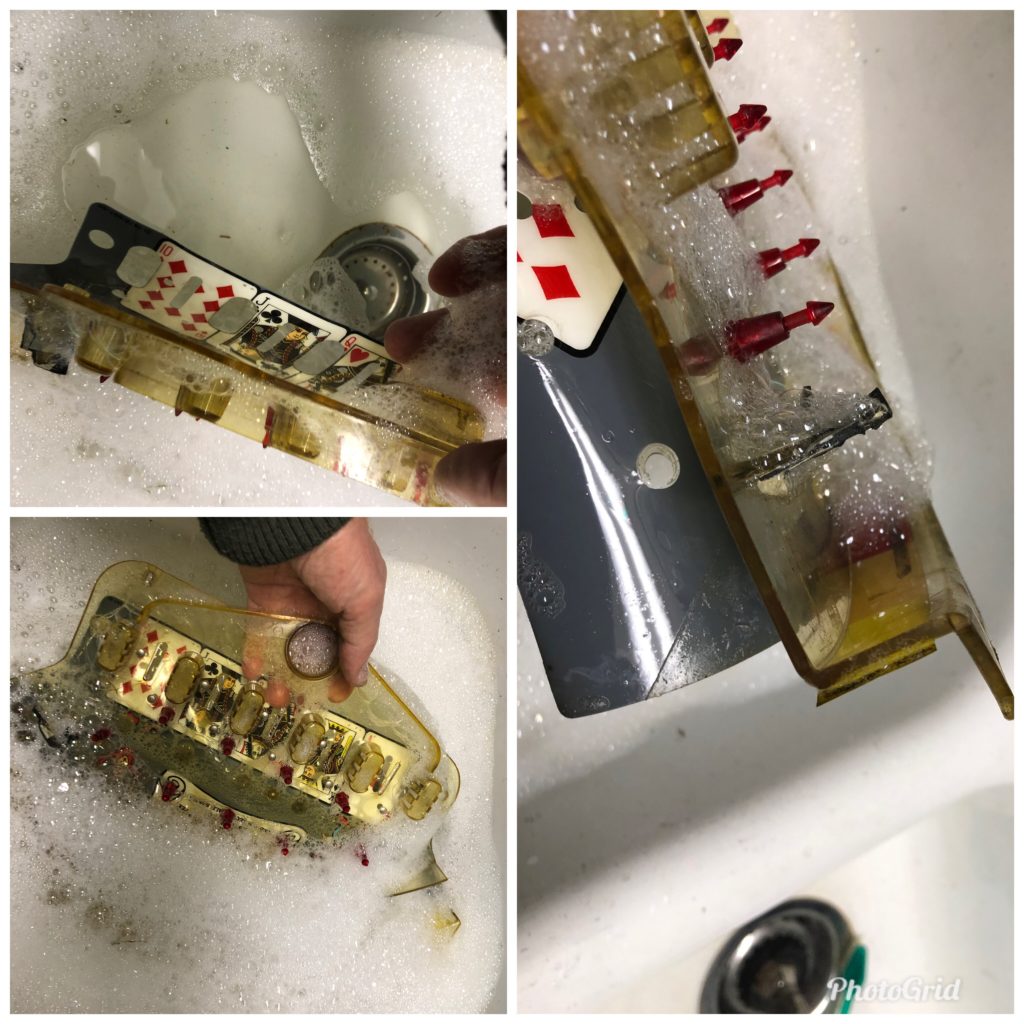
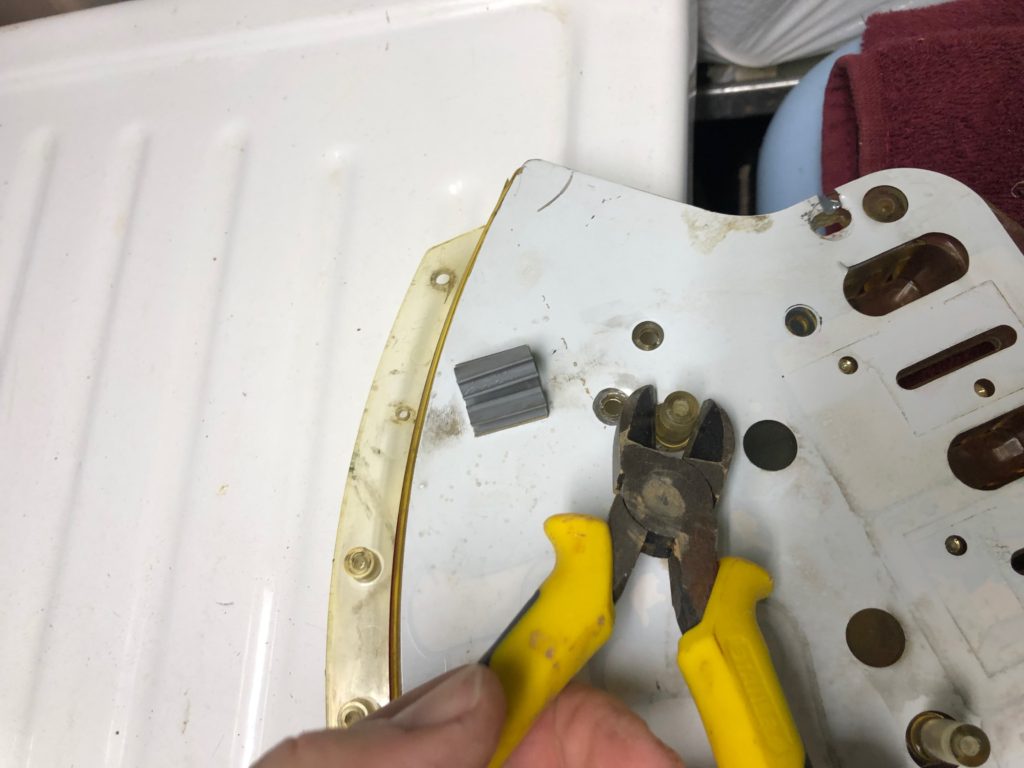
Then I carefully began the pull the large decal. slow and steady and adding hot soapy water under it as I went. It came off without any damage at all. I repeated the process for the rear decal. That one was a little “stickier” but I managed to remove and save it as well. Hint: leave the wire loom retainer (gray thingy) on the bottom of the decal. If you try to remove it, you may damage the decal … and you will need it anyway to hold your wires.
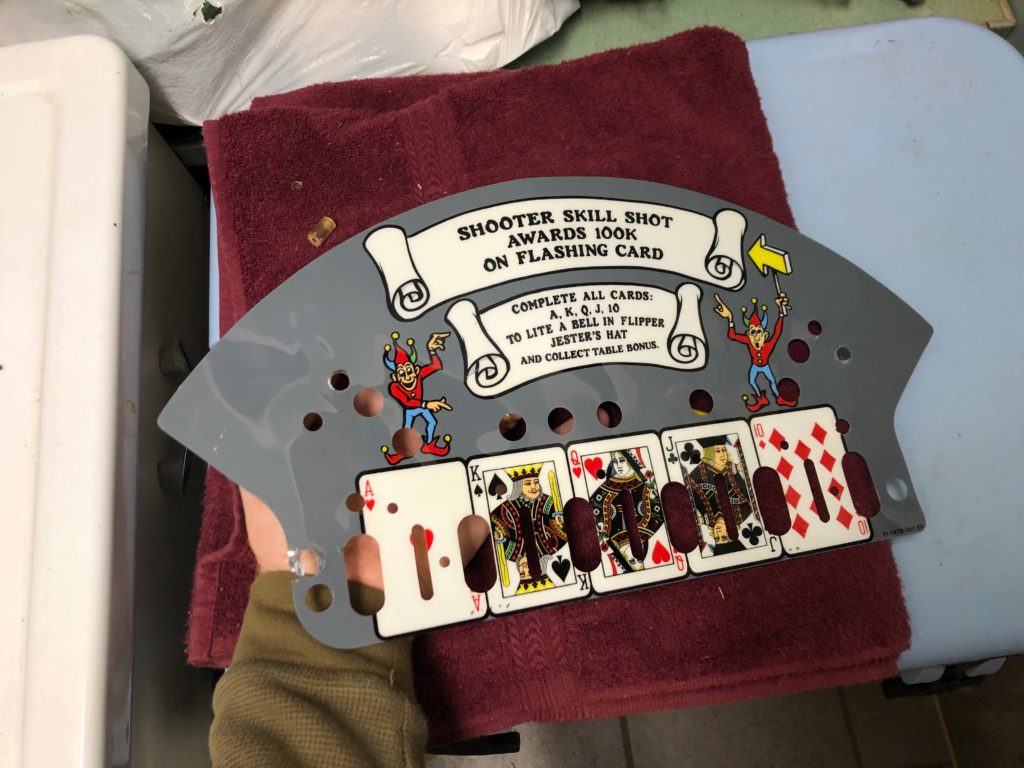
Now I needed to removed the small amount of glue residue that stayed behind on both decals. Goo Gone is perfect for this. Spray. Wait 2 minutes. Use a dry soft rag to rub off the glue. Even a small amount of this kind of adhesive is a pain to get off, but stay after it and eventually it will be free of glue. Finally, it was time to re-assemble my upper playfield. I laid my cleaned decal in place on the bottom and began the process of riveting the switch array back in place. First, I had to choose a rivet size. The Pinside thread (and original Williams specs) recommends a 1/8″ by 7/32″ long rivet. I tried those and they were just too short to properly crimp so I moved up one length to 5/16″ and they worked much better. Remember, if you have to squeeze or crush the rivet any amount past “firmly”, then the rivet is too short or too long. I was able to use my hand rivet tool to address all but 3 of the total 10 rivets needed. For the remaining 3, I used a low profile screw (I ground the head down) and a nut with blue Loctite. CAUTION when adding Loctite so close to the edge of that decal … just a small drop “too much” of the Loctite can very quickly “wick” up and under that decal. Ask me how I know. Ask me how hard it is to clean out blue Loctite from that decal when half the switches are already riveted on. I used a wooden stick based “Q-tip” that I use for detail work on my guns but it still was not easy. Live and learn. I got them all done and they are all nicely attached. Yay!
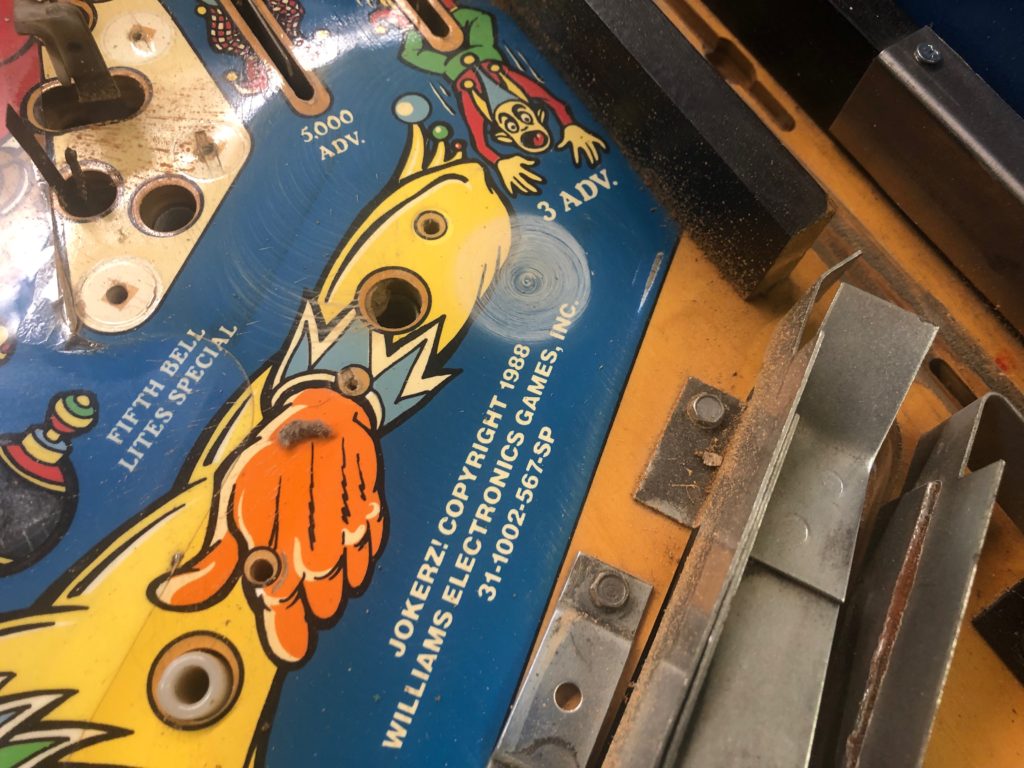
I had ordered new red mini posts as well and the final steps to re-building my upper playfield required that I re-populate all those posts. The red mini’s are easy and were done in just a few minutes. Then I remembered a post on Pinside where someone had modified the post types to make it easier and more reliable long term. I followed the same instructions. Basically, you are placing a star post in place of 2 metal posts with a rubber stretched between them. That rubber (under constant tension) tends to pull/warp and buckle the upper plastic playfield. The star post is an elegant mod and works well in practice. Heading into the home stretch and I had just a few things to finish. I added 2 SMD yellow LED’s in the front row but covered them in the yellow rubber condoms. I added naked warm white frosted LED’s for the back row.
For reference, all lights in the upper playfield (except the rear flashers) are bayonet style with twist lock connectors into the light boards. When I mounted the light boards back to the playfield, I used some more blue Loctite because you really can’t crank those nuts down without damaging the circuit board. The Loctite ensures those nuts will stay. The last steps were to add rubber rings to the posts and to ensure the decal was somehow adhered to the bottom so it did not droop and interfere with game play or get damaged. I use E6000 for everything – hell, I put it in my coffee. OK, so that’s a stretch … but I use it a lot in Pinball repair. It’s perfect for this situation. A very small “dot” of it placed in 5 places along the back of that large bottom decal is all you need to hold it tightly in place. If you ever want to remove it, just gently pull and it will release with no harm done. I did the same for the rear (yellow and red striped) decal. Upper playfield DONE.
Mylar, Plastics and Game 1
The Mylar on this game needed a good polish and the playfield needed some cleaning as well. Polishing the playfield is fairly straightforward but its messy. I use a 2,800 RPM hand drill with polishing pads. Keep the pads dedicated to each polishing “grit” by storing them in labelled baggies. I start with Meguiar’s Medium Cut. You don’t need much. If you use too much it just spins and sprays all over the place anyway. Polish until the pad is “almost dry” but not completely or you will quickly build up too much heat. Use your hand from time to time to check the playfield temperature. Warm to very warm is OK – HOT IS NOT!

Then I wipe the playfield down clean and start with Meguiar’s Fine Cut. Repeat the procedure using Meguiar Mirror Glaze and you’re done. Depending on the amount of scratching/cloudiness to your Mylar, you may need to start with a more aggressive polish. If you are new to this I suggest you choose a spot away from the flippers and away from the center of the playfield and test it – go through all 3 polishes and see if the result is satisfactory. If it’s not “shiny” enough, it’s more likely you did not START with a course enough grit – not that you did not spend enough time working the other/finer ones.
The logic is simple. Course grit removes the deepest scratches, Medium gets the next ones BUT can not now remove any course ones left behind in stage one. Get the first stage wrong and the Mylar will only be as “shiny” as that first choice. I’ve never gotten Mylar to “shine like new” but I have always vastly improved the look and you can do the same. I finished the day by using my Super Clean degreaser to clean up the pop skirts and the inside (blue painted part) edges of the cabinet to the left and right of the playfield. I swear I don’t know how that could get “greasy” but it did. No amount of soap and water would remove it but the Super Clean did!

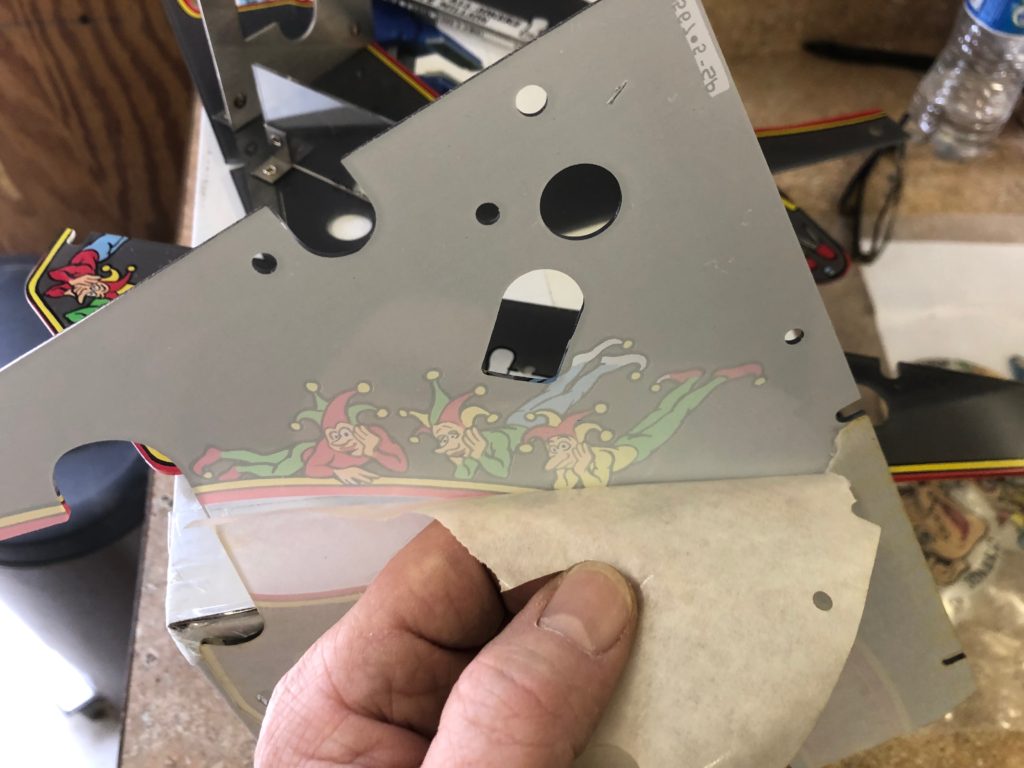
As I noted when I picked up the game, there were also a few spots around the edges of the Mylar that needed to be trimmed away. When Mylar loses it’s grip at the edges, it not only comes loose but it also grabs any and all available dirt and grime and holds it to the now exposed adhesive. Those lifted sections cant be saved. I started by trimming them. First step is the plan the attack. You are literally cutting away part of a pattern that was very purposefully placed on the playfield. The cut you make to remove it has to:- Look good- Work well (not lead to any playfield wear)- Be “far enough” into the good Mylar (so no more lifting takes place) I made mental notes where I needed to cut (it was 4 different places) and here are my steps. Start with a new blade or fresh razor knife. Make one “score cut” not all the way through Mylar, then turn the knife on edge (may need to expose several lengths of blades). Cut along score mark, while tugging loose end. I made all the cuts successfully and the game looks significantly better without the “black flaps” of Mylar all over the place.

Time to move to the new plastics set I ordered and get this game ready to play! The first thing you notice when you compare the old plastics to the new is that they are NOT the same. Oh, all the shapes and colors are the same but the old plastics have parts riveted to them – like quite a few parts! They require that you drill out rivets in the old plastics and remove, then move those components (mostly errant ball deflectors) to the new plastics. So what I had planned to be a pretty quick process to get the new parts populated onto the game was at first slowed down by the need to get the new plastics set ready for install.
An hour with the rivet tool and I was now ready. It was the weekend and I was glad because I would need a bit of time to pull this off. Remember – I did not take this game apart. I picked it up with all the playfield components in a box. This makes the challenge of knowing what post and what gate goes where even more challenging. The rough order is to add the playfield posts and gates as you go (first), then add the center upper playfield, then the side ramps and work your way down to the slings and flippers. After 3 hours or so, I had it back together … except for the slings. Darn it. I was a few metal posts short.
I did not have enough of the steel rods that go through the star posts and into the playfield either terminating in a #6 wood screw or a 6/32 machine end. I was missing a few of each. I racked my brain on how to make/modify or jury-rig it to get it together but to no avail. I would have to wait for the parts from Marco to finish adding the sling rubbers. No matte. I didn’t wait anyway. I played a game or two and even without the slings I could tell it was going to be fun! The only real issue presenting itself was the drops being super “sticky” and taking forever to drop after being hit. I had already prepared for the repair by ordering all new drop target components. That fix would be for another day.
I’m Melting
Today I tackled the little seen backbox area. The white colored light board is always a mess on these games and the only thing that seems to be able to get them clean are the industrial strength degreasers – like Super Clean. This stuff is surprisingly powerful so I usually spray the rag, then use it to clean with. My exception to that is when cleaning the cabinets. After testing a spot for potential paint loss, I will spray the whole cab, then after a minute, wash it down with a damp rag to remove any remaining degreaser. After cleaning the back box light board, it looked almost new again. Next I moved on to replacing all the 47 incandescent bulbs with 2 SMD warm white LED’s. I then replaced all of the burned out flashers with fresh incandescent #89s.

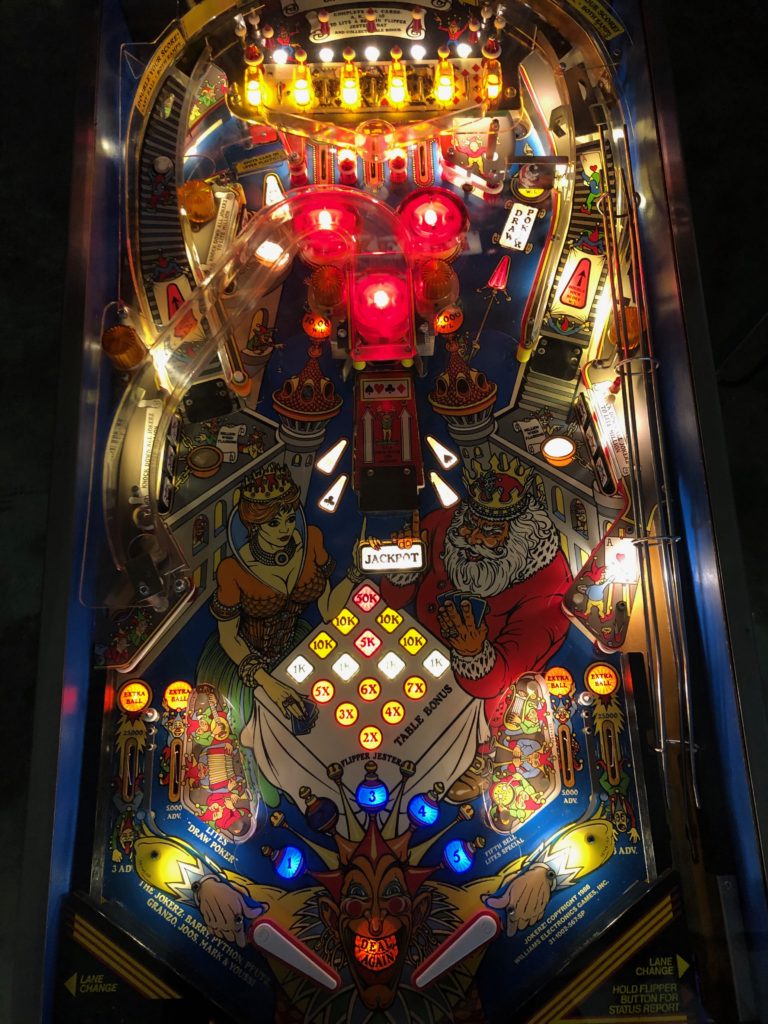
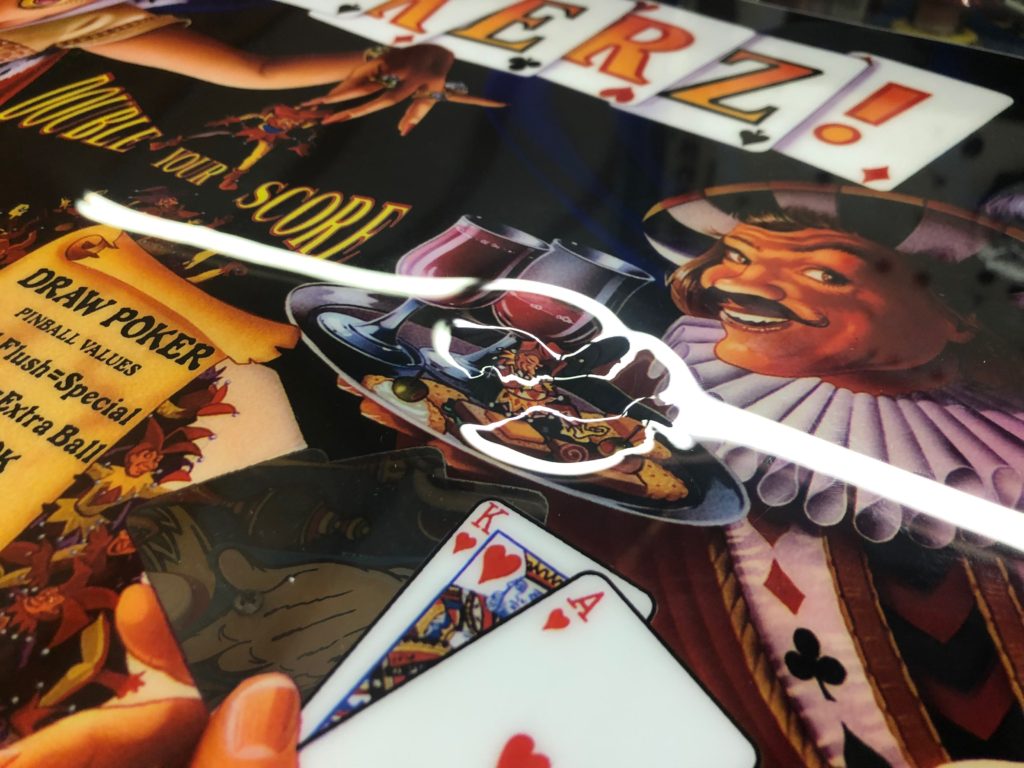
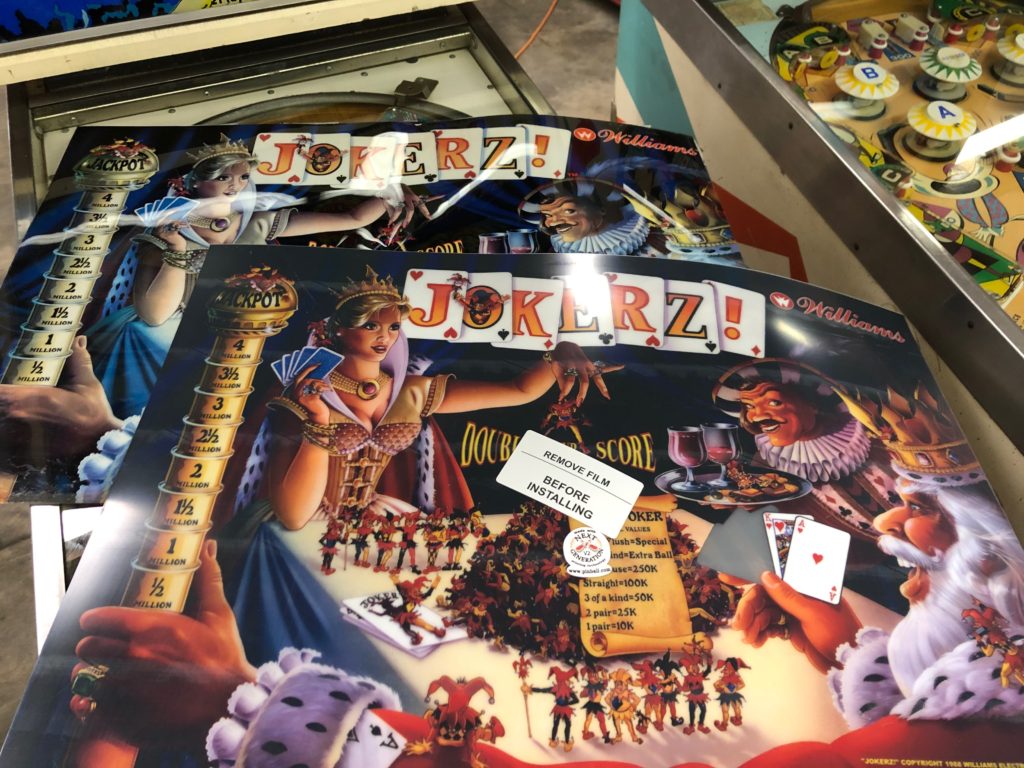
This, it turns out, was a mistake as you see later. Next I moved on to the spinning card decal on the draw poker wheel mechanism. I tried peeling the old one off – no luck. I decided to use my heat gun on low and once it got started it came off nicely and left almost no residue. I installed my new one using the index marker (black triangle on the decal and “notch” on the wheel itself) and squeegeed it out flat. It looked awesome compared to the dirty, bubbled and blistered one I just removed. I Installed new translight and was disappointed with the color saturation – it was not the translight problem, it was the fact that I had just installed 2 SMD LED bulbs in the backbox – it was simply too bright. Oh well, time to play a game anyway. I could always swap out the LED’s for a single SMD later.
About 5 minutes into the game I started to smell something burning – it was my translight. The new flashers I had just installed that correspond with the Draw Poker function in the backglass were locked on because of a previously blown transistor at Q16. They had gotten hot enough to melt my translight right around the Draw Poker see through window. Bummer. I typed a quick message to the gentleman that I ordered it from on Ebay begging for a “frequent flyer” discount. He was kind enough to allow one so I ordered a new translight. While waiting for the new one to arrive, I was struck by the idea that maybe I could stuff the older/melted one in behind the new one and get 2x the saturation of colors – maybe even leave my 2 SMD LED lamp in? The translight arrived when I was traveling but when I returned home, I popped open the shipping tube and installed it in front of the other one. The registration was perfect and lo and behold so was the color saturation! It almost looks like a backglass – really nice!
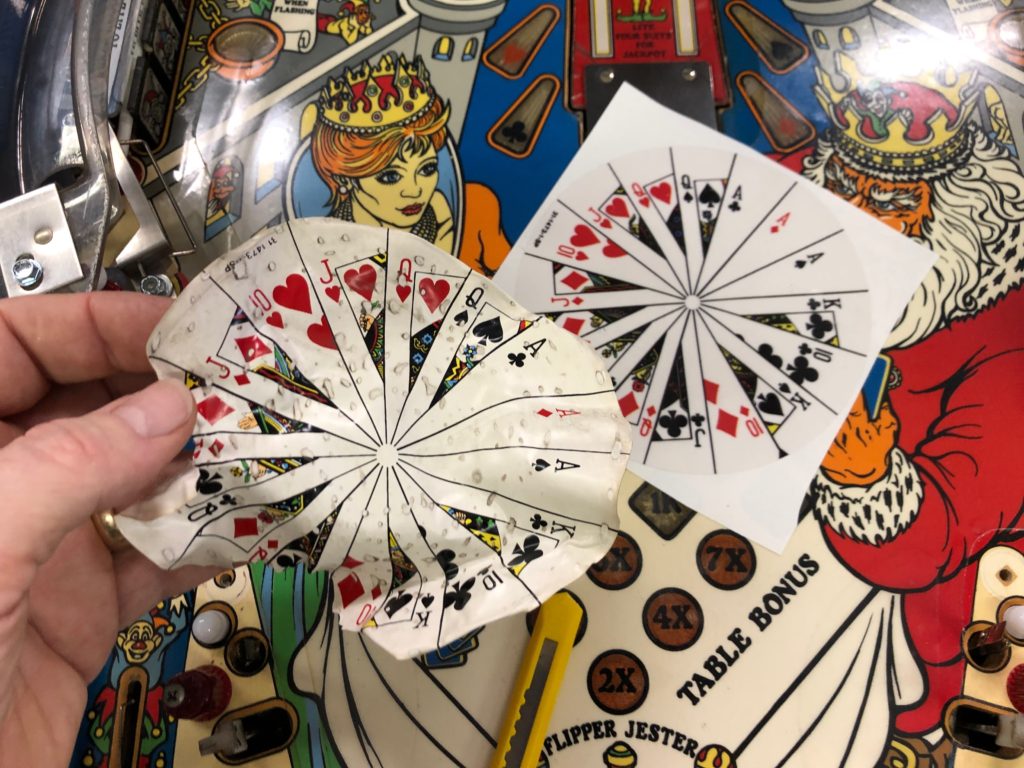
Now I noticed that the cards on the draw poker wheel were about 1/2″ our of alignment with the see through window. It was bugging me. I searched high and low for a way to adjust the rotational/index alignment of the spinning disk but without success. I could test it using the menu system. I could make very small adjustments by loosening the 4 mounting screws in the back. I could make it move step by step in test mode. I could move it by hand to align it BUT nothing would make the adjustment “stick”. So I solved it the old fashioned way. I pulled it out of the game and tossed it in the trash. Kidding. I ordered another replacement decal for $9, marked the one that was installed so I knew how much to rotate the new one. Taped the new one to the old one with painters tape. Played a dozen games to watch it and make certain it was lined up, THEN I used my heat gun to remove the old one and install my fresh one in the correct position – problem solved!
Make it Sparkle
I had already Installed about half of the total insert LED’s and today my project was to add the remaining. I color matched all the inserts and am pleased with the result. I used some of the Comet flex product to great effect. Specifically the arrow inserts under each of the left and right ramps. the “10,00 W/L” large inserts left and right of the center ramp and, finally, the “Deal Again” insert between the flippers. All of the GI and backbox were LED’s using Comet 2 SMD Warm Whites with the frosted lens. I took the time to document the insert LED type and color and that chart is listed here for reference. While under the playfield I completed a repair a 2 terminal connector that someone had cut and then rewired improperly. These were a .062/2 pin style housing and I had a male/female pair on hand so in just a few minutes I had the new terminals crimped on and inserted into the fresh housing.
Dealt a Bad Hand
The fact that the Draw Poker flashers were not working (locked on) was driving me nuts. I read the schematic and for the life of me could not find which transistor drove that flasher section so I posted the issue on Pinside. I got a quick response that narrowed the issued to the Q12 pre-driver and Q16 transistor. I had already checked the board and noticed that Q16 was blown out so this confirmed what needed to be fixed. I had a TIP102 transistor on hand and the 2N4401 pre-driver as well so all I needed to do was remove the circuit board and get busy un-soldering and soldering. Removing the system 11 board is very straightforward. Take a bunch of pics of all the plugged in connectors, then unplug them all – then unscrew 6 phillips head screws to unbolt the board from the metal stand-offs.

While I had the board out, I soldered in a new remote battery holder that I ordered from Marco BUT the supply wires were waaaay too short, so I needed to first solder on longer leads (WHY!!??). With the new leads in place I had enough length to mount the battery box almost anywhere within the head. To pull the old burned out components off the board, I used my Hakko desoldering tool. First I removed the pre-driver (oops, removed Q10 instead – soldered it back – no harm). Back on track, I desoldered the CORRECT component, the Q12 pre-driver and soldered in a new one, clipped the leads and moved on to the Q16 transistor (TIP102). Ugh. The Q16 was a mess- ground leg was completely blown out, the trace was lifted and the through hole was enlarged. The traces were lifted on the center leg too although the last leg was fine. When I tried to add solder to the blown out grounded leg, it simply dripped through the hole and pooled across all 3 legs of my newly installed transistor – time to desolder and start over. This time, I scratched the front of the circuit board to expose the ground trace and soldered the transistor ground leg to that exposed area using a solder “blob” or solder trail

Molasses Drops
Today was drop target day. The drops in Jokerz play a unique role in the game vs other games. First, there are 9 (yes, 9) drop targets spread out over 3 individual banks. The lower banks (left and right on the lower PF) are positioned so they can be purposefully targeted. The upper left bank – not so much. No matter … mine were taking a month to drop after hitting them and looked like they had taken a frontal attack from a nuclear blast at some point – they were a mess. I bought all new drop targets and (I thought) a completely new set of decals. I got the targets, but my decal set from Planetary Pinball was 3 Jokerz short of a full deck. I sent them an email asking for the rest.
Meantime, I set about rescuing the best 3 from the 9 old ones. To pull the drop targets for cleaning and repair is super simple. Loosen the wood screw holding the single bulb that lights the insert for each and rotate that bulb holder out of the way. Carefully pull the circuit board connectors from each drop target board (there are only 2). Then use your 1/4″ magnetic nut driver to remove the bottom 2 screws holding the drop target frame to the bottom of the playfield. Then remove either one of the top screws. Next hold the entire mech while you remove the last screw (there are only 4 total). Finally, use your 9/16″ nut driver to remove the coil stops on the attached coils, thus allowing you to remove the coil from the bracket, freeing the bracket to be removed entirely. I always mark which bank of targets each represents (Lower Left, Lower Right, etc.) just because I want to put them back where they came from – even if they are interchangeable. If one of them was experiencing any board issues or misbehavior, I don’t want to unknowingly transport that problem to a new spot in the game. While the coil is hanging there from the bottom of the play field, I slip in a brand new coil sleeve. The next steps are all “Mike Rowe” dirty jobs kinda things.
Pop off all the retaining clips, carefully save all the washers and spray the entire bracket with your favorite degreaser (Super Clean for me). Spray and clean those washers and clips too – very important as the drops “slide” along the face of those parts and you don’t want them all sticky with grease and God knows what. Use a bit of alcohol to clean the face of the new targets and then stick the new target decals into position. Rub them hard to get good adhesion to the surface of the new target. Add new target springs cause the old ones are probably worn out, reassemble and you’re ready to put them back in the game.
Well bummer. I played a couple games and the drop targets are super snappy when going down, but now they are struggling to go UP! How can that be? Brand new everything, sparkling clean, etc. Well, there can only be a few things that cause this. Especially because all 3 banks are the same issue. Either I put them together wrong (I did not), there is not enough voltage getting to the entire circuit (there was) or … the brand new springs I put on all the drops are too strong (they were). So I spend the next 15 minutes digging through the garbage trying to fish out the 9 old springs I tossed when I was finished rebuilding the drops last night. Scrape the potato peeling off and installed the old vs the new and voila – they all work again. How on earth did I get drop springs that were “too strong”?
My Head is Loose
I drove over to see the seller during lunch today and returned the spare ramp he loaned me. While there, I had a chance to see some new games he had gotten in. There were quite a few and several that caught my eye. Bally Frontier, Gottlieb Totem, Harlem Globe Trotters to name a few. I was mostly interested in a Gottlieb Volcano that he had. It needed quite a bit of work but he was getting much of it fixed before offering it for sale. I put my name at the top of the list when it was ready. I headed back to work and ended up leaving work later than normal. Once home, I had a ton of work to do on planning our new house. Tami and I spent more than an hour reviewing the electrical plan and making notes for our builder. When we finished there wasn’t much time left for Pinball repair BUT … I thought I might at least head out to the pole barn and get one thing done on Jokerz. So tonight was the night to tackle the head. If you remember, it was cracked, chipped and separated in several areas. There would be no quick fix for the cosmetics of it but there needed to be a permanent fix for the structural issues. Tonight I would address the structure of it to make it sound again.

The head was cracked at the top left and bottom left dovetailed area where the side panel joins both the top and bottom. The back panel was completely lifted from its rebate on the left and halfway across the bottom. My plan was to use glue and my Paslode finish nailer to get it back sound. I wedged a screwdriver into the top and bottom left joints to force them open while adding glue. When the glue had settled into the joint, I used the Paslode with 1 1/4″ finish nails to secure it tightly. The rear panel was trickier but no too difficult. I carefully pried the panel away and backwards from the entire side/top frames. This was a little scary as I was essentially pulling the entire circuit/ground board assembly with it. Being careful not to COMPLETELY pull it free from the right side where it remained fully glued, I was able to drip glue into the interior of the head using Q-tips into the void I had just created by pulling the panel. I then pushed the panel back to its correct position within the rebated edge and used the Paslode to secure it. Pretty? No. Functional. You bet!
Fire Wire
The power cord always looked a little sketchy to me. I decided to order a 14′ replacement from Marco. Like everything related to restoring a Pinball, it’s not as straightforward as you think. I needed to find out how to get the original cord loose from the filter/ground box connection before I could proceed. First, I unplugged the machine. Then I checked to make sure I had unplugged the machine. Next I removed the 4 wood screws that mount the filter box to the sidewall of the cabinet. Now I could see the soldered connections and the strain relief that was used to secure the cord in the box. It is easier with these types of strain relief designs to “push” the strain relief back OUT of the box, then unhinge it and remove it from the cord (save it as you’ll need it again). I took several pictures to make sure I soldered the new cord correctly.

Quickly there appeared to be a problem. The original cord was European color coded and the Marco cord was North American. I checked Pinside and Vid1900 had a great section on how to replace an old power cord on a Williams system 11. I followed that to the letter and all ended well. The old cord was quite loose on the plug end and I feel much more comfortable with the new one installed. There is great info on this link for anyone looking to do the same!
Rocky Ramp
I was going to call it quits but Pinball can make you pretty obsessive. I just couldn’t leave that cracked lift ramp alone. So on a rainy weeknight around 8:30pm I grabbed my rivet tool and headed out to the workshop. I can knock this out in an hour – right? Nope. But I did get it done in 2! Not too shabby from a flat footed start.
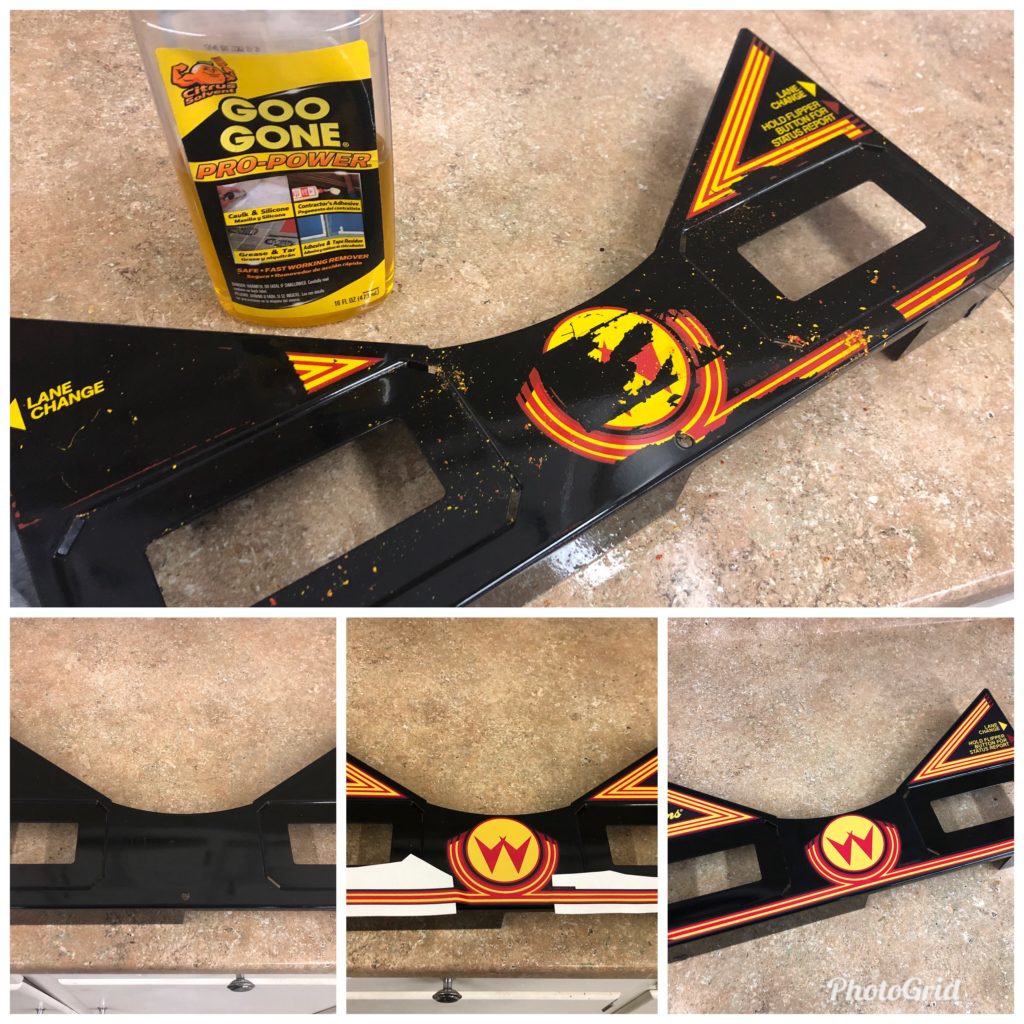
Let’s see … just getting it off seemed to be a bit of a puzzle. The mystery is now solved and I’ll share it with you. The entire assembly is held on by just 2 machine screws. Look under the playfield directly under the attached metal ramp flap and you’ll see them. ONE of them is under the motor bracket and you’ll need to remove the 4 motor bracket screws to get to it. Use your 1/4″ magnetic nut driver and you’ll have the motor bracket off there in no time. Just gently move it to the side and let it hang by the soldered joints to the attached switch. Now remove the 2 machine screws that hold the ramp and the entire ramp comes out. As soon as I got it out, I made a quick scan of the face of the ramp “just in case”. Then I turned it upside down onto a piece of 0.093 Lexan and traced the exterior and cut a fresh piece using my jigsaw and laminate blade. Now I was ready to tackle that decal.
Now that it was out, I was now keenly aware that there was a bigger issue. The red decal was glued on. I also had no idea what it was made of. Would it come off with some gentle tugging? Was it paper and it would quickly tear? I got my first answer – NO. Pulling was not going to accomplish anything good. Next step was the heat gun. That was going to work. Going slowly and taking advantage of the broken pieces to peel just a little at a time, I started to make headway. I kept the decal “just hot enough” to keep it moving until it was completely off. Steady and slow is the way – no need to hurry it or you might end up with “2 decals” if you know what I mean.
It was off. It was incredibly sticky. The good news was that it was also made of the SAME material as the upper playfield decal – maybe a little thinner but certainly the same. That means the cleaning procedure is the same. Goo-Gone and lots of rags. I sprayed and let it soak for 2 minutes. Then I started rubbing, careful not to “catch” an edge and wrinkle it. After 5 minutes or so it was clean as a whistle. Time to get this thing glued back to my newly cut Lexan ramp. But first … I took one more “clean” scan.
To put the decal back on the ramp/Lexan requires some special tape. It’s from 3M and the code number is 467. It’s sticky on 2 sides and super thin. It’s used by many Pinball restorers to attach decals to ramps. Just get the old decal flat, cut a section of the 3M tape slightly longer than the decal. Square up one end of the decal at one end of the tape and then work the tape bit by bit until the entire decal is covered. Remember, you are putting the sticky part of the tape on the FACE of the decal. Next, trim away the excess tape from around the perimeter of the decal. Finally, pull the brown protective covering off the tape and prepare to “stick it” to the new piece of Lexan. Carefully align the bottom (widest) part first and eyeball the rest. There is NO TEST STICK. If it simply touches the Lexan it is bonded until eternity. You can see on mine that I got it a 1/16″ off to the left – oh, well. It is now married in that position. No prenuptial is going to help undo what is done. Proceed carefully.

All that’s left is to rivet the Lexan to the frame up top and to the frame AND the ramp metal on the bottom. Don’t forget to include the ramp metal flap in your parts sandwich when you prep for riveting the hinge end (ask me how I know to tell you that). The top is easy – 2 parts, 2 rivets and you’re done. The bottom has the metal ramp flap, the Lexan/decal, the entire frame piece AND, finally the hinge all included in your rivet job – again add 2 rivets. Couple hours and it’s looking brand new. It’s made from Lexan and will never crack again. Now about those black key lines and missing paint around that ramp … hmmmm.

Dirty Apron
I had ordered a replacement decal for my damaged apron almost a month ago. It still hadn’t come so I reached out to the seller who shipped me another one. Well, today – they both showed up. One with a ship date from more than 3 weeks ago. No matter. It was here and I had a few minutes to duck into the shop and prepare the apron for the install
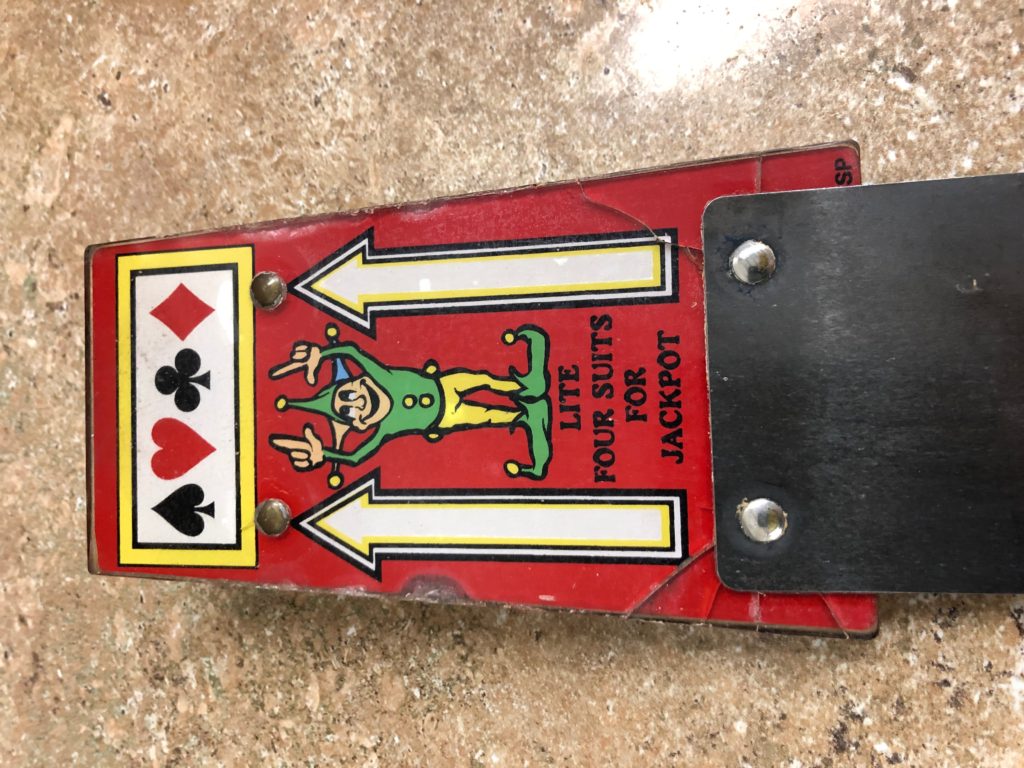
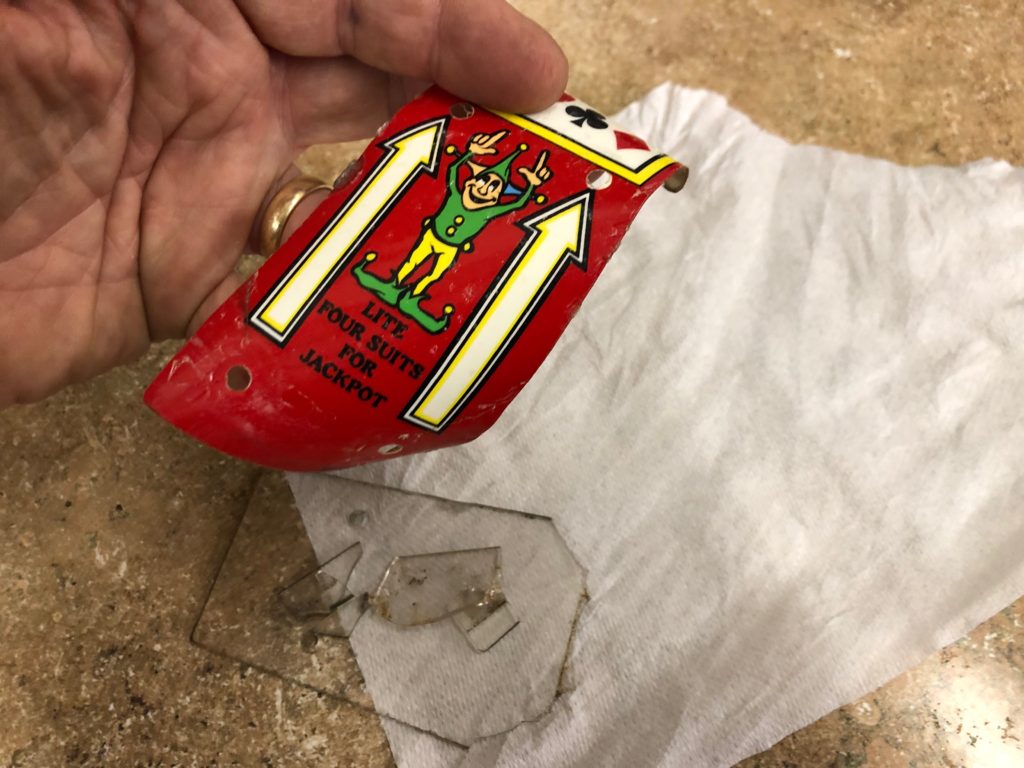
Prepping the apron involves REMOVING all of the existing art. It’s painted on and getting it off is tricky. I soak mine in Goo-Gone for 5 minutes then use plastic razor blades and my fingernails with a rag to step-by-step scrape away the paint. You need to be careful that you don’t remove the black base paint or you will be refinishing the entire apron. When you finally get all the artwork scraped off, then wipe down the apron with some alcohol to remove the remaining Goo-Gone. Next I install the left and right triangles. Line them up along the top edge of the instruction card recesses. Let them stick in the middle and then work the decal left and right. This eliminates air bubbles.

The center decal is a little trickier to install. First, I remove the backing from the large “W” medallion and a little bit to the left and right as well. Position the decal so the base of the “W” is right down near the bottom edge of the apron and make certain it’s level. Then let the bottom edge stick to the apron and work your way up until the entire medallion is on. Now you can work the “wings” that are left and right of the medallion because you left the backing on. Peel away about 2/3rds of the backing and work the “wing” toward the outside of the apron taking care to keep it level along the bottom as you go. Repeat for the other side and you are done!
Playing Cards
So how’s it play? Great! I’m a big fan of the simpler games and Jokerz is very easy to play and understand. Plus, it has 3 ramps and lifting ramp, 3 banks of drops, a multi-ball and a spinning deck of cards in the backglass. What’s not to love? A few if my favorite things about the game:
- The left and right ramps are challenging to hit consistently. They look deceptively simple – they are not
- The drops are challenging as well. The top left set is mostly hit by the pops action but the bottom left and right drop targets (especially the single target closest to the flippers) are hard too.
- LOVE the Draw Poker animated backglass. What a fun idea
- The flippers do NOT have to be super powerful to accomplish what needs to be done in the game. Each ramp is easily hit, yet the flippers don’t beat up the plastics in the game.
- The asymmetrical ramp shot up the middle is brilliant. Not much risk at all of having SDTM drains – well done
- I really like the simple but well executed sounds and call-outs
- The multi-ball launch into the pops area
- Lock stealing is a game function
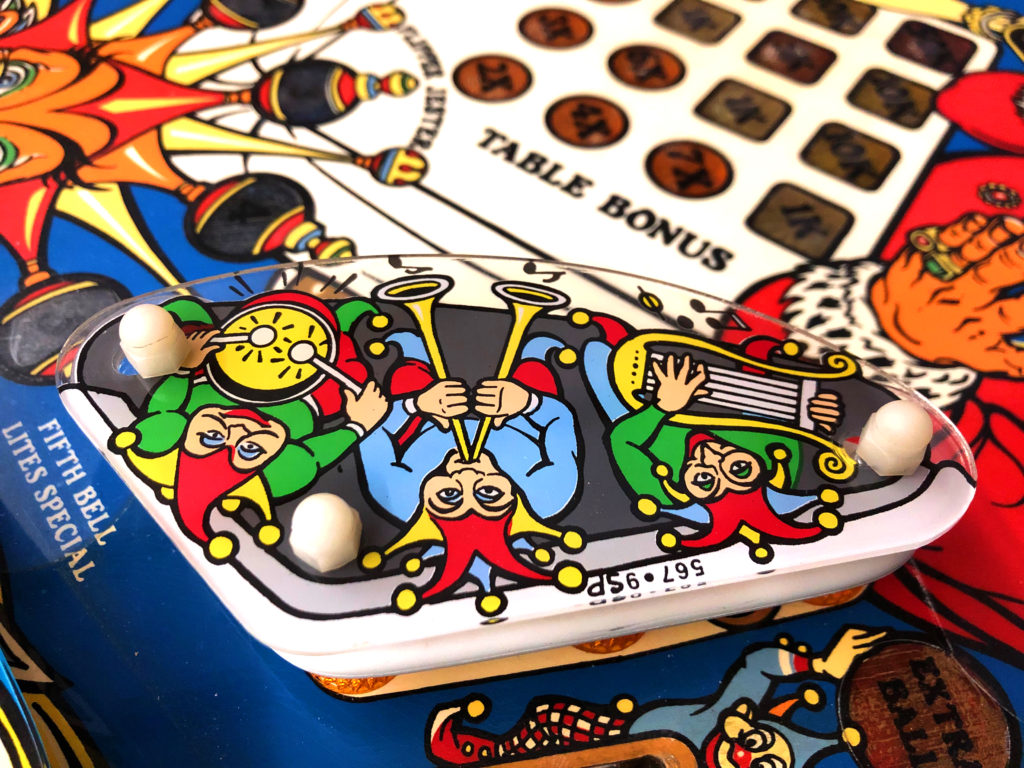
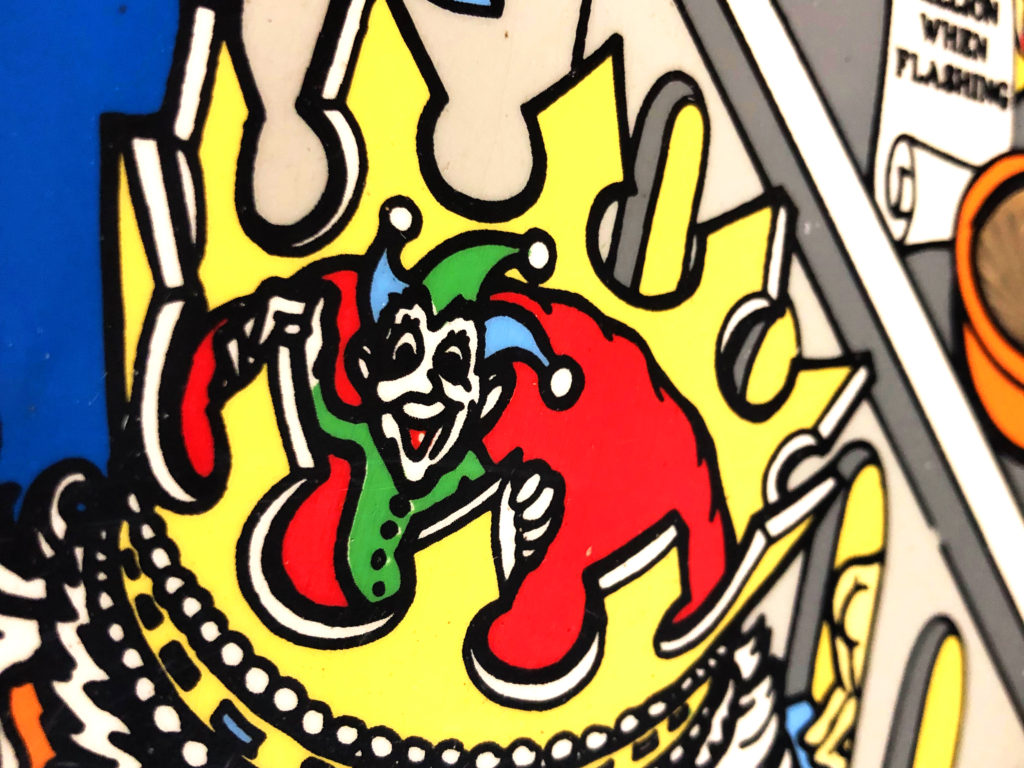
- Finally, the art – nice job John
For some really great photos of Jokerz during a shop out, visit http://www.videoengine.com/pins/jokerz/jokerzmain.htm