“Soviet Bromance”
As you might guess by looking at my collection, I’ve been on a bit of a mission lately to collect EM titles. I’m also a history buff and when I got the chance to pick up a local copy of Williams “Space Mission” I was excited at the opportunity. My problem is that I’m in the middle of building a new house and if I asked my wife to buy one more pinball she would likely drop one on me. If I was to get this machine, I would have to be stealthy. But how do you “sneak” a pinball machine into the house? You’ll see a bit later, you don’t.

I knew the seller and had purchased games from him before so it was a quick trip once we arranged our schedules. I was pleased on the day we planned to meet because (at least at the time) it looked like it was not going to rain! I have a pickup truck and my track record for picking up games in inclement weather is near perfect.
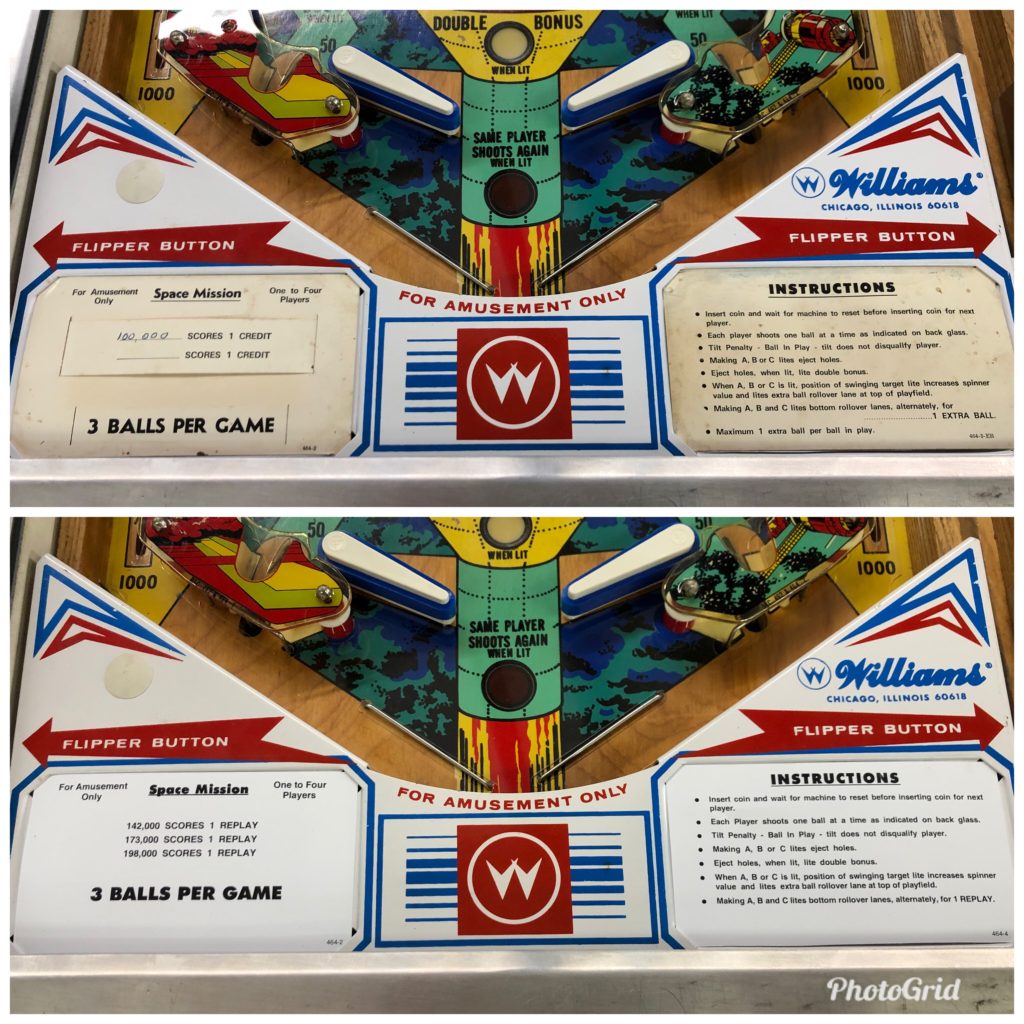
I got there at the appointed time and met him in his shop/garage to see the game. We talked pinball for a bit and spent a few minutes checking out a nice condition Gottlieb Haunted House he had just picked up. That title is still on my wish list for a later date. I turned my attention to Space Mission and noticed right away it had some issues. The biggest being the cupped inserts, a destroyed apron (missing paint) and the fact that it simply would not start player 3 or 4. I shared with the seller that the inserts would require clear coat or at a minimum a playfield protector installed. He agreed and was willing to adjust the price accordingly. I offered him a price that allowed me to buy a protector and asked if he had another apron laying around to replace the damaged one. He did. He changed it out on the spot. I bought the machine and loaded it. Done

I hit the road and it immediately started to rain – well drizzle anyway. Whew! I was worried I might break the streak. The roads got slick and I began to make a plan to pull over and tarp the machine. The thought had barely left my head when I came over the crest of a hill on the narrow road I was on and came upon a car off the road and in the ditch. Waaaay in the ditch! I slowed but saw that no one appeared hurt and there were a half dozen locals standing around looking like they had the situation under control – I moved on. I stopped a bit farther down the road in a parking lot and put a tarp on the machine – good move, it started to pour. I made it safely home and unloaded the machine into the pole barn. Tami was out at a concert and although I’m sure she knows the Space Mission sitting in the pole barn is “new to us” she still hasn’t said anything. How could she? It was such a good deal and it’s out of the way in the barn!

One of my favorite things about the Pinball hobby is not the hunt for a new pinball, not playing pinball, not listening to pinball podcasts, but actually taking a broken, or imperfect machine and bringing it back to life in a step-by-step, methodical fashion. That was my plan with Space Mission. First, a little background on this title …

Space Mission is a Steve Kordek designed game released in January of 1976. It was designed to celebrate a moment in time when 2 superpowers took a step back from being wary of each other and cooperated to achieve a common goal in space. I was 16 years old at the time and remember vividly the US Bicentennial of the same year AND the general attitude and politics of the US and Soviet governments of the time. We were nearing the end of the cold war and Thomas Otten Paine the NASA Administrator of the time sent a letter to the Soviets proposing a cooperative space mission. A few months later it was set. The US and Soviets would dock in space, ceremoniously shake hands, conduct some joint scientific experiments, have lunch and return home safely. For the most part all went as planned. They successfully docked on July 17th 1975, and overall the event was heralded as a huge success for the newly minted process of “detente”. The US team had a bit of trouble on splashdown with some poisonous gases entering the cabin, and although it was a close call (they spent 2 weeks in a hospital in Honolulu) they all recovered to tell the tale. Here’s a cool tidbit of history. The US and Soviet flight commanders, Stafford and Leonov became lasting friends. According to Wikipedia, Leonov is the godfather of Stafford’s younger children – now that’s detente
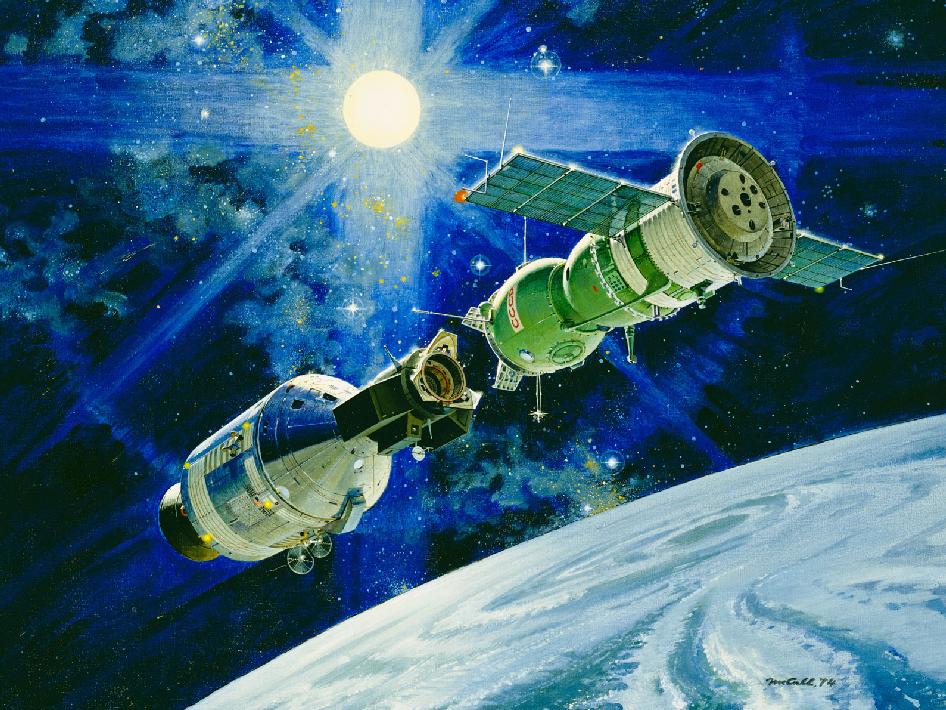
The artwork on Space Mission is from Christian Marche who has more than a hundred Pinball machines to his credit. The backglass art was inspired by a painting by Robert McCall. Check out the image and you’ll see the unmistakable similarities (image from NASA website). Space Mission is actually 2 machines. It has a little brother named Space Odyssey – a 2 player game vs the 4 player that is Space Mission. They made 11,652 total units of Space Mission with roughly 5,600 units for the US market and the remaining exported overseas. It’s model number was #464 and they sold to distributors for $861.50 and had a manufactured cost of $355.99 (info courtesy of IPDB)
The first thing I did when I got the machine home was to start a deep clean. The most obvious area is usually the cabinet and in this case it was pretty dirty. Sitting for years in a bar will deposit a surprising amount of nicotine that is hard to see until you spray some purple power on it. You need to be careful because these types of degreasers can easily remove paint if left on too long. My method is to test a spot first. If all goes well, I’ll spray, let sit for 15 seconds, then wipe off. I always follow that step with a clean, wet cloth to remove any residual degreaser. Quite a bit of tar stains came off this machine in the process. It was looking better already!

Next I moved to the interior of the cabinet. The seller had already done some cleaning but there were lots of pieces of nuts and old fiberglass insulation that either squirrels or mice had introduced to the game at one time. It grabbed my trusty mini-vac and got rid of that in short order. The playfield was already in great shape as the seller had cleaned it as good as it was going to be without a full touch-up/clear coat. No further work was needed. However, there was one plastic on the play field that had a large chunk out of it from an errant ball. In addition, the plastics had the expected yellowing that comes from the “bar life”. I knew that CPR made a replacement set so I put that on my “might spend the money” list depending on how much the rest of the repairs/restore might cost
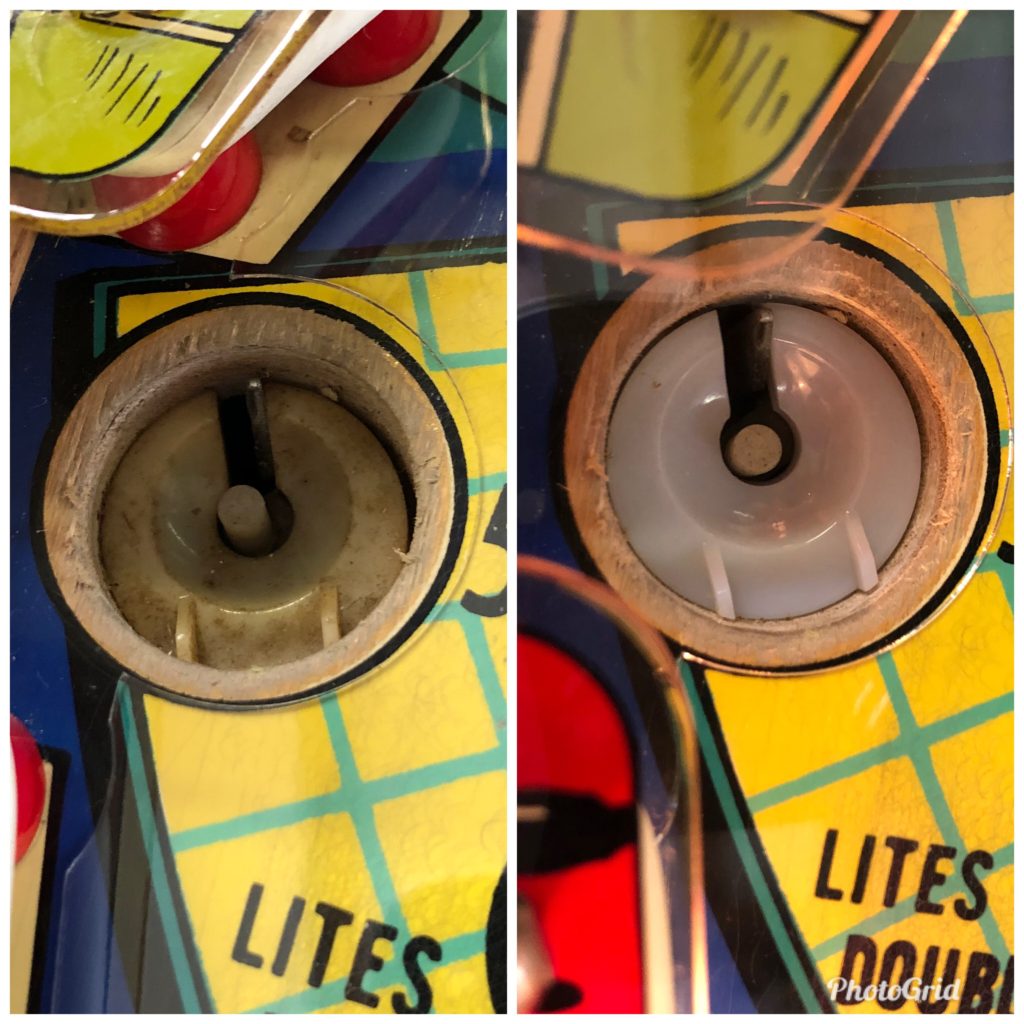
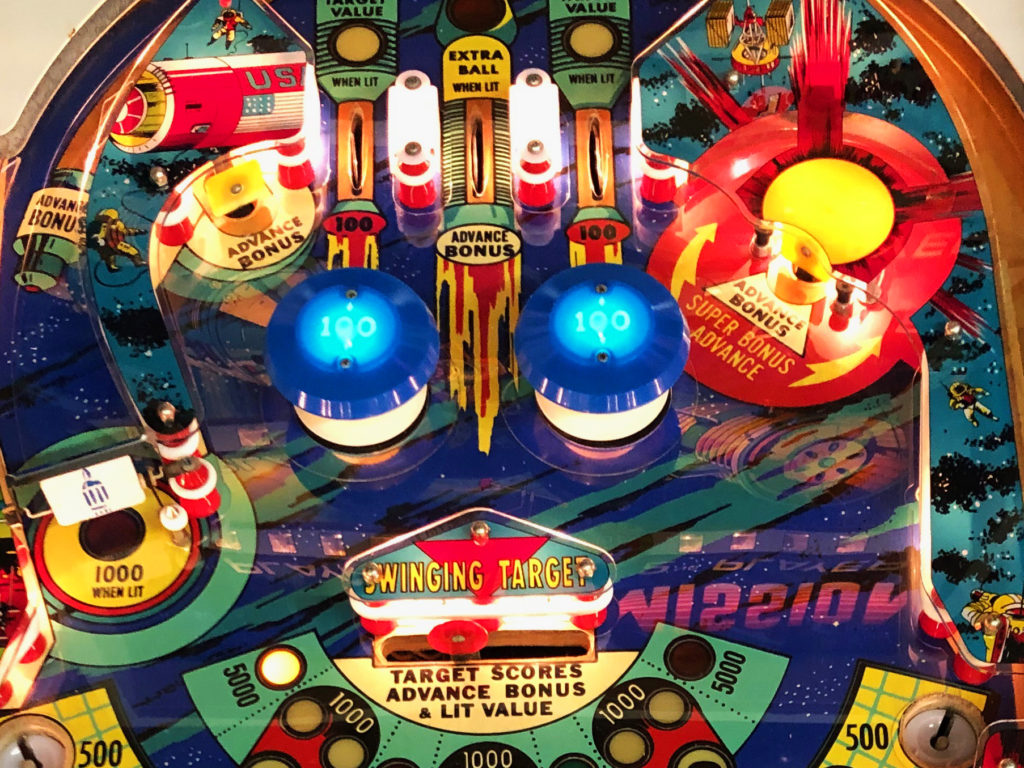
Cosmetically, I noticed a few things as I took inventory of the condition. First the pop caps were the wrong color – Space Mission games had blue factory pop caps and the ones on this game were white. The saucer cups in both kick-out holes were yellowed and nasty, as were the lane guides at the top of the game. The leg bolts were a mix of 9/16″ and 5/8″ head leg bolts with a few “Home Depot” subs thrown in for good measure. A few of them threaded hard and most looked rusty and beat up – time to replace them. I took a note to add these items to my Pinball Resource order.

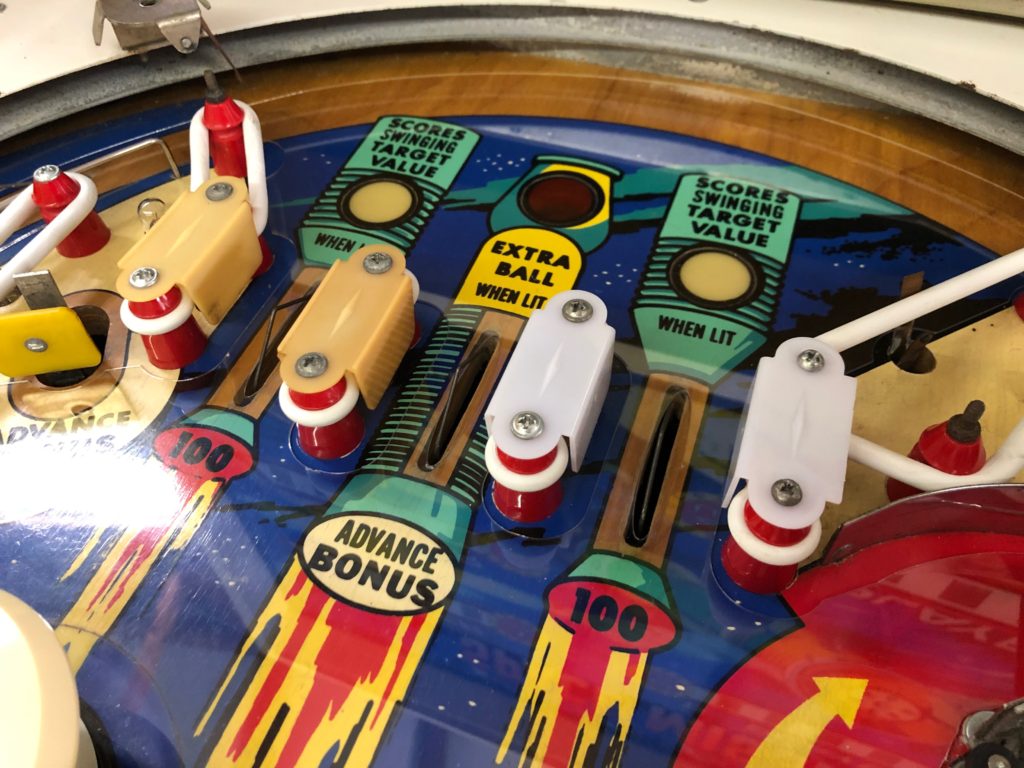
At this time, I thought I would play test the machine and see if I might be able to get the 3 and 4 player credits to work. During extended gameplay, you get to see a few things you might not have noticed during the test games you play at the sellers location. This was true here as well. Surprise! There are a few more things that are not “quite right”. Let’s see … the flippers are pretty weak. The left even more than the other. The rollover switch in the horseshoe shot does not register. The match indicator is not coming on. The captive ball lane on the left side switch is only operating intermittently (and stopping gameplay when it does not!).
So where to start. I quickly wrote orders to Marco, PBR, and the Playfield Protector team over in Germany. The leg bolts from Marco and the blue cabinet protectors came quickly so I got them installed first. I then turned my attention to those weak flippers. First, I needed to check all switches for cleanliness and good contact. Check (after I filed and cleaned them!). Next was a quick look at the EOS switches. They were opening way too soon and that was a big culprit in the left flipper being very weak. Using my switch adjust tool, I reset those accordingly. Now it was time to use my fresh parts to completely rebuild them. New bats, shafts, coil stops, sleeves and flipper bushings. I re-used the plunger shafts and just ground down and wire wheeled them smooth. Messy business but they are fresh and snappy now!

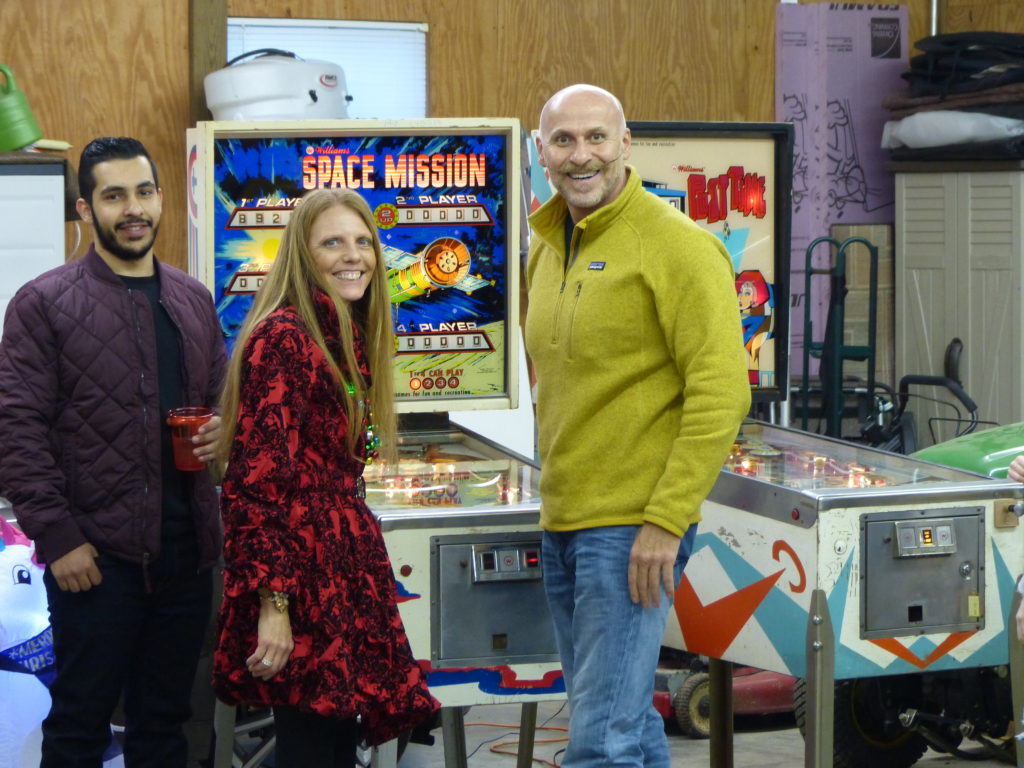
I setup the game during our Ranch Christmas party and it got lots of plays. There were lots of “I haven’t played one of these in years” comments and at least one guest asked that I help buy her one for her husband. She wondered if there were any motorcyle themed pinballs. I assured her there were and I’d start looking for one locally. During the party, the left captive ball kicker was still giving intermittent trouble but I was able to shotgun repair it right there and get the game running again.
A few days after the party, the game started exhibiting some strange behavior. Sometimes you could get a game to start with the credit button and other times the game was completely unresponsive. Being new to the EM world, I was clueless where to start, so I posted my situation to Pinside and waited for the good people there to help. While waiting, I noticed that if I manipulated the coin door switches, I could get a credit to show on the game. I still could not get the 3rd or 4th player to start BUT at least I could get into game play. So I went back to the schematics and reviewed the coin door switches. I posted what I saw on Pinside and between Pinside feedback and a little homework, I figured it out. The coin door switches were badly adjusted. One of them is “make/break” type switch and for whatever reason that was set permanently open.
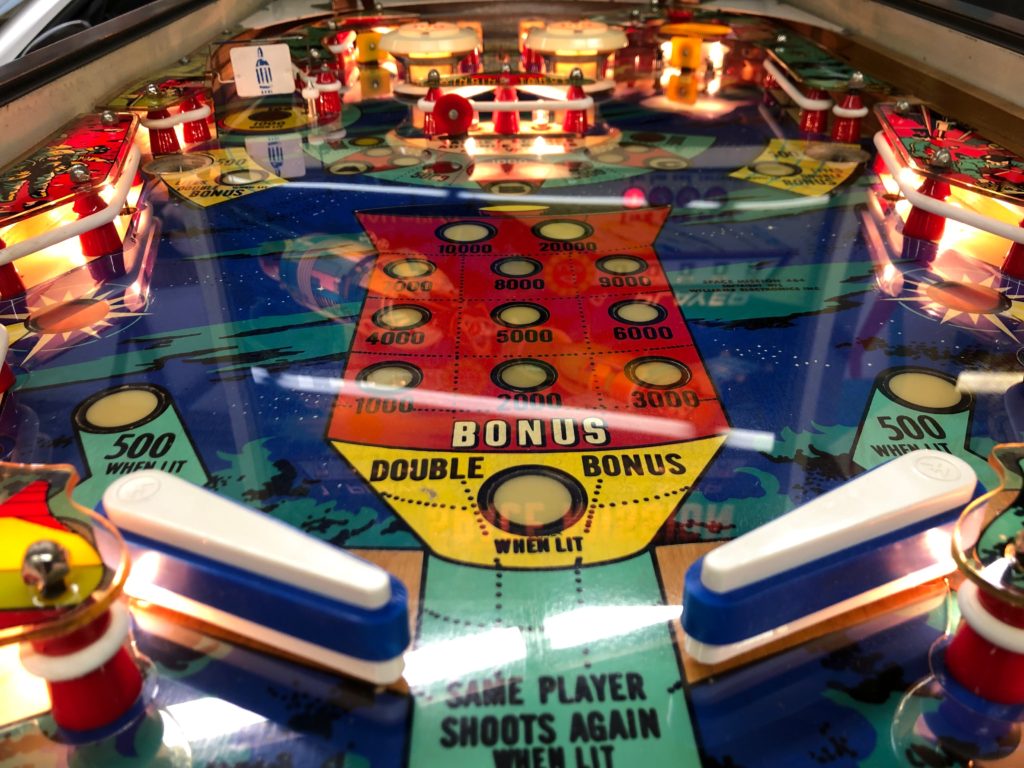
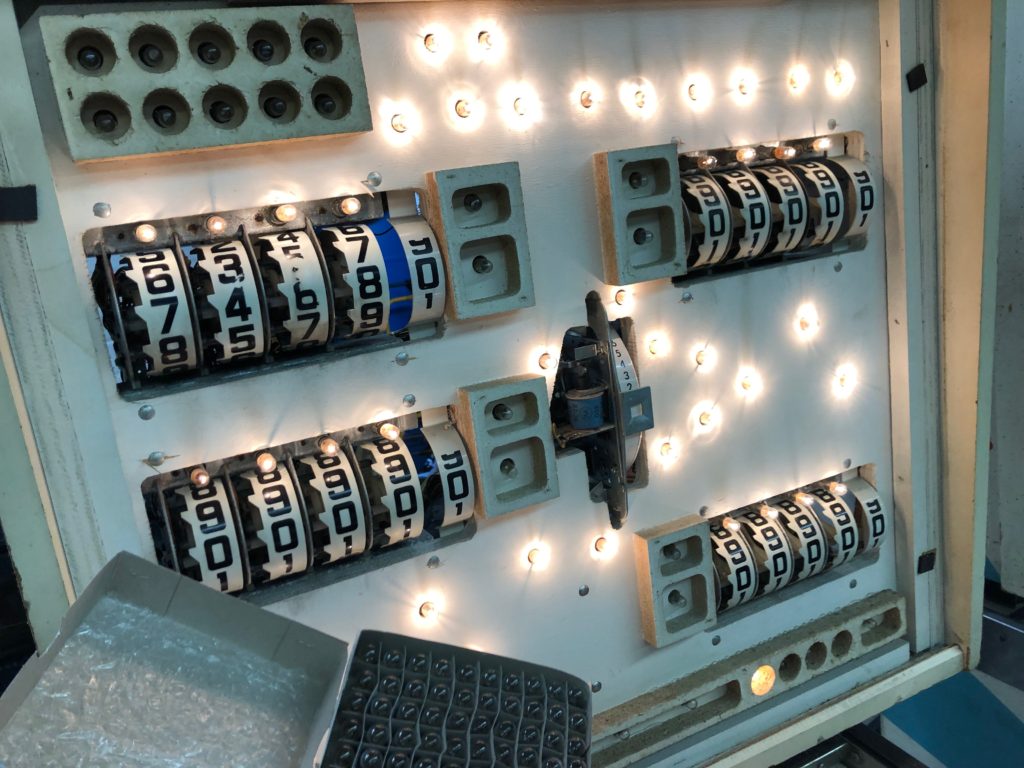
With the coin switches working, I could “drop a coin” in the slot and go about playing a 1 player or 2 player game. I closed up the coin door, hit the credit button and … wait for it … NOTHING! Back to square one (or so I thought). I posted my result to Pinside and then began to research “free play” for a Williams EM pinball machine. I found my answer on the web and it was as simple as shorting (or using an alligator clip, like I did) a switch back in the head on the credit unit. Simple, done. It worked! Now I had a game that could be played as intended … sort of. You see, when I was checkout out the back side of the head where the score reels are, I noticed there was a little stepper unit right in the middle that said “match unit”. But it wasn’t doing any “matching” – in fact it was doing nothing. I poked and prodded a bit and soon discovered how it was at least intended to work. It was driven at the end of each game via solenoid. A plate was supposed to move forward engaging a nylon “tooth” on a nylon cog/gear that would then drive the contacts in a circular fashion around the bakelite plate. This made an electrical connection that then lit one of 10 bulbs in the backglass. These bulbs then highlight the numbers on the backglass 00 through 90. If your score ended in the 2 digits randomly presented you win a free game.
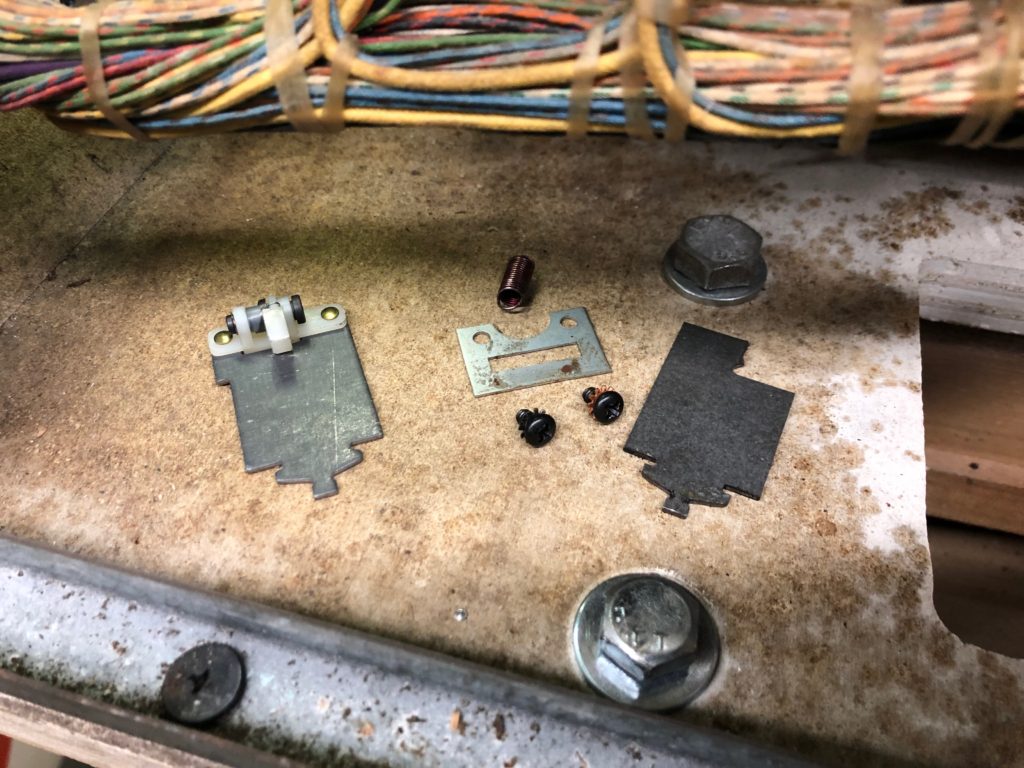
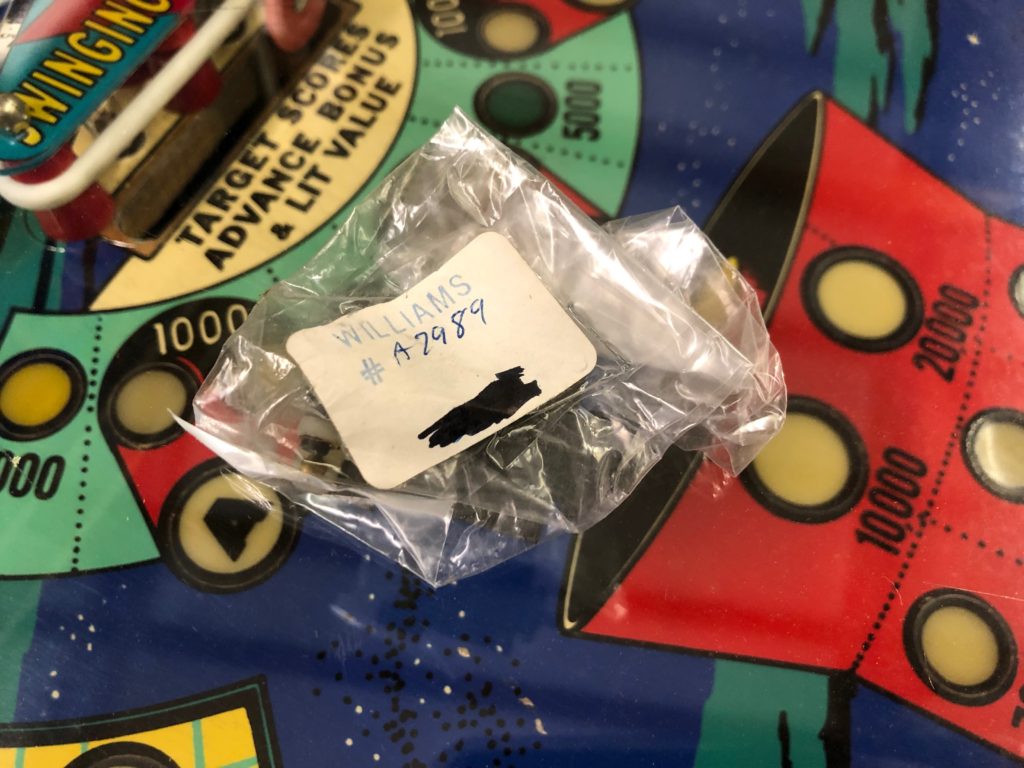
But mine just sat there because the plate that was supposed to be there was broken in half and the nylon tooth was missing. No tooth, no match! Finding that part was like hunting for the Ark of the Covenant. Unicorns are easier to find. Finally, someone on Pinside suggested I check out Flippers.com up in Canada. Sure enough they had the part! Pricey at $25 plus shipping but the only game in town – so thankful they have them.

If you pull just the bottom 2 short black screws and you are patient, you can get the new plate inserted back in there, the tooth aligned on the cog, the plate return spring (attaches to bottom of the new part) hooked back on and the whole thing screwed back together. I did but it was a bit of a delicate/frustrating time and took over 30 minutes for something that seems so simple – replace it and you’ll see why. That tooth always wants to pull toward the backglass and end up on that (wrong) side of the cog. Keep after it and you’ll be rewarded with a match feature that works.
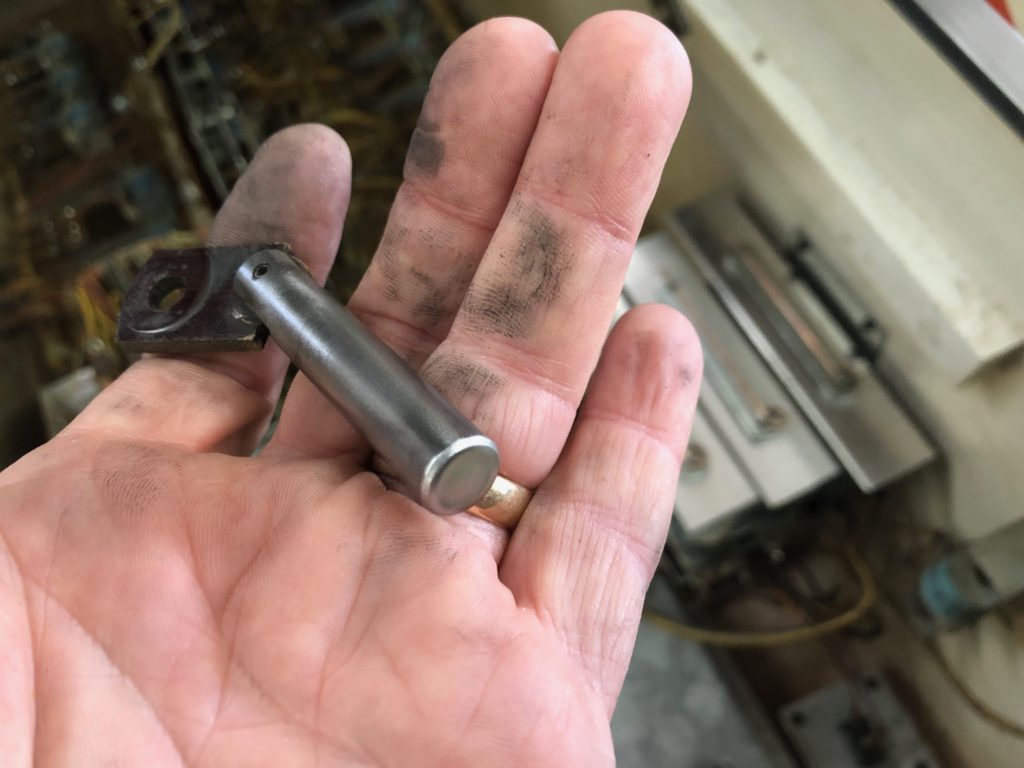
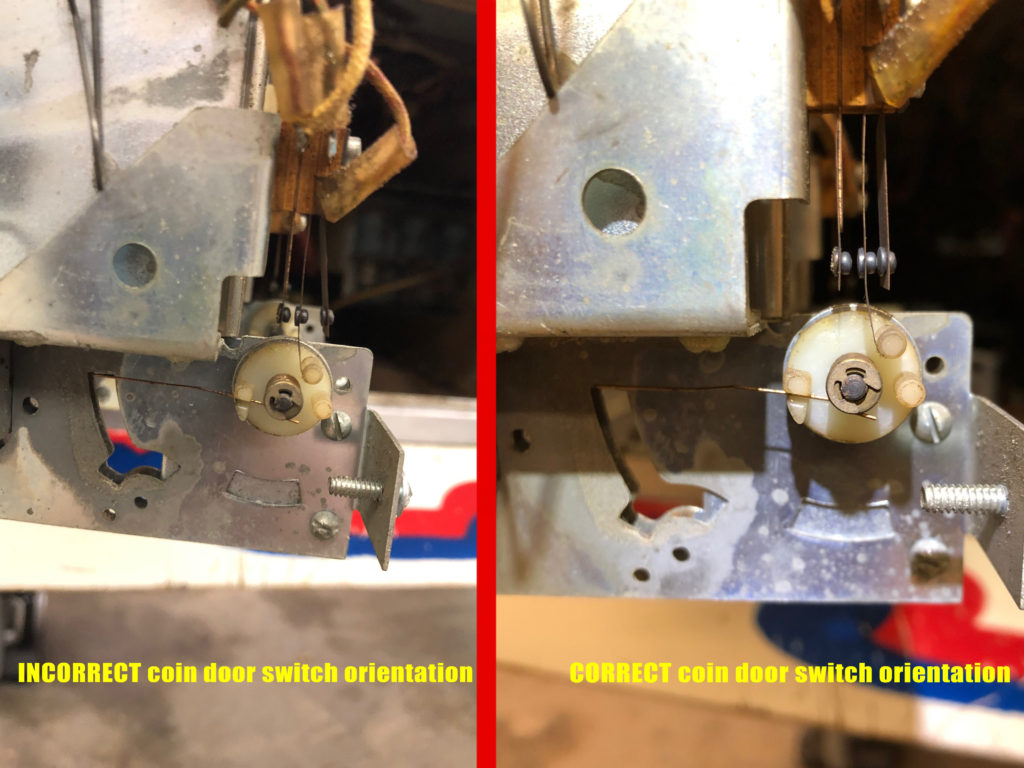
So what about that 3/4 player bit? I asked myself … don’t you think someone will someday want to play this in 4 player mode? Why didn’t you just buy a Space Odyseey? That’s a 2 player! As you can see – it bothered me. So I began a quest to find out how to get the machine to work as intended – as a 4 player EM. I noticed when mucking around earlier that if I forced the switch closed on the cabinet located coin unit, I COULD add 3rd and 4th players.

It made sense to start there. I posted a picture of the orientation of that switch on Pinside and did a little more research. I suspected that the switch was installed on the wrong side of the actuator pin. With some web based images and a confirm from the Pinside team, it was clear that this was the issue. A was a little unsure what to do other than “move the switch to the other side” because I did not know how and at what point the actutator pin interacted with that switch. A little more web searching showed me that in 4th player position, the switch is broken open by that actuator. Perfect, now all I had to do is watch that actuator pin move as I hit the credit button each time and then set the switch to stay “closed” until the pin hit the 4th player (last) position. I shot a video so I could review each pin position as well. I loosened the front screw on the switch stack, rotated that switch outward and then over the actuator pin – now it was on the correct side. I set the gap on it so it looked like it would stay closed until the 4th player position and … it worked! Perfectly. I now have a game that can be played as intended.
Back to the very beginning of this story. Remember when I shared that the seller agreed to knock some off the price so I could buy a playfield protector? It really needed it as the inserts in some spots were cupped so badly they were changing the ball direction and badly impacting play. So, I ordered one from Germany and it was now time to do that install. Chris was there to help but adding these to EM games is about as simple as it gets. No ramps to get in the way, no complex mechs or habitrails either. Just start by making sure the playfield is super clean, then remove the plastics.
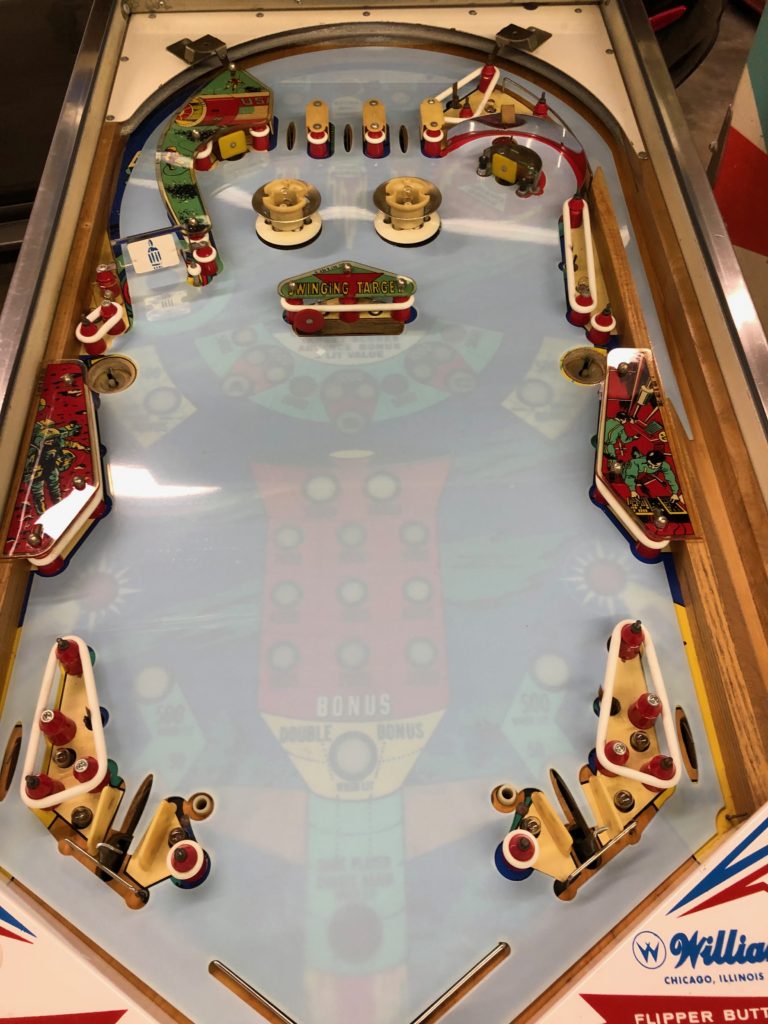
You first remove the protective backing (both sides have this, but leave the top side on for now), then lay the new protector over the playfield. Nothing “bolts” or screws it down, it simply free floats. It needs to or the heat from the incandescent bulbs would cause it to swell and buckle. In the case of Space Mission, I had to remove just one side of the spinner gate assembly in order to slip the protector under it. Other than the plastics, and importantly the flipper bats, nothing else needed to be removed to install. These protectors are amazing in how they fit, but sometimes take some tweaking to be perfect. Mine was no exception and you can see where a red post on each side of the outlanes could have used a notch cut in it for the best fit. I cut it out myself and moved on – problem fixed.
If you own pinball machines, then you know you’re never really “done” when repairing or restoring one. Space Mission was no exception. With some time on my hands and the Christmas parties over with, I dug in with both hands. First was to install some new lane guides and pop caps up top. The old lane guides had turned a nice nicotine yellow and (as you now know) the pops were the wrong color. This was literally a 3 minute job. Boom. Done. Looks fantastic now.
With the lane guides done, it was an even faster job to remove 4 pop cap screws and replace the old, yellowed ones with the vibrant blue original ones that I had ordered from PBR. Again, they fit perfect, went on fast and look outstanding.
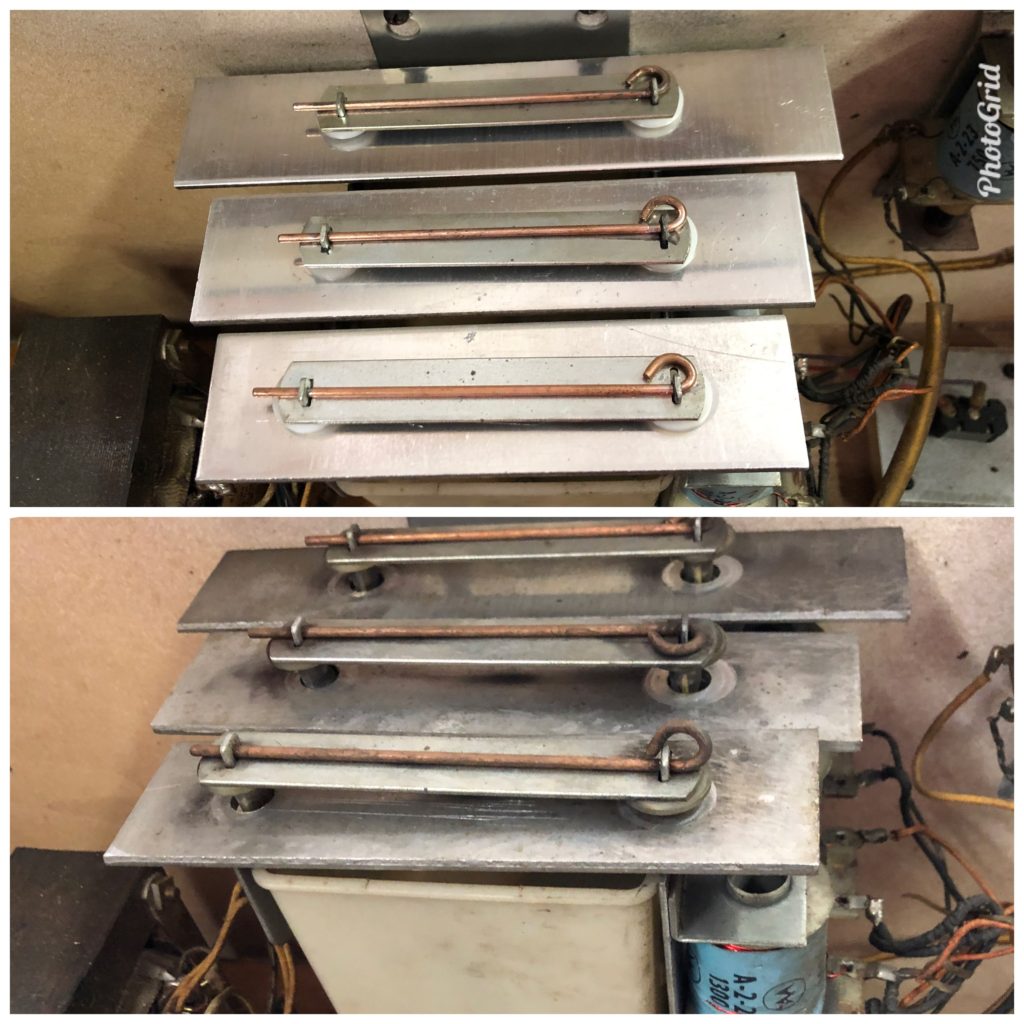
Space Mission was looking good. I was feeling good about it but I wasn’t hearing the best “sounds” from her. She needed her chime box tweaked. Don’t we all from time to time? Another order to PBR and I soon had in my hands a complete Williams chime box repair/rebuild kit. It included foam washers, nylon top washer, tubing, sleeves and a rubber strip for the striker shafts that shoot from the 3 vertically mounted coils under the playfield.

The PBR kit is slick and comes with everything you need to make your chimes sing again. I used my own tubing by cutting red heat shrink tape, then using my heat gun on high, ran it over the tubing to quickly shrink it to the metal tabs. I purposefully kept the tubes short so the chime bars do NOT bind or scrunch them down when you re-install. If they do, your chimes will sound dead. I added the new coil sleeves, cleaned up the coil shafts, added the new foam washers and foam block under the coil shafts. I then took a few minutes to polish the chime bars, then put it all back together, added the copper pins and man … in ain’t stereo but it sure sounds sweet now.
I ordered a fresh box of #47 bulbs for the game and one day when I had a few extra minutes, I replace nearly 100% of the backbox lights. The #47 bulbs runs much cooler (draws only 150 ma of current) than the #44 (draws 250 ma current) . The #44 were of course original, but the #47 give off nearly as much light. Those lower temps are easier on the paint on the backglass and on playfield plastics as well. Replacing bulbs in the backbox is a pain as some of them are very difficult to reach. A bulb tool is very helpful here.
For just a few dollars and available for many games, Marco and other suppliers can set you up with crisp white apron cards. It’s really hard to to understand how yellowed and nasty these are until you get the new ones. Bravo to our supplier community that these are still available. Cheap and effective enhancement to the game. I put mine on in just a few minutes.
I fee like I’m getting close to completing phase one of the Space Mission restore. This spring I plan to paint and stencil the cabinet. For now, there are just a few minor things to finish. I have a new set of plastics I ordered from CPR. I added those recently and was blown away by how the color (especially the blues) had faded/changed to more green due to time and cigarette smoke. When I finished installing the new plastics, I played a few games and headed into the house. On the way, my phone indicated I had gotten an email. It was a reminder from Ebay that a favorite seller has just listed some new items. I sat down at my desktop in the office and pulled it up.

Karma. Fortune. Blessings. It was the original blueprint from the Williams corporate office archives for … Space Mission. I bid, and then won it. What a privilege to have a piece of history this significant. Space Mission was/is a popular EM designed by a prolific and great guy – Steve Kordek. I now own the original signed blueprints for the game he designed. I can’t wait to get Space Mission and this piece of history set up in the new game room. Who could have predicted that when I bought this game, I would have the opportunity to acquire the blueprints too – how cool is that?